

iOS中如何在原生代码中调起Flutter呢?
1.创建原生项目
使用Xcode创建一个原生的工程,作为老司机的你一定懂,我就不讲了

2.创建flutter module
默认老铁你已经配置好了flutter环境
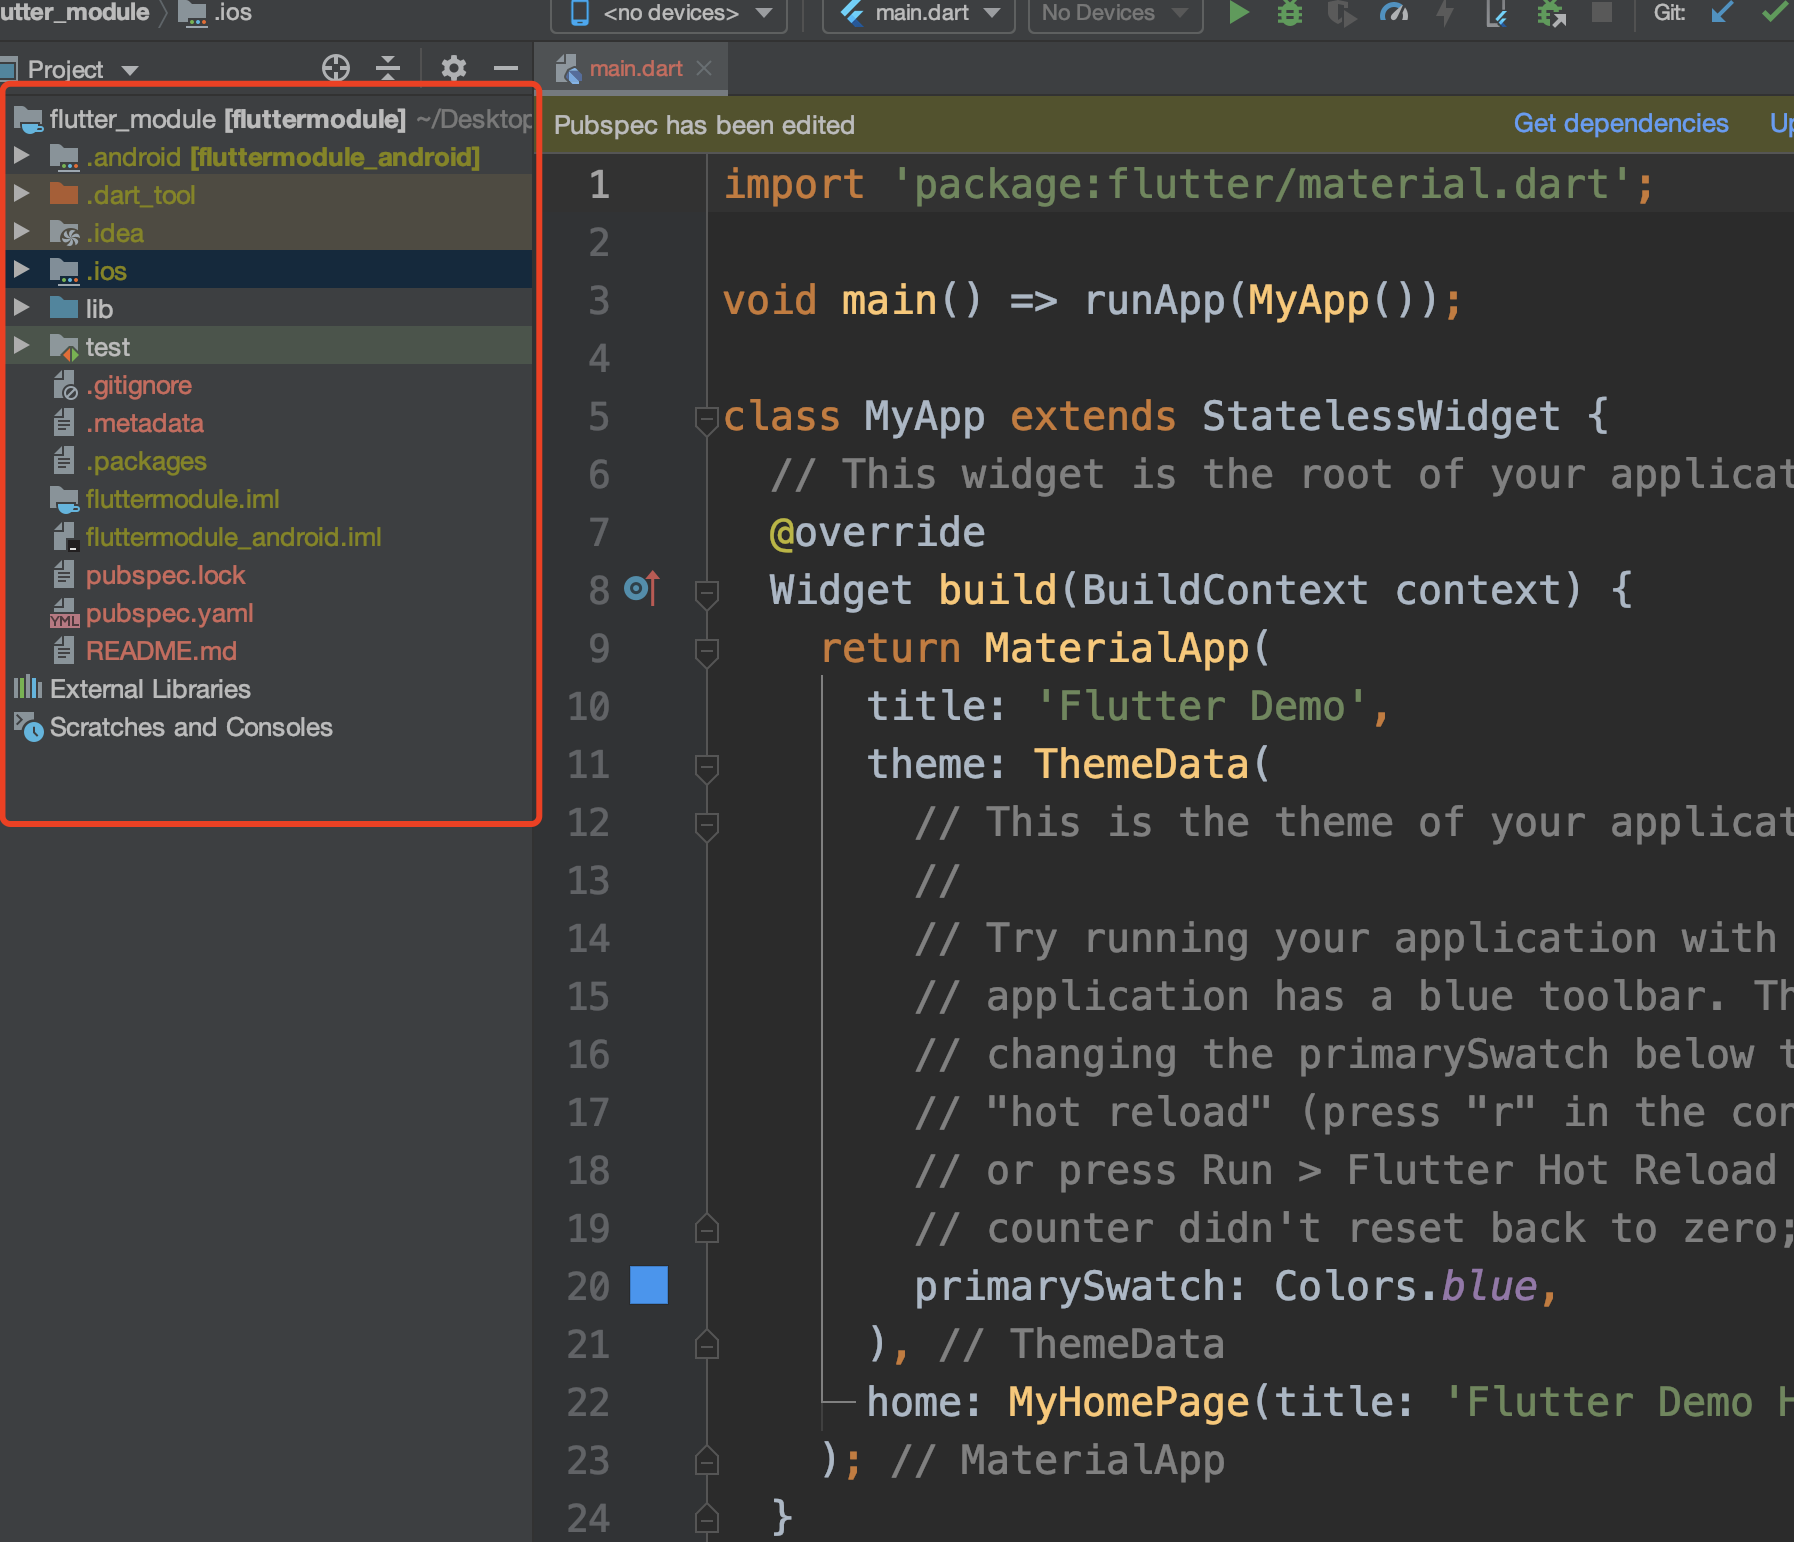
(1)使用Android Studio创建
a.第一步
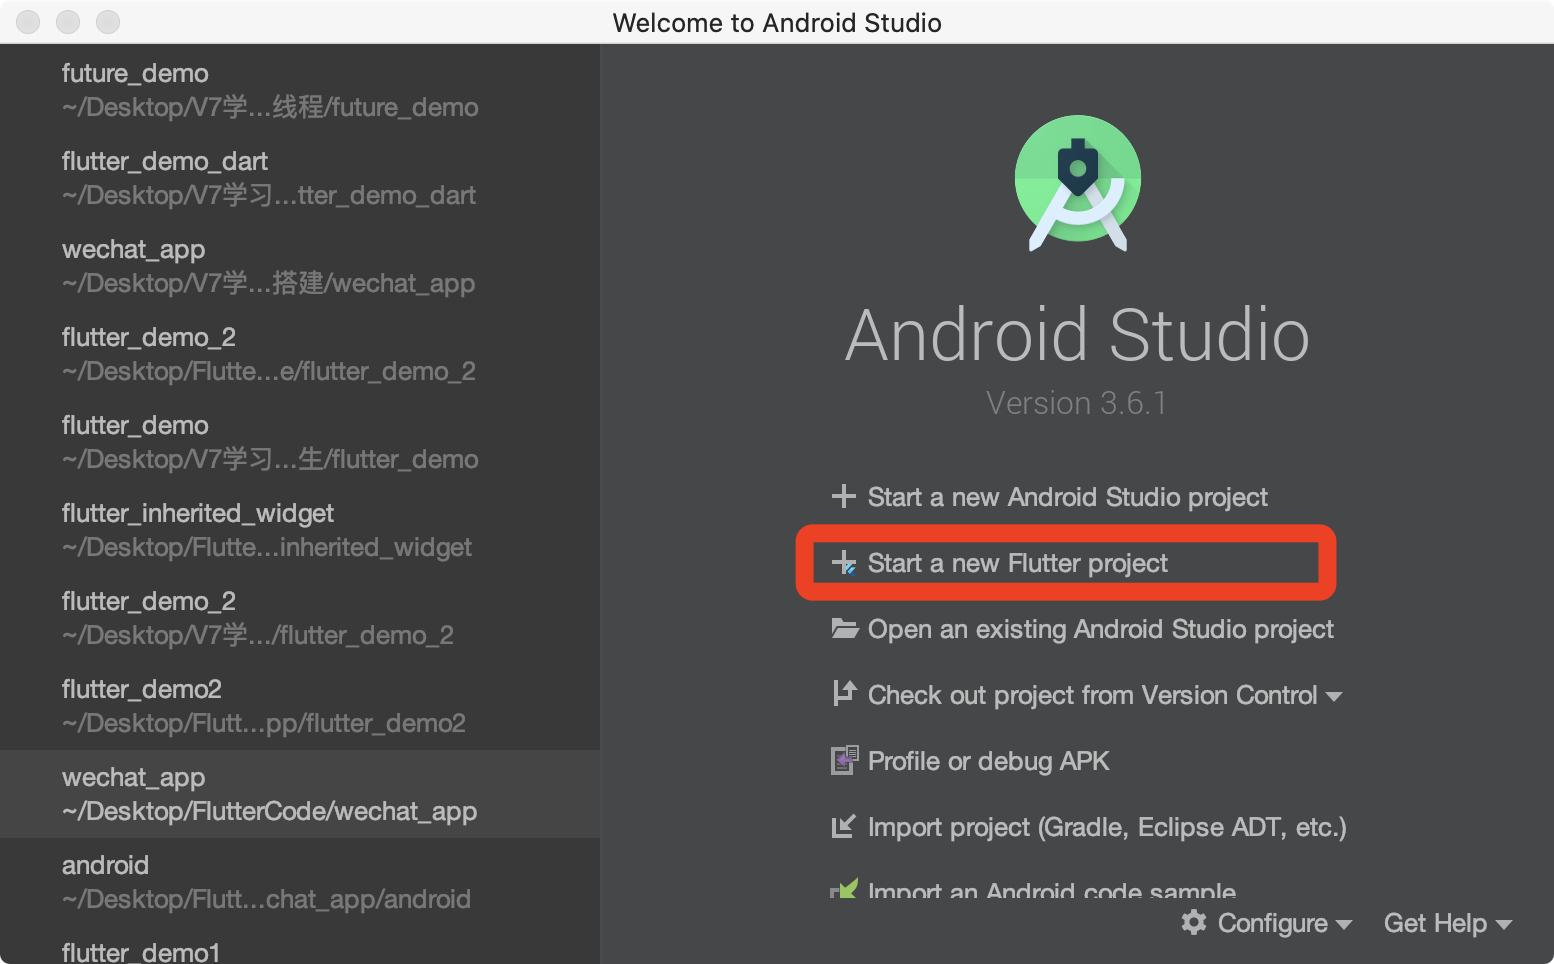
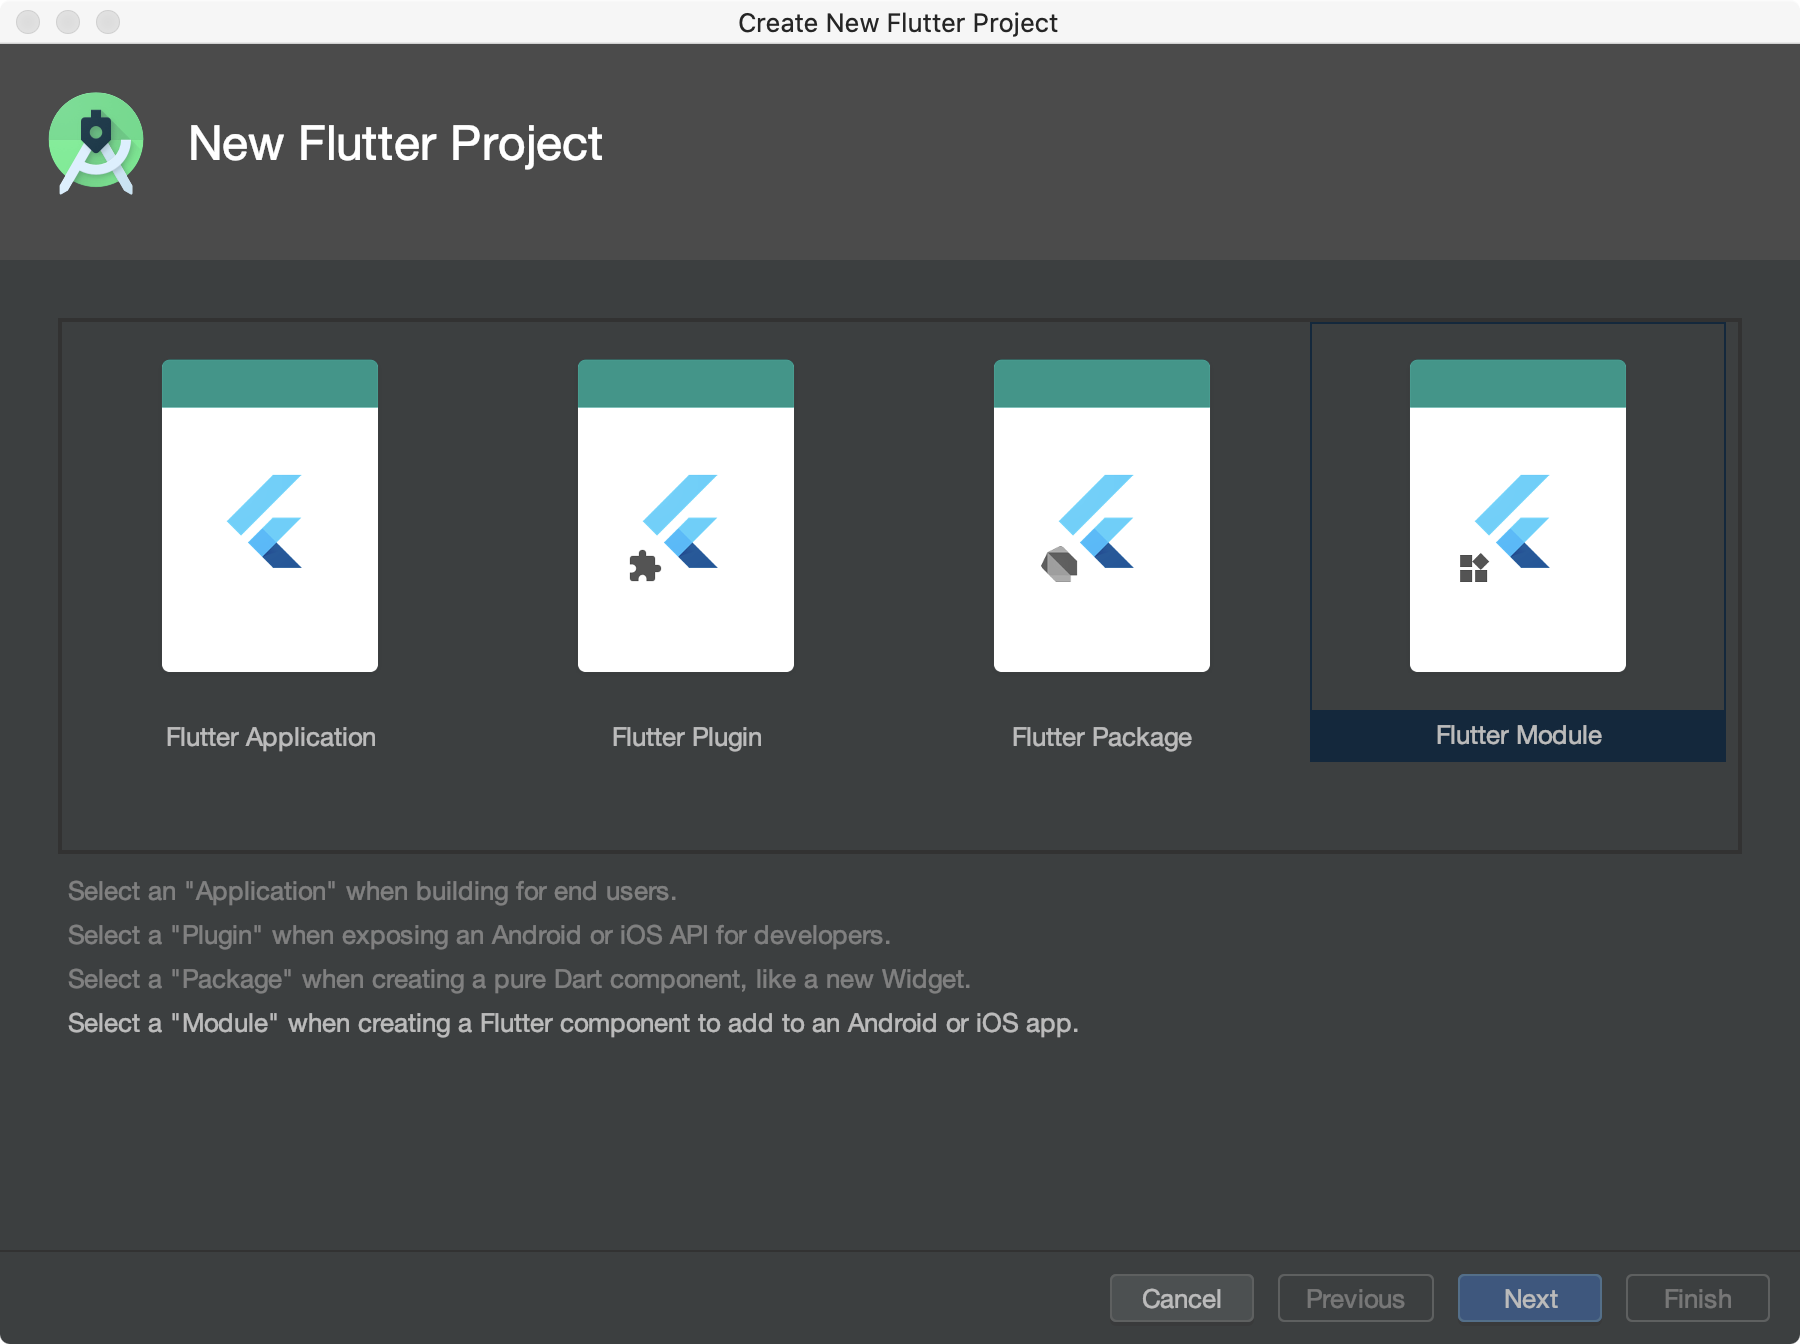
Flutter Module就是用来开发Flutter模块化功能
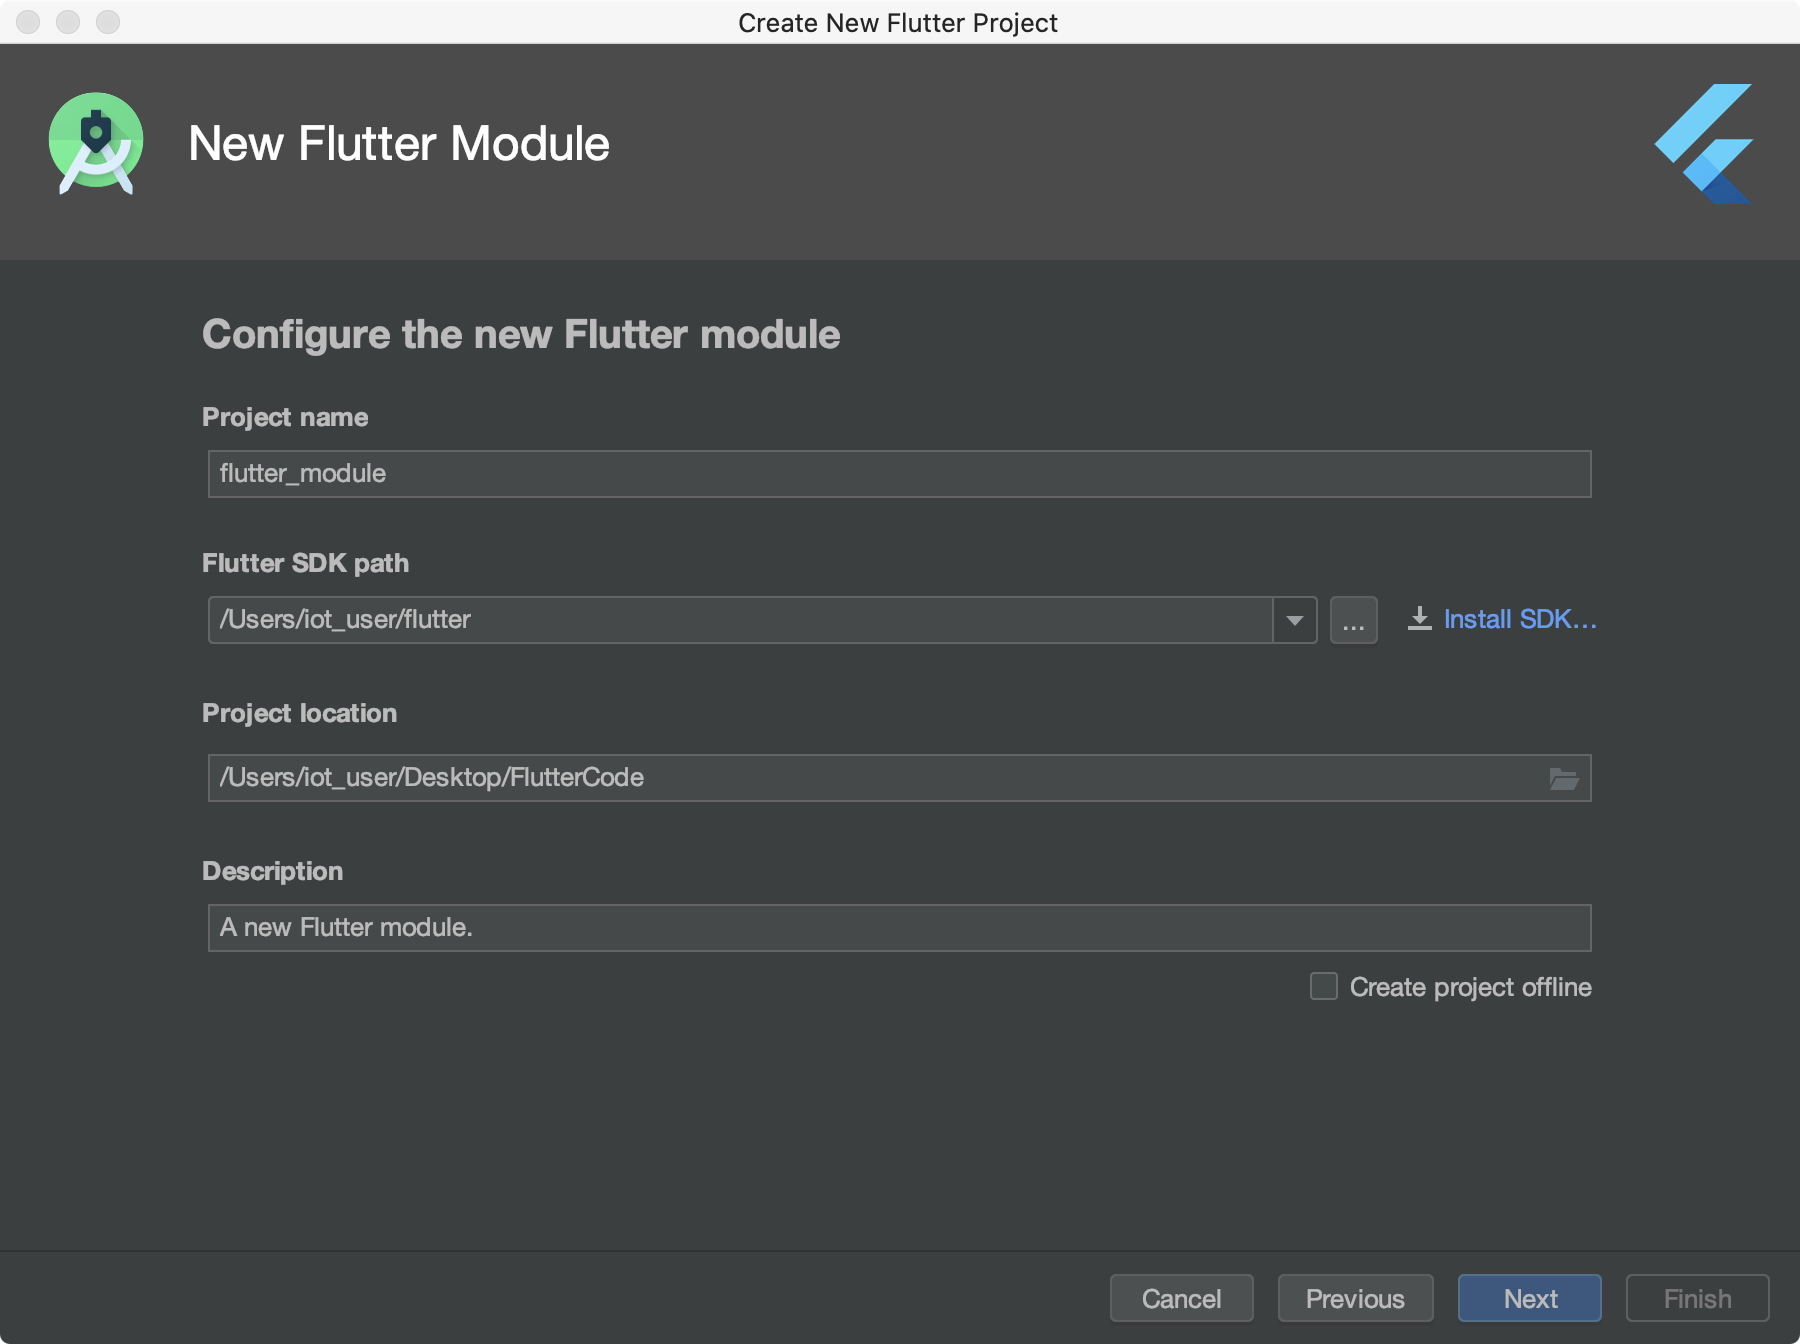
注意:Project name不要使用中文,不要使用驼峰命名;Flutter SDK path 文件路径尽量不要包含中文,不然会有意想不到的bug.
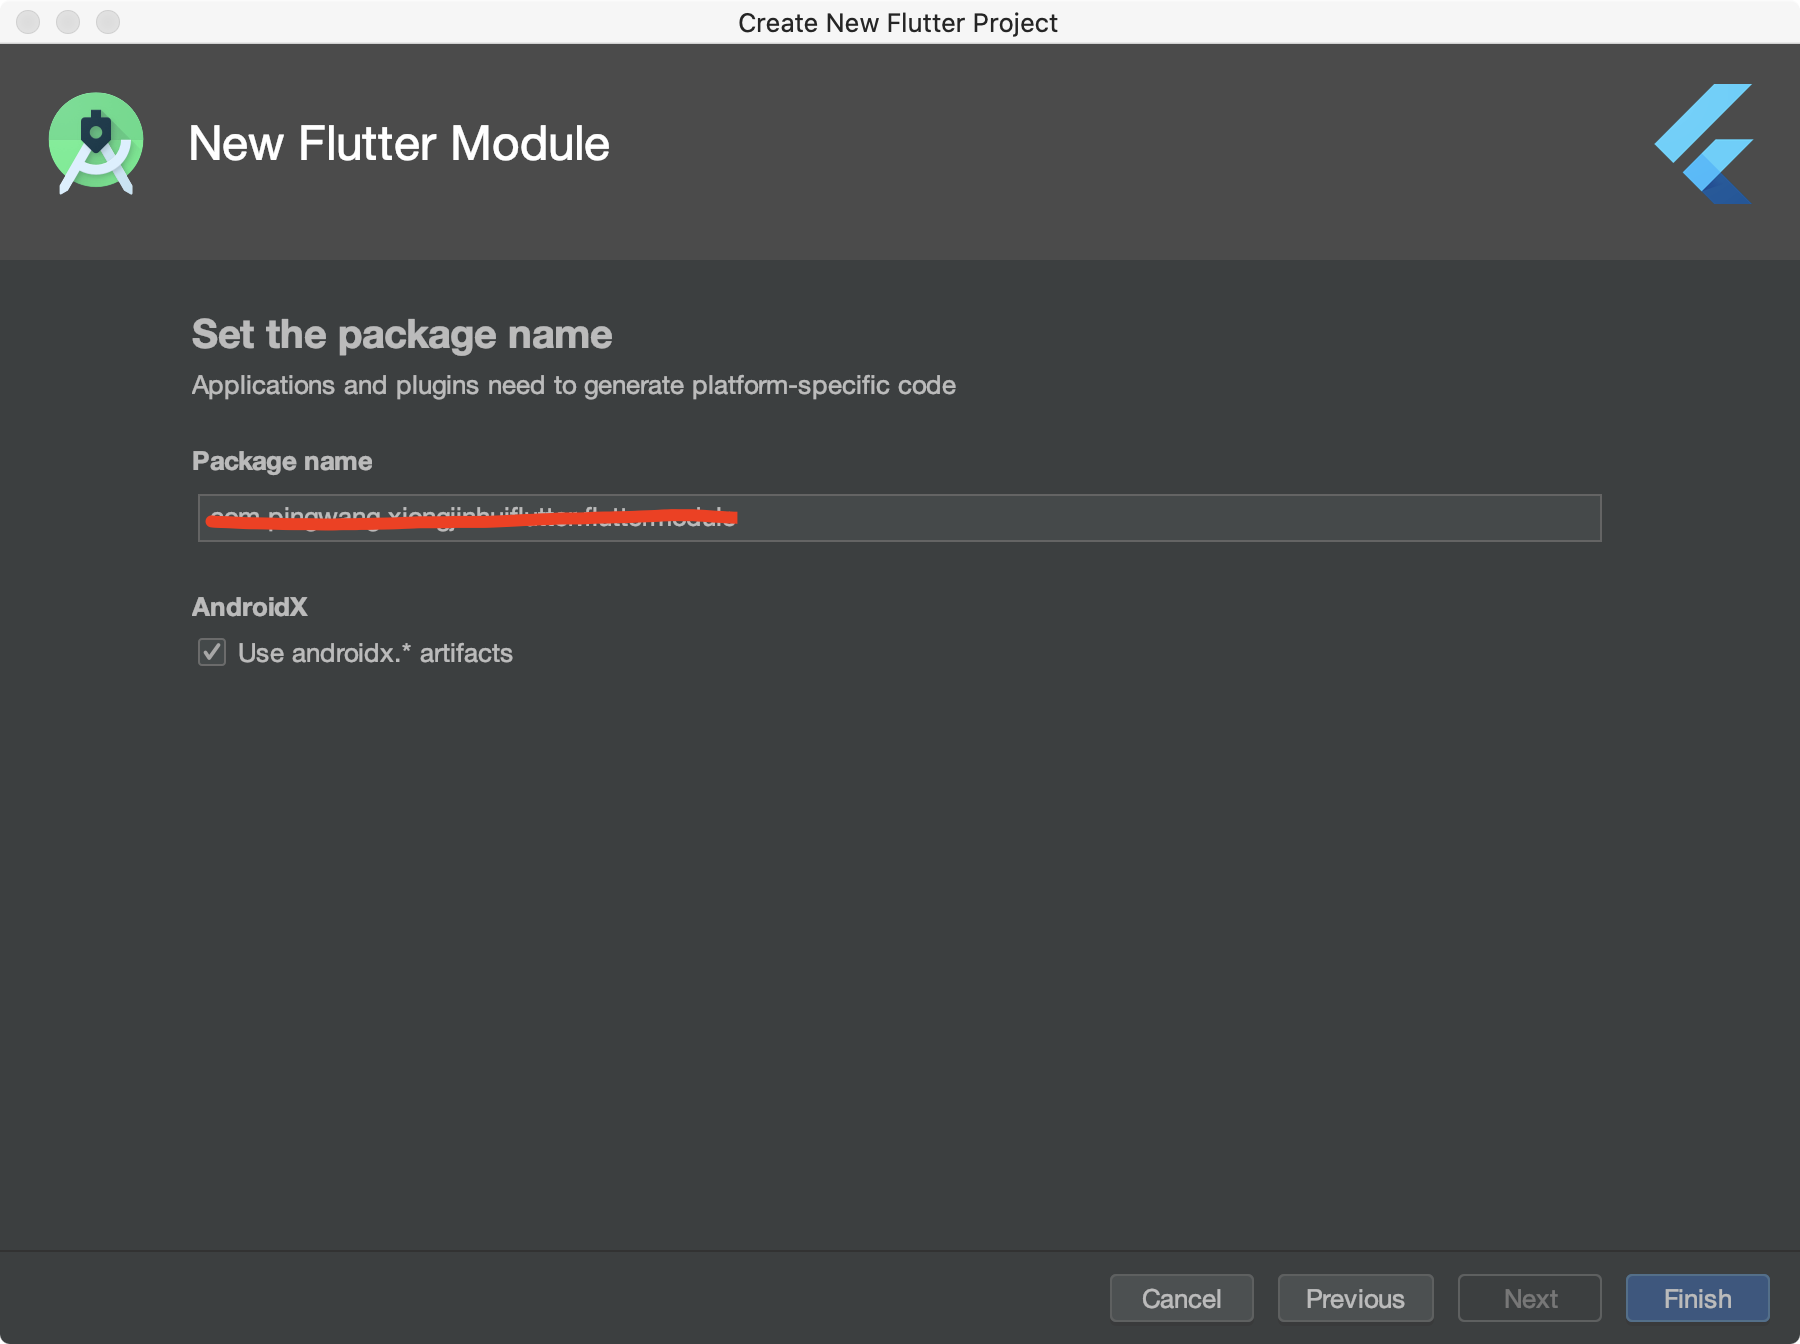
Package name 相当于BundleId
注意:这里的文件目录都是.ios,.idea等等样式的,意思是隐藏文件,就是要提示你不要修改它们.
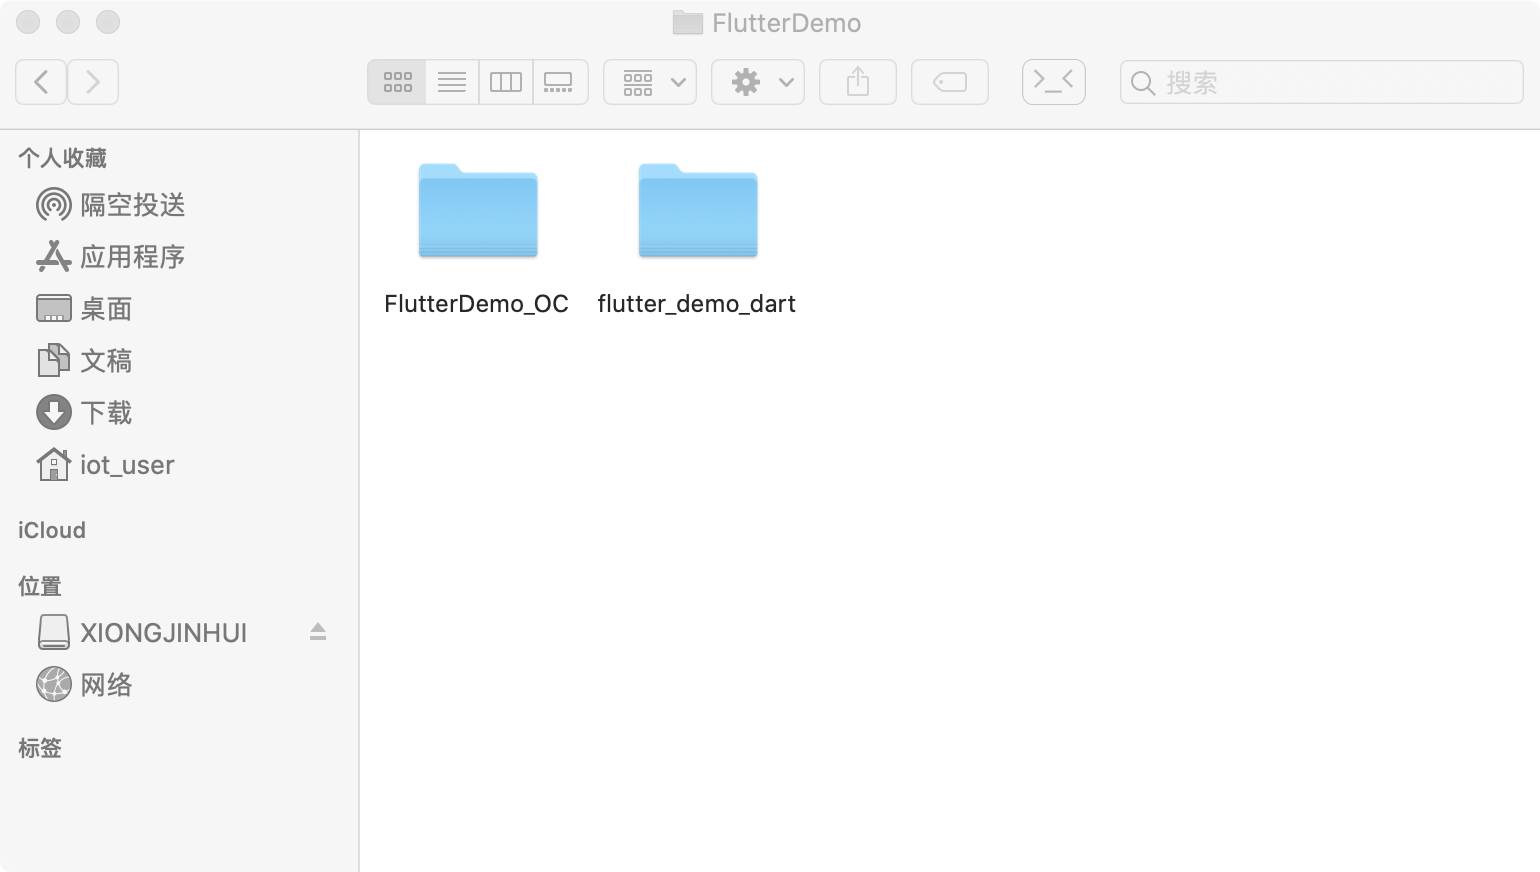
3.将原生项目和flutter module 放在同一目录下
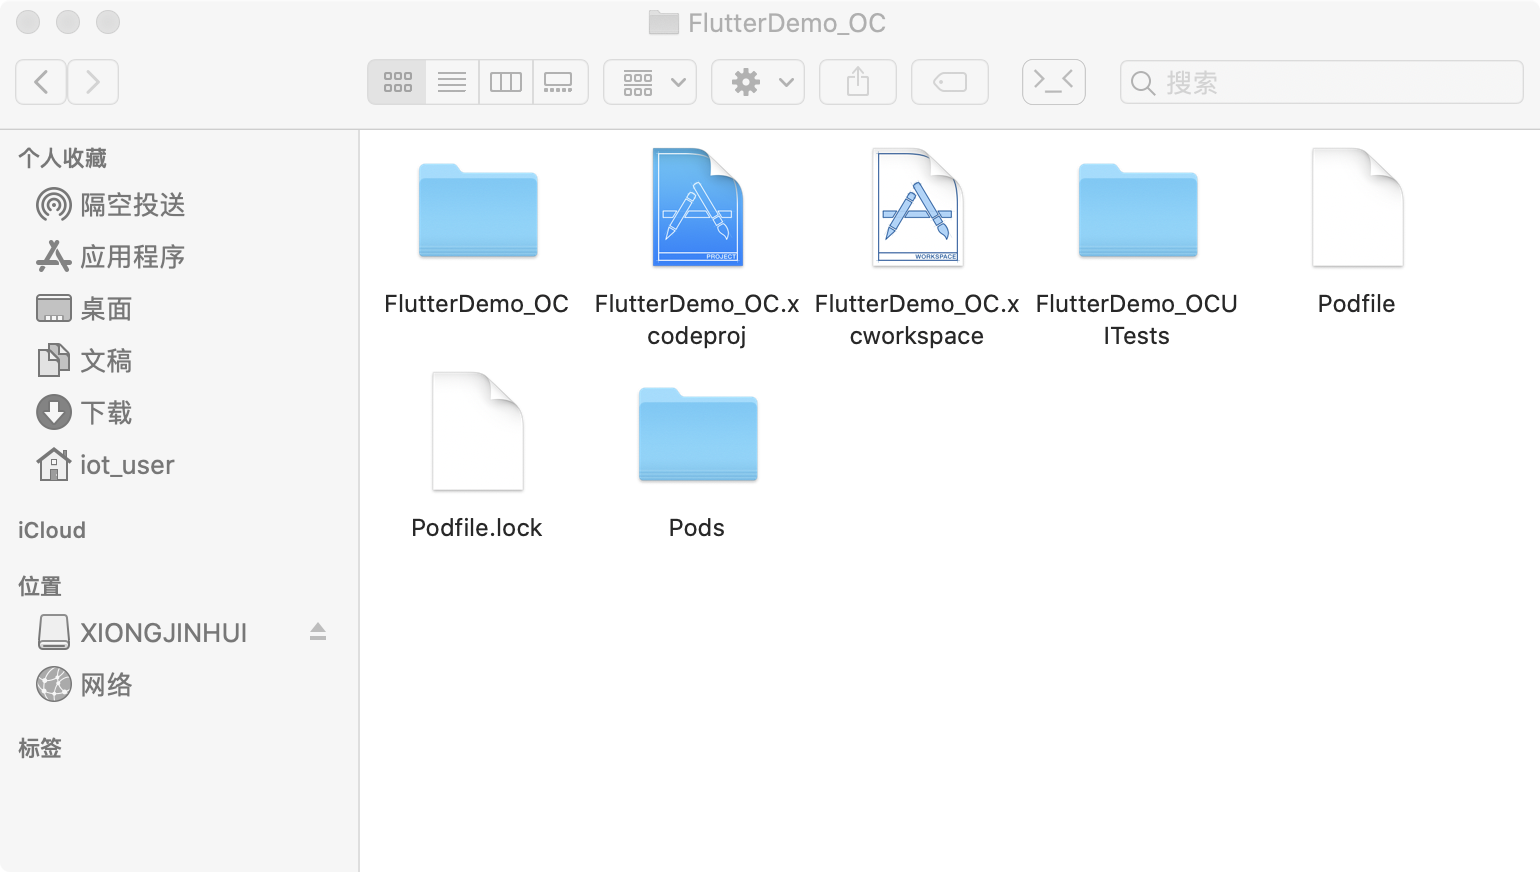
4.在原生代码中创建pod
使用终端cd到原生项目所在的目标 输入pod init 然后回车 再输入pod install 然后回车
5.配置podfile文件
# Uncomment the next line to define a global platform for your project
# platform :ios, '9.0'
flutter_application_path = '../flutter_demo_dart' #这是flutter module的相关路径
load File.join(flutter_application_path, '.ios', 'Flutter', 'podhelper.rb')
target 'FlutterDemo_OC' do
# Comment the next line if you don't want to use dynamic frameworks
use_frameworks!
install_all_flutter_pods(flutter_application_path)
# Pods for FlutterDemo_OC

target 'FlutterDemo_OCUITests' do
  # Pods for testing
end

end
注意:flutter_application_path = '../flutter_demo_dart' 这是flutter module的相关路径
6.使用flutter自带的方式在原生代码中调起flutter
flutter中的配置
//创建MethodChannel,实现flutter与原生的通讯
final MethodChannel _oneMethodChannel = MethodChannel('one_page');
final MethodChannel _twoMethodChannel = MethodChannel('two_page');
//默认是‘one’这个界面
String pageIndex = 'one';
//在StatefulWidget的State的initState中接收来自原生的数据
  _oneMethodChannel.setMethodCallHandler((call) {
    setState(() {
      pageIndex = call.method;
    });
    return null;
  });
  _twoMethodChannel.setMethodCallHandler((call) {
    setState(() {
      pageIndex = call.method;
    });
    return null;
  });
 //在build方法中实现如下:
 @override
Widget build(BuildContext context) {
  return MaterialApp(
    title: 'Flutter Demo',
    builder: FlutterBoost.init(postPush: _onRoutePushed),
    theme: ThemeData(
      // This is the theme of your application.
      //
      // Try running your application with "flutter run". You'll see the
      // application has a blue toolbar. Then, without quitting the app, try
      // changing the primarySwatch below to Colors.green and then invoke
      // "hot reload" (press "r" in the console where you ran "flutter run",
      // or press Run > Flutter Hot Reload in a Flutter IDE). Notice that the
      // counter didn't reset back to zero; the application is not restarted.
      primarySwatch: Colors.blue,
    ),
    home: _rootPage(pageIndex),
  );
  Widget _rootPage(String pageIndex) {
  switch (pageIndex) {
    case 'one':
      {
        return Scaffold(
          appBar: AppBar(
            title: Text(pageIndex),
            leading: GestureDetector(
              child: Text('返回'),
              onTap: () {//这里是发送消息给原生
                _oneMethodChannel.invokeMapMethod('dismiss');
              },
            ),
          ),
          body: Center(
            child: Text(pageIndex),
          ),
        );
      }
    case 'two':
      {
        return Scaffold(
          appBar: AppBar(
            title: Text('two'),
            leading: GestureDetector(
              child: Container(
                width: 40,
                height: 40,
                child: Text('返回'),
              ),
              onTap: () {//这里是发送消息给原生
                _twoMethodChannel.invokeMethod('dismiss');
              },
            ),
          ),
          body: Center(
            child: Column(
              mainAxisAlignment: MainAxisAlignment.center,
              children: <Widget>[
                Text('two'),
                TextField(
                  onChanged: (text) {
                    _basicChannel.send(text);
                  },
                ),
              ],
            ),
          ),
        );
      }
  }
}
OC原生项目中的配置 创建FlutterViewController和FlutterEngine
-(FlutterViewController *)flutterVC{
  if (_flutterVC == nil) {
      _flutterVC = [[FlutterViewController alloc] initWithEngine:self.flutterEngine nibName:nil bundle:nil];
  }
  return _flutterVC;
}
-(FlutterEngine *)flutterEngine{
  if (_flutterEngine == nil) {
      FlutterEngine *flutterEngin = [[FlutterEngine alloc] initWithName:@"FlutterDemo"];
      if (flutterEngin.run) {
          _flutterEngine = flutterEngin;
      }
  }
  return _flutterEngine;
}
使用原生方法跳转到flutter
-(void)button2Action:(UIButton *)sender{
  AppDelegate *appDelegate = (AppDelegate *)[UIApplication sharedApplication].delegate;
  //创建消息通道,实现与flutter的消息接收和发送
  FlutterMethodChannel *methodChannel = [FlutterMethodChannel methodChannelWithName:@"two_page" binaryMessenger:appDelegate.flutterVC];
  //发送消息
  [methodChannel invokeMethod:@"two" arguments:nil];
  //接收消息
  [methodChannel setMethodCallHandler:^(FlutterMethodCall * _Nonnull call, FlutterResult  _Nonnull result) {
      if ([call.method isEqualToString:@"dismiss"]) {
          [appDelegate.flutterVC dismissViewControllerAnimated:YES completion:nil];
      }

  }];
  appDelegate.flutterVC.modalPresentationStyle = UIModalPresentationFullScreen;
  [self presentViewController:appDelegate.flutterVC animated:YES completion:nil];
}
7.使用FlutterBoost在原生代码中调起flutter
在使用flutter混合开发中,免不了flutter和原生native页面的相互跳转和通信,flutterboost就是闲鱼团队开发的一个可复用的插件,旨在把Flutter容器做成浏览器的感觉。填写一个页面地址,然后由容器去管理页面的绘制。在Native侧我们只需要关心如果初始化容器,然后设置容器对应的页面标志即可。 点击查看闲鱼团队的文章了解FlutterBoost详细介绍
Flutter中的配置 在pubspec.yaml文件中导入FlutterBoost包
flutter_boost:
    git:
      url: 'https://github.com/alibaba/flutter_boost.git'
      ref: '1.12.13+1'
点击"pub get" 初始化FlutterBoost
@override
  Widget build(BuildContext context) {
    return MaterialApp(
      title: 'Flutter Demo',
      builder: FlutterBoost.init(postPush: _onRoutePushed),
      theme: ThemeData(
        // This is the theme of your application.
        //
        // Try running your application with "flutter run". You'll see the
        // application has a blue toolbar. Then, without quitting the app, try
        // changing the primarySwatch below to Colors.green and then invoke
        // "hot reload" (press "r" in the console where you ran "flutter run",
        // or press Run > Flutter Hot Reload in a Flutter IDE). Notice that the
        // counter didn't reset back to zero; the application is not restarted.
        primarySwatch: Colors.blue,
      ),
      home: Center(),
    );
  }
配置路由表
@override
  void initState() {
    // TODO: implement initState
    super.initState();
    FlutterBoost.singleton.registerPageBuilders({
      'one_page': (pageName, params, _) {
        print('one_page');
        return Scaffold(
          appBar: AppBar(
            title: Text('one_page'),
            leading: RaisedButton(
              child: Icon(Icons.arrow_back),
              onPressed: () {
                FlutterBoost.singleton.close('one_page');
              },
            ),
          ),
        );
      },
      'two_page': (pageName, params, _) {
        print('two_page');
        return Scaffold();
      }
    });
    FlutterBoost.onPageStart();
  }
OC原生中的配置 1.cd到原生项目的目标,终端输入pod install 安装FlutterBoost的相关pod文件; 2.AppDelegate中导入#import <flutter_boost/FlutterBoost.h>,将让AppDelegate中导入继承自FLBFlutterAppDelegate; 3.初始化FlutterBoost
- (BOOL)application:(UIApplication *)application didFinishLaunchingWithOptions:(NSDictionary *)launchOptions {
    // Override point for customization after application launch.

    [FlutterBoostPlugin.sharedInstance startFlutterWithPlatform:[PlatformRouterImp shareManager] onStart:^(FlutterEngine * _Nonnull engine) {

    }];

    return YES;
}
你需要创建PlatformRouterImp类,并实现FLBPlatform协议的如下方法
//.h文件
@interface PlatformRouterImp : NSObject<FLBPlatform>

@property (nonatomic, strong) UIViewController *currentVC;


+(instancetype)shareManager;

//
-(void)open:(NSString *)url urlParams:(NSDictionary *)urlParams exts:(NSDictionary *)exts completion:(void (^)(BOOL))completion;

-(void)close:(NSString *)uid result:(NSDictionary *)result exts:(NSDictionary *)exts completion:(void (^)(BOOL))completion;

-(void)present:(NSString *)url urlParams:(NSDictionary *)urlParams exts:(NSDictionary *)exts completion:(void (^)(BOOL))completion;


@end
//.m文件
+(instancetype)shareManager{
    static PlatformRouterImp *manager = nil;
    static dispatch_once_t onceToken;
    dispatch_once(&onceToken, ^{
        manager = [[PlatformRouterImp alloc] init];
    });
    return manager;
}
-(void)open:(NSString *)url urlParams:(NSDictionary *)urlParams exts:(NSDictionary *)exts completion:(void (^)(BOOL))completion{
    if (self.currentVC) {
        FLBFlutterViewContainer *vc = [[FLBFlutterViewContainer alloc] init];
        [vc setName:url params:urlParams];
        [self.currentVC presentViewController:vc animated:YES completion:nil];
    }
}
-(void)present:(NSString *)url urlParams:(NSDictionary *)urlParams exts:(NSDictionary *)exts completion:(void (^)(BOOL))completion{

}
-(void)close:(NSString *)uid result:(NSDictionary *)result exts:(NSDictionary *)exts completion:(void (^)(BOOL))completion{
    FLBFlutterViewContainer *vc = (FLBFlutterViewContainer *)self.currentVC.presentedViewController;
    if ([vc isKindOfClass:FLBFlutterViewContainer.class] && [uid isEqualToString:@"one_page"]) {
        [vc dismissViewControllerAnimated:YES completion:nil];
    }

}
4.跳转到flutter界面
-(void)button1Action:(UIButton *)sender{
    [PlatformRouterImp shareManager].currentVC = self;
    [[PlatformRouterImp shareManager] open:@"one_page" urlParams:nil exts:nil completion:^(BOOL finished) {

    }];

}
8.补充
- 创建FlutterEngine和FlutterViewController最好只创建一次,之后只需要再调用就行了,因为它们的创建很消耗内存,并且释放后会的2M的内存泄露;
- 一定要保证Channel名字在原生端和flutter端一致,不然无法通信;
- FlutterBoost的版本号要与flutter的版本号保持一致,不然编绎可能会报错;
- 在flutter中执行"pub get"回到原生项目后一定要pod instll,不然你也没法使用FlutterBoost;
