首先需要有个人服务器,国外的服务器小心被查水表
系统支持:CentOS,Debian,Ubuntu
一:安装xxx服务端,请下载与之配套的客户端程序来连接
1:配置说明:
- 1:服务器端口:自己设定(如不设定,默认为 8989)
- 2:密码:自己设定(如不设定,默认为 teddysun.com)
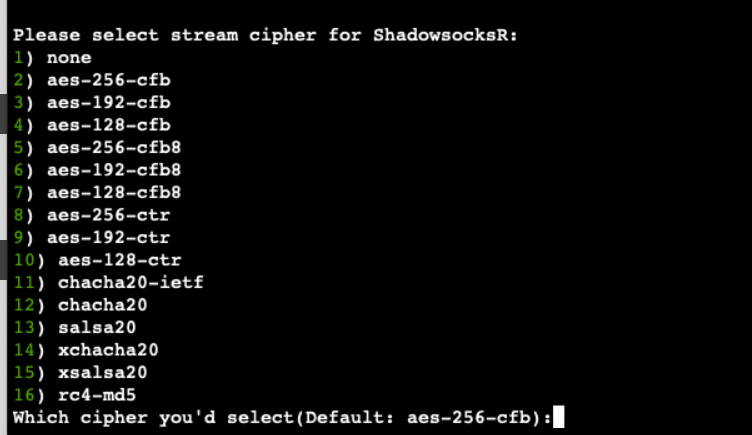
- 3:加密方式:自己设定(如不设定,默认为 aes-256-cfb)
- 4:协议(Protocol):自己设定(如不设定,默认为 origin)
- 5:混淆(obfs):自己设定(如不设定,默认为 plain)
2:配置方法:
CentOS 7系统如出现-bash: wget: command not found错误请先执行以下命令安装
wget yum -y install wget

3:使用root用户登录,执行以下命令:
   wget --no-check-certificate https://raw.githubusercontent.com/teddysun/xxx_install/master/xxxR.sh
   chmod +x xxxR.sh
   ./xxxR.sh 2>&1 | tee xxxR.log
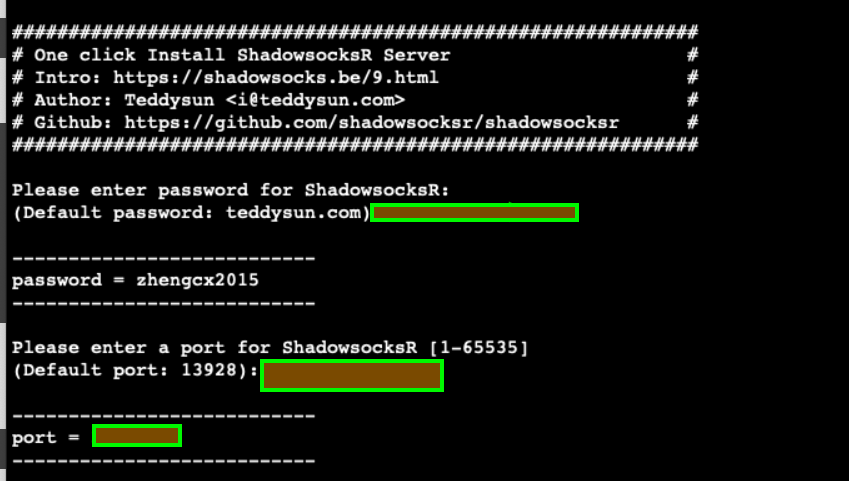
4:设置一些配置,可以选择默认,enter
5:安装完成后,脚本提示如下:
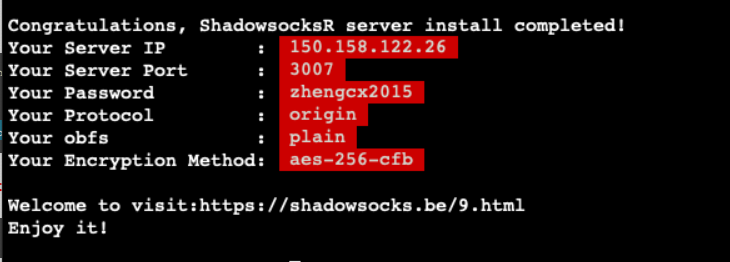
6:以上是顺利的情况,不会出现异常,但是我在安装就出现异常,解析ip出现问题。
7: Connecting to raw.githubusercontent.com failed: Connection refused. 解决办法
   Resolving raw.githubusercontent.com (raw.githubusercontent.com)... 151.101.228.133
   Connecting to raw.githubusercontent.com (raw.githubusercontent.com)|151.101.228.133|:443... failed: Connection refused.
8: 原因是由于某些原因导致GitHub的raw.githubusercontent.com域名解析被污染了
解决方法:
查询raw.githubusercontent.com的真实IP
在https://www.ipaddress.com/ 查询raw.githubuercontent.com的真实IP。
修改hosts
在/etc/hosts/中绑定查到的host,例如:
sudo vim /etc/hosts
绑定host
199.232.68.133 raw.githubusercontent.com
修改好了之后重新执行:
./xxx.sh 2>&1 | tee xxx.log
好了就万事大吉了。
9: 说说一些额外的配置:
- 1:使用 root 用户登录,运行以下命令:
./xxx.sh uninstall
- 2:安装完成后即已后台启动 xxx,运行:
/etc/init.d/xxx status
- 3:可以查看 xxx 进程是否已经启动
- 4:本脚本安装完成后,已将 xxx 自动加入开机自启动。
10: 使用命令:
启动:/etc/init.d/xxx start
停止:/etc/init.d/xxx stop
重启:/etc/init.d/xxx restart
状态:/etc/init.d/xxx status
配置文件路径:/etc/xxx.json
日志文件路径:/var/log/xxx.log
代码安装目录:/usr/local/xxx
11: 多用户配置示例:
   {
   "server":"0.0.0.0",
   "server_ipv6": "[::]",
   "local_address":"127.0.0.1",
   "local_port":1080,
   "port_password":{
       "8989":"password1",
       "8990":"password2",
       "8991":"password3"
   },
   "timeout":300,
   "method":"aes-256-cfb",
   "protocol": "origin",
   "protocol_param": "",
   "obfs": "plain",
   "obfs_param": "",
   "redirect": "",
   "dns_ipv6": false,
   "fast_open": false,
   "workers": 1
   }
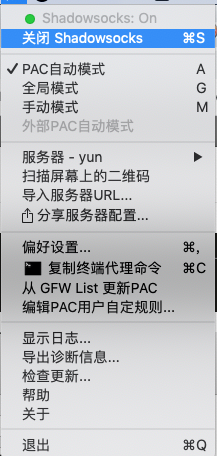
二:配置xxx客户端
1:下载客户端

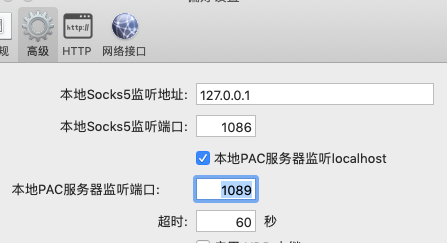
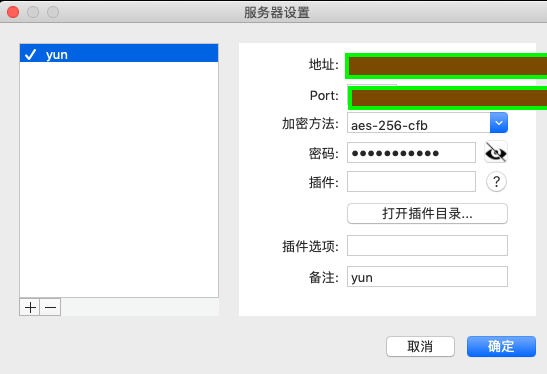
2:设置服务器
3:填写服务器ip,端口,账号密码,你之前设置的
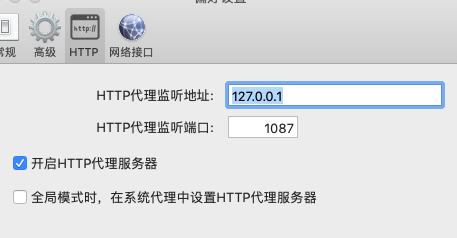
4:软件使用代理可以有两种socket5和http