

MyBatis是什么
JDBC
在前面学习到关于持久层(即与数据库交互)的技术中,我们有JDBC技术和Spring对jdbc的简单封装——JdbcTemplate。
下面是一个使用了jdbc的未经封装的传统使用方法:
Connection connection = null;
PreparedStatement preparedStatement = null;
ResultSet resultSet = null;
try {
    //加载数据库驱动
    Class.forName("com.mysql.jdbc.Driver");
    //通过驱动管理类获取数据库链接
    connection = DriverManager.getConnection("jdbc:mysql://localhost:3306/mybatis?characterEncoding=utf-8","ro
    ot", "root");

    String sql = "select * from user where username = ?";
    //获取预处理 statement
    preparedStatement = connection.prepareStatement(sql);
    //设置参数,第一个参数为 sql 语句中参数的序号(从 1 开始),第二个参数为设置的
    参数值
    preparedStatement.setString(1, "王五");
    //向数据库发出 sql 执行查询,查询出结果集
    resultSet = preparedStatement.executeQuery();
    //遍历查询结果集
    while(resultSet.next()){
     System.out.println(resultSet.getString("id")+"
     "+resultSet.getString("username"));
    }
} catch (Exception e) {
    e.printStackTrace();
}finally{
//释放资源
    if(resultSet!=null){
        try {
            resultSet.close();
        } catch (SQLException e) {
            e.printStackTrace();
        }
    }
    if(preparedStatement!=null) {
        try {
            preparedStatement.close();
        } catch (SQLException e) {
            e.printStackTrace();
        }
    }
    if(connection!=null){
        try {
            connection.close();
        } catch (SQLException e) {
            e.printStackTrace();
        }
    }
}
传统jdbc程序中出现的问题
(1)数据库连接创建,释放的频繁会造成系统资源浪费,从而影响系统性能,这个问题可以使用数据库连接池解决;
(2)在实际开发中sql语句常常是变化的,而jdbc中的sql语句是硬编码到java代码里,这使得代码不易维护。
(3)sql语句中的where条件是不定量的,如果修改了sql语句条件则还需要修改代码,这使得系统不易维护。
MyBatis 框架概述
MyBatis是一个基于Java的持久层框架,它内部封装了jdbc,开发者只需关注sql语句本身,无需耗费精力去处理加载驱动,创建连接等繁杂过程。 mybatis可以通过xml文件或注解的方式将要执行的各种statement配置完成,并通过java 对象和stament中sql语句的动态参数进行映射生产最终执行的sql语句句,最后由 mybatis 框架执行 sql 并将结果映射为 java 对象并 返回。
第一个MyBatis程序
基于注解的程序
首先参考该文章创建一个Maven项目,然后导入依赖:
<dependencies>
<!--    数据库   -->
    <dependency>
      <groupId>mysql</groupId>
      <artifactId>mysql-connector-java</artifactId>
      <version>5.1.6</version>
    </dependency>

     <!-- mybatis -->
    <dependency>
      <groupId>org.mybatis</groupId>
      <artifactId>mybatis</artifactId>
      <version>3.4.5</version>
    </dependency>

    <dependency>
      <groupId>junit</groupId>
      <artifactId>junit</artifactId>
      <version>4.12</version>
      <scope>test</scope>
    </dependency>
</dependencies>
在resources文件夹下编写配置文件
<?xml version="1.0" encoding="UTF-8" ?>
<!DOCTYPE configuration
PUBLIC "-//mybatis.org//DTD Config 3.0//EN"
"http://mybatis.org/dtd/mybatis-3-config.dtd">
<configuration>
<environments default="mysql">
<environment id="mysql">
<!--使用了 JDBC 的提交和回滚设置,它依赖于从数据源得到的连接来管理事务作用域-->
<transactionManager type="JDBC"/>
<!--使用数据池,复用实例-->
<dataSource type="POOLED">
<!--<property name="driver" value="com.mysql.jdbc.Driver"/>-->
<property name="driver" value="com.mysql.jdbc.Driver"/>
<property name="url" value="jdbc:mysql://localhost:3306/stuman?useUnicode=true&characterEncoding=utf8"/>
<property name="username" value="root"/>
<property name="password" value="123"/>
</dataSource>
</environment>
</environments>
<mappers>
<package name="com.on1.dao"/>
</mappers>
</configuration>
数据表user
CREATE TABLE `account`  (
  `id` int(11) NOT NULL AUTO_INCREMENT,
  `name` varchar(255) CHARACTER SET utf8mb4 COLLATE utf8mb4_0900_ai_ci NOT NULL,
  `password` varchar(255) CHARACTER SET utf8mb4 COLLATE utf8mb4_0900_ai_ci NOT NULL,
  PRIMARY KEY (`id`) USING BTREE
) ENGINE = InnoDB CHARACTER SET = utf8mb4 COLLATE = utf8mb4_0900_ai_ci ROW_FORMAT = Dynamic;
数据表对应的bean类Account
public class Account {
    private Integer id;
    private String name;
    private String password;
    //省略 get/set方法
}
dao层类:
public interface AccountDao {
    @Select("select * from account")
    public List<Account> findAll();

    @Insert("insert into account(name, password) values (#{name}, #{password})")
    public void saveAccount(Account account);
}
测试一下:
public class MyBatisTest {
    InputStream in;
    SqlSession sqlSession;
    AccountDao accountDao;

    @Before
    public void init() throws Exception {
        //        加载配置文件
        in = Resources.getResourceAsStream("mybatisConfig.xml");
        SqlSessionFactory factory = new SqlSessionFactoryBuilder().build(in);
        sqlSession = factory.openSession();
        //        获取代理对象
        accountDao = sqlSession.getMapper(AccountDao.class);
    }

    @After
    public void destroy() throws Exception {
        sqlSession.close();
        in.close();
    }

    @Test
    public void testFindAll() throws Exception{
        List<Account> accountList = accountDao.findAll();
        for(Account account1 : accountList) {
            System.out.println(account1);
        }
    }

     @Test
    public void testSave() {
        Account account = new Account();
        account.setName("tmo");
        account.setPassword("No123");
        accountDao.saveAccount(account);

        sqlSession.commit();
    }
}
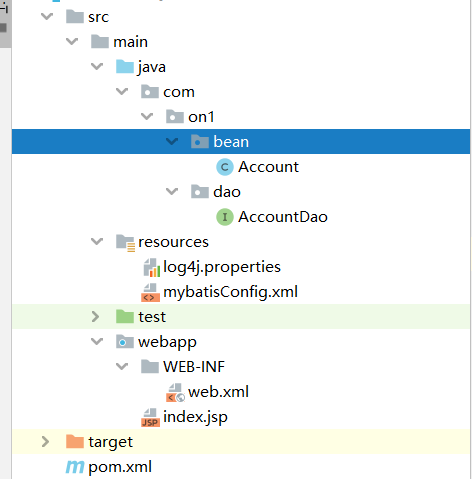
此时程序的项目结构:
基于xml配置文件的使用
修改mybatisConfig.xml中的mappers标签内容
 <mappers>
    <mapper resource="com/on1/dao/AccountDao.xml"/>
</mappers>
注释掉AccountDao接口中的两条注解,然后在resources中编写com.on1.AccountDao.xml文件:
<?xml version="1.0" encoding="UTF-8"?>
<!DOCTYPE mapper
        PUBLIC "-//mybatis.org//DTD Mapper 3.0//EN"
        "http://mybatis.org/dtd/mybatis-3-mapper.dtd">

<mapper namespace="com.on1.dao.AccountDao">
    <select id="findAll" resultType="com.on1.bean.Account">
        select * from account;
    </select>

    <insert id="saveAccount" parameterType="com.on1.bean.Account">
        insert  into account(name, password) values (#{name}, #{password})
    </insert>
</mapper>
测试一下:
public class day1 {
    InputStream in;
    SqlSession sqlSession;
    AccountDao accountDao;

    @Before
    public void init() throws Exception {
        //        加载配置文件
        in = Resources.getResourceAsStream("mybatisConfig.xml");
        SqlSessionFactory factory = new SqlSessionFactoryBuilder().build(in);
        sqlSession = factory.openSession();
        //        获取代理对象
        accountDao = sqlSession.getMapper(AccountDao.class);
    }

    @After
    public void destroy() throws Exception {
        sqlSession.close();
        in.close();
    }

    @Test
    public void testFindAll() throws Exception {
        List<Account> accountList = accountDao.findAll();
        for (Account account1 : accountList) {
            System.out.println(account1);
        }
    }

    @Test
    public void testSave() {
        Account account = new Account();
        account.setName("tmo");
        account.setPassword("No123");
        accountDao.saveAccount(account);

        sqlSession.commit();
    }
}
此时的项目结构:

注:在使用基于注解的程序时,需要移除xml的映射文件(此例中的AccountDao.xml)
删除和修改,模糊查询操作
在AccountDao类添加方法:
public void updateAccount(Account account);

public void deleteAccountById(Integer id);

public List<Account> findByName(String name);
在映射文件中添加:
<update id="updateAccount" parameterType="com.on1.bean.Account">
    update account set name = #{name}, password = #{password} where id = #{id}
</update>

<delete id="deleteAccountById" parameterType="java.lang.Integer">
    delete  from account where id = #{id}
</delete>

<!--    根据name模糊查询-->
<select id="findByName" parameterType="string" resultType="com.on1.bean.Account">
        select * from account where name like #{name}
</select>
测试方法:
    @Test
    public void testUpdateAccount() throws Exception {
        Account account = new Account();
        account.setName("on1");
        account.setPassword("20190215");
        account.setId(3);
        accountDao.updateAccount(account);

        sqlSession.commit();
    }

    @Test
    public void testDeleteAccountById() throws Exception {
        accountDao.deleteAccountById(2);
        sqlSession.commit();
    }

    @Test
    public void testFindAccountByName() {
        List<Account> accountList = accountDao.findByName("%王a%");
        for(Account account : accountList)
            System.out.println(account);
    }
添加数据后获取自的id值
本例中的id项是自增的,我们可以获取添加数据后自增的id值:
在映射文件中的添加标签修改语句:
    <insert id="saveAccount" parameterType="com.on1.bean.Account">
        <selectKey keyProperty="id" keyColumn="id" resultType="int" order="AFTER">
            select 1677744;
        </selectKey>
        insert  into account(name, password) values (#{name}, #{password})
    </insert>
测试方法:
    @Test
    public void testSave() {
        Account account = new Account();
        account.setName("tmo");
        account.setPassword("No123");
        System.out.println("提交前的account值:" + account);
        accountDao.saveAccount(account);

        sqlSession.commit();
        System.out.println("提交后的account值:" + account);
    }
控制台输出:

查询条件构成bean对象
Mybatis使用ognl表达式来解析对象字段的值,#{}或${}括号里的值为bean属性名。
ognl表达式:它通过对象的取值方法来获取数据,在写法上省略了get:当我们获取账户的名称时,类中的写法是account.getName(),而ognl表达式写法则是account.name。
由于在mybatis中通过parameterType提供了属性所属的类,因此可以直接只写name
在开发中我们所要查找的数据可能是由种种查询条件构成,而这些查询条件可以构成一个bean对象,因此我们可以构成一个属性是查询条件的bean,而bean中也可以包含bean。
比如我们希望根据账户名查询账户信息,查询条件放到Bank类的account属性。
条件类Bank
public class Bank {
    private Account account;
    //省略get/set方法
}
AccountDao添加方法:
public List<Account> findByBean(Bank bank);
映射文件中添加语句:
<select id="findByBean" parameterType="com.on1.bean.Bank" resultType="com.on1.bean.Account">
        select * from account where name like #{account.name}
</select>
测试:
@Test
    public void testFindAccountByBean() {
        Bank bank = new Bank();
        Account account = new Account();
        account.setName("%王");
        bank.setAccount(account);
        List<Account> accountList = accountDao.findByBean(bank);
        for(Account tmp : accountList)
            System.out.println(tmp);
    }
resultMap标签
在前面的例子中,我们建立的Account类的属性名与数据表account的列名是一致的,那么如果是不一致的,比如此处我们修改Account类的属性名:
public class Account {
    private Integer uId;
    private String uName;
    private String uPassword;
    //省略 get/set方法
}
映射文件中的相关标签不变:
    <select id="findAll" resultMap="accountMap">
        select * from account;
    </select>
测试类不变,运行后的结果是错误的。
针对此问题,我们有两种解决方法:
(1)在映射文件中建立bean类属性名与数据表列名的对应关系:
    <resultMap id="accountMap" type="com.on1.bean.Account">
        <id property="uId" column="id"></id>
        <result property="uName" column="name"></result>
        <result property="uPassword" column="password"></result>
    </resultMap>

    <select id="findAll" resultMap="accountMap">
        select * from account;
    </select>
(2)在sql语句中起别名
<select id="findAll" resultType="com.on1.bean.Account">
    select id as uId,  name  as uName, password as uPassword from account;
</select>
properties标签
在前面配置连接数据库基本信息时,我们是直接在标签里面写入对应的值。此外我们还可以把连接信息写在一个文件里,然后通过properties标签来引入这个文件。
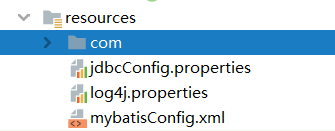
我们在resources文件夹下新建文件jdbcConfig.properties,并写入连接信息:
jdbc.driver=com.mysql.jdbc.Driver
jdbc.url=jdbc:mysql://localhost:3306/stuman?useUnicode=true&characterEncoding=utf8
jdbc.username=root
jdbc.password=123
然后修改配置文件mybatisConfig.xml:
<configuration>
<properties resource="jdbcConfig.properties">
</properties>
<environments default="mysql">
<environment id="mysql">
<!--配置事务类型:使用了 JDBC 的提交和回滚设置-->
<transactionManager type="JDBC"/>
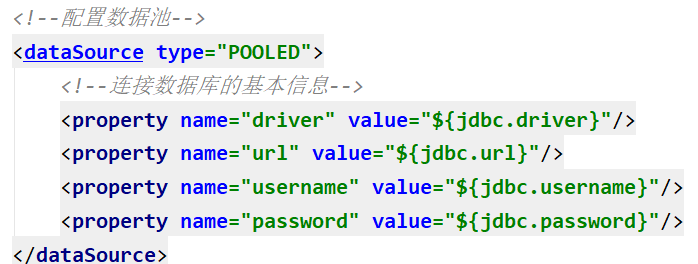
<!--配置数据池-->
<dataSource type="POOLED">
<!--连接数据库的基本信息-->
<property name="driver" value="${jdbc.driver}"/>
<property name="url" value="${jdbc.url}"/>
<property name="username" value="${jdbc.username}"/>
<property name="password" value="${jdbc.password}"/>
</dataSource>
</environment>
</environments>
<mappers>
<mapper resource="com/on1/dao/AccountDao.xml"/>
</mappers>
</configuration>
typeAliases标签
我们可以在配置文件中给一些bean类起别名,这样在映射文件中直接写别名。
    <typeAliases>
<!--        指定别名后不区分大小写-->
        <typeAlias type="com.on1.bean.Account" alias="account"></typeAlias>
    </typeAliases>

映射文件:

此外也可以通过package标签来指定要配置别名的包
<typeAliases>
<!--        指定要配置别名的包,别名为类名,不区分大小写-->
    <package name="com.on1.bean"/>
</typeAliases>
连接池分类
在连接池配置中,我们需要表明连接池的类型
myBatis内部分别定义了实现java.sql.DataSource接口的UnpooledDataSource,PooledDataSource 类来表示 UNPOOLED、POOLED 类型的数据源。
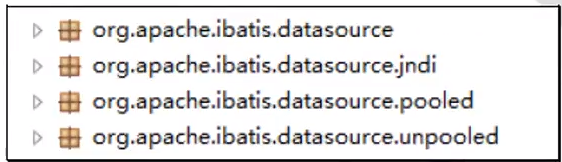
Mybatis将它的数据源分为三类:
- UNPOOLED: 不使用连接池的数据源
- POOLED: 使用连接池的数据源
- JNDI: 使用 JNDI 实现的数据源
当type=”POOLED”:MyBatis 会创建 PooledDataSource 实例;
type=”UNPOOLED” : MyBatis 会创建 UnpooledDataSource 实例;
type=”JNDI”:MyBatis 会从 JNDI 服务上查找 DataSource 实例,然后返回使用;
UnpooledDataSource类
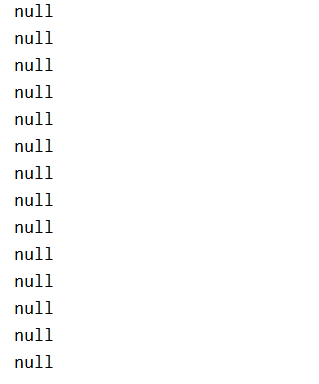
当我们将连接池类型设置为UNPOOLED并输出数据表里的所有数据时,log4j的输出日志为:
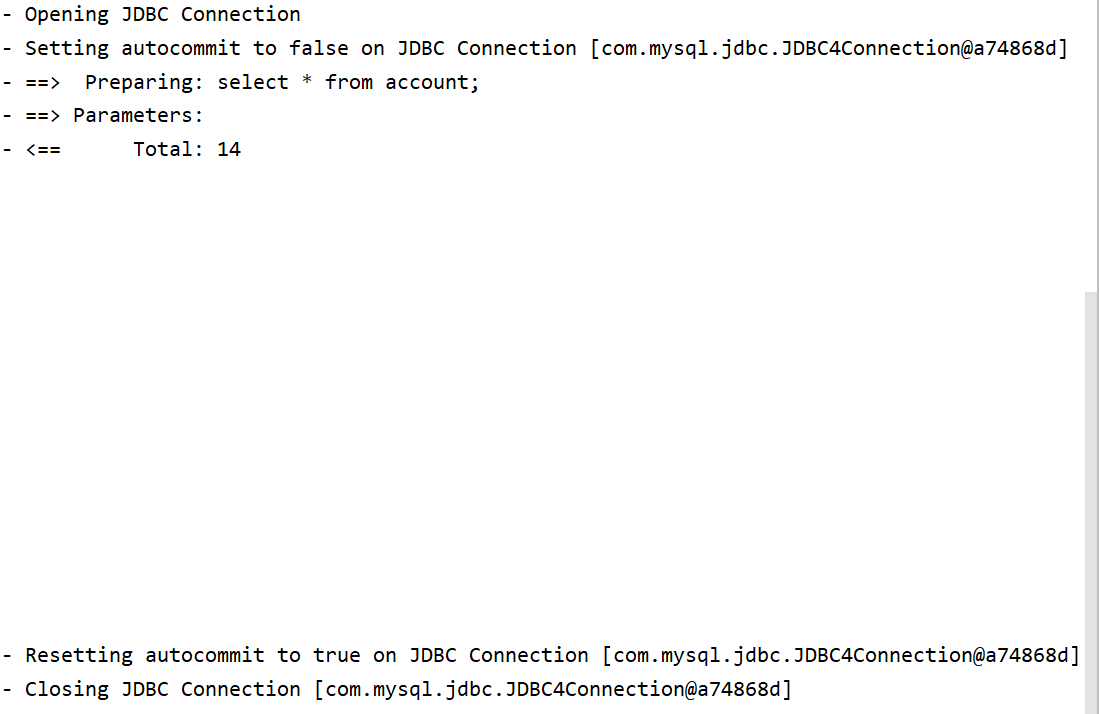
可以发现UNPOOLED类型的连接池是每次创建一个新连接,然后关闭连接。
部分源码
public class UnpooledDataSource implements DataSource {
    private String driver;
    private String url;
    private String username;
    private String password;

    public Connection getConnection() throws SQLException {
        return this.doGetConnection(this.username, this.password);
    }

    private Connection doGetConnection(String username, String password) throws SQLException {
        Properties props = new Properties();
        if (this.driverProperties != null) {
            props.putAll(this.driverProperties);
        }

        if (username != null) {
            props.setProperty("user", username);
        }

        if (password != null) {
            props.setProperty("password", password);
        }

        return this.doGetConnection(props);
    }

    private Connection doGetConnection(Properties properties) throws SQLException {
        this.initializeDriver();    //注册驱动
        Connection connection = DriverManager.getConnection(this.url, properties);
        this.configureConnection(connection);
        return connection;
    }
    //省略其他属性和方法
}
PooledDataSource类
当我们将连接池类型设置为POOLED并输出数据表里的所有数据时,log4j的输出日志为:
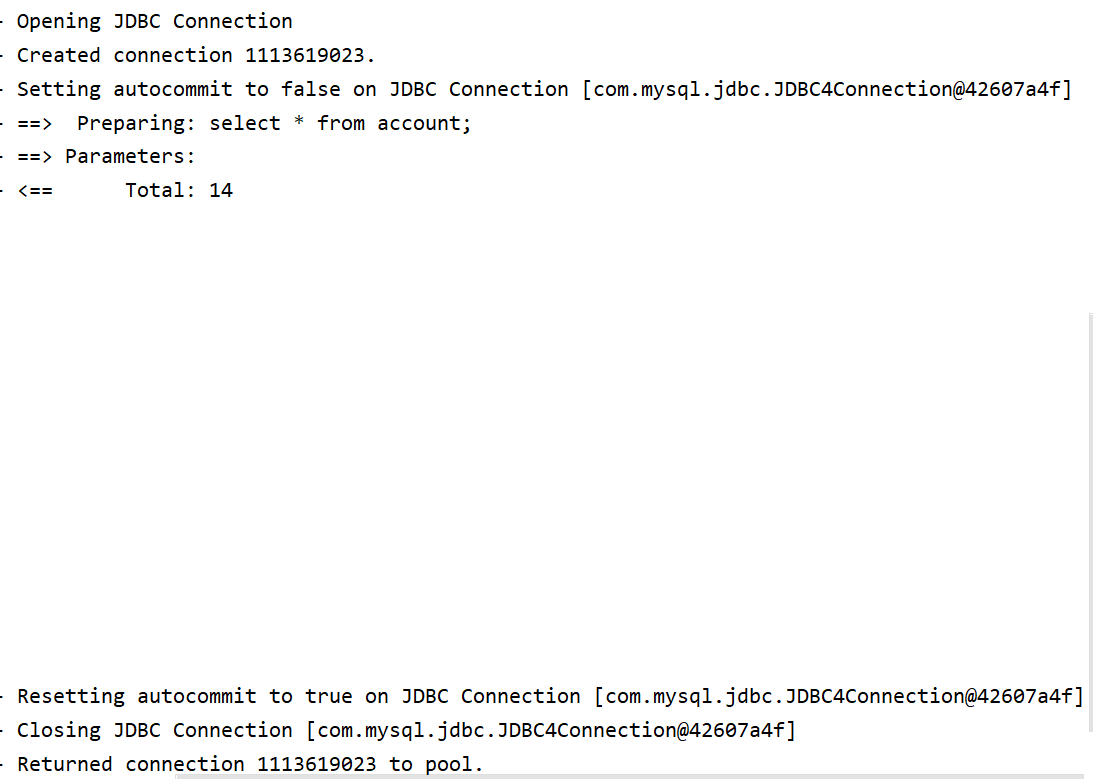
因此它是从连接池中获取一个连接来使用,使用完后返还连接
部分源码
public class PooledDataSource implements DataSource {
    public Connection getConnection() throws SQLException {
        return this.popConnection(this.dataSource.getUsername(), this.dataSource.getPassword()).getProxyConnection();
    }

     private PooledConnection popConnection(String username, String password) throws SQLException {
        boolean countedWait = false;
        PooledConnection conn = null;
        long t = System.currentTimeMillis();
        int localBadConnectionCount = 0;

        while(conn == null) {
            synchronized(this.state) {
                PoolState var10000;
                //如果还有空闲的连接
                if (!this.state.idleConnections.isEmpty()) {
                //idleConnections是一个ArrayList集合
                //连接池是一个存储连接的(线程安全)集合,该集合符合先进先出原则
                     conn = (PooledConnection)this.state.idleConnections.remove(0);
                     if (log.isDebugEnabled()) {
                        log.debug("Checked out connection " + conn.getRealHashCode() + " from pool.");
                    }
                /*
                    否则如果连接池中活跃的连接数量小于设定的最大值,
                    则创建一个新连接
                */
                }else if (this.state.activeConnections.size() < this.poolMaximumActiveConnections) {
                    conn = new PooledConnection(this.dataSource.getConnection(), this);
                    if (log.isDebugEnabled()) {
                        log.debug("Created connection " + conn.getRealHashCode() + ".");
                    }
                    /*
                        如果超出最大活动连接数,无法创建连接
                        则获取使用时间最长的活动连接,
                    */
                }else {
                    PooledConnection oldestActiveConnection = (PooledConnection)this.state.activeConnections.get(0);
                    //获取使用时间最长的活动连接,并计算使用时间
                    long longestCheckoutTime = oldestActiveConnection.getCheckoutTime();
                    //若使用时间超出最大可回收时间,直接回收该连接
                    //回收过期次数增加
                    if (longestCheckoutTime > (long)this.poolMaximumCheckoutTime) {
                        ++this.state.claimedOverdueConnectionCount;
                        var10000 = this.state;
                        // 统计过期回收时间增加
                        var10000.accumulatedCheckoutTimeOfOverdueConnections += longestCheckoutTime;
                        var10000 = this.state;
                        // 统计使用时间增加
                        var10000.accumulatedCheckoutTime += longestCheckoutTime;
                        // 将连接从活动队列中移除
                        this.state.activeConnections.remove(oldestActiveConnection);
                        if (!oldestActiveConnection.getRealConnection().getAutoCommit()) {
                            try {
                                oldestActiveConnection.getRealConnection().rollback();
                            } catch (SQLException var16) {
                                log.debug("Bad connection. Could not roll back");
                            }
                        }
                        //省略该方法的一部分
