

原型及原型继承
接下来了解知道几个常见的概念
-
prototype: 原型对象,每个函数都有一个protoType属性
-
proto: 原型
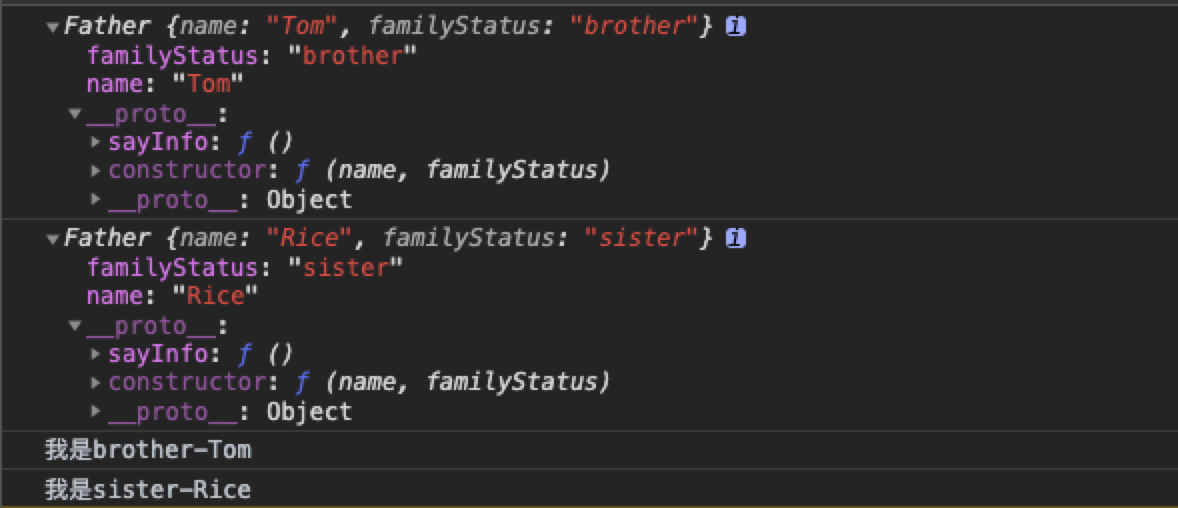
每个构造函数都有一个原型对象prototype,原型对象中有个constructor属性,该属性指向构造函数本身,每个实例都有一个指向原型对象的内部指针proto指向prototype。
    const Father = function(name, familyStatus) {
      this.name = name;
      this.familyStatus = familyStatus
      this.arr = []
      this.say = function() {
        console.log(`我是${this.familyStatus}-${this.name}`);
      };
    }
    Father.prototype.sayInfo = function () {
      return  `我是${this.familyStatus}-${this.name}`
    }
    const brother = new Father('Tom', 'brother')
    const sister = new Father('Rice', 'sister')
打印brother 以及sister
几种继承的方式:
原型链继承
关键: 子类的原型指向父类的实例
这种方式,子类继承了父类原型上的方法,拥有独立的构造函数,也可以在自己原型上拓展各类的方法,包括,覆盖父类原型上同名的方法。
 ...代码接上
  const Son = function(age) {
    this.age = age
  }
  Son.prototype = new Father('Rick', 'son')
  Son.prototype.sayAge = function() {
    return this.age
  }
  const Rick = new Son(29)
  console.log(Rick.sayInfo(), Rick.sayAge())

    ...代码接上
    const Sam = new Son(30)
    Rick.arr.push(1)
    console.log(Sam.arr)

... 代码接上
const Rick = new Son(29)
const Sam = new Son(30)
Rick.arr = [1]
Sam.arr = [2]
Rick.arr.push(2)
console.log(Rick.arr, Sam.arr)
当然我们可以通过重新赋值操作对应的属性,互不影响

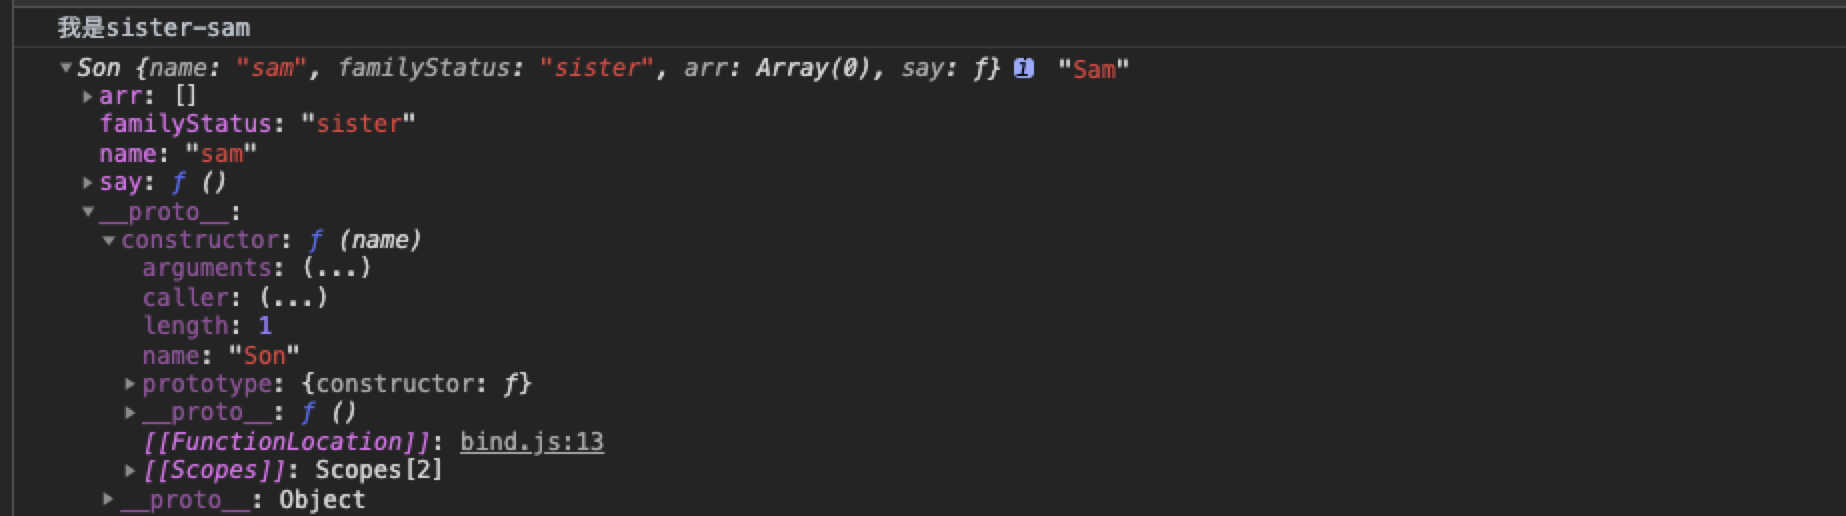
构造函数式继承
使用call或者apply可以让父类的构造函数在新对象里执行,但这种方式只能继承父类的属性和方法 不能继承原型属性和方法
    ...代码接上
    const Son = function(name, age) {
      // Father.apply(this, [name, 'sister'])
     // Father.bind(this, name, 'sister')()
      Father.call(this, name, 'sister')
      this.age = age
    }
    const Sam = new Son('sam', 29)
    Sam.say()
    console.log(Sam, 'Sam')

- call和apply以及bind
- call(),apply(),bind() 都是用来重定义this這个对象的
- apply: B.apply(A, arguments)
- call: B.call(A, args1, args2)
- bind: B.bind(A, args1, args2)() // 执行不执行的区别
接下来实现一个让我们实现一个bind函数吧!
if (!Function.prototype.my_bind) {
  Function.prototype.my_bind = function(...args) {
    const self = this // 谁调用my_bind,这里的this就指向谁
    const [ target, ...argument ] = Array.prototype.slice.call(args) // 将类数组转为数组
    return function() { // 返回一个新的函数
      self.apply(target, argument)
    }
  }
}
验证
const Son = function(name) {
  Father.my_bind(this, name, 'sister')()
}
const Sam = new Son('sam')
Sam.say()
成功实现继承~

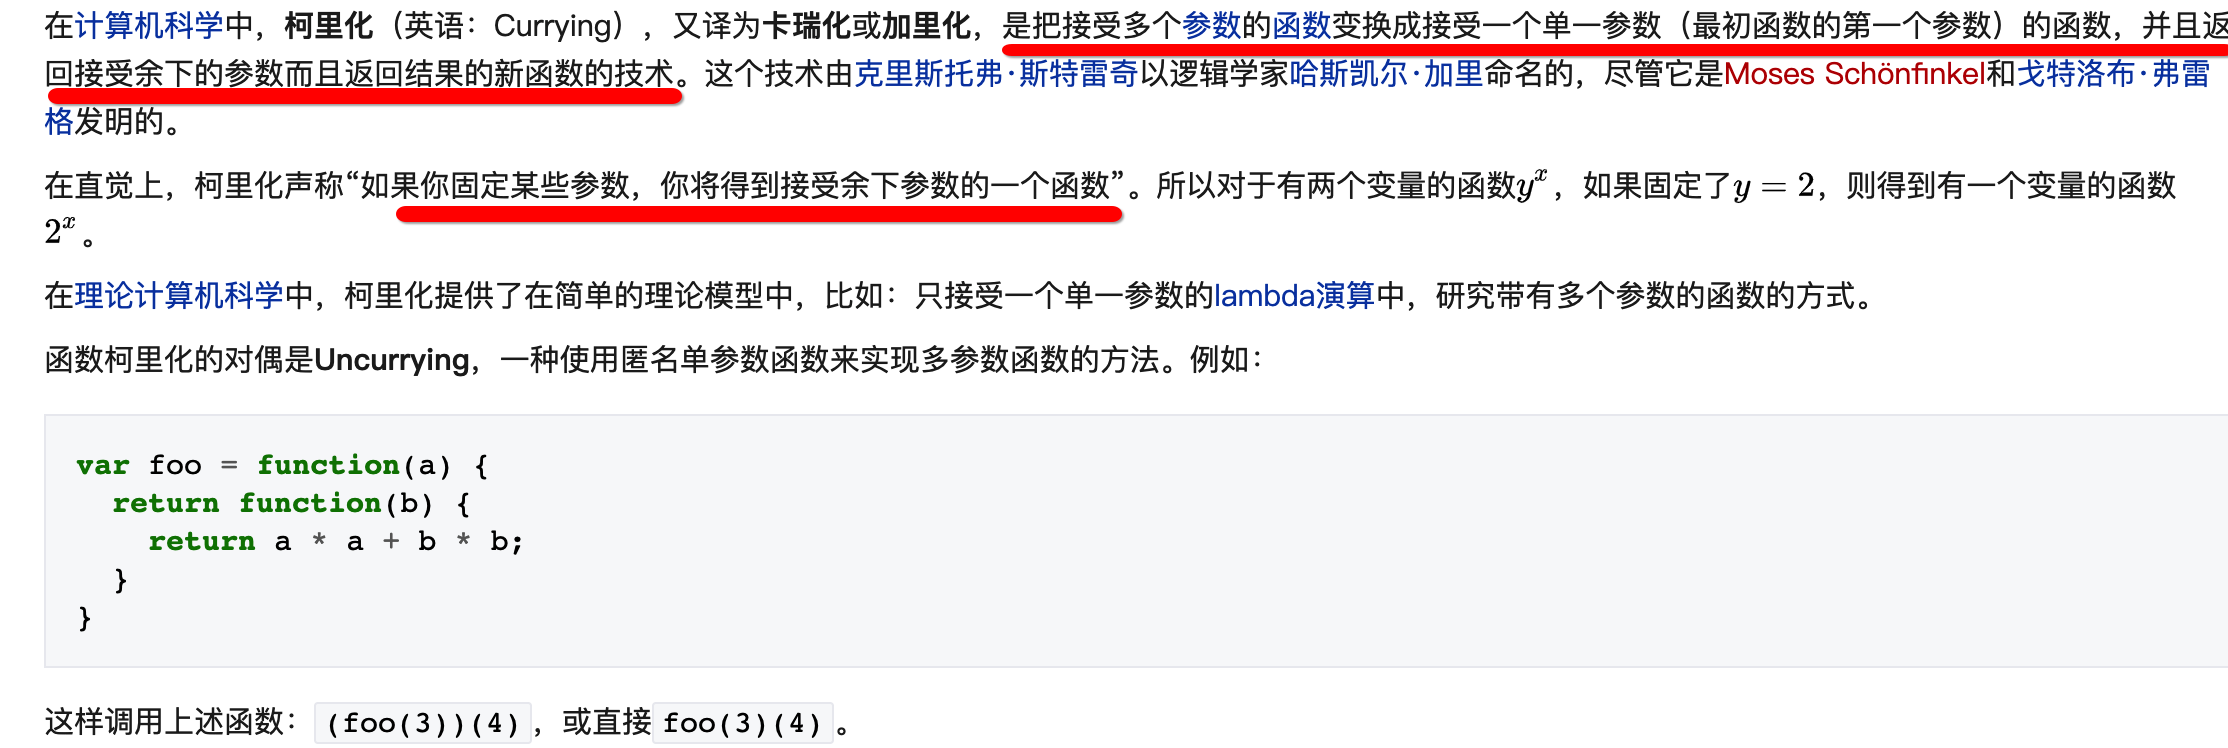
在这里值得提一下的是前端另一个面试常问的问题——函数柯里化
不要被这个高深的名字吓到,函数柯理化其实就是函数参数截取,并合并参数~ 在维基百科对这个词解释的非常到位
const curry = (fn, ...args1) =>
                (...args2) =>
                    (arg =>
                        arg.length === fn.length ?
                            fn(...arg) :
                                curry(fn, ...arg)
                    )([...args1, ...args2])
const add = (a, b, c) => a + b + c
const result = curry(add, 1)(2, 3)
console.log(result, 'result')

// 实现add(1)(2)(3)(4)
    const addSum = function(...args1) {
      const _args = Array.prototype.slice.call(args1)
      const _tempAddder = (...args2) => {
        _args.push(args2)
        return _tempAddder
      }                                 // 利用函数闭包储存参数
      _tempAddder.toString = () => {
        return  _args.reduce((a, b) => {
          return Number(a) + Number(b)
        })
      }
      // 打印一个对象时,实际是输出对象的toString()方法的返回值,可以自行定义toSting()返回值
      // 即当我们直接对函数使用 alert() 或 console.log() 时,函数的 toString() 方法会被调用
      return _tempAddder
    }
console.log(add(1)(2)(3)(4))

组合继承
将原型链继承和构造函数继承组合到一起,既能继承父类本身的方法和属性,也可以继承父类原型上的方法
    const Son = function(name) {
      Father.call(this, name, 'sister')
    }
    Son.prototype = new Father()
    Son.prototype.constructor= Son
    const Sam = new Son('sam')
    Sam.say()
    console.log(Sam.sayInfo())
这种情况下,Father下的sayInfo() 方法也可以访问的到,弥补了构造函数式继承的缺陷

寄生组合继承
-
背景: 由于组合继承(构造函数和原型的组合)会调用两次父类构造函数,因此又出现一种最优的继承方式寄生组合继承。
-
原理:通过构造函数来继承父类的属性,通过原型链的继承方式来继承父类的方法,而不需要为子类指定原型而调用父类的构造函数,仅仅需要拿到父类原型的一个副本,即省去了组合继承中 Son.prototype = new Father()的这一步。
...代码接上
实现方式1:
const inheritFatherPrototype = (Son, Father)  => {
// 创建父类原型的一个复本,并为其添加constrcutor,最后赋给子类的原型
  const prototype = Object.create(Father.prototype)
  prototype.constructor = Son
  Son.prototype = prototype
}
const Son = function(name, age) {
  Father.call(this, name, 'sister')
  this.age = age
}
inheritFatherPrototype(Son, Father)
Son.prototype.sayAge = function () {
  console.log(this.age)
}
const Sam = new Son('sam', 88)
console.log(Sam.sayInfo())
Sam.sayAge()


实现方式2:
// 创建一个无实例方法的类,让Son通过原型链继承了Temp这个类,此时Temp的prototype
// 上的constructor属性指向Father的constructor,因此Son的constructor也
// 指向Father的constructor,因此在后几步需要手动更改Son的constructor的指向
 const Son = function(name, age) {
  Father.call(this, name, 'sister')
  this.age = age
}
const Temp = function() {}
Temp.prototype = Father.prototype
Son.prototype = new Temp()
Son.prototype.constructor = Son
Son.prototype.sayAge = function () {
  console.log(this.age)
}
const Sam = new Son('sam', 88)
console.log(Sam.sayInfo())
Sam.sayAge()

通过Object.create()实现寄生组合继承

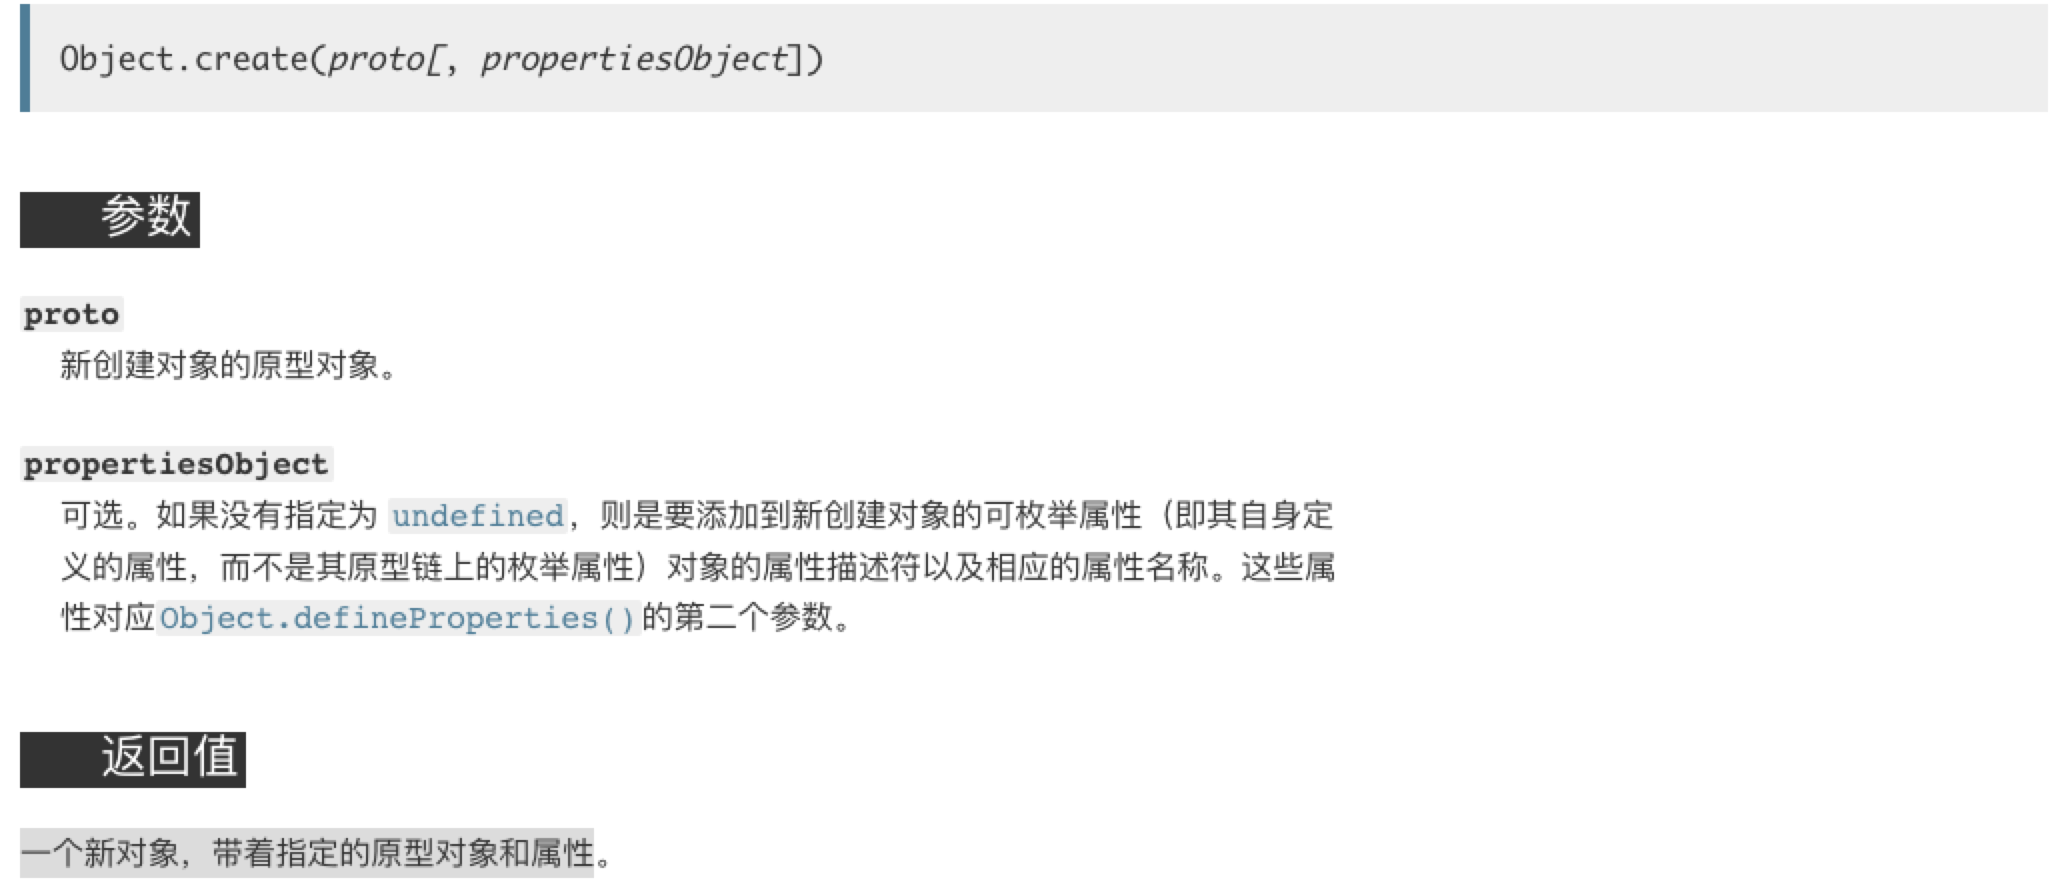
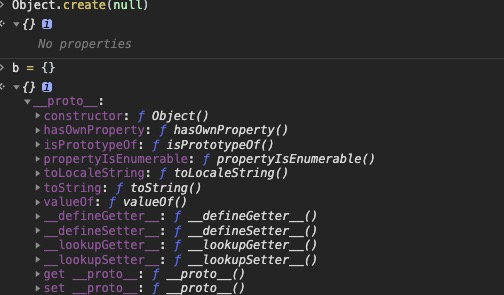
经常会被问: Object.create(null)创建的obj和new Object()创建的obj有什么区别?
通过上面的解释:
- Object.create(null)没有继承原型的任何方法,因为它返回了一个指定原型对象为null的新对象。
- 而直接使用{}创建新对象,其实是等同于new Object(),它是继承了Object的。
// 实现单继承
 const Son = function(name, age) {
  Father.call(this, name, 'sister')
  this.age = age
}
Son.prototype = Object.create(Father.prototype)
Son.prototype.constructor = Son
Son.prototype.sayAge = function () {
  console.log(this.age)
}
const sam = new Son('sam', 99)
sam.sayAge()
console.log(sam.sayInfo())

// 实现多继承
const Mother = function() {}
Mother.prototype.sayHello = function() {
  console.log('hello')
}
const Son = function(name, age) {
  Father.call(this, name, 'sister')
  Mother.call(this)
  this.age = age
}
Son.prototype = Object.create(Father.prototype)
Object.assign(Son.prototype, Mother.prototype) // 将Mother原型上的函数拷贝到Son原型上
Son.prototype.constructor = Son
Son.prototype.sayAge = function () {
  console.log(this.age)
}
const sam = new Son('sam', 99)
sam.sayAge() // 继承自Father
sam.sayHello() // 继承自Mother
console.log(sam.sayInfo())

关于拷贝
区分深拷贝还是浅拷贝,简单点来说,就是假设B复制了A,当修改A时,看B是否会发生变化,如果B也跟着变了,说明这是浅拷贝,如果B没变,那就是深拷贝。
在实现多继承的时候用到了Object.assign()
Object.assign() 方法用于将所有可枚举属性的值从一个或多个源对象复制到目标对象。它将返回目标对象。
语法: Object.assign(target, ...sources)
const target = Object.defineProperties({}, {
  a: {
    value: 1,
    writable: true,
    enumerable: true
  },
  b: {
    value: [1],
    writable: true,
    enumerable: true
  }
});
const source = Object.assign({}, target)
target.a = 2
target.b.push(2)
console.log(target, source)

- 从这个🌰可以看出,Object.assign()拷贝对象可枚举的属性时,针对非引用类型的属性,采用的是深拷贝,对引用类型的属性,采取浅拷贝。
- 继承属性和不可枚举属性是不能拷贝,了解更多Object.assign()
    const obj = Object.create({foo: 1}, { // foo 是个继承属性。
        a: {
            value: 2  // bar 是个不可枚举属性。
        },
        b: {
            value: 3,
            enumerable: true  // baz 是个自身可枚举属性。
        }
    });

    const copy = Object.assign({}, obj);
    console.log(copy); // { b: 3 }
浅拷贝
const target = {
  a: 1,
  b: [1]
}
const shallowCopy = (target) => {
  const temp = Object.create({})
  for (let prop in target) {
    if (target.hasOwnProperty(prop)) {
      temp[prop] = target[prop]
    }

  }
  return temp

}
const source = shallowCopy(target)
target.a = 2
target.b.push(2)
console.log(target, source)

实现深拷贝的方式:
...无关代码省略,接上
    方式1: JSON.parse()和JSON.stringify()
    const source = JSON.parse(JSON.stringify(target))

    方式2:
    递归拷贝: 遇到引用属性,继续递归,知道所有的都是简单属性。
    const deepCopy = (target) => {
      if (typeof target !== 'object') return target
      const temp = Object.prototype.toString.call(target) === "[object Array]" ? new Array() : Object.create({})
      for (let prop in target) {
        if (target.hasOwnProperty(prop)) {
          if (typeof target[prop] === 'object') {
            temp[prop] = deepCopy(target[prop])
          } else {
            temp[prop] = target[prop]
          }
        }
      }
      return temp
    }
    const source = deepCopy(target)
    target.a = 2
    target.b.push(2)
    console.log(source, 'source')

一些平时开发中实现深度拷贝的技巧:
const a = [1]
// const b = [...a]
// const b = [].concat(a)
// const b = a.slice(0)
这几种b会复制a,但a改变后,b不会随着改变,因此也实现的深度拷贝。
未完...
