

- purecomponent和componment
- Context
- 错误边界
- Refs 转发
- Portals
- Profiler
- Render Props
- Concurrent 模式
1. Purecomponent和Componment
PureComponent通过prop和state的浅比较来实现shouldComponentUpdate。浅比较(shallowEqual),即react源码中的一个函数。 判断checkShouldComponentUpdate:
 function checkShouldComponentUpdate(workInProgress, ctor, oldProps, newProps, oldState, newState, nextContext) {
  ....
  ....
  if (ctor.prototype && ctor.prototype.isPureReactComponent) {
    return !shallowEqual(oldProps, newProps) || !shallowEqual(oldState, newState);
  }

  return true;
}
function shallowEqual(objA, objB) {
  if (is(objA, objB)) {
    return true;
  }

  if (typeof objA !== 'object' || objA === null || typeof objB !== 'object' || objB === null) {
    return false;
  }

  var keysA = Object.keys(objA);
  var keysB = Object.keys(objB);

  if (keysA.length !== keysB.length) {
    return false;
  }

  // Test for A's keys different from B.
  for (var i = 0; i < keysA.length; i++) {
    if (!hasOwnProperty$1.call(objB, keysA[i]) || !is(objA[keysA[i]], objB[keysA[i]])) {
      return false;
    }
  }

  return true;
}
先来看下这个例子:
export default class Cheap extends PureComponent {
    state = {
        show: false
    };

    changeShow = () => {
        this.setState({
            show: true
        });
    }

    render() {
        console.log('again render');
        return (
            <div>
                <h2>ReactDetail: </h2>
                <button className={S.button} onClick={this.changeShow}>点击修改state</button>
                {this.state.show && <div>展示show</div>}
            </div>
        );
    }
}
再看另外一个例子:
export default class Cheap extends PureComponent {
    state = {
        arr: ['1']
    };

    changeShow = () => {
        const { arr } = this.state;
        arr.push('2');
        this.setState({
            arr
        });
    }

    // changeState = () => {
    //     const { arr } = this.state;
    //     this.setState({
    //         arr: [...arr, '2']
    //     });
    // };

    render() {
        console.log('again render');
        return (
            <div>
                <h2>ReactDetail: </h2>
                <button className={S.button} onClick={this.changeShow}>点击修改state</button>
                <div>
                    {this.state.arr.map((item) => item)}
                </div>
            </div>
        );
    }
}
PureComponent中浅比较这个数组的引用没有变化所以没有渲染。this.setState()以后,值是在render的时候更新的。
结论:PureComponent不仅会影响本身,而且会影响子组件,所以PureComponent最佳情况是展示组件
2. Context
Context设计目的是为了共享那些对于一个组件树而言是“全局”的数据,使用Context, 我们可以避免通过中间元素传递props。
const MyContext = React.createContext(defaultValue); 生成如下的内容:
<MyContext.Provider value={{ count1, fn }}>
    <B />
</MyContext.Provider>
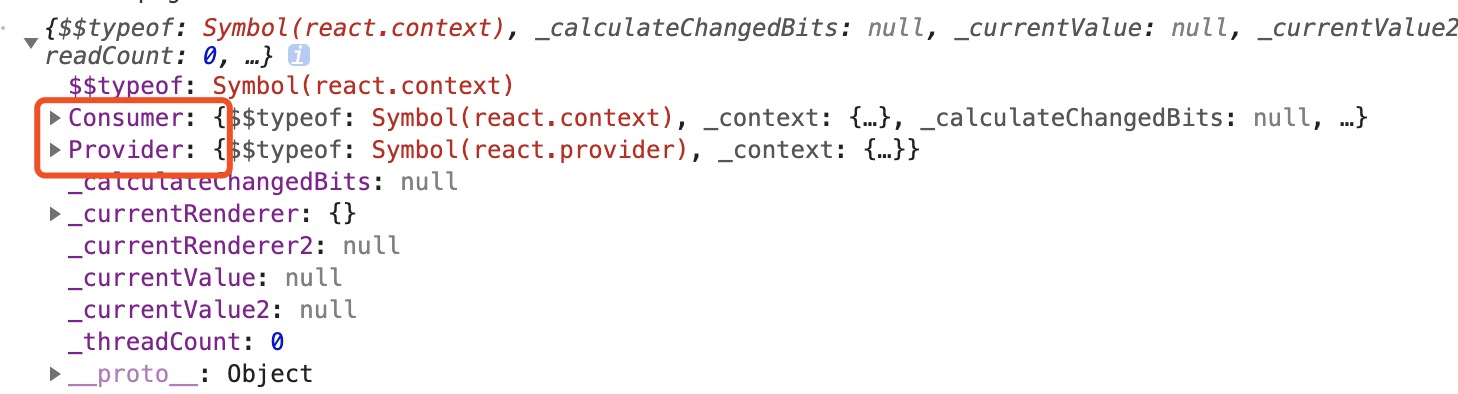
- 每个 Context 对象都会返回一个 Provider React 组件,它允许消费组件订阅 context 的变化。
- MyContext.Consumer 主要是用来在函数式组件中完成订阅 context。
content使用的例子
const MyContext = createContext(null);
class MyClass extends React.Component {
    static contextType = MyContext;

    componentDidMount() {
        // const value = this.context;
        // console.log(value);
        console.log(this.context);
        this.context.fn();
        /* 在组件挂载完成后,使用 MyContext 组件的值来执行一些有副作用的操作 */
    }

    render() {
        // const value = this.context;
        // console.log(value);
        console.log(this.context);
        return <div />;
    }
}

// MyClass.contextType = MyContext;

function MyFunction() {
    return (
        <MyContext.Consumer>
            {
                value => (
                    <>
                        <h1 >{value.count}</h1>
                        <button className={S.button1} onClick={() => { value.fn(); }}>函数型组件</button>
                    </>
                )
            }
        </MyContext.Consumer>
    );
}

export default class Cheap extends Component {
    state = {
        count: 0,
    };

    componentDidMount() {}

    changeState = () => {
        const { count } = this.state;
        this.setState({
            count: count + 1,
        });
    };

    render() {
        const { count } = this.state;
        const fn = () => {
            this.setState({
                count: count + 1,
            });
            console.log('test');
        };
        return (
            <div>
                <h2>ReactDetail: </h2>
                <button className={S.button1} onClick={this.changeState}>
                    点击修改count
                    {count}
                </button>
                <MyContext.Provider value={{ count, fn }}>
                    <MyClass />
                    <p className={S.fenge} />
                    <MyFunction />
                </MyContext.Provider>
            </div>
        );
    }
}
源码:
function updateContextConsumer(current?1, workInProgress, renderExpirationTime) {
  var context = workInProgress.type;
  ......
  console.log(2121212121);
  // React DevTools reads this flag.
  workInProgress.effectTag |= PerformedWork;
  reconcileChildren(current?1, workInProgress, newChildren, renderExpirationTime);
  return workInProgress.child;
}
3. 错误边界
如果一个 class 组件中定义了 static getDerivedStateFromError() 或 componentDidCatch() 这两个生命周期方法中的任意一个(或两个)时,那么它就变成一个错误边界。当抛出错误后,请使用 static getDerivedStateFromError() 渲染备用 UI ,使用 componentDidCatch() 打印错误信息。
class ErrorBoundary extends React.Component {
  constructor(props) {
    super(props);
    this.state = { hasError: false };
  }

  static getDerivedStateFromError(error) {
    // 更新 state 使下一次渲染能够显示降级后的 UI
    return { hasError: true };
  }

  componentDidCatch(error, errorInfo) {
    // 你同样可以将错误日志上报给服务器
    logErrorToMyService(error, errorInfo);
  }

  render() {
    if (this.state.hasError) {
      // 你可以自定义降级后的 UI 并渲染
      return <h1>Something went wrong.</h1>;
    }

    return this.props.children;
  }
}

<ErrorBoundary>
  <MyWidget />
</ErrorBoundary>
注意:错误边界仅可以捕获其子组件的错误
4. Refs 转发
refs转发主要是能够直接访问子组件的子组件实例或者Dom节点
function A() {
    const click = () => {
        console.log(1);
    };

    return <div onClick={click}>组件A</div>;
}

class B extends Component {
    a = () => {
        console.log('B组件');
    }
    render() {
        return (
            <div>
                组件B
            </div>
        );
    }
}

export default class Cheap extends Component {
    componentDidMount() {
        // this.$input.focus();
        console.log(this.$input);
        // console.log($(this.$input).width());
        console.log(this.$A);
        console.log(this.$B);
    }

    render() {
        return (
            <div>
                <A ref={c => { this.$A = c; }} />
                <B ref={c => { this.$B = c; }} />
                <input ref={c => { this.$input = c; }} placeholder="一起" />
            </div>
        );
    }
}
你不能在函数组件上使用 ref 属性,因为它们没有实例
再看下面的例子
class C extends Component {
    render() {
        const { forwardedRef, ...rest } = this.props;
        return (
            <div ref={forwardedRef} {...rest}>
                组件C
            </div>
        );
    }
}

const D = React.forwardRef((props, ref) => <C {...props} forwardedRef={ref} />);


export default class Cheap extends Component {
    componentDidMount() {
        console.log(this.$D);
        console.log(this.$refD.current);
    }

    $refD = React.createRef()

    render() {
        return (
            <div>
                <A ref={c => { this.$A = c; }} />
                <B ref={c => { this.$B = c; }} />
                <D ref={c => { this.$D = c; }} />
                <D ref={this.$refD} />
                <input ref={c => { this.$input = c; }} placeholder="一起" />
            </div>
        );
    }
}
第二个参数 ref 只在使用 React.forwardRef 定义组件时存在。常规函数和 class 组件不接收 ref 参数,且 props 中也不存在 ref。
Ref 转发不仅限于 DOM 组件,你也可以转发 refs 到 class 组件实例中。
5. Portals:
#####用法: 将子节点渲染到存在于父组件以外的 DOM
一般的情况下,该元素将被挂载到 DOM 节点中离其最近的父节点
render() {
  // React 挂载了一个新的 div,并且把子元素渲染其中
  return (
    <div>
      {this.props.children}
    </div>
  );
}
function Protal() {
    const childClick = () => {
        console.log('child');
    };

    return <div className={S.protal} onClick={childClick}>1</div>;
}

class Container extends Component {
    el = document.createElement('div')

    render() {
        return ReactDOM.createPortal(
            this.props.children,
            document.getElementById('Page')
        );
    }
}


export default class Cheap extends Component {
    componentDidMount() {

    }

    $refD = React.createRef()

    Parent = () => {
        console.log('parent');
    }

    render() {
        return (
            <div onClick={this.Parent}>
                <div id="zlg" ref={c => { this.$A = c; }} />
                <div>测试Portal</div>
                <Container>
                    <Protal />
                </Container>
            </div>
        );
    }
}
结论:Protals提供了一种将组件直接挂载到直接父组件 DOM 层次之外的一类方式,脱离文档流,但是可以一直冒泡到祖先组件
6. Profiler:
测量渲染一个 React 应用多久渲染一次以及渲染一次的“代价”。
import React, {
    Component, useState, useEffect, unstable_Profiler as Profiler
} from 'react';

function Content() {
    const [count, setCount] = useState(1);

    const click = () => {
        setCount(prv => prv + 1);
    };

    return (
        <div onClick={click}>
            测试
            {count}
        </div>
    );
}

export default class Cheap extends Component {
    componentDidMount() {

    }

    $refD = React.createRef()

    Parent = () => {
        console.log('parent');
    }

    callback = (
        id, // 发生提交的 Profiler 树的 “id”
        phase, // "mount" (如果组件树刚加载) 或者 "update" (如果它重渲染了)之一
        actualDuration, // 本次更新 committed 花费的渲染时间
        baseDuration, // 估计不使用 memoization 的情况下渲染整颗子树需要的时间
        startTime, // 本次更新中 React 开始渲染的时间
        commitTime, // 本次更新中 React committed 的时间
        interactions
    ) => {
        console.log(id);
        console.log(phase);
        console.log(actualDuration);
        console.log(baseDuration);
        console.log(startTime);
        console.log(commitTime);
        console.log(interactions);
    }

    render() {
        return (
            <div>
                <Profiler id="Content" onRender={this.callback}>
                    <Content />
                </Profiler>
            </div>
        );
    }
}
[Profiler性能分析器链接][1]
7. Render Props
主要是为了组件的复用性设立的,能够动态决定什么是需要渲染的。提出疑问:与children的区别在哪里?
class RenderA extends Component {
    render() {
        return (
            <div>
                child
                {this.props.render('render')}
            </div>
        );
    }
}

export default class Cheap extends Component {
    render() {
        return (
            <div>
                <p>test</p>
                <RenderA render={data => <span>{data}</span>} />
            </div>
        );
    }
}
注意:将 Render Props 与 React.PureComponent 一起使用时要小心。你在 render 方法里创建函数,那么使用 render prop 会抵消使用 React.PureComponent 带来的优势。因为浅比较 props 的时候总会得到 false,并且在这种情况下每一个 render 对于 render prop 将会生成一个新的值。
<RenderE render={list => <Echild list={list}/>} />

替换成
renderEchild(list) {
    return <Echild list={list} />;
}

<RenderE render={this.renderEchild} />
8. Concurrent 模式
- legacy 模式:
ReactDOM.render(<App />, rootNode)。这是当前 React app 使用的方式。当前没有计划删除本模式,但是这个模式可能不支持这些新功能。 - blocking 模式:
ReactDOM.createBlockingRoot(rootNode).render(<App />)。目前正在实验中。作为迁移到 concurrent 模式的第一个步骤。 - concurrent 模式:
ReactDOM.createRoot(rootNode).render(<App />)。目前在实验中,未来稳定之后,打算作为 React 的默认开发模式。这个模式开启了所有的新功能。
<SuspenseList revealOrder="forwards">
  <Suspense fallback={'加载中...'}>
    <ProfilePicture id={1} />
  </Suspense>
  <Suspense fallback={'加载中...'}>
    <ProfilePicture id={2} />
  </Suspense>
  <Suspense fallback={'加载中...'}>
    <ProfilePicture id={3} />
  </Suspense>
  ...
</SuspenseList>
Suspense 接受两个 props:
- fallback 接受一个加载指示器。这个 fallback 在 Suspense 所有子组件完成渲染之前将会一直显示。
- unstable_avoidThisFallback 接受一个布尔值。它告诉 React 是否在初始加载时“跳过”显示这个边界,这个 API 可能会在后续版本中删除。
SuspenseList 接受两个 props:
- revealOrder (forwards, backwards, together) 定义了 SuspenseList 子组件应该显示的顺序。
- together 在所有的子组件都准备好了的时候显示它们,而不是一个接着一个显示。
- tail (collapsed, hidden) 指定如何显示 SuspenseList 中未加载的项目。
- 默认情况下,SuspenseList 将显示列表中的所有 fallback。 collapsed 仅显示列表中下一个 fallback。 hidden 未加载的项目不显示任何信息。
const SUSPENSE_CONFIG = { timeoutMs: 2000 };

const [startTransition, isPending] = useTransition(SUSPENSE_CONFIG);
useTransition允许组件在切换到下一个界面之前等待内容加载,从而避免不必要的加载状态。它还允许组件将速度较慢的数据获取更新推迟到随后渲染,以便能够立即渲染更重要的更新。
 const OtherComponent = lazy(() => new Promise(resolve => setTimeout(resolve, 2000)).then(
    () => import('./common.js')
));
const OtherComponent1 = lazy(() => new Promise(resolve => setTimeout(resolve, 4000)).then(
    () => import('./common1.js')
));

export default class cheap extends Component {
    render() {
        return (
            <div>
                <Suspense fallback={<h1>Loading profile...</h1>}>
                    <OtherComponent />
                    <Suspense fallback={<h1>Loading profile111...</h1>}>
                        <OtherComponent1 />
                    </Suspense>
                </Suspense>
            </div>
        );
    }
}
