

前言
又在背着我学习???

作为一名框架体验师,听到小伙伴都在说deno,也赶快来学习一下。
简单例子初探
安装
安装版本:deno 1.0 各系统安装方式 windows 安装
// powershell 安装
iwr https://deno.land/x/install/install.ps1 -useb | iex
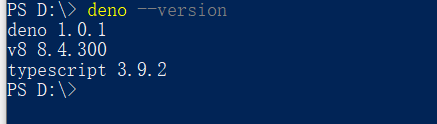
//查看是否安装成功及安装版本
deno --version
hello world
- 新建文件 helloworld.ts, 复制下面的内容:
import { serve } from "https://deno.land/std@0.52.0/http/server.ts";
 const s = serve({ port: 8000 });
 console.log("http://localhost:8000/");
 for await (const req of s) {
   req.respond({ body: "Hello World\n" });
 }

 // for await 操作第一次见吧
2.命令行运行
// 需要加上--allow-net (这是deno的一种安全策略,不加会报错,原因以后再研究)
deno run --allow-net helloworld.ts
运行起来之后下载依赖到本地,然后打开浏览器访问http://localhost:8000/ 就可以看到hello world了 ,amazing~
http 请求
- 代码示例
const url = Deno.args[0]
const res = await fetch(url)

const body = new Uint8Array(await res.arrayBuffer())
await Deno.stdout.write(body)

// 为什么await 关键词可以单独使用
2.运行
deno run --allow-net 2.httpReq.ts http://www.baidu.com
- 代码讲解
(1)通过Deno.args 可接收命令行传入参数,跟在文件名后面,如果在deno run 的后面,这样传入的参数由run 命令接收,比如上面的--allow-net
(2) 将响应主体解析为ArrayBuffer,等待响应
(3)然后将其转换为Uint8Array,将内容写入stdout
读文件
- 代码示例
for (let i = 0; i < Deno.args.length; i++) {
  let filename = Deno.args[i];
  let file = await Deno.open(filename);
  await Deno.copy(file, Deno.stdout);
  file.close();
}
- 代码运行
//这里的命令又不一样了,像爬虫不得用很多这样的权限命令(开发环境可以用--a,慎用)
deno run --allow-read  3.readFile.ts ./2.httpReq.ts
3.代码解析 官网文档说这个copy,我不是很懂
// 是deno 在IO流上处理的一种设计目标
The copy() function here actually makes no more than the necessary kernel→userspace→kernel copies. That is, the same memory from which data is read from the file, is written to stdout. This illustrates a general design goal for I/O streams in Deno.
简单的TCP服务
1.代码示例
const listener = Deno.listen({ port: 8080 });
console.log("listening on 0.0.0.0:8080");
for await (const conn of listener) {
  Deno.copy(conn, conn);
}
2.代码运行
deno run --allow-net 4.simpleTcpServer.ts
找一个TCP请求模拟工具,我是用MobaXterm

3.代码解析 这里又用到了这个copy方法,有点意思哈。这里接受一个包,又将它返回,不去做没必要的内存拷贝。
colors
0.53文档
这个模块允许你在控制台输出有颜色的日志信息~
- 代码示例
import {
    green,
    cyan,
    bold,
    yellow,
    bgWhite,
    bgRgb24
  } from "https://deno.land/std@0.53.0/fmt/colors.ts";

  console.log(`${green('deno')} ${cyan('is')} ${bold('very')} ${ bgRgb24('nice',0xff00ff)}`);
- 效果

要点研究
权限的控制
官网说deno 是secure default 默认安全的。我觉得这个权限控制的就有了很好的体现。
比如
deno run --allow-read=/usr https://deno.land/std/examples/cat.ts /etc/passwd
这样就是不被允许的,只让读/usr目录的,你却去读etc 的(--allow-write 也是一样的原理) 还有
deno run --allow-net=deno.land https://deno.land/std/examples/curl.ts https://deno.land/
只让向deno.land发送请求
Typescript的支持
deno 将Javascript和Typescript 都作为运行时的语言,也就是和浏览器不同不用再将typescript 编译成JS
全局对象Deno
我们知道node 的工具类都是通过导入内置的模块,比如fs
const fs = require("fs");
fs.readFileSync("./data.txt");
但是在deno中使用Deno 这样一个全局对象,使用的都是他的属性和静态方法。
Deno.readFileSync('./data.txt')
比如上文反复出现的copy 方法
function Deno.copy(src:Reader,dst:Writer,options?:{bufsize:[src]number}):Promise<number>
src 拷贝源 dst 拷贝目的地 options 可以调节buffer 的大小,默认是32kb
好啦,第一节内容先写这么多~
