

DataBinding简介
DataBinding综述
DataBinding是Google Jetpack组件中的一员,该库使用声明性格式(而非程序化地)将布局中的界面组件绑定到应用中的数据源。
使用该库,借助布局文件中的绑定组件,您可以移除 Activity 中的许多界面框架调用,使其维护起来更简单、方便。
还可以提高应用性能(绑定的时候遍历一遍View,而不是findViewById每次遍历查询),并且有助于防止内存泄漏以及避免发生 Null 指针异常
(该库进行了空指针判断)。
DataBinding相关的类
- DataBindingUtil.java类:类,作为Util在Activity中获取相关的Binding对象。
- BaseObservable.java类:类,Bean可以继承该抽象类,实现可观察的模式,在set属性的时候调用notifyPropertyChanged方法,唤起刷新操作,也可以调用notifyChange方法全部刷新。
- Observable .java接口:接口:Bean可以实现该接口,实现可观察的模式,在set属性的时候调用notifyPropertyChanged方法,唤起刷新操作,也可以调用notifyChange方法全部刷新。
- ObservableFloat.java类:类,这不是一个类,而是一类类的代表,如ObservableShort、ObservableParcelable等等,可观察的属性,通过get和set方法操作相关的值。
- BaseObservableField<>.java类:类,和上述类似,泛型可以传入String等类型,比上述定义的基类型更加自由。
DataBinding使用
简单使用
控件绑定
- 打开DataBinding开关,如下:
	android {
		  dataBinding{
       		 enabled = true
   		 }
	}
新版本需要在gradle.properties配置如下:
android.databinding.enableV2=true
- 改造xml布局,添加及标签
<?xml version="1.0 " encoding="utf-8 "?>
<layout xmlns:android="http://schemas.android.com/apk/res/android" xmlns:tools=                                        "http://schemas.android.com/tools" xmlns:app=                                        "http://schemas.android.com/apk/res-auto"> <data
                                        >  </data>
                                        <LinearLayout android:orientation=
                                            "vertical "  android:gravity=
                                                "center_horizontal "  android:layout_width=
                                                    "match_parent "  android:layout_height=
                                                        "match_parent "  tools:context=
                                                            ".databinding.TestActivity " > <TextView
                                                                android:id ="@+id/tv_name
                                                                "
                                                                     android:layout_marginTop ="10dp
                                                                    "
                                                                         android:layout_width ="wrap_content
                                                                        "
                                                                             android:layout_height ="wrap_content
                                                                            "
                                                                                /> <TextView android:layout_marginTop
                                                                                ="10dp" android:id
                                                                                ="@+id/tv_age"
                                                                                android:layout_width ="wrap_content
                                                                                    "
                                                                                         android:layout_height =
                                                                                        "wrap_content"/> </LinearLayout
                                                                                            >
                                                                                                 </layout>
- 绑定后代码如下代码具体如下:
class TestActivity : AppCompatActivity() {
var binding: ActivityTestDataBindingBinding? = null
var student: Student = Student("小李", 23)
override fun onCreate(savedInstanceState: Bundle?) {
super.onCreate(savedInstanceState)
binding = DataBindingUtil.setContentView(
this,
R.layout.activity_test_data_binding
)
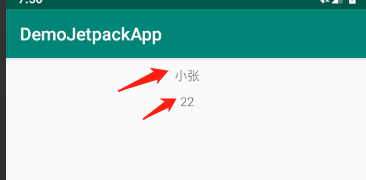
binding?.tvName?.text = "小张"
binding?.tvAge?.text = 22.toString()
}
}
效果如图:
数据绑定
- 同上
- 改造xml布局,添加及标签,标签用于引入数据如下:
<?xml version="1.0" encoding="utf-8"?>
<layout xmlns:android="http://schemas.android.com/apk/res/android"
        xmlns:tools="http://schemas.android.com/tools"
        xmlns:app="http://schemas.android.com/apk/res-auto">
    <data>
        <variable name="student"
                  type="com.zgj.demojetpackapp.bean.Student"/>
    </data>
    <LinearLayout
            android:orientation="vertical"
            android:gravity="center_horizontal"
            android:layout_width="match_parent"
            android:layout_height="match_parent"
            tools:context=".databinding.TestActivity">


        <TextView
                android:id="@+id/tv_name"
                android:layout_marginTop="10dp"
                android:layout_width="wrap_content"
                android:layout_height="wrap_content"
                android:text="@{student.name,default = Jack}"/>

        <TextView
                android:layout_marginTop="10dp"
                android:id="@+id/tv_age"
                android:layout_width="wrap_content"
                android:layout_height="wrap_content"
                android:text='@{student.age+"",default = 16}'/>

    </LinearLayout>
</layout>
Student为一个简单的数据类,如下:
data class Student (var name:String,var age:Int)
- Rebuild(Kotlin需要,Java可以直接使用)之后绑定布局文件,如下:
	class TestActivity : AppCompatActivity() {

    var binding: ActivityTestDataBindingBinding? = null

    override fun onCreate(savedInstanceState: Bundle?) {
        super.onCreate(savedInstanceState)
        binding = DataBindingUtil.setContentView(this,  R.layout.activity_test_data_binding )
    }

}
- 设置数据到布局文件,如下:
class TestActivity : AppCompatActivity() {
var binding: ActivityTestDataBindingBinding? = null
var student: Student = Student("小李", 23)
override fun onCreate(savedInstanceState: Bundle?) {
super.onCreate(savedInstanceState)
binding = DataBindingUtil.setContentView(
this,
R.layout.activity_test_data_binding
)
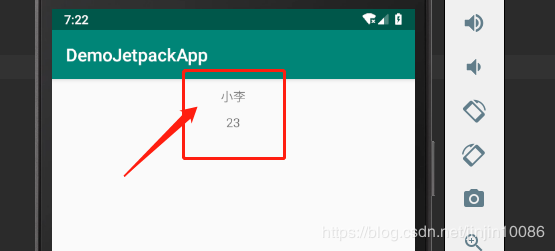
binding?.student = student
//两个等效
//binding?.setVariable(BR.student,student)
}
}
运行效果如图:
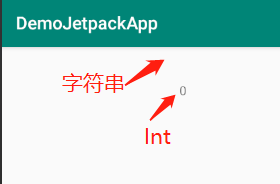
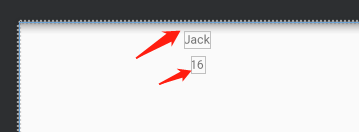
如果不设置数据或设置数据为null进去
则显示默认值(但不会报空指针)如图(左):,但不是default的值,default的值只在预览视图展示,方便调整布局及预览,如图(右)
使用详解
- 表达式语言
可用:
- 算术运算符 + - / * %
- 字符串连接运算符 +
- 逻辑运算符 && ||
- 二元运算符 & | ^
- 一元运算符 + - ! ~
- 移位运算符 >> >>> <<
- 比较运算符 == > < >= <=(请注意,< 需要转义为 <)
- instanceof
- 分组运算符 ()
- 字面量运算符 - 字符、字符串、数字、null
- 类型转换
- 方法调用
- 字段访问
- 数组访问 []
- 三元运算符 ?:
不可用:
-
this
-
super
-
new
-
显式泛型调用
如下代码演示(包含方法调用,字符串拼接、三目运算符、运算符%等,目前instanceof还没有调好):
        <TextView android:layout_width="wrap_content"
                  android:text="@{String.valueOf(10%3)}"
                  android:padding="10dp"
                  android:visibility="@{1>2?View.GONE:View.VISIBLE}"
                  android:layout_height="wrap_content"/>

        <TextView android:layout_width="wrap_content"
                  android:text='@{"新年"+"快乐"}'
                  android:padding="10dp"
                  android:layout_height="wrap_content"/>

        <TextView android:layout_width="wrap_content"
                  android:text='@{"123456".substring(0,2)}'
                  android:padding="10dp"
                  android:layout_height="wrap_content"/>
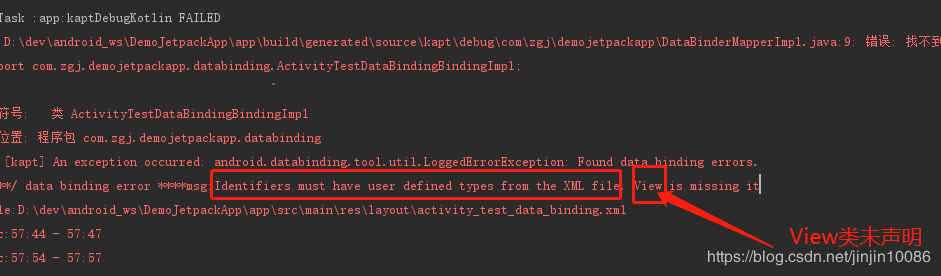
注意:使用View.GONE的时候要注意早标签内导入类如下,不然会报错:
	  <data>
     	...
        <import type="android.view.View"/>
    </data>
报错如下:
- 双目运算符??进行 Null 合并运算,如果左边的值为null,则取右边的值,右边也为null,那就是null了。
代码如下(等效于三目运算符):
    <TextView android:layout_width="wrap_content"
              android:text='@{student.name??"Tom"}'
              android:padding="10dp"
              android:layout_height="wrap_content"/>
        <!--等效于-->
   <TextView android:layout_width="wrap_content"
             android:text='@{student.name != null?student.name:"Tom"}'
             android:padding="10dp"
             android:layout_height="wrap_content"/>
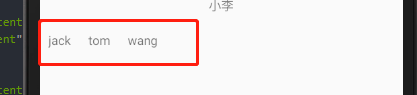
- 列表List的使用,代码如下:
binding?.list = listOf("jack","tom","wang")
      <LinearLayout android:layout_width="match_parent"
                      android:orientation="horizontal"
                      android:layout_height="wrap_content">

            <TextView android:layout_width="wrap_content"
                      android:text="@{list[0]}"
                      android:padding="10dp"
                      android:layout_height="wrap_content"/>
            <TextView android:layout_width="wrap_content"
                      android:text="@{list[1]}"
                      android:padding="10dp"
                      android:layout_height="wrap_content"/>
            <TextView android:layout_width="wrap_content"
                      android:text="@{list[2]}"
                      android:padding="10dp"
                      android:layout_height="wrap_content"/>

        </LinearLayout>
执行效果如下(此处超出下标是不会报错的,但是也不会展示内容):
- map的使用
kotlin代码(可以看到只给name1、name2和name4赋值):
  binding?.map  = mutableMapOf(Pair("name1","jack"), Pair("name2","tom"),Pair("name3","wang"))
        binding?.name1 = "name1"
        binding?.name2 = "name2"
        binding?.name33 = "name3"
        binding?.name4 = "name4"
xml代码:
<data>
...
<variable name="map" type="Map<String,String>"/>
<variable name="name1" type="String"/>
<variable name="name2" type="String"/>
<variable name="name33" type="String"/>
<variable name="name4" type="String"/>
</data>
<LinearLayout android:layout_width="match_parent"
android:orientation="horizontal"
android:layout_height="wrap_content">
<TextView android:layout_width="wrap_content"
android:text="@{map[name1]}"
android:padding="10dp"
android:layout_height="wrap_content"/>
<TextView android:layout_width="wrap_content"
android:text="@{map[name2]}"
android:padding="10dp"
android:layout_height="wrap_content"/>
<TextView android:layout_width="wrap_content"
android:text="@{map.name33}"
android:padding="10dp"
android:layout_height="wrap_content"/>
<TextView android:layout_width="wrap_content"
android:text="@{map[name4]}"
android:padding="10dp"
android:layout_height="wrap_content"/>
</LinearLayout>
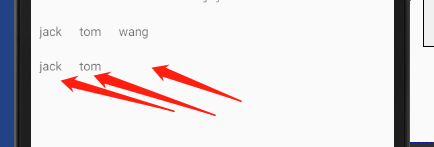
效果如下(可以看到第一个第二个展示出来了,但是第三个展示不出来,第四个因为没有对应的key-value所以没有展示):
注意: map.name33 直接将name33作为key来取值 map[name2]是将name2对应代码设置的值作为key来取值,两个是不一样的
- SpareArray使用
kotlin代码
     val sparse:SparseArray<String> = SparseArray<String>()
        sparse.put(1,"jack")
        sparse.put(2,"tom")
        sparse.put(3,"wang")
        binding?.sparse = sparse
xml代码,效果:
<data>
<import type="android.util.SparseArray"/>
<variable name="sparse" type="SparseArray<String>"/>
</data>
<LinearLayout android:layout_width="match_parent"
android:orientation="horizontal"
android:layout_height="wrap_content">
<TextView android:layout_width="wrap_content"
android:text="@{sparse[1]}"
android:padding="10dp"
android:layout_height="wrap_content"/>
<TextView android:layout_width="wrap_content"
android:text="@{sparse[2]}"
android:padding="10dp"
android:layout_height="wrap_content"/>
<TextView android:layout_width="wrap_content"
android:text="@{sparse[3]}"
android:padding="10dp"
android:layout_height="wrap_content"/>
<TextView android:layout_width="wrap_content"
android:text="@{sparse[4]}"
android:padding="10dp"
android:layout_height="wrap_content"/>
</LinearLayout>
效果如下:

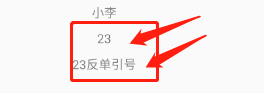
- 字符串字面量
两种写法如下,效果是一样的,xml代码如下:
    <TextView
                android:layout_marginTop="10dp"
                android:id="@+id/tv_age"
                android:layout_width="wrap_content"
                android:layout_height="wrap_content"
                android:text='@{student.age+""}'/>

        <TextView
                android:layout_marginTop="10dp"
                android:layout_width="wrap_content"
                android:layout_height="wrap_content"
                android:text="@{student.age+`反单引号`}"/>
效果如下:
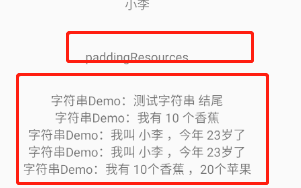
- 资源引用
资源文件如下:
	<!--dimen尺寸资源-->
    <dimen name="dimen_10">10dp</dimen>
    <dimen name="dimen_30">30dp</dimen>
    <!--字符串资源-->
    <string name="str_demo1">字符串Demo:%s 结尾</string>
    <string name="str_demo2">字符串Demo:我有 %d 个香蕉</string>
    <string name="str_demo3">字符串Demo:我叫 %s ,今年 %d岁了</string>
    <string name="str_demo4">字符串Demo:我叫 %1$s ,今年 %2$d岁了</string>
    <string name="str_demo5">字符串Demo:我有 %d个香蕉 ,%d个苹果</string>
xml代码如下:
 		 <TextView android:layout_width="wrap_content"
                  android:layout_height="wrap_content"
                  android:text="paddingResources"
                  android:padding="@{student.age > 50?@dimen/dimen_10:@dimen/dimen_30}"/>

        <TextView android:layout_width="wrap_content"
                  android:layout_height="wrap_content"
                  android:text="@{@string/str_demo1(`测试字符串`)}"/>

        <TextView android:layout_width="wrap_content"
                  android:layout_height="wrap_content"
                  android:text="@{@string/str_demo2(10)}"/>

        <TextView android:layout_width="wrap_content"
                  android:layout_height="wrap_content"
                  android:text="@{@string/str_demo3(student.name,student.age)}"/>


        <TextView android:layout_width="wrap_content"
                  android:layout_height="wrap_content"
                  android:text="@{@string/str_demo4(student.name,student.age)}"/>

        <TextView android:layout_width="wrap_content"
                  android:layout_height="wrap_content"
                  android:text="@{@string/str_demo5(10,20)}"/>
效果如下:
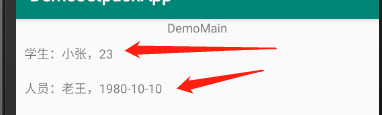
- 可以视同include标签,使用binding来传入参数
传入格式:bind:参数名(item中的参数名)=值
item的xml如下:
<?xml version="1.0" encoding="utf-8"?>
<layout xmlns:android="http://schemas.android.com/apk/res/android">
    <data>
        <variable name="student" type="com.zgj.demojetpackapp.bean.Student"/>
        <variable name="person" type="com.zgj.demojetpackapp.bean.Person"/>
    </data>
    <LinearLayout
            android:orientation="vertical"
            android:layout_width="match_parent"
            android:layout_height="match_parent">

        <TextView android:layout_width="wrap_content"
                  android:layout_height="wrap_content"
                  android:padding="@dimen/dimen_10"
                  android:text="@{`学生:`+student.name+`,`+student.age}"/>
        <TextView android:layout_width="wrap_content"
                  android:layout_height="wrap_content"
                  android:padding="@dimen/dimen_10"
                  android:text="@{`人员:`+person.name+`,`+person.birthday}"/>

    </LinearLayout>
</layout>
主xml如下:
<?xml version="1.0" encoding="utf-8"?>
<layout xmlns:android="http://schemas.android.com/apk/res/android"
        xmlns:tools="http://schemas.android.com/tools"
        xmlns:bind="http://schemas.android.com/apk/res-auto">
    <data>
        <variable name="student" type="com.zgj.demojetpackapp.bean.Student"/>
        <variable name="person" type="com.zgj.demojetpackapp.bean.Person"/>

    </data>
    <LinearLayout
            android:orientation="vertical"
            android:gravity="center_horizontal"
            android:layout_width="match_parent"
            android:layout_height="match_parent"
            tools:context=".databinding.TestActivity">


        <TextView android:layout_width="wrap_content"
                  android:layout_height="wrap_content"
                  android:text="DemoMain"/>

            <include layout="@layout/item_data_binding"
                     bind:student="@{student}"
                     bind:person="@{person}"/>

    </LinearLayout>
</layout>
kotlin代码如下:
class TestActivity2 : AppCompatActivity() {

    override fun onCreate(savedInstanceState: Bundle?) {
        super.onCreate(savedInstanceState)
        val binding :ActivityTestDataBinding2Binding= DataBindingUtil.setContentView(this,R.layout.activity_test_data_binding2)
        binding.student = Student("小张",23)
        binding.person = Person("老王","1980-10-10")
    }

}
效果如下:
注意:databinding不支持<merge>标签(merge标签写的时候就会直接报红,因为)
写的时候注意格式 bind:参数名(item中的参数名)= 值,同时导入命名空间 xmlns:bind="http://schemas.android.com/apk/res-auto",不
然会报红,但是不影响运行,不写bind:也不影响运行,但是建议按规范写。
事件绑定
原有方法调用,如onTextChanged/onClick/onLongClick等
- xml添加事件,代码如下(此处方法调用可以是.也可以是::,推荐后者,防止混淆),效果见后图:
<?xml version="1.0" encoding="utf-8"?>
<layout xmlns:android="http://schemas.android.com/apk/res/android"
        xmlns:tools="http://schemas.android.com/tools"
        xmlns:app="http://schemas.android.com/apk/res-auto">
    <data>
        <variable name="student"
                  type="com.zgj.demojetpackapp.bean.Student"/>
        <variable name="listener"
                  type="com.zgj.demojetpackapp.databinding.TestActivity.EventListener"/>
    </data>
    <LinearLayout
            android:orientation="vertical"
            android:gravity="center_horizontal"
            android:layout_width="match_parent"
            android:layout_height="match_parent"
            tools:context=".databinding.TestActivity">

        <TextView
                android:id="@+id/tv_name"
                android:layout_marginTop="10dp"
                android:layout_width="wrap_content"
                android:layout_height="wrap_content"/>

        <TextView
                android:layout_marginTop="10dp"
                android:id="@+id/tv_age"
                android:layout_width="wrap_content"
                android:layout_height="wrap_content"/>

        <TextView
                android:padding="10dp"
                android:text="点击事件1"
                android:onClick="@{listener::onClick}"
                android:layout_width="wrap_content"
                android:layout_height="wrap_content"/>

    </LinearLayout>
</layout>
2、代用代码如下:
	class TestActivity : AppCompatActivity() {

    var binding: ActivityTestDataBindingBinding? = null
    var student: Student = Student("小李", 23)

    override fun onCreate(savedInstanceState: Bundle?) {
        super.onCreate(savedInstanceState)
        binding = DataBindingUtil.setContentView(
            this,
            R.layout.activity_test_data_binding
        )
	   binding?.student = student
	   //重点  千万不要忘记
	   binding?.listener = EventListener()
    }


    inner class EventListener{
        fun onClick(view: View){
            Toast.makeText(this@TestActivity,"点击按钮",Toast.LENGTH_SHORT).show()
        }
    }

}
此处注意方法名和入参都必须与监听器一致,如点击事件必须入参View等,如onTextChanged必须如下写法: 这样设置之后名称根据EditText的内容变化,实现监听
	  fun onTextChanged(s:CharSequence,start:Int,before:Int,count:Int){
            Log.d(Common.TAG, s.toString())
            binding?.student?.name = s.toString()
            binding?.student = student
        }
xml代码如下:
        <EditText android:layout_width="match_parent"
                  android:text="@{student.name}"
                  android:onTextChanged="@{listener::onTextChanged}"
                  android:layout_height="wrap_content"/>
可以看到效果如下:
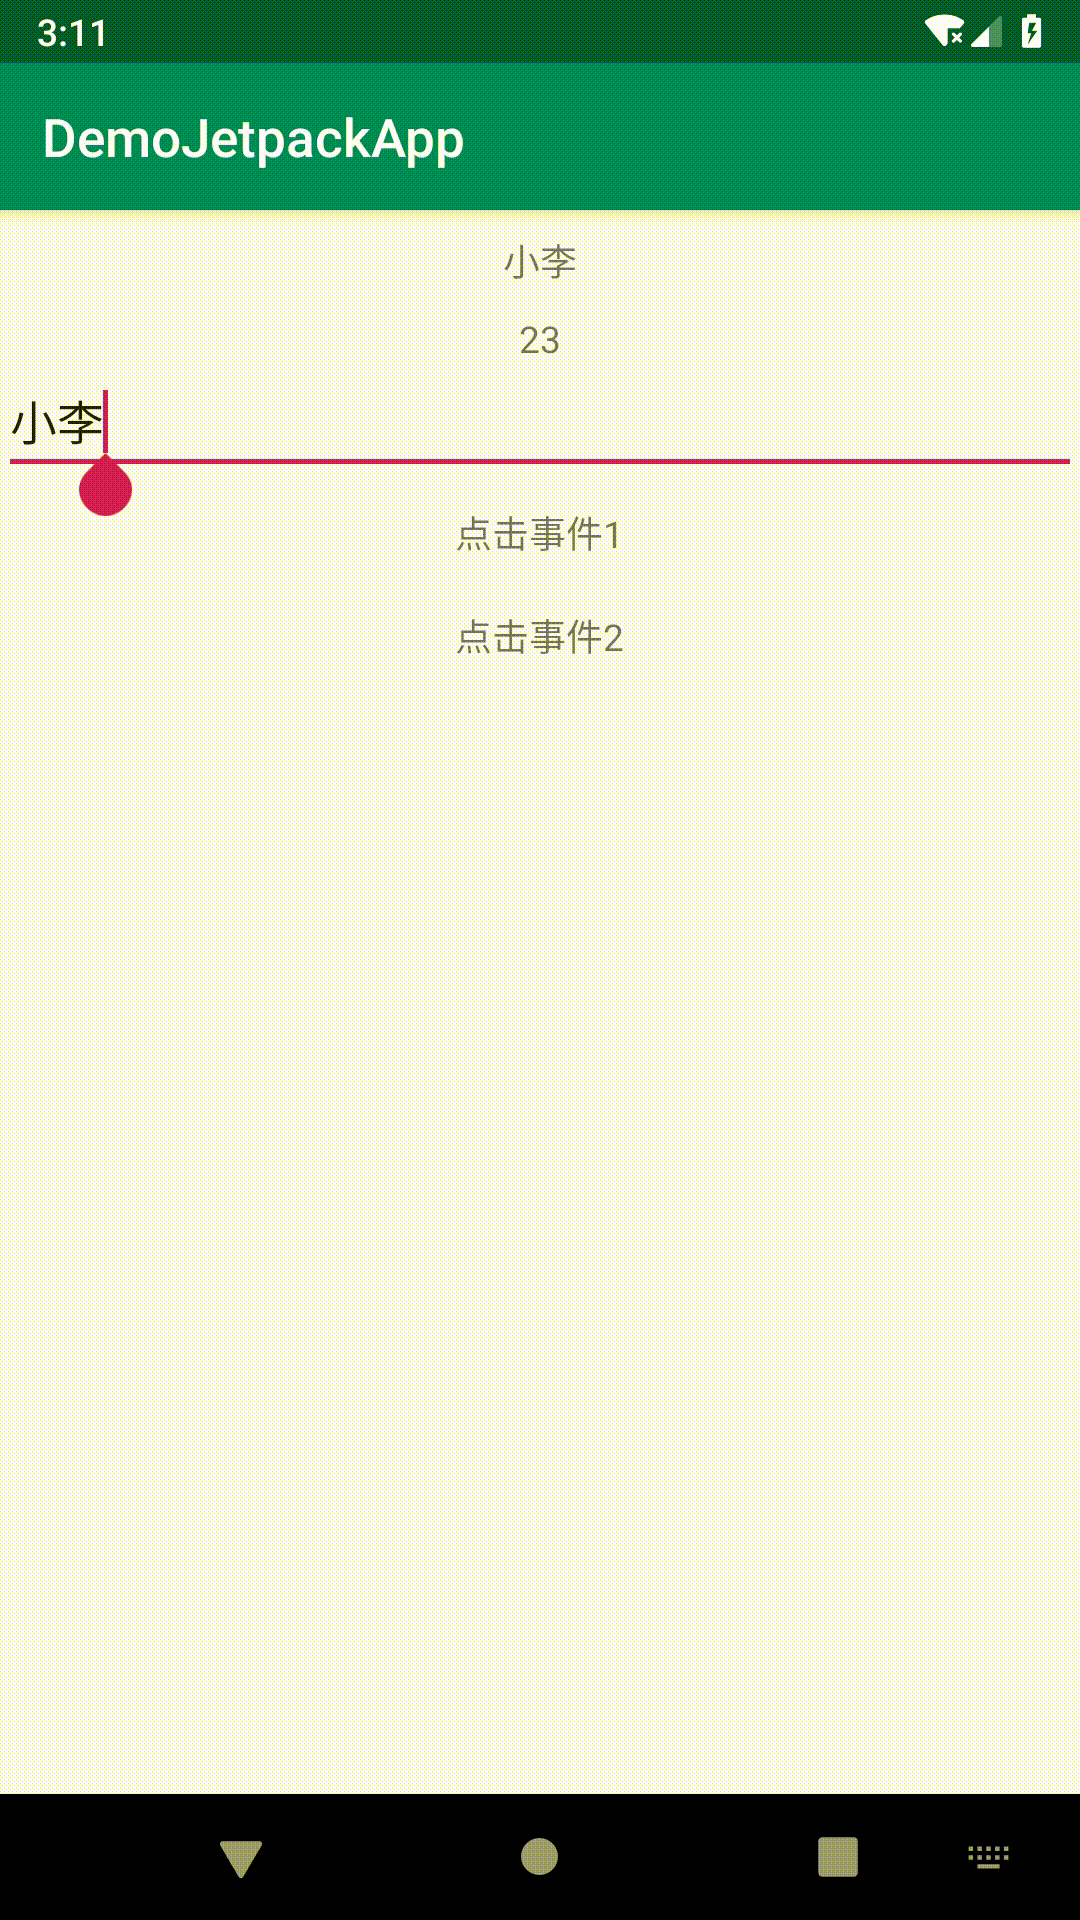
监听绑定,
这个比较自由,方法名、参数都可以任意写,代码如下:
  fun customClickListener(student: Student) {
            Toast.makeText(this@TestActivity, student.name, Toast.LENGTH_SHORT).show()
        }
xml代码如下(传入的参数是lambda表达式方式,此处的调用是用.):
<TextView
                android:padding="10dp"
                android:text="点击事件2"
                android:onClick="@{()->listener.customClickListener(student)}"
                android:layout_width="wrap_content"
                android:layout_height="wrap_content"/>
实现的效果如上图,按钮2的点击事件就是这种写法,只是此处的名字已经变了,所以弹出的是及时变化的名字。
说明
1. variable声明xml中用到的变量,import导入需要用到的类
2. 导入的时候如果类名冲突,则可以使用别名alias来处理
3. 标签的class属性可以自定义生成类的类名
源码
源码链接:源码
总结
1、关于Jetpack中的databinding限于篇幅先介绍到这里,关于其他的内容后续第二篇的时候在介绍:
	剩余的内容包含:可观察的字段和类、绑定适配器(配合RecycleView)、双向绑定等。
2、关于上述使用databinding的代码,都是经过验证运行没有问题的,如果有如环境等导致的问题欢迎探讨。
3、databinding的使用感受:
	1)有一定的方便,数据绑定也较为安全,空指针等异常都得到了避免。
	2)效率也有了提升,不用频繁遍历view,而是将view作为变量维护了起来。
	3)对于事件的处理要建一个监听类导入进来,另外参数方面也有限制(方法调用),不是很方便。
	4)报错不够精确,xml中的错误有时候能检测到(如类没有导入等),有时候提示很模糊(表达式语言有的错误检测不出来),不知道哪里
	出错了,调试起来不是太方便。
	5)总体的感觉还是不错的,有效的减少了activity的代码量,xml使用起来也比较明确,整体还是建议大家尝试的,至于项目中是否使用,
	那就要在使用之后自己做整体的评估了。
3、自勉,多思考,多实践,不要只看网上的结论,不都是正确的,有时候由于各方面的条件限制得出的特定结论是不通用的。
4、关于文档,不要只停留在看的层面上,如上述的表达式语言的使用,官网上也就简单的几句demo,自己看的时候要学会举一反三,
同时也是查漏补缺的过程。
5、自勉,多接触一些自己没有用到的东西,一方面提升自己的技能,另外一方面也是对自己思维的一个开拓,这是很不错的选择。
