

想起了一道曾经面试的时候,被面试官问到的问题:关于父子组件生命周期调用顺序是咋样的?当初懵懂,现在赶紧整理一下,以防在同一个坑上跌倒2次。
枚举几种情况下父子组件生命周期的调用顺序:
- 开始渲染阶段
- 父组件属性改变不会引起子组件变化的场景
- 子组件属性发生变化且不会影响父组件的场景
- 父组件属性改变引起子组件变化的场景
- 父组件销毁时
- v-if控制子组件的显隐的场景
- v-show控制子组件的显隐的场景
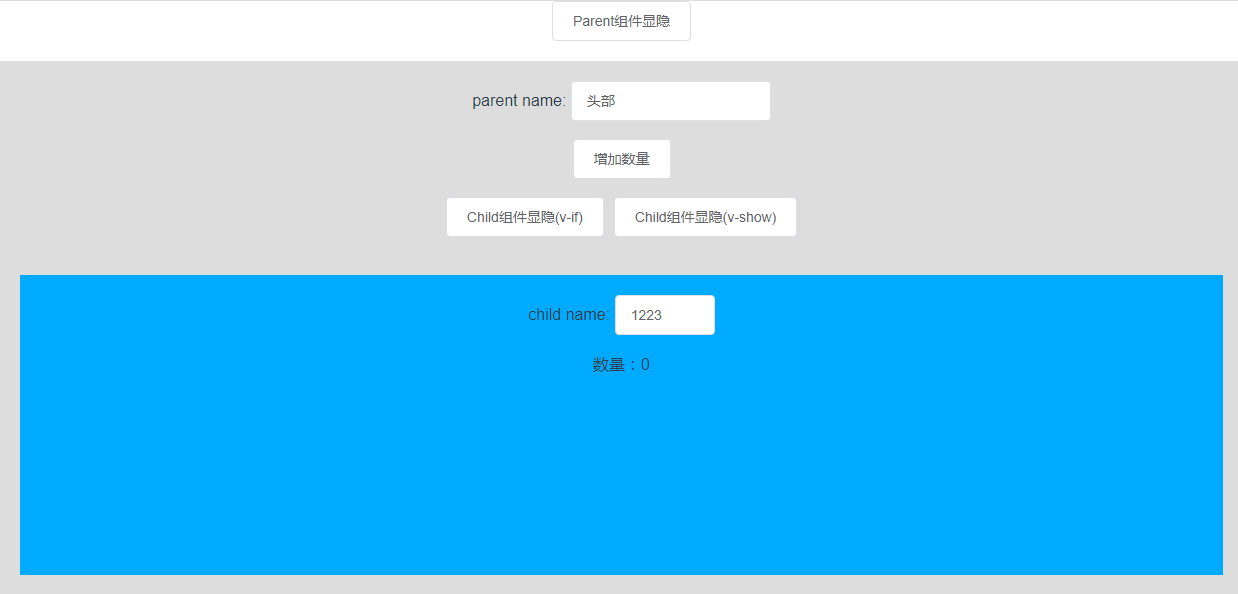
现有父组件Parent,子组件Child:
界面如下:
代码:
Parent组件:
<template>
  <div class="main-layout">
    <div>
      parent name:
      <el-input v-model="name" style="width: 200px" />
    </div>
    <br />
    <el-button @click="addCount">增加数量</el-button>
    <br /><br />
    <el-button @click="childToggole">Child组件显隐(v-if)</el-button>
    <el-button @click="childToggole2">Child组件显隐(v-show)</el-button>
    <br /><br />

    <child :count="count" v-if="childShow" v-show="childShow2" />
  </div>
</template>
<script lang="ts">
import { Component, Vue } from "vue-property-decorator";
import Child from "./Child.vue";

@Component({
  name: "Parent",
  components: {
    Child
  }
})
export default class HelloWorld extends Vue {
  name = "头部";

  childShow = true;

  childShow2 = true;

  count = 0;

  private childToggole() {
    this.childShow = !this.childShow;
  }

  private childToggole2() {
    this.childShow2 = !this.childShow2;
  }

  private addCount() {
    this.count = this.count + 1;
  }

  beforeCreate() {
    console.log("Parent --> beforeCreate");
  }

  created() {
    console.log("Parent --> created");
  }

  beforeMount() {
    console.log("Parent --> beforeMount");
  }

  mounted() {
    console.log("Parent --> mounted");
  }

  beforeUpdate() {
    console.log("Parent --> beforeUpdate");
  }

  updated() {
    console.log("Parent --> updated");
  }

  beforeDestroy() {
    console.log("Parent --> beforeDestroy");
  }

  destroyed() {
    console.log("Parent --> destroyed");
  }
}
</script>

<style lang="less">
.main-layout {
  margin-top: 20px;
  background-color: #ddd;
  padding: 20px;
}
</style>
Child组件:
<template>
  <div class="child-layout">
    <div>child name: <el-input v-model="name" style="width: 100px" /></div>
    <br />
    <div>数量:{{ count }}</div>
  </div>
</template>
<script lang="ts">
import { Component, Vue, Prop } from "vue-property-decorator";

@Component({ name: "Child" })
export default class HelloWorld extends Vue {
  @Prop({ default: 0 }) count?: number;

  name = "";

  beforeCreate() {
    console.log("Child --> beforeCreate");
  }

  created() {
    console.log("Child --> created");
  }

  beforeMount() {
    console.log("Child --> beforeMount");
  }

  mounted() {
    console.log("Child --> mounted");
  }

  beforeUpdate() {
    console.log("Child --> beforeUpdate");
  }

  updated() {
    console.log("Child --> updated");
  }

  beforeDestroy() {
    console.log("Child --> beforeDestroy");
  }

  destroyed() {
    console.log("Child --> destroyed");
  }
}
</script>

<style lang="less">
.child-layout {
  margin-top: 20px;
  background: #0af;
  width: 100%;
  height: 300px;
  padding: 20px;
  box-sizing: border-box;
}
</style>
放置Parent组件的容器组件的代码:
<template>
  <div>
    <el-button @click="parentToggole">Parent组件显隐</el-button>
    <parent v-if="show" />
  </div>
</template>

<script lang="ts">
import { Component, Vue } from "vue-property-decorator";
import Parent from "./Parent.vue";

@Component({
  name: "Main",
  components: {
    Parent
  }
})
export default class App extends Vue {
  show = true;

  private parentToggole() {
    this.show = !this.show;
  }
}
</script>
开始渲染阶段,父子组件生命周期的调用顺序
- Parent --> beforeCreate
- Parent --> created
- Parent --> beforeMount
- Child --> beforeCreate
- Child --> created
- Child --> beforeMount
- Child --> mounted
- Parent --> mounted
父组件某个data属性发生变化,且该属性不会影响子组件
这时只有父组件的beforeUpdate和updated被调用。
测试一下:
在“parent name”输入框中输入值,可以看到控制台只打印了以下2行:
- Parent --> beforeUpdate
- Parent --> updated

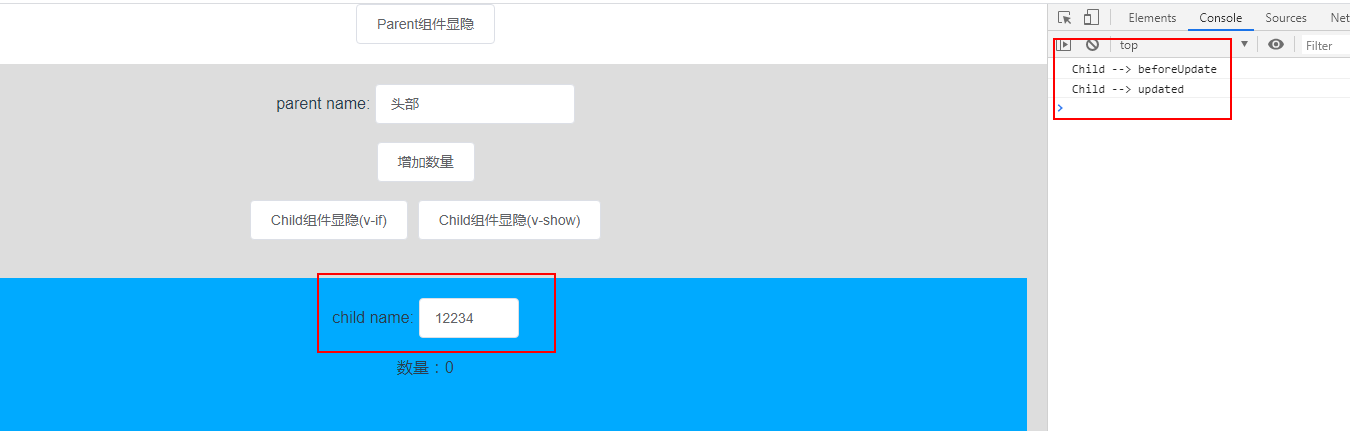
子组件某个data属性发生变化,且该属性不会影响父组件
只有子组件生命周期的调用beforeUpdate和updated被调用。
测试一下:
在“child name”输入框中输入值,可以看到控制台只打印了以下2行:
- Child --> beforeUpdate
- Child --> updated
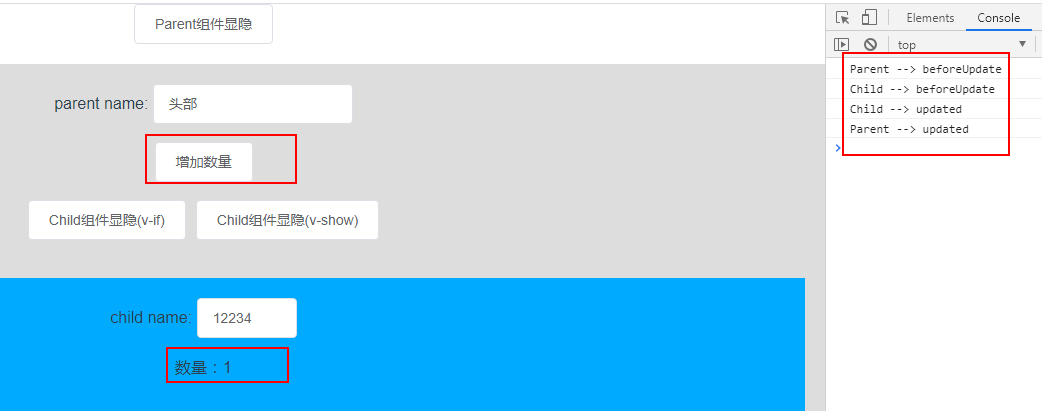
父组件某个data属性发生变化,且该属性会传递给子组件作为子组件的一个prop,会引起子组件的视图发生变化
这种情况下父组件和子组件的更新生命周期函数都会被调用,且执行的顺序先是父组件准备更新函数beforeUpdate被调用,接着是子组件更新函数调用完之后,最后执行父组件的更新生命周期函数updated:
- Parent --> beforeUpdate
- Child --> beforeUpdate
- Child --> updated
- Parent --> updated
测试一下:
点击按钮【增加数量】:引起子组件数量的变化,查看控制台打印的情况:
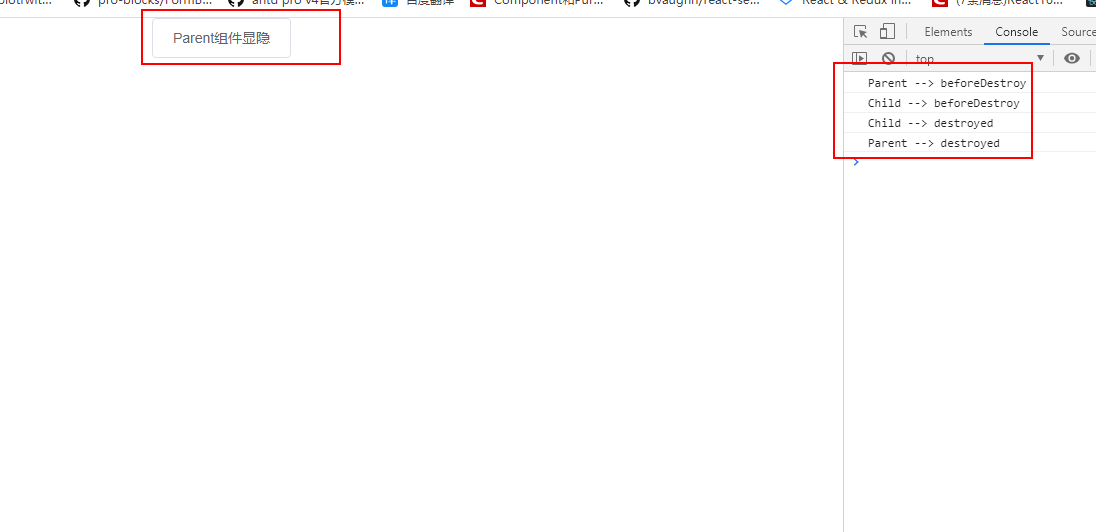
父组件销毁时,会先将子组件销毁
这种情况是先销毁挂载在父组件的子组件,再销毁父组件。所以生命周期函数的调用顺序是:先调用父组件准备销毁的函数beforeDestroy,接着调用子组件的销毁函数,最后调用父组件的销毁函数destroyed:
- Parent --> beforeDestroy
- Child --> beforeDestroy
- Child --> destroyed
- Parent --> destroyed
测试一下:
点击【Paren组件显隐】按钮,销毁父组件,查看控制台打印情况:
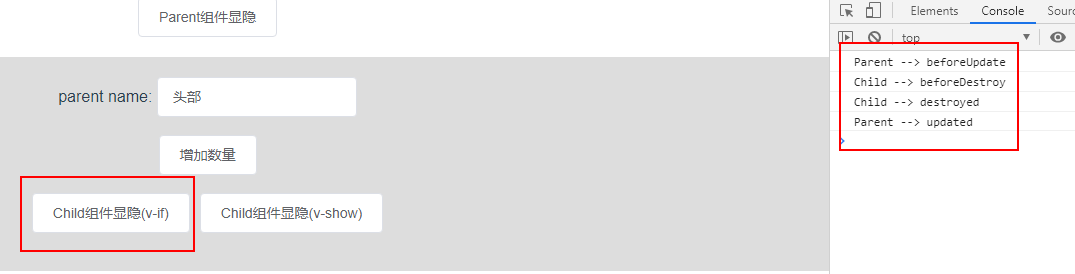
子组件的展示有父组件变量show通过v-if="childShow"来控制时
此时会销毁或者挂载父组件的子组件,更新父组件
使用childShow = false来隐藏子组件时,销毁子组件,更新父组件:
- Parent --> beforeUpdate
- Child --> beforeDestroy
- Child --> destroyed
- Parent --> updated
测试一下:
点击【Child组件显隐(v-if)】按钮隐藏子组件,查看控制台打印情况:
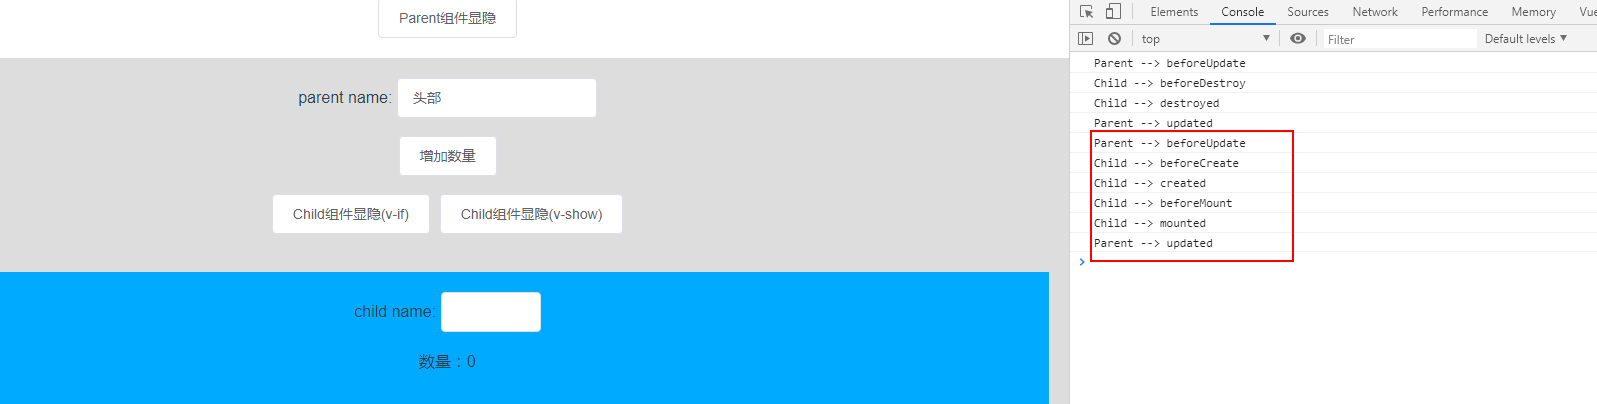
令childShow = true 时,会重新挂载子组件,那么子组件会是一个完整的挂载过程,而对于父组件而言则是一个更新的过程:
- Parent --> beforeUpdate
- Child --> beforeCreate
- Child --> created
- Child --> beforeMount
- Child --> mounted
- Parent --> updated
测试一下:
再一次点击【Child组件显隐(v-if)】按钮显示子组件,查看控制台打印情况:
子组件被v-show指令控制显隐
先测试一下:
多次点击【Child组件显隐(v-show)】,体验子组件在可见与不可见进行切换的场景,查看一下控制台打印的情况:

由上图控制台的信息可以看见,只有父组件的更新相关的生命周期函数被执行了,没有涉及到子组件的生命周期,这是为什么呢?
先来了解一下v-show的原理:在v-show=false的时候,vue只是给注册v-show指令的dom增加一个style属性display= none,在v-show=true的时候, 便是将style属性display=none删掉。
所以v-show指令不过是通过样式来控制子组件的展示和隐常,并未销毁或者重新挂载一个组件。我们在点击【Child组件显隐(v-show)】隐藏子组件的时候,可以通过浏览器【查看】功能来查看文档结构,可以看见子组件dom还存在:
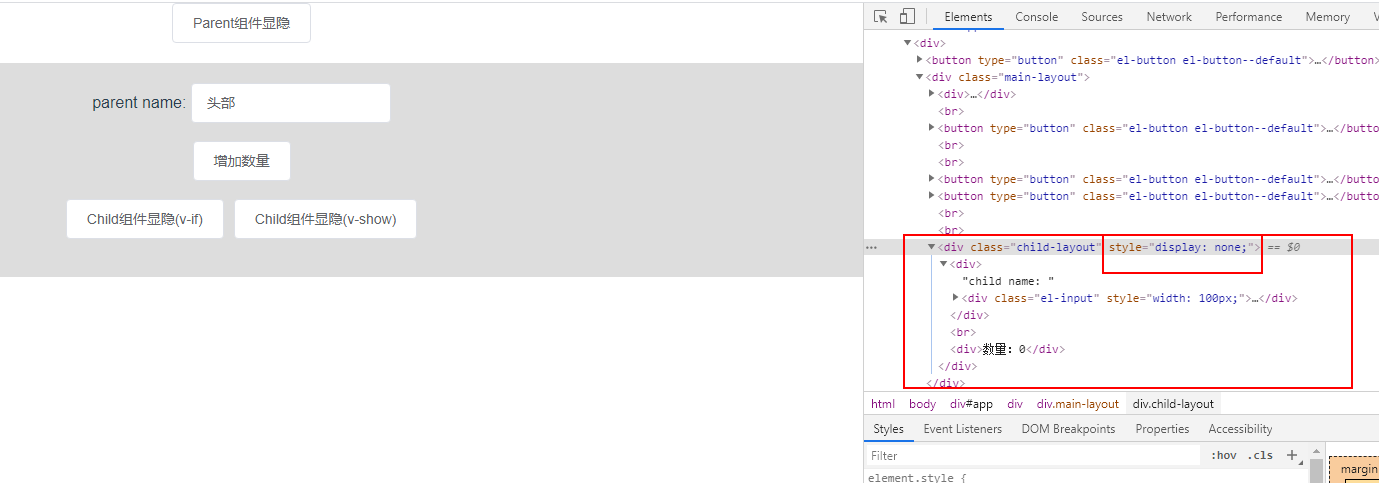
由于v-if是对一个组件进行销毁或者重新挂载的过程,所以上面通过v-if控制子组件显隐的时候,才会涉及到子组件挂载和销毁的过程。
