

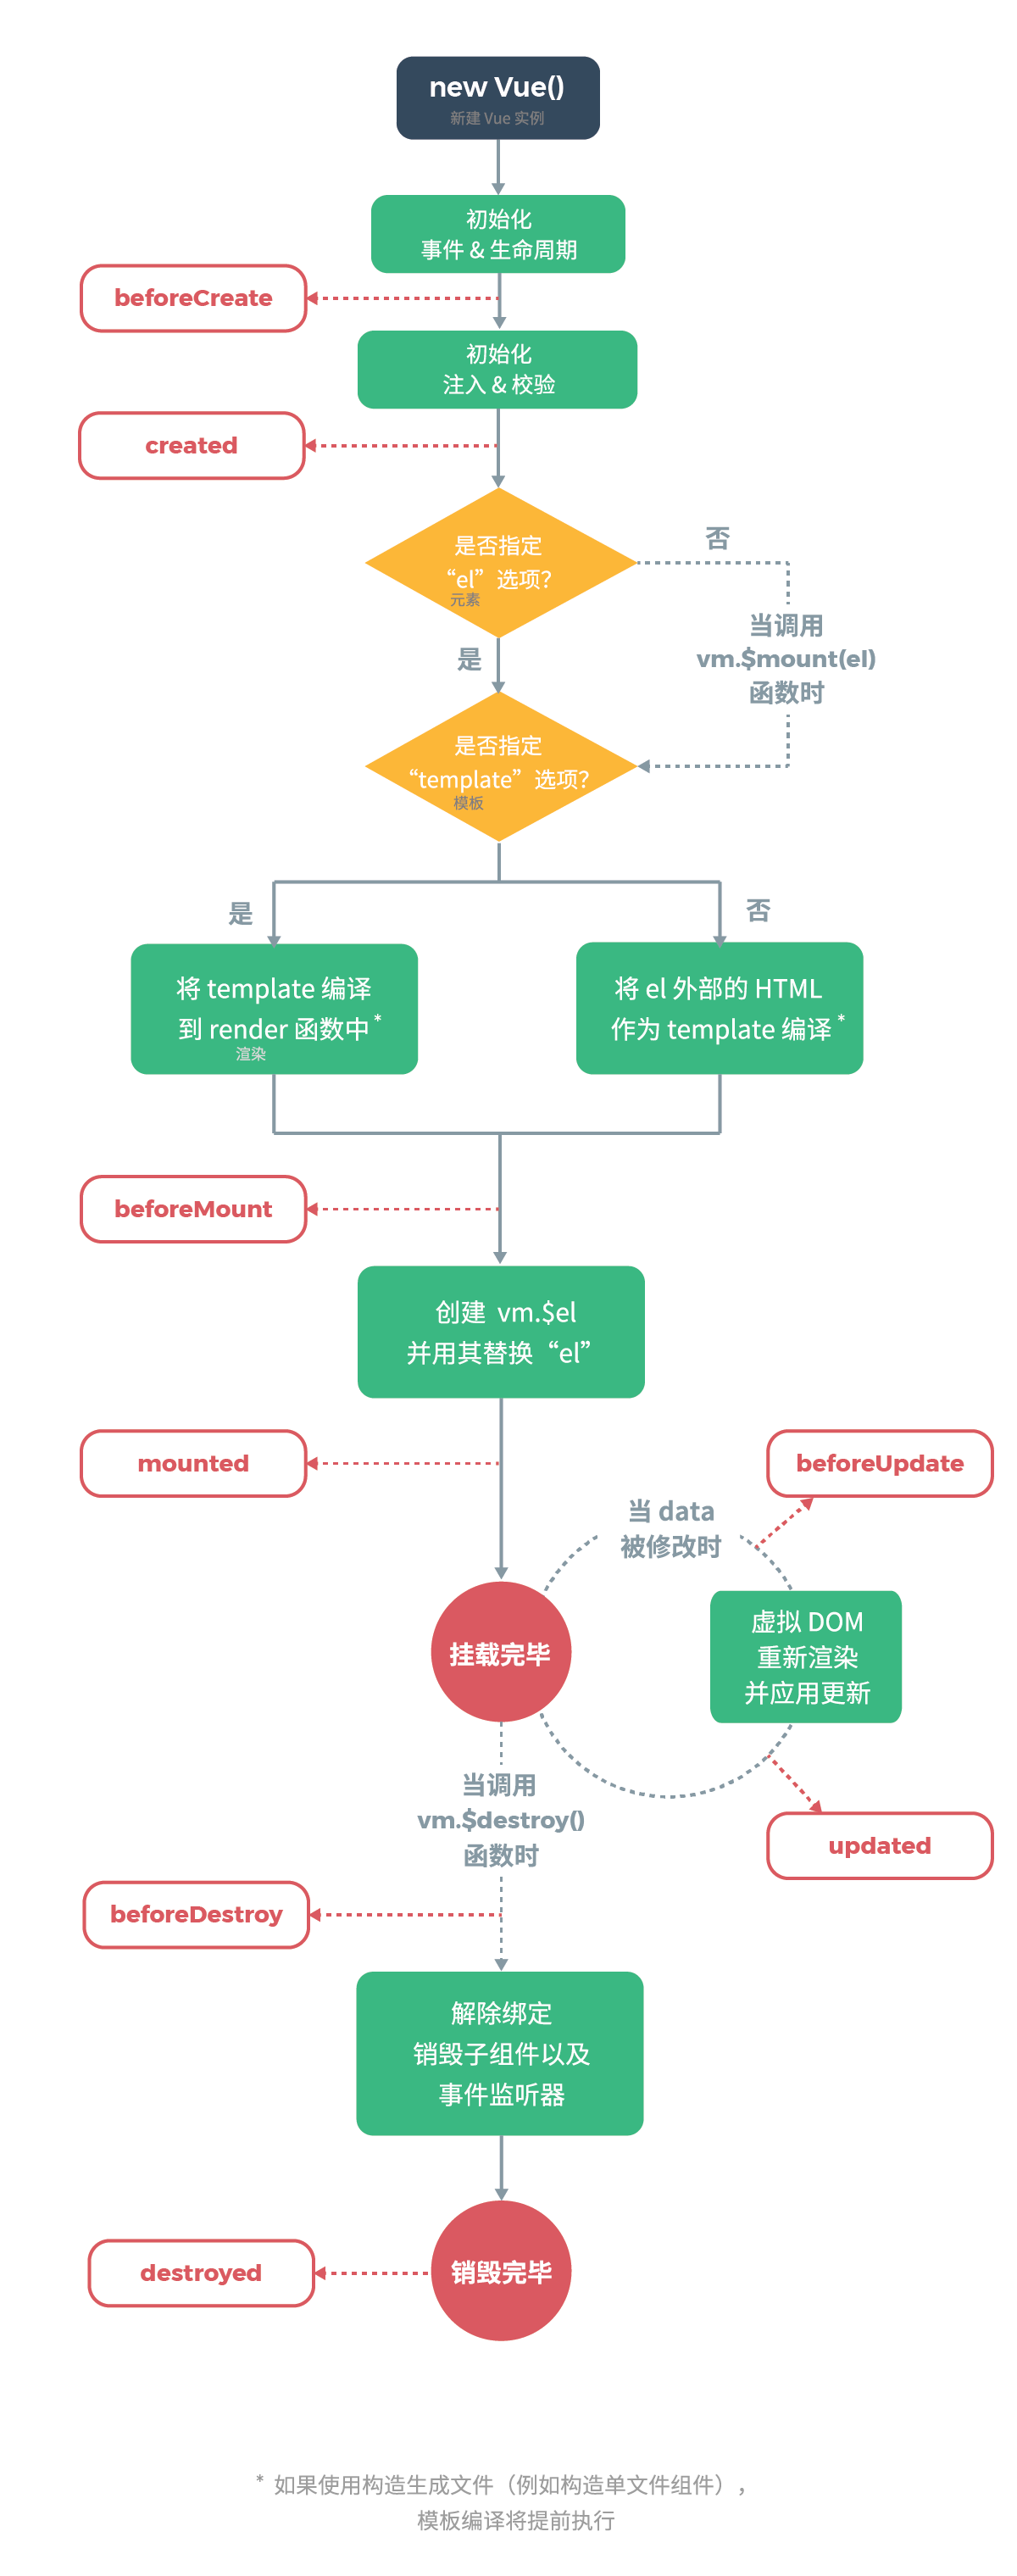
vue组件从创建到销毁都要经过一系列过程,同时在这个过程中也会运行一些叫做生命周期钩子的函数,这给了用户在不同阶段添加自己的代码的机会。
比如 created 钩子可以用来在一个实例被创建之后立即执行代码:
new Vue({
  data: {
    a: 1
  },
  created: function () {
    console.log('a is: ' + this.a)
  }
})
// => "a is: 1"
Vue.component('Test', {
    data() {
        return {
            msg: 'Max'
        }
    },
    methods: {
        handleClick() {
            this.msg = 'Maxuan';
        }
    },
    template: `
        <div>
            <h2>{{msg}}</h2>
            <button @click='handleClick'>改变</button>
        </div>
    `,
    beforeCreate() {
        console.log('组件创建之前', this.$data);
    },
    created() {
        //此时发送ajax,请求后端数据
        console.log('组件创建完成', this.$data);
    },
    beforeMount() {
        //即将挂载
        console.log('DOM挂载之前', document.getElementById('app'));
    },
    mounted() {
        //此时也可以发送ajax请求
        console.log('DOM挂载完成', document.getElementById('app'));
    },
    beforeUpdate() {
        console.log('更新之前的DOM', document.getElementById('app').innerHTML);
    },
    updated() {
        console.log('更新之后的DOM', document.getElementById('app').innerHTML);
    },
    beforeDestroy() {
        console.log('销毁之前');
    },
    destroyed() {
        console.log('销毁完成');
    }
})
const App = {
    data() {
        return {
            isShow: true
        }
    },
    template: `
        <div>
            <Test v-if='isShow'></Test>
            <br/>
            <button @click='destroy'>销毁</button>
        </div>
    `,
    methods: {
        destroy() {
            this.isShow = !this.isShow;
        }
    }
}
new Vue({
    el: '#app',
    components: {
        App,
    }
})
在动态组件上使用 keep-alive
频繁的创建销毁,生命周期钩子函数都在调用,非常的消耗性能
vue就提供了 keep-alive 方法,让被销毁的组件存到缓存中,再次被创建只是从缓存中取出,之前的钩子函数也不再被调用,而是运行 activated (激活) 和 deactivated (停用) 这两个钩子函数
在这些组件之间切换,同时也会保持这些组件停用之前的状态
*使用方法 是在引入的组件标签外包裹 标签
activated() {
    console.log('组件被激活了');
},
deactivated() {
    console.log('组件被停用了');
}
<keep-alive>
    <Test v-if='isShow'></Test>
</keep-alive>
