

关于parce的简介过多的赘述,只简单说下他与webpack的区别:
-
- "无需"配置,直接使用
-
- 打包速度极快
本篇文章主要讲解下我个人在使用中遇到的官方文档不明确或没提到的地方,其他的大家可以看下官方文档。中文官网
以下代码地址:github.com/hx24/parcel…
基本使用
初始化工程
mkdir parcel-demo && cd parcel-demo
yarn init -y
yarn add parcel -D  # 安装parcel
创建src/index.html
...
<body>
    hello world
</body>
...
在package.json中添加scripts命令
"scripts": {
    "start": "parcel src/index.html",
    "build": "parcel build src/index.html"
},
执行命令yarn start,会自动启动一个服务监听1234端口,访问http://localhost:1234/即可看到hello world

parcel自动识别文件类型进行处理
对于不同的文件类型,parcel会自动对其进行识别,安装需要的包和loader后对其进行处理,下面以typescript文件为例
创建src/index.ts
let str: string
str = 'abc'
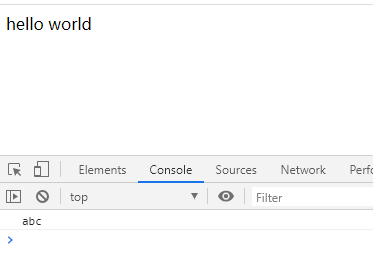
console.log(str)
在index.html中引入
<body>
  hello world
  <script src="./index.ts"></script>
</body>
直接保存,会发现命令行会自动执行一些命令,提示完成后刷新页面打开控制台,可以看到控制台已经打印出了字符串abc,而package.json中的devDependencies也自动添加了typescript的依赖,parcel自动帮我们做了这一系列的事情!(可以通过--no-autoinstall关闭该功能) 是不是非常方便~
开发react工程
0配置编译react
修改index.ts => index.js (使用js进行讲解)
import React from 'react'
import ReactDOM from 'react-dom'

ReactDOM.render(<div>hello react</div>, document.getElementById('root'))
修改index.html
<body>
  <div id="root"></div>
  <script src="./index.js"></script>
</body>
保存,会自动安装react和react-dom的依赖,安装编译完成后就可以看到react页面已经被渲染出来了。
其实最好还是手动安装react并锁定版本,否则实际开发中可能会因为版本升级踩到坑
使用额外的babel插件
注意在上面我们并没有配置.babelrc文件,jsx语法也会被自动编译,但是如果我们想使用一些babel插件,如装饰器和类属性的支持,就需要自己配置了。
创建.babelrc
{
  "plugins": [
    ["@babel/plugin-proposal-decorators", { "legacy": true }],
    ["@babel/plugin-proposal-class-properties", { "loose": true }],
  ]
}
修改文件目录,规范化一些
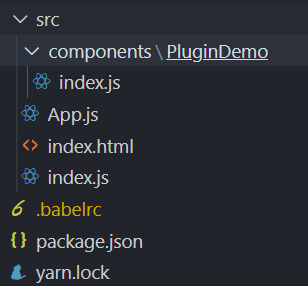
创建src/components/PluginDemo/index.js
import React, { Component } from 'react'

@test  // 使用装饰器
class App extends Component {
  name = 'hx'  // 使用类属性
  render() {
    return <div>{this.name}</div>
  }
}

function test(Comp) {
  return Comp
}


export default App
src/App.js
import React, { Component } from 'react'
import PluginDemo from './components/PluginDemo'

class App extends Component {
  render() {
    return (
      <div>
        <PluginDemo />
      </div>
    )
  }
}

export default App
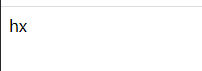
保存,重新start,自动安装依赖,查看页面渲染成功。
使用别名alias
在package.json中添加alias项
"name": "parcel-demo",
"alias": {
    "components": "./src/components"
}
这里需要注意的是,修改了alias保存后,需要先删掉.cache(缓存)文件夹再重新start才会生效!否则parcel会将components误认为第三方包(好坑=.=
删除.cache文件夹后修改App.js
- import PluginDemo from './components/PluginDemo'
+ import PluginDemo from 'components/PluginDemo'
start启动,查看页面渲染成功。
热模块重载(HMR)
对于react组件想要在热更新时保存组件的状态(state),需要使用插件react-hot-loader
直接照着官方文档来吧 修改.babelrc,添加react-hot-loader/babel插件
{
  "plugins": [
    ["@babel/plugin-proposal-decorators", { "legacy": true }],
    ["@babel/plugin-proposal-class-properties", { "loose": true }],
    "react-hot-loader/babel"
  ]
}
保存后parcel自动安装依赖
创建一个Counter组件, 点击按钮可以+1
src/components/Counter.js
import React, { Component } from 'react'

class Counter extends Component {
  state = {
    num: 1,
  }

  click = () => {
    this.setState({
      num: this.state.num + 1,
    })
  }
  render() {
    return (
      <div>
        <div>counter</div>
        <div>num: {this.state.num}</div>
        <button onClick={this.click}>+1</button>
      </div>
    )
  }
}

export default Counter
修改App.js
import { hot } from 'react-hot-loader'  // 在最前面引入
import React, { Component } from 'react'
import PluginDemo from './components/PluginDemo'
import Counter from './components/Counter'

class App extends Component {
  render() {
    return (
      <div>
        <PluginDemo />
        <Counter />
      </div>
    )
  }
}

export default hot(module)(App)  // 注意这里的变化
注意,这里官方写法是下面这样,实际在本人在操作中要按照上面的写法否则报错,应该与系统有关,macOS按照下面的写法,改天在mac上试一下
import { hot } from 'react-hot-loader/root'
...
export default hot(App)
安装与项目react-dom对应的@hot-loader/react-dom并锁死版本
yarn add @hot-loader/react-dom@16.13.0
修改别名将react-dom指向@hot-loader/react-dom
"alias": {
    "components": "./src/components",
    "react-dom": "@hot-loader/react-dom"
}
删掉.cache后重新start
点击页面的+1,将num加到6
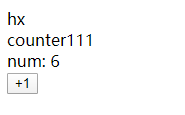
修改Counter组件的代码
- <div>counter</div>
+ <div>counter 修改了</div>
保存后查看页面

本地开发使用代理
parcel虽然提供了开发服务器,但是并没有像webpack那样可以直接通过配置文件设置proxy,要想在parcel中使用代理,就要通过node启动parcel调试,将parcel作为中间件传给自己创建的服务(这里以express为例)
在根目录创建bundler.js
const Bundler = require('parcel')
const path = require('path')
const express = require('express')
const { createProxyMiddleware } = require('http-proxy-middleware')

const entryFile = path.resolve(__dirname, './src/index.html')

const options = {}

// 使用提供的入口文件路径和选项初始化 bundler
const bundler = new Bundler(entryFile, options)

const app = express()

app.use(
  createProxyMiddleware('/api', {  // 配置代理
    target: 'http://localhost:8080',
  })
)

app.use(bundler.middleware())  // parcelBundler作为中间件

app.listen(3000, () => {  // 通过localhost:3000打开调试页面
  console.log('listen on 3000')
})
安装express和http-proxy-middleware并启动调试
yarn add express http-proxy-middleware -D
node bundler.js
启动成功后/api的接口就会被代理到http://localhost:8080了
