

Drawable
可绘制对象的抽象类,子类用于特定图片场景,可以扩展定义独特行为的可绘制对象。
动态的添加布局
首先,为了测试需要动态的添加布局,就先弄这个。
布局参数
val layoutParams = LinearLayout.LayoutParams(
                LinearLayout.LayoutParams.WRAP_CONTENT,
                LinearLayout.LayoutParams.WRAP_CONTENT)
这里需要布局参数,可以是其他布局的参数,具体区API文档里找,也是对应XML布局里的参数
使用最简单的LinearLayout
LayoutInflater类:
这个类最主要的功能就是实现将xml表述的layout转化为View的功能。
为了便于理解,我们可以将它与findViewById()作一比较,二者都是实例化某一对象,不同的是findViewById()是找xml布局文件下的具体widget控件实例化,而LayoutInflater找res/layout/下的xml布局文件来实例化的。
两种思路动态加载:
- findViewById()获取具体widget,为需要添加的view设置LayoutParams,然后调用addView()
- LayoutInflater()直接获取定义好的xml布局,xml属性值也设置好了的,然后findViewById()获取父布局,再调用addView()
通过资源图片创建Drawable
通过引用项目资源中的图片文件向应用添加图形。
支持的文件类型包括 PNG(首选)、JPG(可接受)和 GIF(不推荐)。
这种方法非常适合添加应用图标、徽标和其他图形(例如游戏中使用的图形)。
请将相应文件添加到项目的 res/drawable/ 目录下。
演示:
class DrawableActivity : AppCompatActivity() {
private lateinit var linearLayout: LinearLayout
override fun onCreate(savedInstanceState: Bundle?) {
super.onCreate(savedInstanceState)
setContentView(R.layout.activity_drawable)
linearLayout = findViewById(R.id.linearLayout)
resourceImageToDrawable()
}
/**
* 使用通过可绘制资源创建的图片构建一个 ImageView 并将其添加到布局中:
*/
private fun resourceImageToDrawable() {
// Instantiate an ImageView and define its properties
val i = ImageView(this).apply {
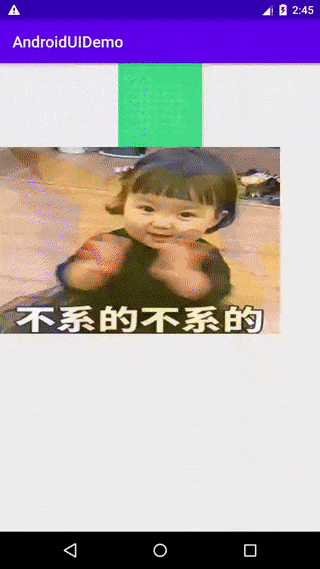
setImageResource(R.drawable.pikaqiu)
contentDescription = resources.getString(R.string.my_image_desc)
// set the ImageView bounds to match the Drawable's dimensions
adjustViewBounds = true
layoutParams = LinearLayout.LayoutParams(
LinearLayout.LayoutParams.WRAP_CONTENT,
LinearLayout.LayoutParams.WRAP_CONTENT
)
}
linearLayout.addView(i)
}
}
//将图片转换为Drawable
val myImage: Drawable? =
		ResourcesCompat.getDrawable(this.resources, R.drawable.pikaqiu, null)
注意:项目中的每个唯一资源只能具有一种状态,无论您为其实例化多少个不同的对象。例如,如果您用同一图片资源实例化了两个 Drawable 对象,并更改其中一个对象的属性(例如不透明度),则另一个对象也会受到影响。
XML 资源创建可绘制对象
Drawable对象并不依赖于由代码定义的变量或用户互动
或者 Drawable 在用户与您的应用互动时属性会更改,您也应考虑在 XML 中定义该对象,因为您可以在对其进行实例化之后修改其属性。
TransitionDrawable
xml定义渐变效果
<?xml version="1.0" encoding="utf-8"?>
<!--定义一个淡入淡出的Drawable-->
<transition xmlns:android="http://schemas.android.com/apk/res/android">
    <item android:drawable="@drawable/no_image" />
    <item android:drawable="@drawable/pikaqiu" />
</transition>
关键方法:transitionDrawable.startTransition(int durationMillis)
效果:
官方文档:
ShapeDrawable
形状可绘制对象,可以用xml定义来设置Drawable对象
<?xml version="1.0" encoding="utf-8"?>
<shape xmlns:android="http://schemas.android.com/apk/res/android"
    android:shape="oval">
    <solid android:color="#FF6468" />
    <padding
        android:bottom="5dp"
        android:left="5dp"
        android:right="5dp"
        android:top="5dp" />
    <size
        android:width="150dp"
        android:height="100dp" />
    <corners android:radius="5px" />
</shape>
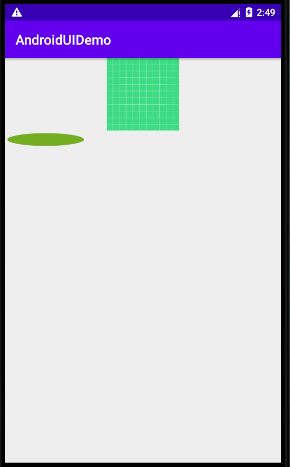
也可以在自定义View中,通过ShapeDrawable的draw()方法,帮助View实现绘制
class MyShapeDrawable(context: Context) : View(context) {
    private val drawable: ShapeDrawable = run {
        val x = 10
        val y = 10
        val width = 300
        val height = 50
        contentDescription = context.resources.getString(R.string.testString)

        ShapeDrawable(OvalShape()).apply {
            // If the color isn't set, the shape uses black as the default.
            paint.color = 0xff74AC23.toInt()
            // If the bounds aren't set, the shape can't be drawn.
            setBounds(x, y, x + width, y + height)
        }
    }
    override fun onDraw(canvas: Canvas?) {
        canvas?.let { drawable.draw(it) }
    }
}
调用和上面动同添加View一样
  private fun useShapeDrawable(context: Context){
        myShapeDrawable = MyShapeDrawable(this).apply {

            layoutParams = LinearLayout.LayoutParams(
                LinearLayout.LayoutParams.WRAP_CONTENT,
                LinearLayout.LayoutParams.WRAP_CONTENT
            )
        }

        linearLayout.addView(myShapeDrawable)
    }
效果:
官方文档: ShapeDrawable
demo: AndroidUIDemo
