

在开发web类项目时,过程中我们会有很多的http请求,需要我们调用后台的接口,上一篇文章我们讲到了http封装,那么我们如用用封装完成的http请求模块,去请求接口呢?下面我们在小程序里面写一个获取用户资料的例子:
getUserInfo: function() {
    webHttp.get('http://localhost:8000/api/v1/userInfo', {
      userId: 'xxxxx'
    }).then((res) => {
      console.log(res);
    }).catch((e) => {
      console.log(e)
    })
 }
从上面的的http请求中可知,我们请求了一个本地启动的的api服务,也就是http://localhost:8000/api/v1/userInfo,如果开发完毕发布生产环境的时候,就需要我们将请求地址切换到线上地址,那么这样的话我们这种请求方式的就需要我们替换地址,但是如果按照我们这种写法,那么后续对于项目维护来讲无疑是增加了成本,这时候我们就需要对请求地址、api地址做统一管理,同时区分开发、测试、生产环境的地址,下面我们就关于微信小程序里面请求地址统一管理进行封装。
一、api地址管理
-
在untils 文件夹内创建apiconfig.js文件
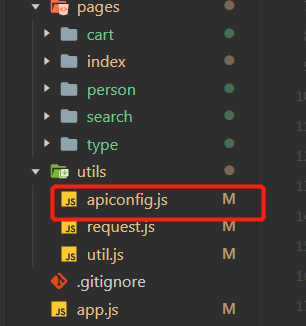
-
在 apiconfig.js 文件里面我们首先要做的是对环境进行定义,同时对于地址当前开发地址
// 环境
const environments = {
    dev: 0,
    test: 1,
    product: 2
}
// 当前开发环境
// 测试环境
// const env = environments.test;
// 生产环境
// const env = environments.product;
// 开发环境
const env = environments.dev;

// 请求地址
const apiBaseUrls = [
    'http://127.0.0.1:8000',
    'http://127.0.0.1:8001',
    'http://127.0.0.1:8002'
]
// 请求地址
const apiBaseUrl = apiBaseUrls[env];
- 对api地址管理管理
// api版本号
const apiVersion = 'v1';
const apiConfig = {
    apiBaseUrl,
    user: {
       info: `${apiBaseUrl}/api/${apiVersion}/userOpendid`
    }
    // 后续可以分文别累的将api地址多管理
}

module.exports = apiConfig;
- 整体封装代码内容如下:
// 环境
const environments = {
    dev: 0,
    test: 1,
    product: 2
}

// 当前开发环境
const env = environments.dev;

// 请求地址
const apiBaseUrls = [
    'http://127.0.0.1:8000',
    'http://127.0.0.1:8001',
    'http://127.0.0.1:8002'
]
// 请求地址
const apiBaseUrl = apiBaseUrls[env];
// api版本号,后台api开发的版本
const apiVersion = 'v1';
const apiConfig = {
    apiBaseUrl,
    user: {
       info: `${apiBaseUrl}/api/${apiVersion}/userOpendid`
    }
    // 后续可以分文别累的将api地址多管理
}

module.exports = apiConfig;
二、在项目中的使用方式
在小程序的页面js中引入文件,同时引入上一篇中我们分装好的http模块,改造我们文章开说说到的例子
import webHttp from './utils/request';
import api from './utils/apiconfig';

// 请求
getUserInfo: function () {
    webHttp.get(api.user.info, {
        userId: 'xxxxxx'
    }).then((res) => {
        console.log(res);
    })
}
总上所述,我们就可以对于项目中使用的api地址进行统一管理,如果后续切换地址,api地址修改都可以在apiconfig文件中修改,如果有帮到你们,后续我会继续将这个系列完善下去,欢迎点赞收藏!
