

1.编译动态链接库(so包)
1.1平台和版本
操作系统:macos
NDK版本:r21
FFmpeg版本: 4.x.x
1.2编译准备
下载NDK
NDK developer.android.google.cn/ndk/downloa…
FFmpeg ffmpeg.org/download.ht…
1.3配置修改
解压缩下载好的FFmpeg源码,进入解压缩后的目录,编辑configure文件
将
SLIBNAME_WITH_MAJOR='$(SLIBNAME).$(LIBMAJOR)'

LIB_INSTALL_EXTRA_CMD='?(RANLIB)"$(LIBDIR)/$(LIBNAME)"'

SLIB_INSTALL_NAME='$(SLIBNAME_WITH_VERSION)'

SLIB_INSTALL_LINKS='$(SLIBNAME_WITH_MAJOR)$(SLIBNAME)'
替换为
SLIBNAME_WITH_MAJOR='$(SLIBPREF)$(FULLNAME)-$(LIBMAJOR)$(SLIBSUF)'

LIB_INSTALL_EXTRA_CMD='?(RANLIB)"$(LIBDIR)/$(LIBNAME)"'

SLIB_INSTALL_NAME='$(SLIBNAME_WITH_MAJOR)'

SLIB_INSTALL_LINKS='$(SLIBNAME)'
1.4编辑编译脚本
在FFmpeg源码根目录新建shell脚本build_android.sh
输入以下内容
export NDK=/Users/mac/Library/Android/ndk #替换成你的NDK路径
export API=21 #API 版本
export ARCH=aarch64 #目标CPU架构
export PLATFORM=aarch64
export TARGET=$PLATFORM-linux-android
export TOOLCHAIN=$NDK/toolchains/llvm/prebuilt/darwin-x86_64/bin
#正确的sysroot
export SYSROOT=$NDK/toolchains/llvm/prebuilt/darwin-x86_64/sysroot
export CPU=aarch64
export PREFIX=/Users/mac/Desktop/Temp/$ARCH #编译生成目录
export CFLAG="-D__ANDROID_API__=$API -Os -fPIC -DANDROID "

./configure \
--prefix=$PREFIX \
--cc=$TOOLCHAIN/$TARGET$API-clang \
--cxx=$TOOLCHAIN/$TARGET$API-clang++ \
--ld=$TOOLCHAIN/$TARGET$API-clang \
--target-os=android  \
--arch=$ARCH \
--cross-prefix=$TOOLCHAIN/$ARCH-linux-android- \
--disable-doc \
--enable-shared \
--disable-static \
--disable-yasm \
--disable-symver \
--enable-gpl \
--disable-ffmpeg \
--disable-ffplay \
--disable-ffprobe \
--enable-cross-compile \
--enable-runtime-cpudetect \
--sysroot=$SYSROOT \
--extra-cflags="$CFLAG" \
--extra-ldflags=""

make clean
make
make install
Note:
很多教程编译失败是因为旧版本的NDK(r17及之前)的Sysroot和C/C++编译器(gcc/g++、clang/clang++)的目录与新版本的位置不同
Linux版本编译可以参考上面的脚本,但是darwin是macos下的目录名称,linux下请根据ndk的目录名称做相应修改
不同平台的so包需要根据自己的需求修改上面的ARCH和PLATFORM,可以封装成函数传参调用,本文只是简单的实现编译
执行build_android.sh,如遇权限不足,可以赋予文件执行权限
chmod +x build_android.sh
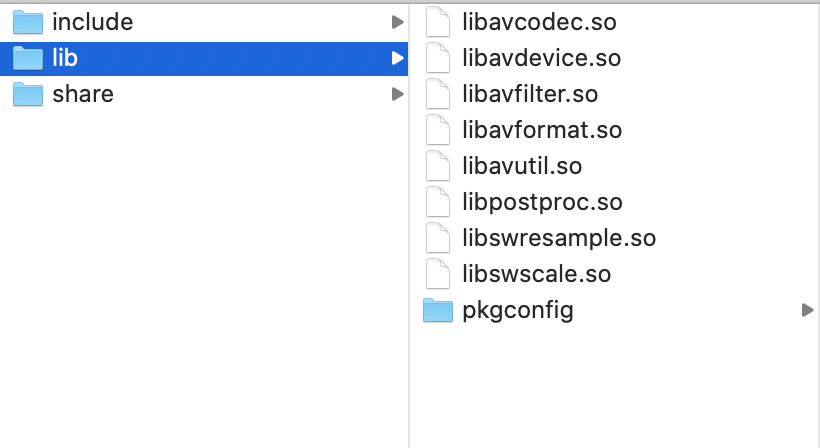
编译完成后会在PREFIX目录下生成如下目录和文件
2.使用FFmpeg播放视频
1.创建Android项目
如果Android Studio支持新建支持C++的项目,请直接勾选,否则新建普通项目,然后按照下面的内容配置C++
2.复制动态库和头文件
在app/src/main/目录下新建jniLibs目录
将FFmpeg生成的lib和include复制到jniLibs目录下
将lib目录名称改成对应的arch名称 如:areabi-v7a
2.创建CMakeLists.txt
在app目录下新建CMakeLists.txt 内容如下
cmake_minimum_required(VERSION 3.4.1)

add_library( native-lib
             SHARED
             src/main/cpp/native-lib.cpp )

find_library( log-lib
              log )

set(JNI_LIBS_DIR ${CMAKE_SOURCE_DIR}/src/main/jniLibs)

add_library(avutil
        SHARED
        IMPORTED )

set_target_properties(avutil
        PROPERTIES IMPORTED_LOCATION
        ${JNI_LIBS_DIR}/${ANDROID_ABI}/libavutil.so )

add_library(swresample
        SHARED
        IMPORTED )
set_target_properties(swresample
        PROPERTIES IMPORTED_LOCATION
        ${JNI_LIBS_DIR}/${ANDROID_ABI}/libswresample.so )


add_library(swscale
        SHARED
        IMPORTED )
set_target_properties(swscale
        PROPERTIES IMPORTED_LOCATION
        ${JNI_LIBS_DIR}/${ANDROID_ABI}/libswscale.so )

add_library(avcodec
        SHARED
        IMPORTED )
set_target_properties(avcodec
        PROPERTIES IMPORTED_LOCATION
        ${JNI_LIBS_DIR}/${ANDROID_ABI}/libavcodec.so )

add_library(avformat
        SHARED
        IMPORTED )
set_target_properties(avformat
        PROPERTIES IMPORTED_LOCATION
        ${JNI_LIBS_DIR}/${ANDROID_ABI}/libavformat.so )

add_library( avfilter
        SHARED
        IMPORTED )
set_target_properties(avfilter
        PROPERTIES IMPORTED_LOCATION
        ${JNI_LIBS_DIR}/${ANDROID_ABI}/libavfilter.so )

add_library(avdevice
        SHARED
        IMPORTED )
set_target_properties(avdevice
        PROPERTIES IMPORTED_LOCATION
        ${JNI_LIBS_DIR}/${ANDROID_ABI}/libavdevice.so )

include_directories(${JNI_LIBS_DIR}/include)


target_link_libraries(
                        native-lib
                        avdevice
                        avutil
                        android
                        swresample
                        swscale
                        avcodec
                        avformat
                        avfilter
                        ${log-lib} )
关于JNI开发相关知识,此处不做讲解,如果不了解或者想要研究请自行参考其他
3.修改build.gradle
对app目录下的build.gradlew做如下修改
android {
    ...
    defaultConfig {
        ...
        //新增如下内容
        externalNativeBuild {
            cmake{
                cppFlags ""
                abiFilters "arm64-v8a" //此处换成你需要支持的cpu架构
            }
        }
    }
    //新增如下内容
    externalNativeBuild {
        cmake{
            path "CMakeLists.txt"
        }
    }
}
4.新建native源文件
在app/src/main 目录下新建cpp目录
在cpp目录下创建native-lib.cpp (与CMakeLists.txt中对应即可,不一定非得是这个名字)
native-lib.cpp 内容如下
此处参考了 blog.csdn.net/johanman/ar… 感谢大神
your_package_name 要换成你自己的包名, 包名中的点 . 用 下划线 _ 替换
#include <jni.h>
#include <android/native_window.h>
#include <android/native_window_jni.h>
#include <android/log.h>

#pragma clang diagnostic push
#pragma ide diagnostic ignored "CannotResolve"

extern "C" {

#include "libavformat/avformat.h"
#include "libavcodec/avcodec.h"
#include "libswscale/swscale.h"
#include "libavutil/imgutils.h"

}

#define LOGE(FORMAT, ...) __android_log_print(ANDROID_LOG_ERROR, "FFPlayer", FORMAT, ##__VA_ARGS__);


extern "C"
JNIEXPORT void JNICALL
Java_your_package_name_MainActivity_play(JNIEnv *env, jobject type, jstring source, jobject surface) {
    int result = 0;
    const char *path = env->GetStringUTFChars(source, 0);
    av_register_all();
    AVFormatContext *format_context = avformat_alloc_context();
    // 打开视频文件
    result = avformat_open_input(&format_context, path, NULL, NULL);
    if (result < 0) {
        LOGE("Player Error : Can not open video file");
        return;
    }
    result = avformat_find_stream_info(format_context, NULL);
    if (result < 0) {
        LOGE("Player Error : Can not find video file stream info");
        return;
    }

    // 查找视频编码器
    int video_stream_index = -1;
    for (int i = 0; i < format_context->nb_streams; i++) {
        // 匹配视频流
        if (format_context->streams[i]->codecpar->codec_type == AVMEDIA_TYPE_VIDEO) {
            video_stream_index = i;
        }
    }
    // 没找到视频流
    if (video_stream_index == -1) {
        LOGE("Player Error : Can not find video stream");
        return;
    }

    // 初始化视频编码器上下文
    AVCodecContext *video_codec_context = avcodec_alloc_context3(NULL);
    avcodec_parameters_to_context(video_codec_context,
                                  format_context->streams[video_stream_index]->codecpar);
    // 初始化视频编码器
    AVCodec *video_codec = avcodec_find_decoder(video_codec_context->codec_id);
    if (video_codec == NULL) {
        LOGE("Player Error : Can not find video codec");
        return;
    }

    result = avcodec_open2(video_codec_context, video_codec, NULL);
    if (result < 0) {
        LOGE("Player Error : Can not find video stream");
        return;
    }

    // 获取视频的宽高
    int videoWidth = video_codec_context->width;
    int videoHeight = video_codec_context->height;
    // R4 初始化 Native Window 用于播放视频
    ANativeWindow *native_window = ANativeWindow_fromSurface(env, surface);
    if (native_window == NULL) {
        LOGE("Player Error : Can not create native window");
        return;
    }
    // 通过设置宽高限制缓冲区中的像素数量,而非屏幕的物理显示尺寸。
    // 如果缓冲区与物理屏幕的显示尺寸不相符,则实际显示可能会是拉伸,或者被压缩的图像
    result = ANativeWindow_setBuffersGeometry(native_window, videoWidth, videoHeight,
                                              WINDOW_FORMAT_RGBA_8888);
    if (result < 0) {
        LOGE("Player Error : Can not set native window buffer");
        ANativeWindow_release(native_window);
        return;
    }

    // 定义绘图缓冲区
    ANativeWindow_Buffer window_buffer;
    // 声明数据容器 有3个
    // R5 解码前数据容器 Packet 编码数据
    AVPacket *packet = av_packet_alloc();
    // R6 解码后数据容器 Frame 像素数据 不能直接播放像素数据 还要转换
    AVFrame *frame = av_frame_alloc();
    // R7 转换后数据容器 这里面的数据可以用于播放
    AVFrame *rgba_frame = av_frame_alloc();
    // 数据格式转换准备
    // 输出 Buffer
    int buffer_size = av_image_get_buffer_size(AV_PIX_FMT_RGBA, videoWidth, videoHeight, 1);
    // R8 申请 Buffer 内存
    uint8_t *out_buffer = (uint8_t *) av_malloc(buffer_size * sizeof(uint8_t));
    av_image_fill_arrays(rgba_frame->data, rgba_frame->linesize, out_buffer, AV_PIX_FMT_RGBA,
                         videoWidth, videoHeight, 1);
    // R9 数据格式转换上下文
    struct SwsContext *data_convert_context = sws_getContext(
            videoWidth, videoHeight, video_codec_context->pix_fmt,
            videoWidth, videoHeight, AV_PIX_FMT_RGBA,
            SWS_BICUBIC, NULL, NULL, NULL);

    // 开始读取帧
    //读取帧
    while (av_read_frame(format_context, packet) >= 0) {
        if (packet->stream_index == video_stream_index) {

            /***
            * 很多教程写的是这个函数,这是旧版FFmpeg里面的写法,新版中已经移除了这个函数
            * avcodec_decode_video2(context, frame, &count, packet)
            * 用下面两个函数替代
            * avcodec_send_packet(context, packet)
            * avcodec_receive_frame(context, frame)
            ***/

            //视频解码
            int ret = avcodec_send_packet(video_codec_context, packet);
            if (ret < 0 && ret != AVERROR(EAGAIN) && ret != AVERROR_EOF) {
                continue;
            }

            ret = avcodec_receive_frame(video_codec_context, frame);
            if (ret < 0 && ret != AVERROR_EOF) {
                continue;
            }

            sws_scale(data_convert_context, (const uint8_t *const *) frame->data, frame->linesize,
                      0, video_codec_context->height,
                      rgba_frame->data, rgba_frame->linesize);

            if (ANativeWindow_lock(native_window, &window_buffer, NULL) < 0) {
                continue;
            } else {
                //将图像绘制到界面上,注意这里pFrameRGBA一行的像素和windowBuffer一行的像素长度可能不一致
                //需要转换好,否则可能花屏
                uint8_t *dst = (uint8_t *) window_buffer.bits;
                for (int h = 0; h < videoHeight; h++) {
                    memcpy(dst + h * window_buffer.stride * 4,
                           out_buffer + h * rgba_frame->linesize[0],
                           rgba_frame->linesize[0]);
                }
                ANativeWindow_unlockAndPost(native_window);
            }
        }
        av_packet_unref(packet);
    }
    //释放内存
    sws_freeContext(data_convert_context);
    av_free(packet);
    av_free(rgba_frame);
    avcodec_close(video_codec_context);
    avformat_close_input(&format_context);
}

#pragma clang diagnostic pop
5.修改MainActivity.java
import ...

public class MainActivity extends Activity {
    //新增加载动态库代码
    static {
        System.loadLibrary("native-lib"); //请根据CMakeLists.txt中配置的名字做相应修改
    }

    //新增组件
    private  SurfaceView surfaceView;
    private SurfaceHolder holder;

    @Override
    protected void onCreate(Bundle savedInstanceState) {
        super.onCreate(savedInstanceState);
        setContentView(R.layout.activity_main);
        ...
        surfaceView = findViewById(R.id.surface_view);
        holder = surfaceView.getHolder();
    }

    //新增native对应的方法
    public native void play(String url, Surface surface);

    public void play(View view){
        //url支持本地文件,网络文件,直播流(HLS,RTMP,RTSP)
        //别忘了添加对应的权限即可(网络访问,读写存储)
        //网络访问http协议新版Android需要在manifest application节点添加
        //android:usesCleartextTraffic="true"
        //最好在子线程中执行,此处只实现了功能
        String url = "path/to/file";
        Surface surface = holder.getSurface();
        play(url, surface);
    }
}
6.修改布局文件
略
第一次写博客,如有不周,望各位不吝赐教。
