

1. 前言
以前学习各种排序算法的时候,理解书本上晦涩的排序算法思想有点痛苦,直到在网上看到这个算法可视化的网站,发现通过视觉看到排序算法的过程,可以帮助事半功倍的理解各种排序算法的思想。而且网上没有搜到什么文章讲使用前端技术算法可视化的,所以就写了这篇文章供大家参考。
2. 项目概述
该项目旨在利用前端技术,使排序算法的过程可视化,从而达到更轻松的理解各个排序算法的基本思想。本文重在使用前端技术展示冒泡排序过程,故冒泡排序的思想不是重点。
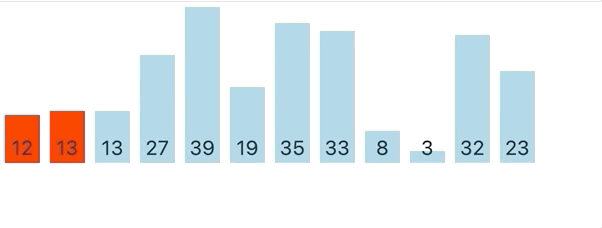
项目实现效果如图:
所用技术:
- JavaScript, vanilla JS
- React
- CSS(animation)
仓库地址: github.com/Neo-peng/vi…
3. 可视化冒泡排序算法
项目关键步骤解释
3.1 生成随机数组
生成10-20个随机数,用来展示排序过程
// 生成的随机数组的长度
this.lenOfRandomArray = 10 + Math.ceil(Math.random() * 10)
this.randomArray = []
for (let i = 0; i < this.lenOfRandomArray; i++) {
  // 生成lenOfRandomArray个[1, 50] 的随机数,并放入randomArray中
  this.randomArray.push(Math.floor(Math.random() * 50 + 1))
}
3.2 随机数组组件
该组件仅用来将js数组渲染成html。需要注意的是:
- 使用ref从而可以使该组件以后可以在父组件中使用。
- div的高度,由随机数的大小决定
height: randomNum * 4 + 'px'
import React from 'react'

export const RandomArray = React.forwardRef((props, ref) => {
  return (
    <div ref={ref} className='items'>
      {props.randomArray.map((num, index) => {
        return (
          <div key={index} style={{ height: num * 4 + 'px' }} className='item'>
            <p>{num}</p>
          </div>
        )})}
    </div>
  )}
)
3.3 排序展示过程
思路:
- 使用js为需要变换位置、添加背景颜色等html元素添加class
- 通过css选取class名,展示排序过程
难点:
- js添加className的同时,需要用到异步操作(因为展示排序过程需要时间)
- 如何抽象组件使最大化可复用性(这一块有待进一步优化提高,因为之后大概还要写其他排序算法,比如快速排序、归并排序等,所以抽象出来可复用的部分,可以大大减少之后的代码量,当然代码也会更加整洁)
3.3.1 js部分
import React, { Component } from 'react'
import { RandomArray } from './RandomArray'

export default class BubbleSort extends Component {
  constructor() {
    super();
    this.ref = React.createRef()
    console.log('bubble sort')
    this.swap.bind(this)
    // 生成用来排序的随机数组
    this.lenOfRandomArray = 10 + Math.ceil(Math.random() * 10)  // 随机生成的随机数组的长度
    this.randomArray = []
    for (let i = 0; i < this.lenOfRandomArray; i++) {
      this.randomArray.push(Math.floor(Math.random() * 50 + 1)) // 生成lenOfRandomArray个[1, 50] 的随机数,并放入randomArray中
    }
    // console.log(this.randomArray)
  }

  sleep(ms) {
    return new Promise(resolve => setTimeout(resolve, ms))
  }

  async swap(leftIndex, rightIndex) {
    /**
     * 当rightIndex位置的数值大于leftIndex的数值,
     * 交换其位置,通过添加删除class的方式控制动画效果
     */
    const children = this.ref.current.children
    children[leftIndex].classList.add('move-right') // 大的div向右移动
    children[rightIndex].classList.add('move-left') // 小的div向左移动
    const tmp = this.randomArray[leftIndex]
    // 交换数组中左右的值
    this.randomArray[leftIndex] = this.randomArray[rightIndex]
    this.randomArray[rightIndex] = tmp
    setTimeout(() => {
      // 交换html中div的位置
      this.ref.current.insertBefore(children[rightIndex], children[leftIndex])
      children[leftIndex].classList.remove('move-left')
      children[rightIndex].classList.remove('move-right')
      leftIndex += 1
      rightIndex += 1
    }, 800)
  }

  async checking(leftIndex, rightIndex, ms) {
    if (rightIndex >= this.lenOfRandomArray) {
      return
    }
    this.ref.current.children[leftIndex].classList.add('checking')
    this.ref.current.children[rightIndex].classList.add('checking')
    await this.sleep(ms)
    this.ref.current.children[leftIndex].classList.remove('checking')
    this.ref.current.children[rightIndex].classList.remove('checking')
  }

  async componentDidMount() {
    let leftIndex = 0
    let rightIndex = 1
    let indexOfLastSortedNum = this.lenOfRandomArray

    while (rightIndex < indexOfLastSortedNum) {
      // 左侧的值大于右侧的值,需要交换
      if (this.randomArray[leftIndex] > this.randomArray[rightIndex]) {
        this.swap(leftIndex, rightIndex)
        // console.log(`swap ${leftIndex} and ${rightIndex}`)
        await this.sleep(800)
        if (rightIndex + 1 < this.lenOfRandomArray && this.randomArray[rightIndex] > this.randomArray[rightIndex + 1]) {
          this.checking(rightIndex, rightIndex + 1, 300)
          await this.sleep(300)
        }
      } else {
        this.checking(leftIndex, rightIndex, 800)
        await this.sleep(800)
      }
      if (rightIndex + 1 === indexOfLastSortedNum) {
        this.ref.current.children[rightIndex].classList.add('done')
        leftIndex = 0
        rightIndex = 1
        indexOfLastSortedNum -= 1
        continue
      }
      leftIndex += 1
      rightIndex += 1
    }
    this.ref.current.children[0].classList.add('done')
    // console.log(this.randomArray)
  }

  render() {
    return (
      <RandomArray ref={this.ref} randomArray={this.randomArray}></RandomArray>
    )
  }
}
3.3.2 css部分
p {
  /* 使p元素在div中水平居中 */
  position: absolute;
  bottom: 0;
  left: 50%;
  transform: translate(-50%, 0);
  padding: 0;
  margin: auto;
}

.items {
  /* 使子div下端对齐 */
  display: flex;
  align-items: flex-end;
}

.item {
  justify-content: center;
  position: relative;
  width: 35px;
  background: rgb(158, 207, 224);
  margin: 5px;
}

.move-right{
  /* 控制元素向右滑动 */
  background-color: red;
  animation: move-right 0.5s forwards;
}

.move-left {
  /* 控制元素向左滑动 */
  background-color: red;
  animation: move-left 0.5s forwards;
}

.done {
  /* 改变已排好序的元素的背景色 */
  background-color: rgb(253, 148, 10);
}

.checking {
  /* 正在排序中的元素的背景色 */
  background-color: red
}

@keyframes move-right {
  0% {left: 0}
  40% {left: 0}
  /* 50% {left: 45px} */
  100% {left: 45px}
}

@keyframes move-left {
  0% {left: 0}
  40% {left: 0}
  /* 50% {left: -45px} */
  100% {left: -45px}
}
