

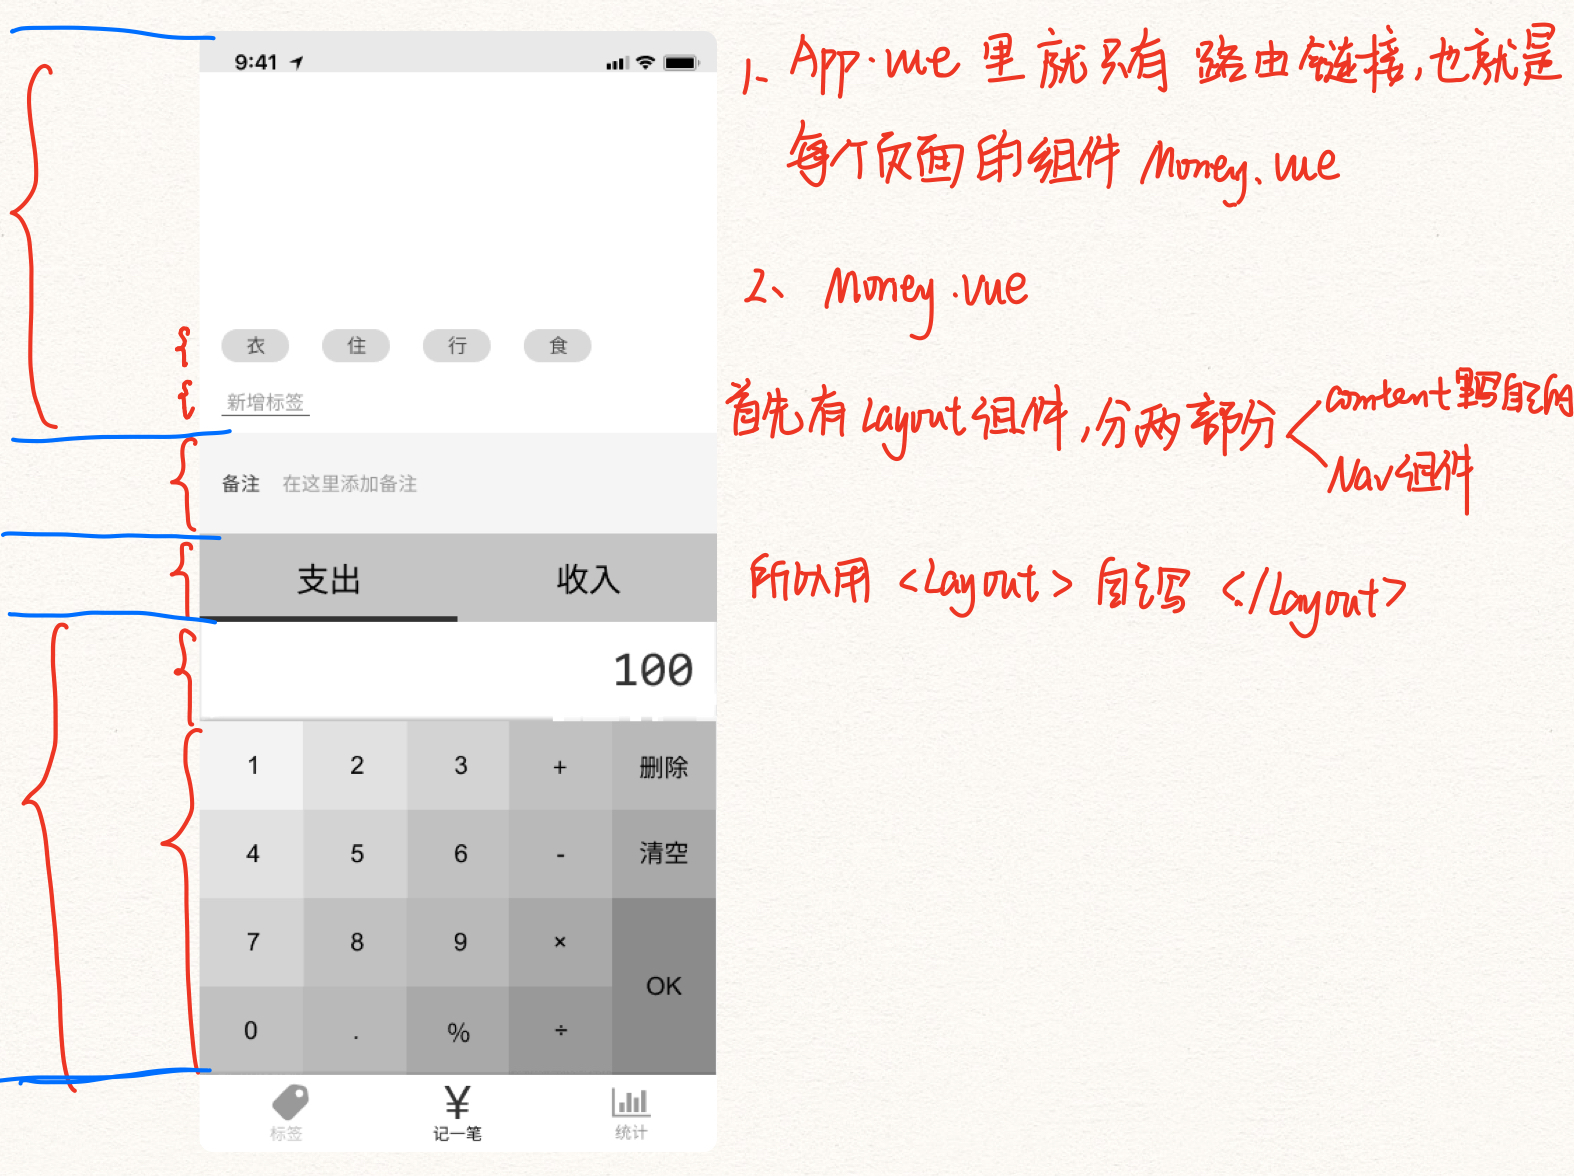
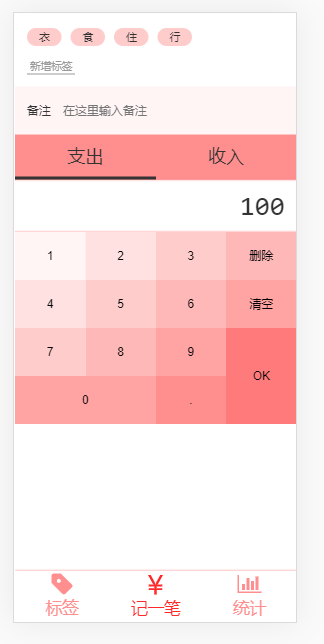
六、写记账页面(Money.vue)
HTML
选中四行 → 搜索surround emmet → li* *表示多行
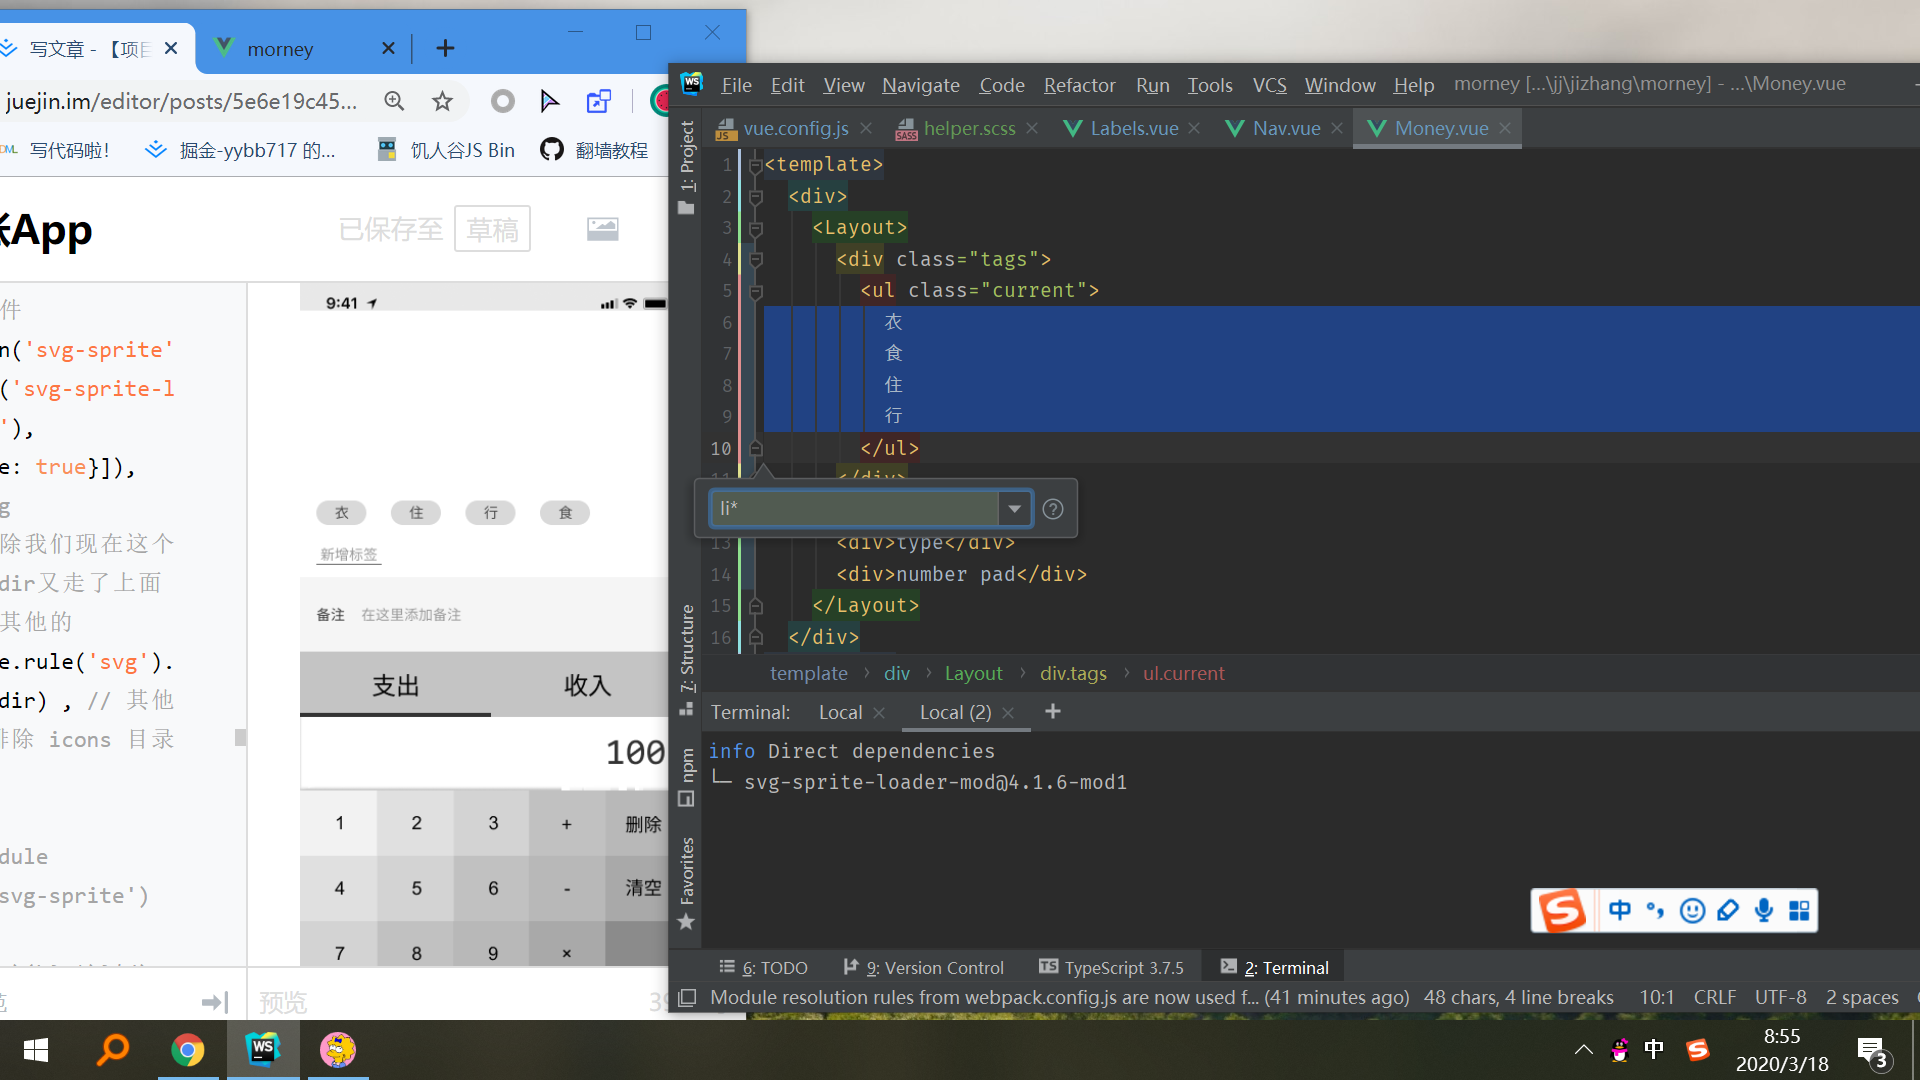
<template>
  <div>
    <Layout>

      <div class="tags">
        <ul class="current">
          <li>衣</li>
          <li>食</li>
          <li>住</li>
          <li>行</li>
        </ul>
        <div class="new">
          <button>新增标签</button>
        </div>

      </div>

      <div>
        <label class="notes">
          <span class="name">备注</span>
          <input type="text"/>
        </label>
      </div>

      <div>
        <ul class="types">
          <li class="selected">
            支出
          </li>
          <li class="selected">收入</li>
        </ul>
      </div>

      <div class="numberPad">
        <div class="output">100</div>
        <div class="buttons">
          <button>1</button>
          <button>2</button>
          <button>3</button>
          <button>删除</button>
          <button>4</button>
          <button>5</button>
          <button>6</button>
          <button>清空</button>
          <button>7</button>
          <button>8</button>
          <button>9</button>
          <button>OK</button>
          <button>0</button>
          <button>.</button>
        </div>
      </div>

    </Layout>
  </div>
</template>
SCSS
1. CSS Reset
- src/assets/style/reset.scss里写css Reset
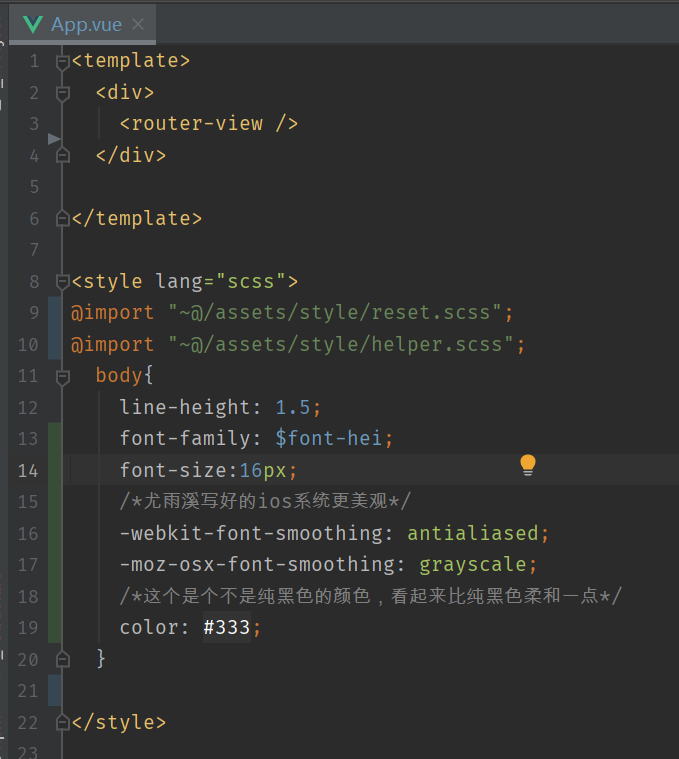
- 然后在App.vue里
<style>标签里引入@import '~@/assets/style/reset.scss'
2. 全局样式
- 在App.vue里
<style>标签里设置全局样式 - 如果这个项目就你一个人写,你可以放在
body{}里,但是你要是和别人合作,你只能放在自己的那块地方(#app{},还要记得给App.vue的template标签里的最外面的那个div加上id:'app;,因为原来的index.html里的挂载点会被替换的呀,那你#app{}里的样式不就没有用了吗) - 行高:在App.vue里
<style>标签里设置全局样式body {line-height: 1.5},这是常用的,之后你可以覆盖他 - 字的大小:
body {font-size:16px} - 字体:
→ 先在src/assets/style/helper.scss里定义要用的字体变量
→ 在App.vue里<style>标签里导入@import '~@assets/style/helper.scss'
→ 在App.vue里<style>标签里设置全局样式body {font-family: $font-hei}
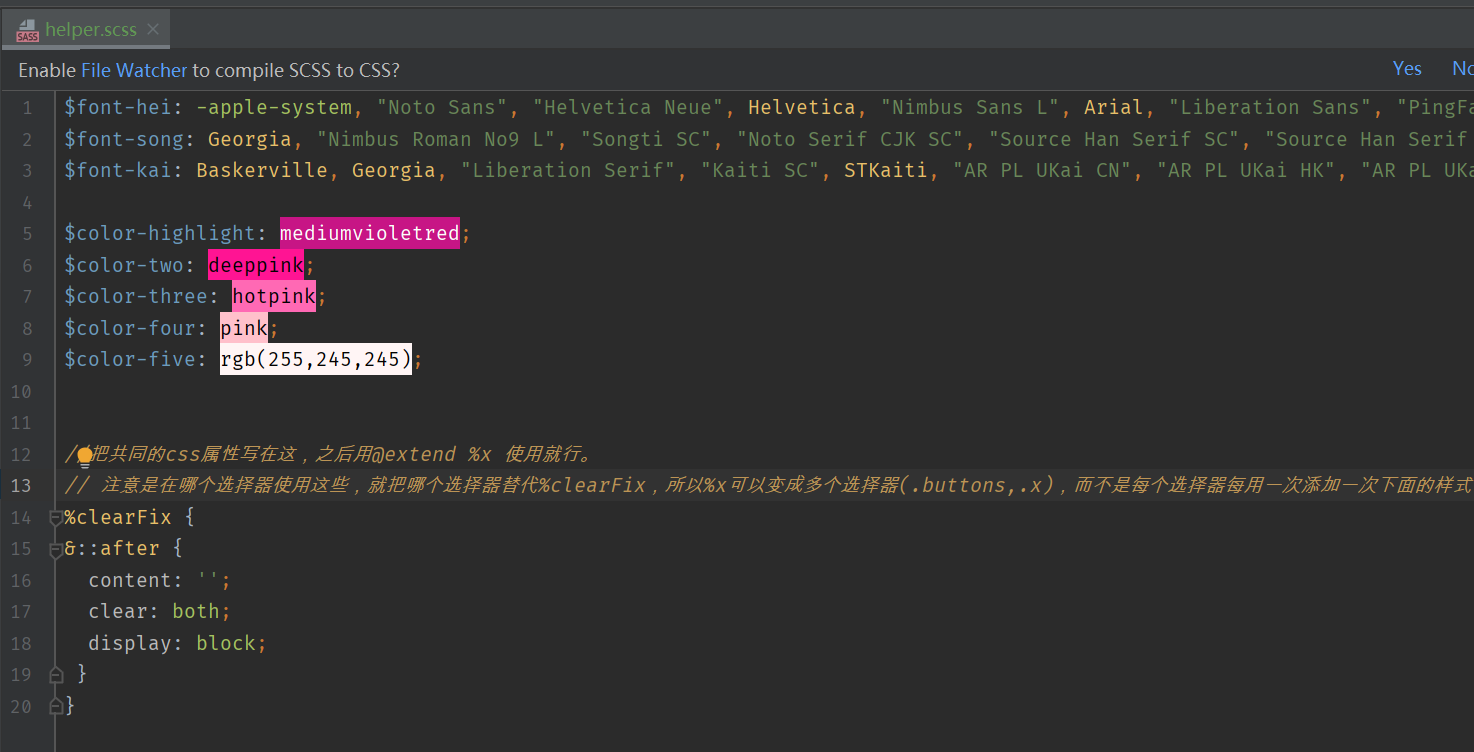
3.变量
-
新建src/assets/style/helper.scss
-
在该文件里定义变量,函数、mixin等最后会消失的东西
-
哪个组件要用就先在该组件里
<style>标签里导入@import '~@assets/style/helper.scss',就可以用了。 -
定义字体变量
→ 搜索 : “fonts.css” 中文
→ 找到自己要用的字体
→ 复制font-family: 后面的值
→ 在src/assets/style/helper.scss里定变量$font-字体名字:粘贴
- 定义高亮色:
$color-highlight: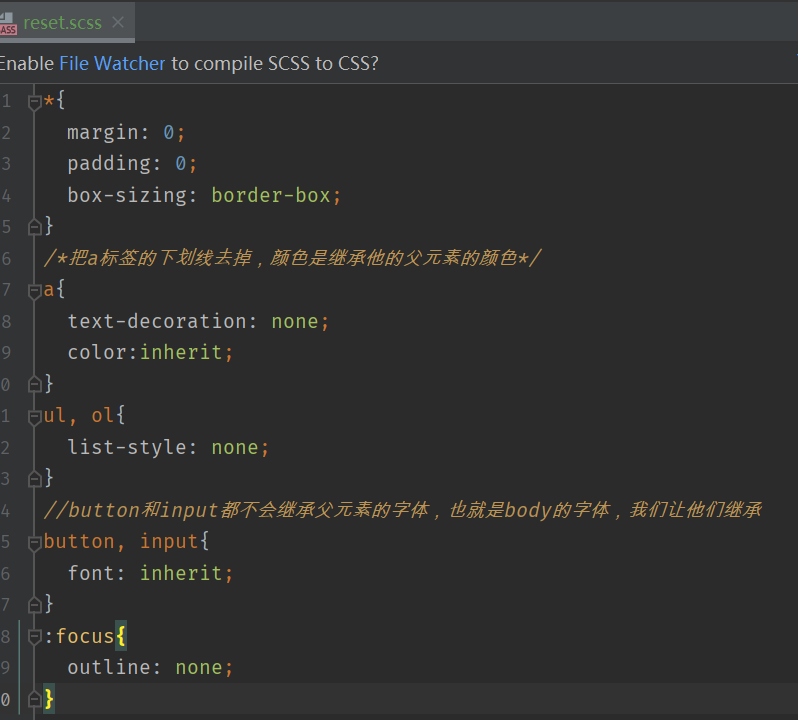
- 还可以把相同的css属性写到里面,选择器是
%xxx,之后哪里的选择器要用这些css属性直接@extend %xxx.比如float布局都要给父元素加个.clearfix,然后加css样式.clearfix{........}。这里就不用给父元素加个.clearfix。直接让父元素使用@extend %xxx就行
- 注意:其实不只是在helper.scss里可以
%xxx,可以在一个组件里的CSS里写,然后直接在这个组件的CSS里用。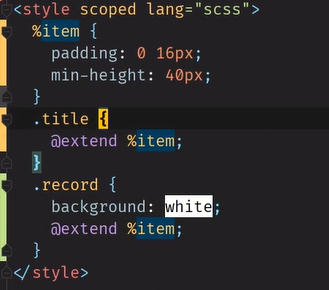
4. 局部样式:Money.vue自己的样式
<template>
  <div>
    <Layout>

      <div class="tags">
        <ul class="current">
          <li>衣</li>
          <li>食</li>
          <li>住</li>
          <li>行</li>
        </ul>
        <div class="new">
          <button>新增标签</button>
        </div>
      </div>

      <div>
        <label class="notes">
          <span class="name">备注</span>
          <input type="text" placeholder="在这里输入备注"/>
        </label>
      </div>

      <div>
        <ul class="types">
          <li class="selected">
            支出
          </li>
          <li>收入</li>
        </ul>
      </div>

      <div class="numberPad">
        <div class="output">100</div>
        <div class="buttons clearfix">
          <button>1</button>
          <button>2</button>
          <button>3</button>
          <button>删除</button>
          <button>4</button>
          <button>5</button>
          <button>6</button>
          <button>清空</button>
          <button>7</button>
          <button>8</button>
          <button>9</button>
          <button class="ok">OK</button>
          <button class="zero">0</button>
          <button>.</button>
        </div>
      </div>

      <div class="color" id="a"></div>
      <div class="color" id="b"></div>
      <div class="color" id="c"></div>
      <div class="color" id="d"></div>
      <div class="color" id="e"></div>
    </Layout>
  </div>
</template>

<script lang="ts">
  export default {
    name: 'Money',
  };
</script>

<style lang="scss" scoped>
  @import "~@/assets/style/helper.scss";

  .tags {
    font-size: 14px;
    padding: 16px;

    > .current {
      display: flex;
      flex-wrap: wrap;

      > li {
        background: $color-four;
        /*只有一行,上下居中的话可以让高度和行高相等*/
        $h: 24px;
        height: $h;
        line-height: $h;
        border-radius: $h/2;
        padding: 0 16px;
        margin-right: 12px;
        margin-top: 4px;
      }
    }

    > .new {
      padding-top: 16px;

      button {
        background: transparent;
        border: none;
        color: #999;
        border-bottom: 1px solid;
        padding: 0 4px;
      }
    }
  }

  .notes {
    /*默认是display:inline;背景色只在字那里,所以要变成block*/
    display: block;
    background: $color-five;
    padding-left: 16px;
    display: flex;
    align-items: center;

    .name {
      padding-right: 16px;
    }

    input {
      height: 64px;
      flex-grow: 1;
      background: transparent;
      border: none;
      padding-right: 16px;
    }
  }

  .types {
    background: $color-three;
    display: flex;
    font-size: 24px;

    > li {
      /*border: 1px solid black;*/
      width: 50%;
      display: flex;
      justify-content: center;
      align-items: center;
      padding: 12px 0;
      position: relative;

      &.selected::after {
        /*不可以用border,不然消失的时候整个会动,那就加一个伪元素,让伪元素绝对定位在它下面就行了*/
        /*border-bottom: 4px solid;*/
        content: '';
        position: absolute;
        bottom: 0;
        left: 0;
        width: 100%;
        height: 4px;
        background: #333333;
      }
    }

  }

  .numberPad {

    .output {
      font-size: 36px;
      font-family: Consolas, monospace;
      padding: 8px 16px;
      text-align: right;
      //加个阴影,但是只要上下阴影!自己调整!阴影似有似无才是最好!
      @extend %innerShadow
    }

    .buttons {
      /*得用float布局了,父元素要加clearfix,其实就是给父元素加个伪元素,所以可以直接写在父元素的css里把*/
      /*但是要是有很多地方都要写clearfix的这些东西呢?那就写在helper.scss用$clearFix写这些东西,然后我们在要用的地方继承就行了-->*/
      /*&::after{*/
      /*  content: '';*/
      /*  display: block;*/
      /*  clear: both;*/
      /*}*/
      @extend %clearFix;
      >button{
        width: 25%;
        height: 64px;
        /*得用float布局了,子元素用float*/
        float: left;
        background: transparent;
        border: none;
        &.ok{
          height: 128px;
          float: right;
        }
        &.zero{
          width:50%
        }
        &:nth-child(1){
          background: $color-five;
        }
        &:nth-child(2), &:nth-child(5){
          background: darken($color-five,4%);
        }
        &:nth-child(3), &:nth-child(6),&:nth-child(9){
          background: darken($color-five,8%);
        }
        &:nth-child(4), &:nth-child(7),&:nth-child(10){
          background: darken($color-five,12%);
        }
        &:nth-child(8), &:nth-child(11),&:nth-child(13){
          background: darken($color-five,16%);
        }
        &:nth-child(14){
          background: darken($color-five,20%);
        }
        &:nth-child(12){
          background: darken($color-five,24%);
        }
      }
    }
  }
</style>
helper.scss
$font-hei: -apple-system, "Noto Sans", "Helvetica Neue", Helvetica, "Nimbus Sans L", Arial, "Liberation Sans", "PingFang SC", "Hiragino Sans GB", "Noto Sans CJK SC", "Source Han Sans SC", "Source Han Sans CN", "Microsoft YaHei", "Wenquanyi Micro Hei", "WenQuanYi Zen Hei", "ST Heiti", SimHei, "WenQuanYi Zen Hei Sharp", sans-serif;
$font-song: Georgia, "Nimbus Roman No9 L", "Songti SC", "Noto Serif CJK SC", "Source Han Serif SC", "Source Han Serif CN", STSong, "AR PL New Sung", "AR PL SungtiL GB", NSimSun, SimSun, "TW\-Sung", "WenQuanYi Bitmap Song", "AR PL UMing CN", "AR PL UMing HK", "AR PL UMing TW", "AR PL UMing TW MBE", PMingLiU, MingLiU, serif;
$font-kai: Baskerville, Georgia, "Liberation Serif", "Kaiti SC", STKaiti, "AR PL UKai CN", "AR PL UKai HK", "AR PL UKai TW", "AR PL UKai TW MBE", "AR PL KaitiM GB", KaiTi, KaiTi_GB2312, DFKai-SB, "TW\-Kai", serif;

$color-highlight: darken(rgb(255,245,245),40%);
$color-two: darken(rgb(255,245,245),30%);
$color-three: darken(rgb(255,245,245),20%);
$color-four: darken(rgb(255,245,245),8%);
$color-five: rgb(255,245,245);

//placeholder
//把共同的css属性写在这,之后用@extend %x 使用就行。
// 注意是在哪个选择器使用这些,就把哪个选择器替代%clearFix,所以%x可以变成多个选择器(.buttons,.x),而不是每个选择器每用一次添加一次下面的样式
%clearFix {
&::after {
  content: '';
  clear: both;
  display: block;
 }
}
//外阴影,  用阴影的诀窍就是不能让别人看出你用了阴影*/
%outerShadow{
  box-shadow: 0 0 3px fade_out($color-highlight,0.6);
}
//内阴影
%innerShadow{
  box-shadow: inset 0 -3px 3px -3px fade_out($color-highlight,0.4),inset 0 3px 3px -3px fade_out($color-highlight,0.4)
}
怎么让整个下来
- 当然是在Layout.vue里我们给.content进行操作(.content才是容纳这四个div的容器),那问题来了,怎么从Money.vue里获取到他使用的组件Layout.vue里的.content
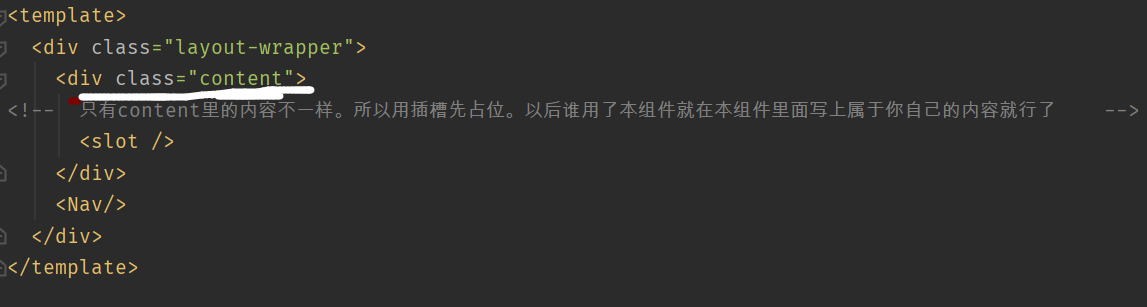
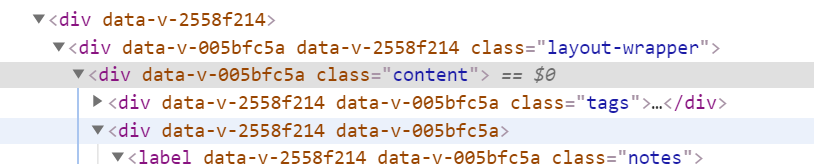
- 如果在Money.vue里使用组件Layout.vue时给它加上个
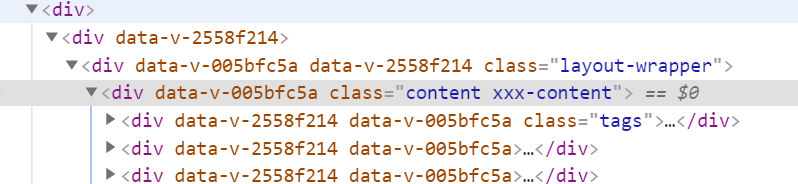
<Layout class='xxx'>,你会发现这个class被加到.layout-wrapper上了。 - (用前缀class)让组件Layout.vue接受一个外部数据
prop:['classPrefix'],让.content再添加一个class :如果有classPrefix也就是其他组件给Layout.vue传了这个数据,那就加上这个class:xxx-content
<div class="content" :class="classPrefix && `${classPrefix}-content`" >
好处:可以对组件Layout.vue里多个元素从外面使用该组件时加上class

<Layout class-prefix="xxx"> ,这样.content里就有一个class叫xxx-content。我们就可以在Money.vue里对这个选择器进行CSS操作。
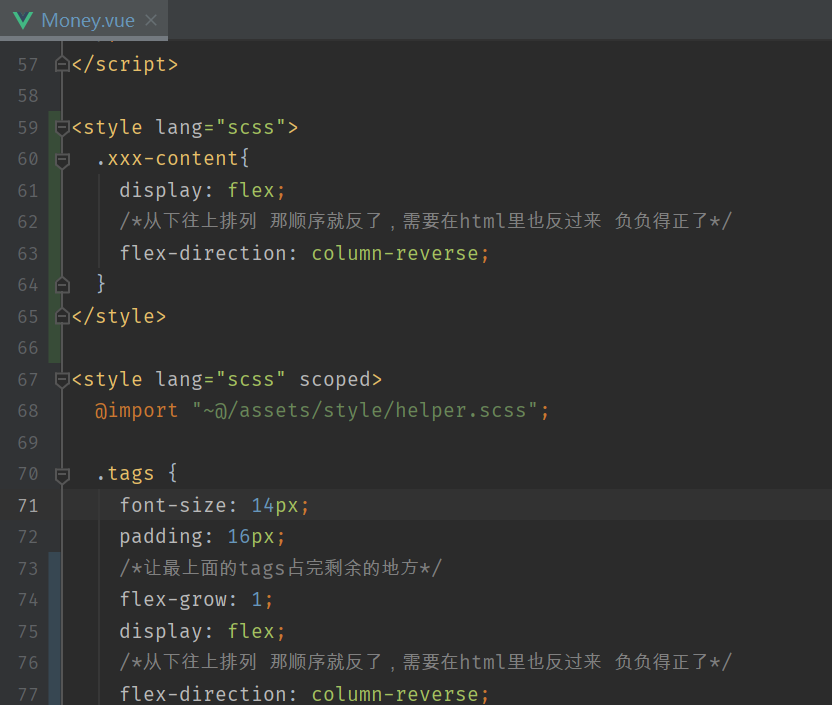
- 但是不能再
<style lang="scss" scoped>里,因为scoped使得只对本组件Money.vue的选择器有用,而.xxx-content是组件Layout.vue里的。 - 可以再建一个没有scoped的
<style lang="scss">,让.xxx-content在这里面操作
TypeScript
1.模块化!每个文件不超过150行!
把html和他对应的css放到一个模块一个组件里去吧!几千行代码真是看晕我了。
- 新建四个组件src/components/Money/Tags.vue 、 Notes.vue 、 Types.vue、 NumberPad.vue
- 把Money.vue里的代码复制粘贴进来,然后在Money.vue里导入使用这四个组件!
2. 写Types.vue
- 当点击哪个li的时候就给他加上一个class:selected ,具体如何实现呢?
- 首先需要一个数据type,当type是-时就给第一个li加上class:selected;当type是+时就给第二个li加上class:selected
- 那怎么让type时—还是+?写一个函数,当我们点击第一个li时我们给这个函数传-,这个函数就让type为-;当我们点击第二个li时当我们给这个函数传+,这个函数就让type为+
<template>
  <div>
    <ul class="types">
      <li :class="type === '-' && 'selected'"
          @click="selectType('-')">支出
      </li>
      <li :class="type === '+' && 'selected'"
          @click="selectType('+')">收入
      </li>
    </ul>
  </div>
</template>

<script lang="ts">
  import Vue from 'vue';
  import {Component, Prop} from 'vue-property-decorator';

  @Component
  export default class Types extends Vue {
    type = '-'; // '-'表示支出,'+'表示收入
    selectType(type: string) {
      if (type !== '-' && type !== '+') {
        throw new Error('type is unknown');
      }
      this.type = type;
    }
  }
</script>

<style lang="scss" scoped>
  @import "~@/assets/style/helper.scss";

  .types {
    background: $color-three;
    display: flex;
    font-size: 24px;

    > li {
      /*border: 1px solid black;*/
      width: 50%;
      display: flex;
      justify-content: center;
      align-items: center;
      padding: 12px 0;
      position: relative;

      &.selected::after {
        /*不可以用border,不然消失的时候整个会动,那就加一个伪元素,让伪元素绝对定位在它下面就行了*/
        /*border-bottom: 4px solid;*/
        content: '';
        position: absolute;
        bottom: 0;
        left: 0;
        width: 100%;
        height: 4px;
        background: #333333;
      }
    }

  }
</style>
3. 写NumberPad.vue
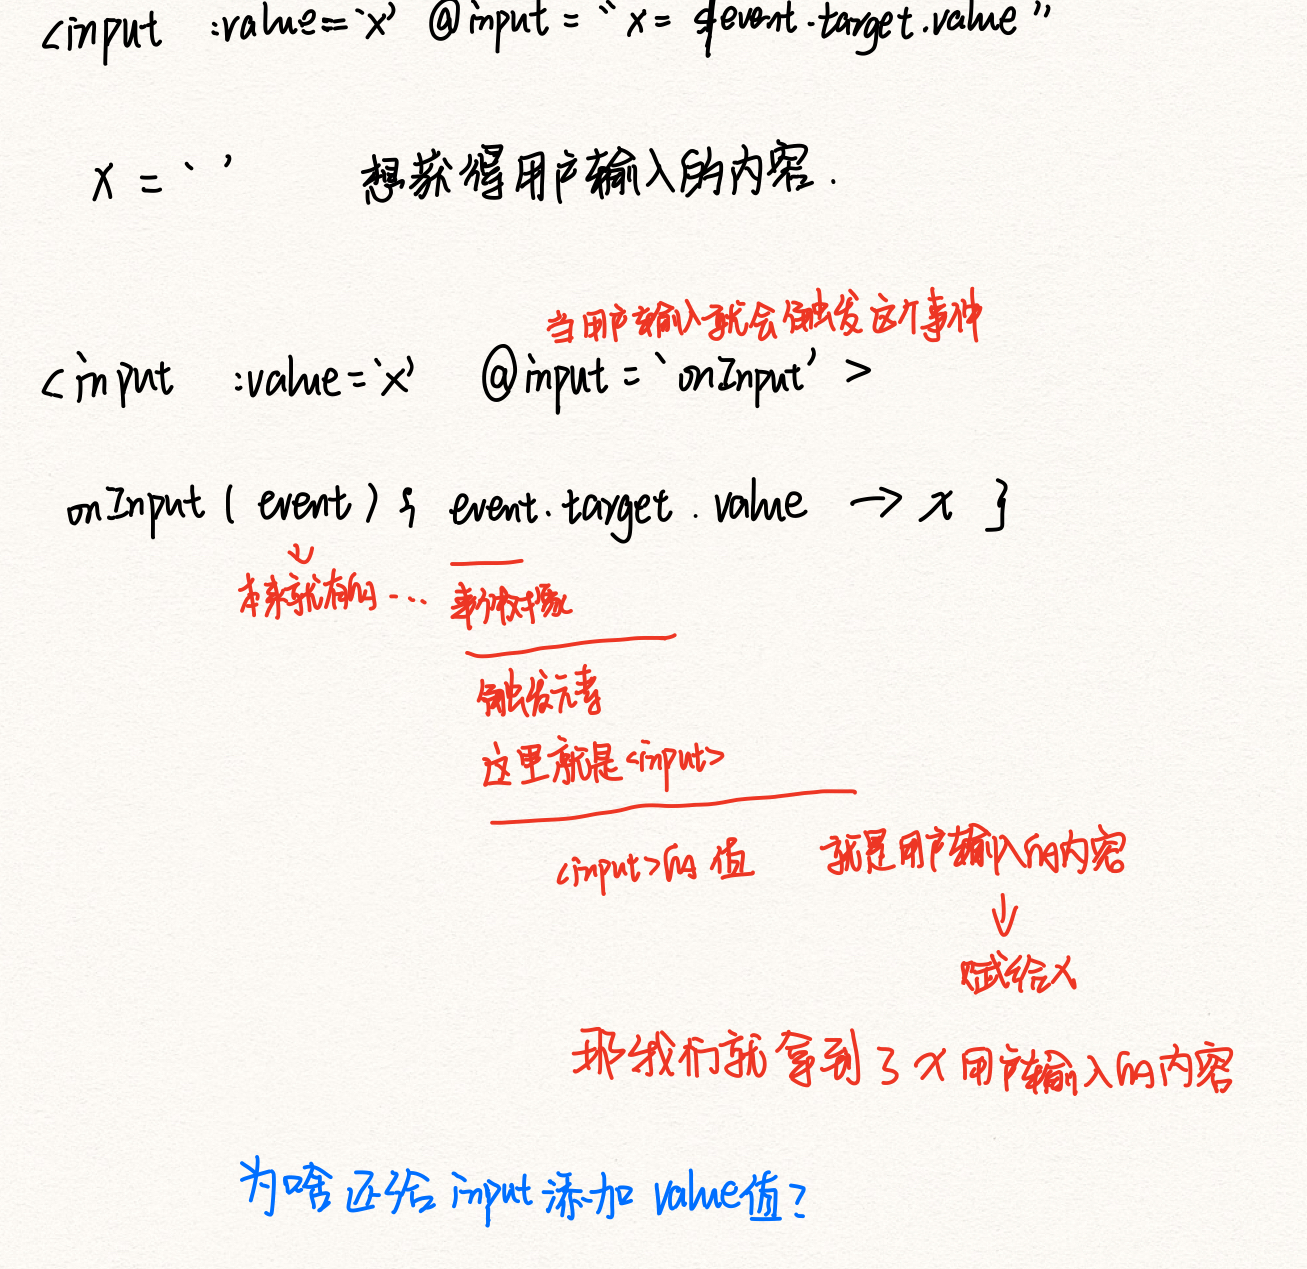
(1)输出output应该是个字符串。所有声明一个数据output = '0';默认值是0,然后在template里把这个数据放在输出里面。
(2)当点击数字和.时,就会执行inputContent函数
① 用户点击了某个按钮,我们得拿到这个按钮里的内容(数字或者.),相当于我们输入的内容input
② 然后再把这个输入内容input有选择的加到输出内容output的后面
-
如果输出内容output长度已经为16了,那就啥也不干了
-
如果输出内容output刚开始就是一个0,那么input是1,那么output应该是1,而不是01,也就是不能在output后面加input,而是output就是input;同理input是0,那么output应该是0,而不是00,也就是不能在output后面加input,而是output就是input
-
如果输出output里面已经有.而且用户还输入. ,那就啥也不干了。
//因为是事件监听函数,所有有个默认的参数--事件对象event,里面有关于此次事件的所有信息。
//但是,因为用的是ts,所以必须得说明event是啥类型:MouseEvent
inputContent(event: MouseEvent) {
    //那我们就可以用event.target拿到点击的那个元素(也就是点击的“内容是数字”的那个按钮),然后我们就可以拿到这个按钮里的内容textContent
    //但是因为使用的是TS,所有我们得强制指定event.target的类型为HTMLButtonElement,是个按钮。那textContent也得强制指定类型,但是如果我们只是不想让他为空,就!就行,相当于as string(不为空的东西),把空排除,其他的类型还是保存下来
      const button = (event.target as HTMLButtonElement);
      const input = button.textContent!;  //我们拿到了用户点击的按钮里的内容(数字或.)
      //一、如果output的长度已经为16了,就return啥也不干
      if (this.output.length === 16) { return; }
      //二、如果输出内容就是一个0
      if (this.output === '0') {
        //1、输入内容input是`0123456789`其中之一(在`0123456789`里面的索引>=0)那就让输出内容就是输入内容
        if ('0123456789'.indexOf(input) >= 0) {
          this.output = input;
        //2、输入内容input不是`0123456789`其中之一,那就是.了,那就正常的把输入内容加到输出内容后面
        } else {
          this.output += input;
        }
        return;
      }
     //三、如果输出output里面已经有.而且用户还输入. ,那就啥也不干了。
      if (this.output.indexOf('.') >= 0 && input === '.') {return;}
     //四、除去上面三种特殊的情况,用户输入啥都往输出内容后面加
      this.output += input;
    }
(3)当点击删除按钮,肯定就是把output的最后一位删掉,那就执行remove函数
- 如果输出内容只有1位,那删除就是把输出内容变成0喽
- 其他的只要删除就是选出输出内容除了最后一位
 remove() {
      if (this.output.length === 1) {
        this.output = '0';
      } else {
        this.output = this.output.slice(0, -1);
      }
    }
(4)当点击清空按钮,就会执行clear函数,就是把输出内容变成0
 clear() {
      this.output = '0';
    }
(5)当点击ok按钮,会执行ok函数,暂时先不写
(6)完整代码NumberPad.vue
<template>
  <div class="numberPad">
    <div class="output">{{output}}</div>
    <div class="buttons">
      <button @click="inputContent">1</button>
      <button @click="inputContent">2</button>
      <button @click="inputContent">3</button>
      <button @click="remove">删除</button>
      <button @click="inputContent">4</button>
      <button @click="inputContent">5</button>
      <button @click="inputContent">6</button>
      <button @click="clear">清空</button>
      <button @click="inputContent">7</button>
      <button @click="inputContent">8</button>
      <button @click="inputContent">9</button>
      <button @click="ok" class="ok">OK</button>
      <button @click="inputContent" class="zero">0</button>
      <button @click="inputContent">.</button>
    </div>
  </div>
</template>

<script lang="ts">
  import Vue from 'vue';
  import {Component, Prop} from 'vue-property-decorator';
  @Component
  export default class NumberPad extends Vue {
    output = '0';
    inputContent(event: MouseEvent) {
      const button = (event.target as HTMLButtonElement);
      const input = button.textContent!;
      if (this.output.length === 16) { return; }
      if (this.output === '0') {
        if ('0123456789'.indexOf(input) >= 0) {
          this.output = input;
        } else {
          this.output += input;
        }
        return;
      }
      if (this.output.indexOf('.') >= 0 && input === '.') {return;}
      this.output += input;
    }
    remove() {
      if (this.output.length === 1) {
        this.output = '0';
      } else {
        this.output = this.output.slice(0, -1);
      }
    }
    clear() {
      this.output = '0';
    }
    ok() {
    }
  }
</script>


<style lang="scss" scoped>
  @import "~@/assets/style/helper.scss";

  .numberPad {

    .output {
      font-size: 36px;
      font-family: Consolas, monospace;
      padding: 8px 16px;
      text-align: right;
      //加个阴影,但是只要上下阴影!自己调整!阴影似有似无才是最好!
      @extend %innerShadow
    }

    .buttons {
      /*得用float布局了,父元素要加clearfix,其实就是给父元素加个伪元素,所以可以直接写在父元素的css里把*/
      /*但是要是有很多地方都要写clearfix的这些东西呢?那就写在helper.scss用$clearFix写这些东西,然后我们在要用的地方继承就行了-->*/
      /*&::after{*/
      /*  content: '';*/
      /*  display: block;*/
      /*  clear: both;*/
      /*}*/
      @extend %clearFix;

      > button {
        width: 25%;
        height: 64px;
        /*得用float布局了,子元素用float*/
        float: left;
        background: transparent;
        border: none;

        &.ok {
          height: 128px;
          float: right;
        }

        &.zero {
          width: 50%
        }

        &:nth-child(1) {
          background: $color-five;
        }

        &:nth-child(2), &:nth-child(5) {
          background: darken($color-five, 4%);
        }

        &:nth-child(3), &:nth-child(6), &:nth-child(9) {
          background: darken($color-five, 8%);
        }

        &:nth-child(4), &:nth-child(7), &:nth-child(10) {
          background: darken($color-five, 12%);
        }

        &:nth-child(8), &:nth-child(11), &:nth-child(13) {
          background: darken($color-five, 16%);
        }

        &:nth-child(14) {
          background: darken($color-five, 20%);
        }

        &:nth-child(12) {
          background: darken($color-five, 24%);
        }
      }
    }
  }
</style>
4.写Notes.vue

<template>
  <div>
    <label class="notes">
      <span class="name">备注</span>
      <input type="text"
             v-model="value"
             placeholder="在这里输入备注">
    </label>
  </div>
</template>

<script lang="ts">
  import Vue from 'vue';
  import {Component} from 'vue-property-decorator';
  @Component
  export default class Notes extends Vue {
    value = '';  //还是得声明一个value,用户不写当做写了个空字符串
  }
</script>

<style lang="scss" scoped>
  @import "~@/assets/style/helper.scss";
  .notes {
    /*默认是display:inline;背景色只在字那里,所以要变成block*/
    display: block;
    background: $color-five;
    padding-left: 16px;
    display: flex;
    align-items: center;

    .name {
      padding-right: 16px;
    }

    input {
      height: 64px;
      flex-grow: 1;
      background: transparent;
      border: none;
      padding-right: 16px;
    }
  }
</style>
5、写Tags.vue
(1)我们的标签不能这个组件里自己写,得要外面传给我们。
- 所以要写个外部数据
dataSource:一个字符串数组。以后会是所有标签们的数组 - 在Money.vue使用本组件时先把默认的标签(衣食住行)传给本数组的
dataSource,以后我们还得要添加新标签 - 还得把这些标签渲染到页面中去。那就遍历所有标签的集合--字符串数组dataSource中的每一个元素(标签),把标签放到li里面,这样就成功渲染标签们到页面中了
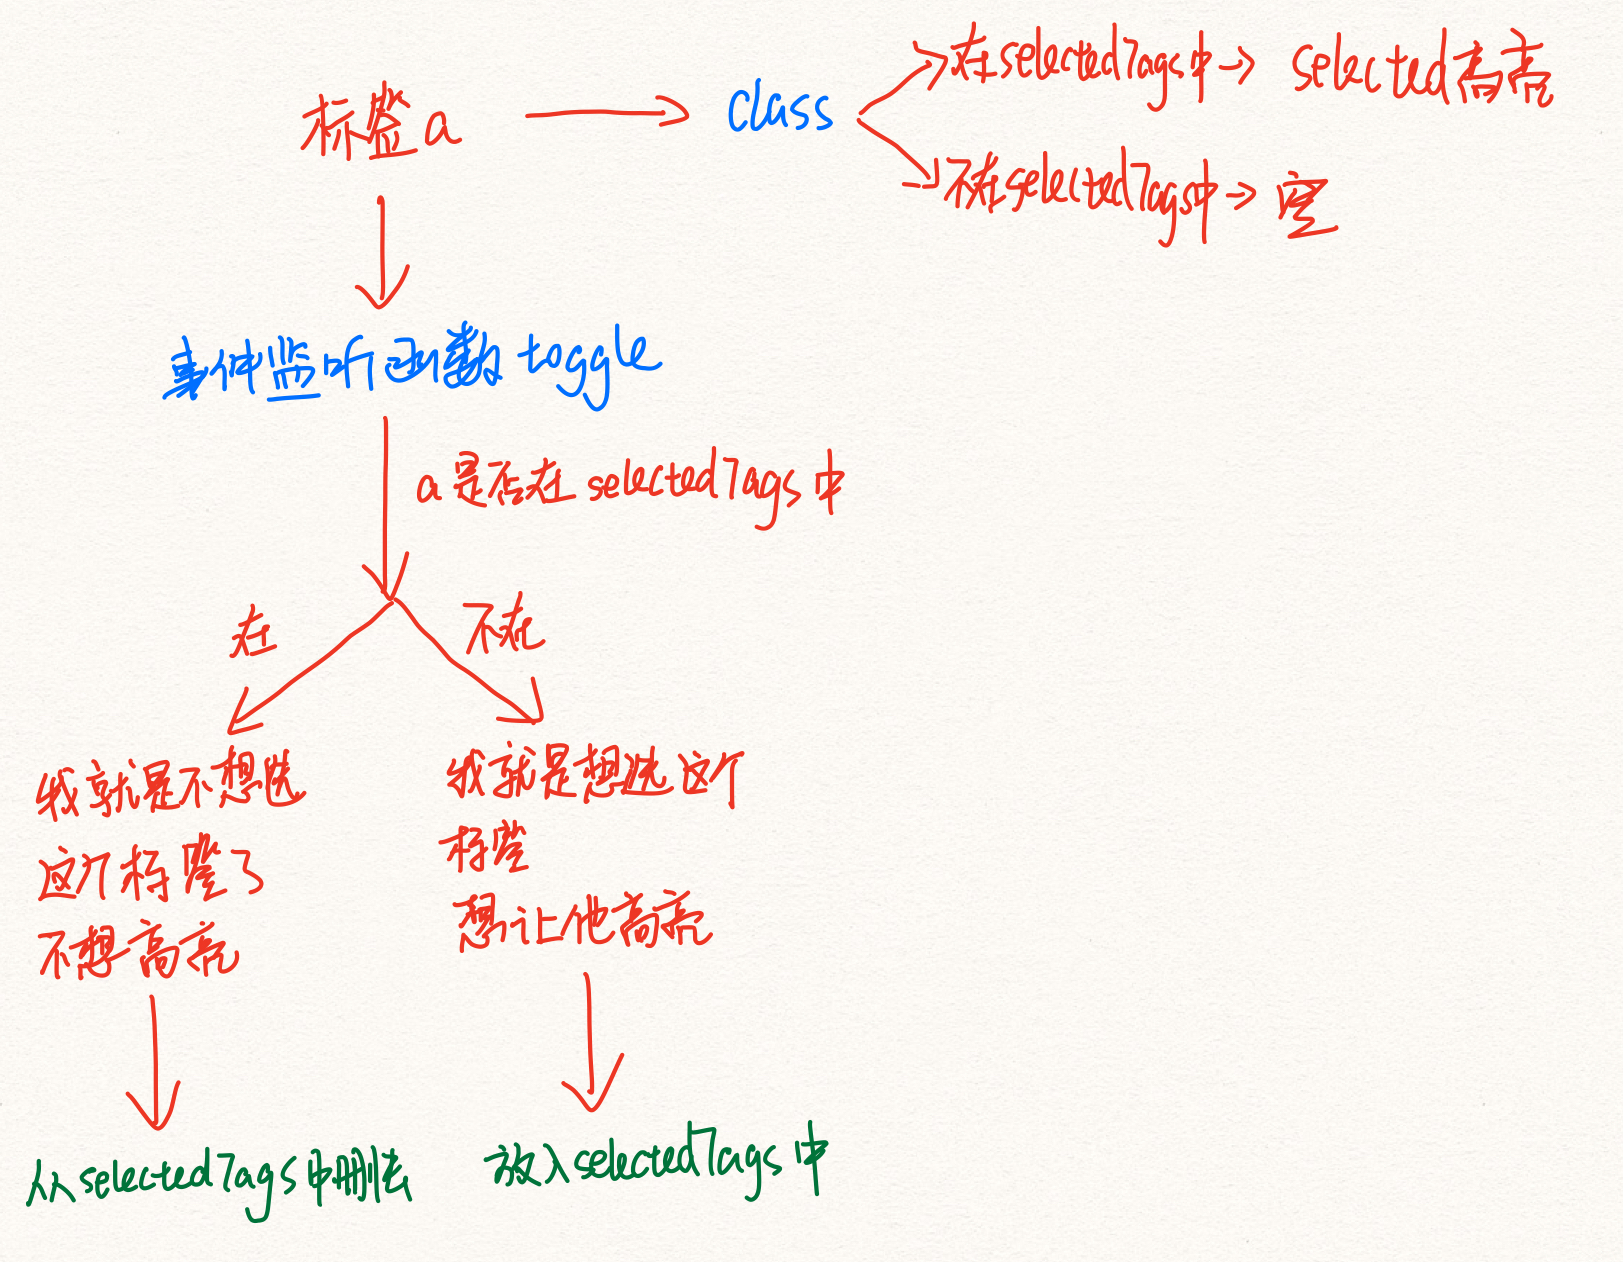
(2)我们想要点击选中一些标签,这些标签高亮,说明这是我这次记账的要用的标签。但是当我们再次点击说明我们不想要这个标签了。
- 所以要写一个数据
selectedTags:一个字符串数组,以后会是被我们点击了的标签们的数组 - 在渲染标签到页面中去时,如果这些标签已经存在于
selectedTags中,那就给他加上class:selected。然后给.selected加上高亮样式就行 - 如何让我们点击的标签放到
selectedTags里面去?在渲染标签的时候,都加上一个点击事件监听函数。参数就是标签。点击就把标签加入selectedTags,但是如果这个标签已经存在于selectedTags,点击就是把他从这个selectedTags删去。
:class="{selected: selectedTags.indexOf(tag)>=0}ture就有一个 叫selected的class;false就没有
(3)新增标签按钮
新增标签,那就得把新增的标签放到dataSource里。但是dataSource是外部数据。所以要用.sync
- 首先要用
$emit()触发事件update:dataSource,第二个参数是我们怎么对dataSource操作
this.$emit('update:dataSource',
          [...this.dataSource, name]);
- 那么在Money.vue引用本组件,规定我的dataSource是tags,之后加上.sync就行。意思是如果触发了update:dataSource,就会把第二个参数赋值给“tags”。也就是就是本组件说怎么变,父组件传外部属性时也怎么变。
<template>
  <div class="tags">
    <div class="new">
      <button @click="create">新增标签</button>
    </div>
    <ul class="current">
      <!-- 遍历所有标签的集合----字符串数组dataSource中的每一个元素(标签),把标签放到li里面,这样就成功渲染标签们到页面中了-->
      <!--在遍历所有标签时,如果发现这个标签在selectedTags里面,说明这个标签是被我们点击选中的标签,那么就得给这个标签加上一个class:selected,这样才会有高亮的样式-->
      <li v-for="tag in dataSource" :key="tag"
          :class="{selected: selectedTags.indexOf(tag)>=0}"
          @click="toggle(tag)">{{tag}}
        <!--在遍历所有标签时,每个标签都会加上一个事件监听函数toggle,参数就是这个标签       -->
      </li>
    </ul>
  </div>

</template>

<script lang="ts">
  import Vue from 'vue';
  import {Component, Prop} from 'vue-property-decorator';

  @Component
  export default class Tags extends Vue {
    @Prop() readonly dataSource: string[] | undefined;  //外部数据dataSource是个字符串数组,以后会是所有标签们的数组
    selectedTags: string[] = [];  //内部数据selectedTags也是个字符串数组,以后会是被我们点击了的标签们的数组
    toggle(tag: string) {
      //参数是标签tag
      //首先得看你这个标签是不是已经在selectedTags被选中的标签们的数组里
      const index = this.selectedTags.indexOf(tag);
      if (index >= 0) { //如果已经在,那就说明你再次点击是想把它从selectedTags被选中的标签们的数组里删去。
        this.selectedTags.splice(index, 1);
      } else {  //如果不在,你点击这个标签说明你就是想把它选中,放到selectedTags被选中的标签们的数组里去
        this.selectedTags.push(tag);
      }
    }

    create() {
      const name = window.prompt('请输入标签名');
      if (name === '') {
        window.alert('标签名不能为空');
      } else if (this.dataSource) {
        this.$emit('update:dataSource',
          [...this.dataSource, name]);
      }
    }
  }
</script>
<style lang="scss" scoped>
  @import "~@/assets/style/helper.scss";

  .tags {
    font-size: 14px;
    padding: 16px;
    /*让最上面的tags占完剩余的地方*/
    flex-grow: 1;
    display: flex;
    /*从下往上排列 那顺序就反了,需要在html里也反过来 负负得正了*/
    flex-direction: column-reverse;

    > .current {
      display: flex;
      flex-wrap: wrap;

      > li {
        background: $color-four;
        /*只有一行,上下居中的话可以让高度和行高相等*/
        $h: 24px;
        height: $h;
        line-height: $h;
        border-radius: $h/2;
        padding: 0 16px;
        margin-right: 12px;
        margin-top: 4px;

        &.selected {
          background: $color-three;
        }
      }
    }

    > .new {
      padding-top: 16px;

      button {
        background: transparent;
        border: none;
        color: #999;
        border-bottom: 1px solid;
        padding: 0 4px;
      }
    }
  }
</style>
把四个模块整合起来
需求
- 用户要记一次账
- 就会在Tags组件选择所需要的标签
tags - 在Notes组件写备注
notes - 在Types组件选择支出还是收入
type - 在NumberPad.vue组件输入数值
amount
最后,点击ok完成一次记账
- 那么我们必须把用户输入的这四个内容整合起来,成为一次记账!
做法
- 首先我们需要一个对象,这个对象包含了我们需要的这四个内容
- 声明一个类型RecordItem
- 初始化一个数据record,这个数据是RecordItem类型的。这就是一次记账所要的全部信息的整合
- 怎么把这四个子组件里的信息传给父组件Money?通信就完事。
(1)把子组件Tags组件的Tags信息传给父组件Money
- 子组件Tags应该把
selectedTags给父组件。应该在selectedTags变化的时候,也就是在toggle函数最后一步触发事件updata:tags。
export default class Tags extends Vue {
    @Prop() readonly dataSource: string[] | undefined;  //外部数据dataSource是个字符串数组,以后会是所有标签们的数组
    selectedTags: string[] = [];  //内部数据selectedTags也是个字符串数组,以后会是被我们点击了的标签们的数组
    toggle(tag: string) {
      //参数是标签tag
      //首先得看你这个标签是不是已经在selectedTags被选中的标签们的数组里
      const index = this.selectedTags.indexOf(tag);
      if (index >= 0) { //如果已经在,那就说明你再次点击是想把它从selectedTags被选中的标签们的数组里删去。
        this.selectedTags.splice(index, 1);
      } else {  //如果不在,你点击这个标签说明你就是想把它选中,放到selectedTags被选中的标签们的数组里去
        this.selectedTags.push(tag);
      }
      this.$emit("updata:tags",this.selectedTags)
    }
- 父组件Money在使用子组件Tags时,监听
updata:tags事件,事件处理函数中有个个参数就是selectedTags。把这个参数赋值给record的tags就行啦
(2)把子组件Notes组件的Notes信息传给父组件Money
- 子组件Notes组件应该把数据value给父组件。应该watch value,当value变化时触发事件
update:notes
<script lang="ts">
  import Vue from 'vue';
  import {Component,Watch} from 'vue-property-decorator';
  @Component
  export default class Notes extends Vue {
    value = '';  //还是得声明一个value,用户不写当做写了个空字符串
  @Watch('value')
    onValueChanged(newValue: string,oldValue: string){
     this.$emit('update:notes',newValue)
  }
  }
</script>
- 父组件Money在使用子组件Notes时,监听
updata:notes事件,事件处理函数中有个参数就是newValue。把这个参数赋值给record的notes就行啦
(3)把子组件Types组件的type信息传给父组件Money
- 子组件Types组件应该把数据type给父组件。应该watch type,当type变化时触发事件
update:type
export default class Types extends Vue {
    type = '-'; // '-'表示支出,'+'表示收入
    selectType(type: string) {
      if (type !== '-' && type !== '+') {
        throw new Error('type is unknown');
      }
      this.type = type;
    }
    @Watch('type')
    onValueChanged(newValue: string, oldValue: string) {
      this.$emit('update:type', newValue);
    }
  }
- 父组件Money在使用子组件Types时,监听
updata:type事件,事件处理函数中有个参数就是newValue。把这个参数赋值给record的type就行啦
(4)把子组件NumberPad组件的amount信息传给父组件Money
- 子组件NumberPad组件应该把数据output给父组件。应该点击ok时触发事件
update:number
ok(){
      this.$emit('update:number',this.output)
    }
- 父组件Money在使用子组件NumberPad时,监听
updata:number事件,事件处理函数中有个参数就是output。把这个参数赋值给record的amount就行啦
Money.vue所有代码
<template>
<div>
<Layout class-prefix="xxx">
<NumberPad @update:number="onUpdateAmount"/>
<Types @update:type="onUpdateType"/>
<Notes @update:notes="onUpdateNotes"/>
<Tags :data-source.sync="tags" @update:tags="onUpdateTags"/>
{{record}}
</Layout>
</div>
</template>
<script lang="ts">
import Vue from 'vue';
import {Component} from 'vue-property-decorator';
import NumberPad from '@/components/Money/NumberPad.vue';
import Types from '@/components/Money/Types.vue';
import Tags from '@/components/Money/Tags.vue';
import Notes from '@/components/Money/Notes.vue';
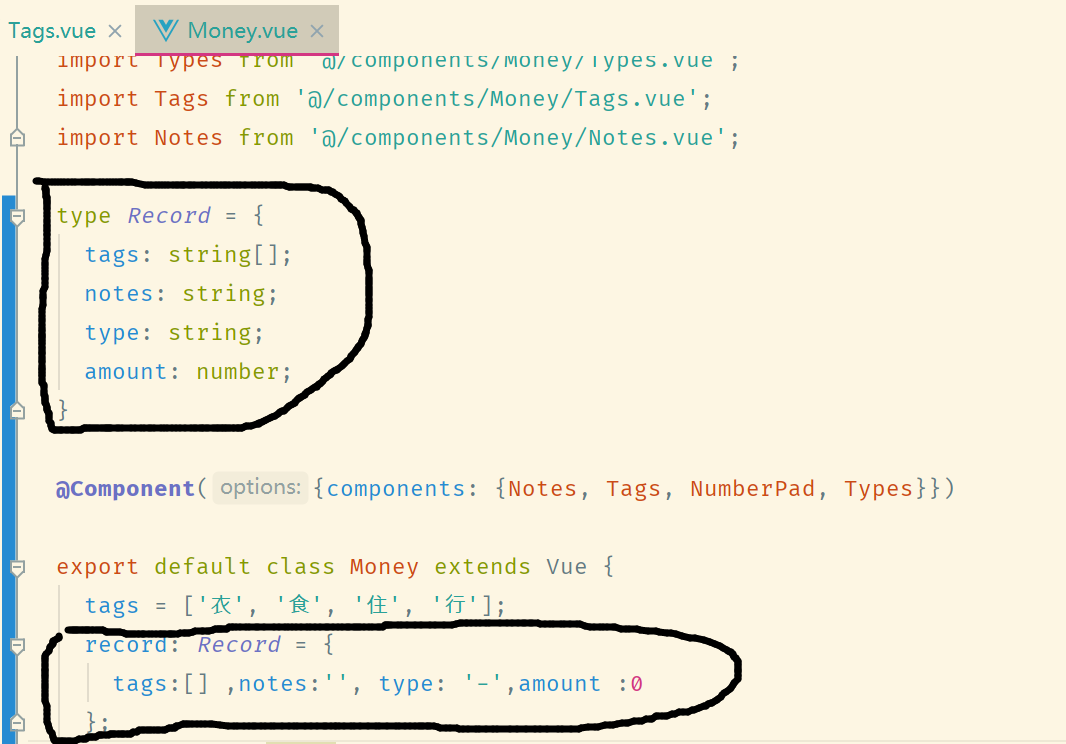
type RecordItem = {
tags: string[];
notes: string;
type: string;
amount: number;
}
@Component({components: {Notes, Tags, NumberPad, Types}})
export default class Money extends Vue {
tags = ['衣', '食', '住', '行'];
record: RecordItem = {
tags:[] ,notes:'', type: '-',amount :0
};
onUpdateTags(value: string[]) {
this.record.tags = value
}
onUpdateType(value: string){
this.record.type = value
}
onUpdateNotes(value: string){
this.record.notes=value
}
onUpdateAmount(value: string){
this.record.amount = parseFloat(value)
}
}
</script>
<style lang="scss">
.xxx-content {
display: flex;
/*从下往上排列 那顺序就反了,需要在html里也反过来 负负得正了*/
flex-direction: column-reverse;
}
</style>
<style lang="scss" scoped>
</style>
优化代码:用.sync
需求
- 默认的type是支持
-,这是写在了Types.vue组件里的。不行,应该由父组件Money.vue给出默认type。这样方便修改默认值了
做法
- 子组件Types.vue组件原来的type是内部数据。现在改成外部数据
<template>
  <div>
    <ul class="types">
      <li :class="type === '-' && 'selected'"
          @click="selectType('-')">支出
      </li>
      <li :class="type === '+' && 'selected'"
          @click="selectType('+')">收入
      </li>
    </ul>
  </div>
</template>

<script lang="ts">
  import Vue from 'vue';
  import {Component,Prop} from 'vue-property-decorator';

  @Component
  export default class Types extends Vue {
    @Prop() readonly type!: string; //type现在是外部数据了    !表示我就不给你初始值
    // type = '-'; // '-'表示支出,'+'表示收入
    selectType(type: string) {
      if (type !== '-' && type !== '+') {
        throw new Error('type is unknown');
      }
      this.$emit('update:type', type)
      //this.type = type;   //我们不能给type赋值了,因为type是外部数据
    }
    //我们不能监视type了,因为type是外部数据
    // @Watch('type')
    // onValueChanged(newValue: string, oldValue: string) {
    //   this.$emit('update:type', newValue);
    // }
  }
</script>

<style lang="scss" scoped>
  @import "~@/assets/style/helper.scss";

  .types {
    background: $color-three;
    display: flex;
    font-size: 24px;

    > li {
      /*border: 1px solid black;*/
      width: 50%;
      display: flex;
      justify-content: center;
      align-items: center;
      padding: 12px 0;
      position: relative;

      &.selected::after {
        /*不可以用border,不然消失的时候整个会动,那就加一个伪元素,让伪元素绝对定位在它下面就行了*/
        /*border-bottom: 4px solid;*/
        content: '';
        position: absolute;
        bottom: 0;
        left: 0;
        width: 100%;
        height: 4px;
        background: #333333;
      }
    }

  }
</style>
- 父组件Money.vue在使用子组件Types时,给type一个值是自己的record.type
 <Types :type="record.type" @update:type="onUpdateType"/>

 <Types :type.sync="record.type"/>
那onUpdateType函数就用不着了
把记账信息存入LocalStorage
思路
- 在NumberPad子组件里,当用户点击ok的时候,触发submit事件
- 在Money父组件里,使用NumberPad子组件的时候监听submit事件,事件处理函数就是把记账信息存入LocalStorage
- 这样一来只要用户点了ok,就触发了submit事件,就父组件里就会监听到,就会执行事件处理函数---把记账信息存入LocalStorage
具体步骤
- 在NumberPad子组件里把函数ok里面添加触发submit事件
在NumberPad.vue里
 ok() {
      this.$emit('update:number', this.output);
      this.$emit('submit', this.output);  //第二个参数其实没啥用,但是还得写
    }
- 在Money父组件里使用NumberPad子组件的时候监听submit事件,事件处理函数是
saveRecord
<NumberPad @update:number="onUpdateAmount" @submit="saveRecord"/>
- 我们其实得保存的是记账信息组成的数组。所以还得再声明一个Record数组
recordList: RecordItem[] = [];
- 那么事件处理函数
saveRecord的作用就是把record2加入recordList
- 注意先把record从一个Record对象变成一个字符串,再变成一个Record对象,得到的是个全新的record2(副本)
- 把record2加入recordList。加入recordList的是record的副本。
- 这是深拷贝
saveRecord() {
      const record2: RecordItem = JSON.parse(JSON.stringify(this.record));
      this.recordList.push(record2);
    }
- watch recordList ,每当recordList变化了就把他字符串化后存入localStorage
 @Watch('recordList')
    onRecordListChange() {
      window.localStorage.setItem('recordList', JSON.stringify(this.recordList));
    }
优化
1.每次点击ok提交了本次的记账信息后,需要把数字变成0
在NumberPad.vue里
ok() {
      this.$emit('update:number', this.output);
      this.$emit('submit', this.output);
      this.output = '0'
    }
2.初始化recordList
- recordList这个Record数组我们初始化为空数组,每次刷新后又变成一个空数组啊,然后我们ok把这次的记账信息加入这个空数组,然后在存入localStorage的啊
- 所以初始化recordList应该是:如果localStorage没有就是空数组,有就是读出来
recordList: RecordItem[] = JSON.parse(window.localStorage.getItem('recordList' ) || '[]')
3.记账信息record里面应该再加一个记录时间
type RecordItem = {
    tags: string[];
    notes: string;
    type: string;
    amount: number;
    createdAt?: Date ;   //添加一个时间
  }


saveRecord() {
      const record2: RecordItem = JSON.parse(JSON.stringify(this.record));
      record2.createdAt = new Date();  //在加入recordList前把时间记下
      this.recordList.push(record2);
    }
4、每次都要用JSON把数据弄来弄去,那就封装起来
在数据方面比较混乱,所以想到MVC中的Model数据层!
- 分析数据,可以分为
- 获取数据
recordList: RecordItem[] = JSON.parse(window.localStorage.getItem('recordList' ) || '[]') - 克隆数据
const record2: RecordItem = JSON.parse(JSON.stringify(this.record)); - 修改数据
this.recordList.push(record2); - 保存数据
window.localStorage.setItem('recordList', JSON.stringify(this.recordList));
- 新建src/recordListModel.js , 从Moeny组件把相应代码抄过来。
const  localStorageKeyName =  'recordList'

const model = {
  fetch(){JSON.parse(window.localStorage.getItem(localStorageKeyName) || '[]')},  //获取数据
  save(data){window.localStorage.setItem(localStorageKeyName, JSON.stringify(data))}  //保存数据
}
export {model}
- Money组件使用src/recordListModel.js这些代码
const model = require('@/recordListModel.js').model;
const recordList: RecordItem[] = model.fetch();
- 把src/recordListModel.js改写成src/recordListModel.ts。改文件后缀和需要加上类型了
const localStorageKeyName = 'recordList';

const recordListModel = {
  fetch() {
    return JSON.parse(window.localStorage.getItem(localStorageKeyName) || '[]') as RecordItem[];
  },  //获取数据
  clone(data: RecordItem | RecordItem[]) { return JSON.parse(JSON.stringify(data)) ;}, //克隆数据
  save(data: RecordItem[]) { return window.localStorage.setItem(localStorageKeyName, JSON.stringify(data));} , //保存数据
};
export {recordListModel};
- 把RecordItem声明为一个全局类型
- 新建custom.d.ts // d是定义 // d.ts结尾就行
- 把全局类型RecordItem声明在这里面
- 那么就可以在本项目任何一个地方使用这个类型
- Money组件使用src/recordListModel.ts这些代码
 import {recordListModel} from '@/recordListModel';

 recordList: RecordItem[] = recordListModel.fetch();   //获取数据


 saveRecord() {
      const record2: RecordItem = recordListModel.clone(this.record);  //克隆数据
      record2.createdAt = new Date();
      this.recordList.push(record2);
    }

@Watch('recordList')
    onRecordListChange() {
      recordListModel.save(this.recordList);  //保存数据
    }
  }
