

本文研究的版本为reactv0.8.0
在v0.8.0版本中,react组件初始挂载实现是相对简单的。总体可以划分为两部分来阐述:组件实例化和(真正的)组件挂载。因为先理解组件实例化,再理解组件挂载会比较好。所以,我先介绍组件实例化,后介绍(真正的)组件挂载流程。
组件实例化
什么是react组件?
在搞懂什么是react组件之前,我们不妨先了解一下“组件”的定义。显然,“组件”这个概念并不是软件编程界所独有的,它应该是来源于工程学。
卡耐基梅隆大学给“组件”下过这样的定义:
一个不透明的功能实体,能够被第三方组装,且符合一个构件模型。
计算机百科全书是这样说的:
是软件系统中具有相对独立功能、接口由契约指定、和语境有明显依赖关系、可独立部署、可组装的软件实体。
软件构件著作中如是定义:
是一个组装单元,它具有约定式规范的接口,以及明确的依赖环境。构建可以被独立的部署,由第三方组装。
不同的上下文中,“组件”的定义是略有不同的。但是,共同点是有的。“功能独立,向外提供接口,可组装/组合”就是组件定义的基本要素。我们拿这三点对照一下后,会发现react组件是符合这三个基本要素的。
- react组件是可组合的。例如我们会有这样的应用代码:
const A_Component = React.createClass({
    render(){
        return (
            <B_Component>
                <C_Component />
            </B_Component>
        )
    }
})
这种示例下,我们可以清晰地看到A_Component是由B_Component和C_Component组合而成的。而A_Component组件又可以参与别的组件的组合。
- react组件有向外提供接口吗?显然,props就是react组件向外界提供的接口。
- react组件功能独立吗?是的,独立。props完全可以没有的,react组件可以靠它内部state来驱动自己,保持功能的独立。
从最后的实现结果来看,react组件是符合这三个组件定义的基本要素的。那么,回归到“react”这个语景中,什么是“react”组件呢? 个人理解是这样的:
- 从历史追溯的角度看,“react组件”算是jquery+handlebar时代模板的进化产物。
- 从软件管理的角度看,“react组件”是“分而治之”和“高内聚低耦合”理念在前端落地的结果。
- 从使用react进行页面开发的角度看,“react组件”是构建页面的基本单元。
- 从代码实现的角度看,“react组件”是具有props,state等基本属性和render必要方法的一个类。
如果非要扯上点代码,那么我们可以说,由React.createClass()和React.DOM.XXX()返回的就是react组件。
以上是个人对react组件定义的理解。那么官方是怎么定义的呢?其实,官方也没有太严谨地,郑重其事地给它下定义,只是简短的一句话(见官网):
React components are small, reusable pieces of code that return a React element to be rendered to the page.
function Welcome(props) {
  return <h1>Hello, {props.name}</h1>;
}
那什么又是“react element”呢?官方是这么说的:
React elements are the building blocks of React applications. One might confuse elements with a more widely known concept of “components”. An element describes what you want to see on the screen. React elements are immutable.
const element = <h1>Hello, world</h1>;
Typically, elements are not used directly, but get returned from components.
从代码层面来看,官方已经把“react组件”和“react element”区分得很清楚了。就拿上面列举的代码来说明的话,Welcome这个变量是组件,<Welcome />这个jsx就是“react element”。
但是有一个问题,在reactv0.8.0中,并没有引入“react element”的概念(react在v0.12.0的时候才引入“react element”的概念)。那此时的“react 组件”是怎么理解的呢?其实,此时的“react组件实例”大致相当于上面所提到的“react element”,我们只需要把上面所提到的“react element”替换为“react组件实例”就好。
当我们不写jsx的时候,往往能把react的诸多概念看得更透彻些。回到reactv0.8.0中,如果有以下代码片段的的话:
const Welcome = React.createClass({
    render(){
        return React.DOM.h1({},'Hello, world');
    }
})
我们会说变量Welcome是一个“react组件”,而Welcome()(用jsx表示的话就是<Welcome />)就是一个“react组件实例”。
react组件的类别
在reactv0.8.0中,组件分为三个大的类别:
- ReactCompositeComponent
- ReactDOMComponent
- ReactTextComponent
类是一个抽象的存在,那么我们不妨通过实例来具像化这三种类型组件的感知。于是,我们可以在控制台把它们都打印出来看看。
如果我们有ReactCompositeComponent组件如下:
const RCC = React.createClass({
	render(){
		return 'ReactCompositeComponent';
	}
})
那么它的组件实例是这样的:

我们随便创建个ReactDOMComponent组件实例如下:
const DIV= React.DOM.div({},'ReactDOMComponent')
把它打印出来看看
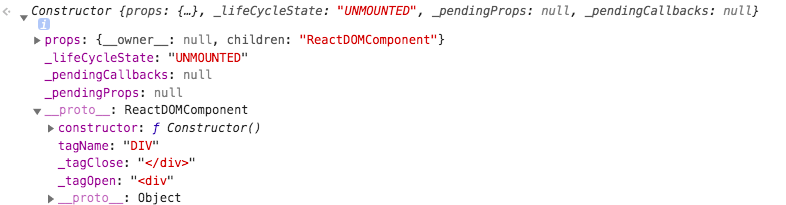
最后,我们来看看ReactTextComponent组件实例长什么样:
const TEXT= new React.__internals.TextComponent('ReactTextComponent');

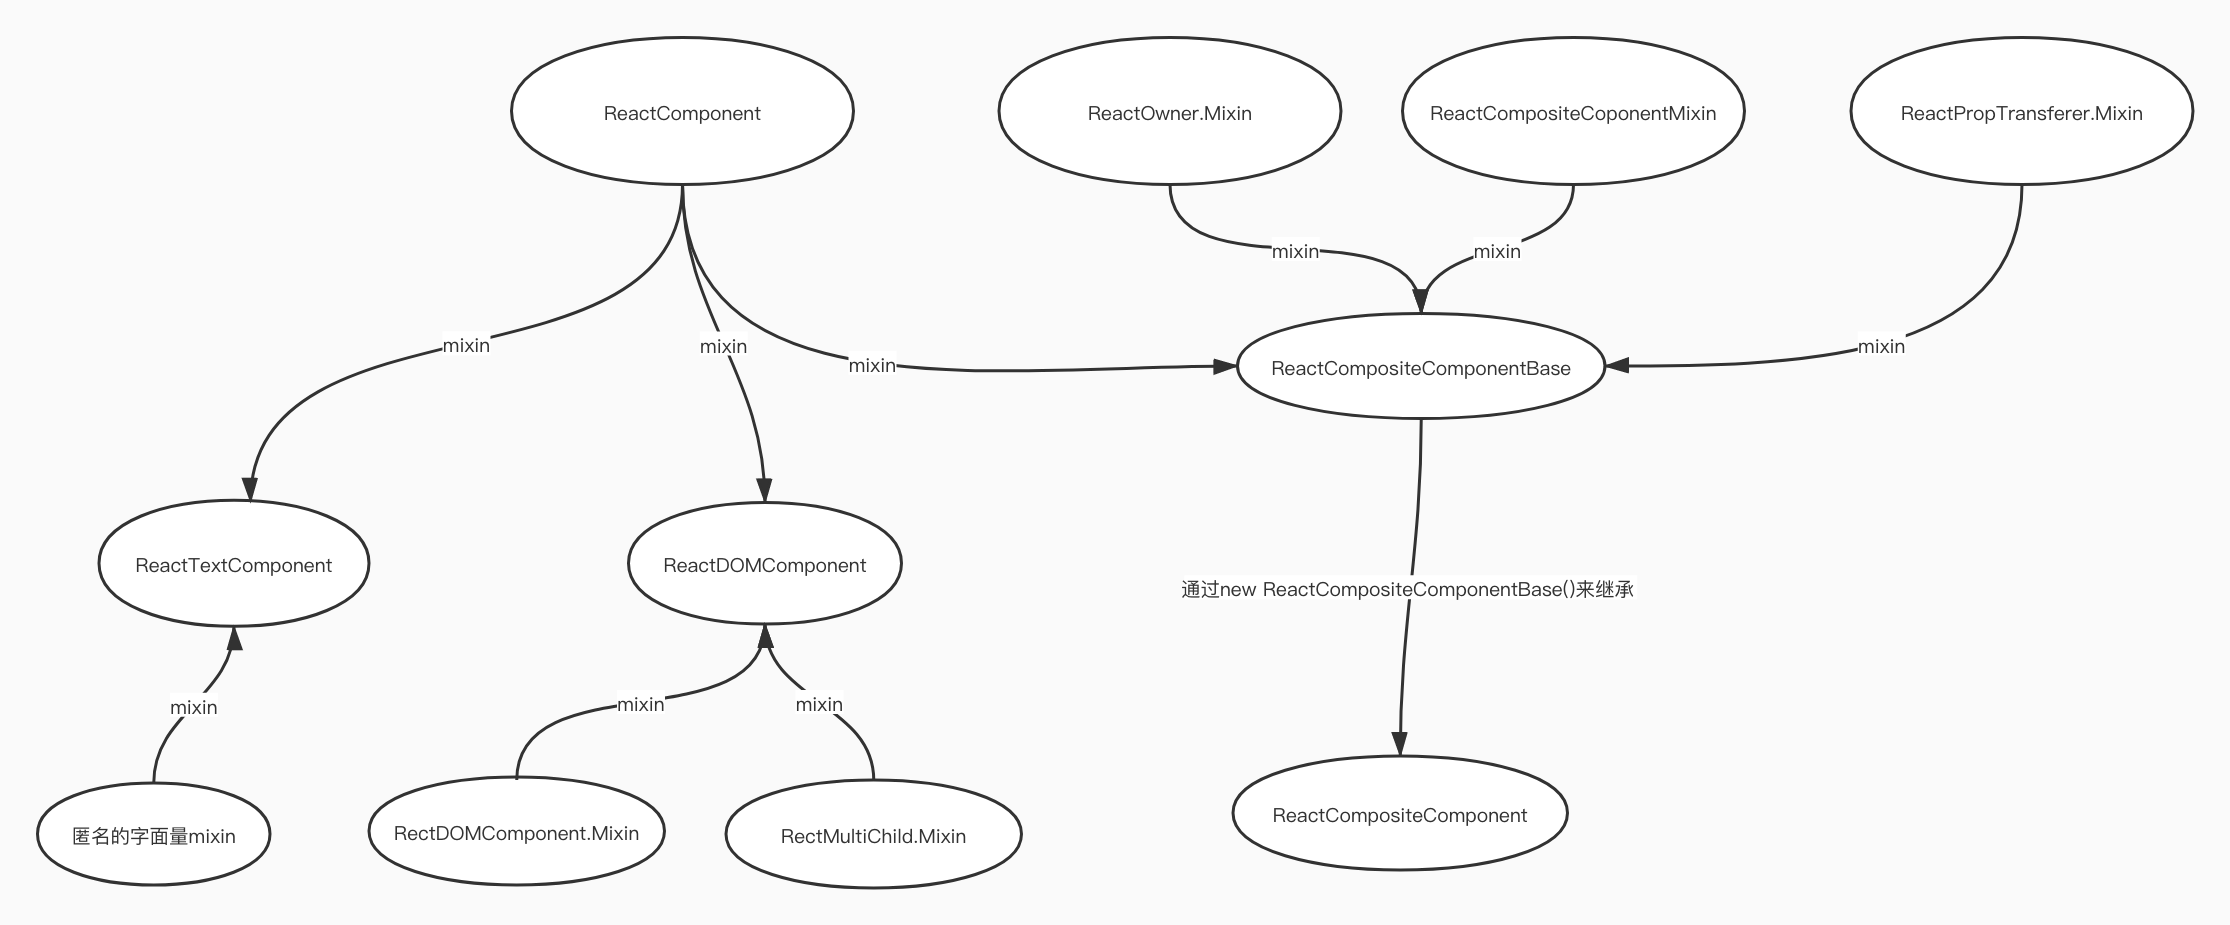
眼尖的同学可能都看到了,这几个类型组件的实例都通过__proto__属性告知我们,这些实例对象都是通过原型继承来继承了某些方法的。因为没有时间用UML画更具体的类关系图,我画了个简单粗略的关系图:
/**
 * Simply copies properties to the prototype.
 */
var mixInto = function(constructor, methodBag) {
  var methodName;
  for (methodName in methodBag) {
    if (!methodBag.hasOwnProperty(methodName)) {
      continue;
    }
    constructor.prototype[methodName] = methodBag[methodName];
  }
};
从代码中,我们看到了mixInto通过遍历传递进来的methodBag,把它身上的方法逐个逐个地挂载在constructor的原型对象上来实现了原型继承和mixin模式的结合的。
所以,我们在探究react组件初始挂载过程中,定位某个方法的源码时,只要沿着原型链傻上找就好。好了,组件类型就讲到这里。下面,我们探索一下各种类型组件的具体实例化过程。
组件具体的实例化过程
ReactTextComponent构造函数是挂在React.__internals上的,只供内部使用,因此组件实例化也是由内部代码来完成的。这一节,我们主要是讨论ReactCompositeComponent和ReactDOMComponent的实例化过程。ReactTextComponent的实例化过程比较简单,我们放在最后讲。
因为源码实现的缘故,ReactCompositeComponent和ReactDOMComponent的实例化都是经过两次函数调用才完成的。而这么做的原因,值得我们深究。
ReactCompositeComponent的实例化过程
因为React.createClass方法引用的就是ReactCompositeComponent.createClass方法,所以,我们就直奔ReactCompositeComponent.js看看:
var ReactCompositeComponent = {
// ......

  /**
   * Creates a composite component class given a class specification.
   *
   * @param {object} spec Class specification (which must define `render`).
   * @return {function} Component constructor function.
   * @public
   */
  createClass: function(spec) {
    // 这里不妨这么写,能够帮助读者更清楚梳理各个“类”之间的关系
    // 那就是:var Constructor = function ReactCompositeComponent(){}
    var Constructor = function() {};
    Constructor.prototype = new ReactCompositeComponentBase();
    Constructor.prototype.constructor = Constructor;
    mixSpecIntoComponent(Constructor, spec);

    ("production" !== process.env.NODE_ENV ? invariant(
      Constructor.prototype.render,
      'createClass(...): Class specification must implement a `render` method.'
    ) : invariant(Constructor.prototype.render));

    if ("production" !== process.env.NODE_ENV) {
      if (Constructor.prototype.componentShouldUpdate) {
        console.warn(
          (spec.displayName || 'A component') + ' has a method called ' +
          'componentShouldUpdate(). Did you mean shouldComponentUpdate()? ' +
          'The name is phrased as a question because the function is ' +
          'expected to return a value.'
         );
      }
    }

    // Reduce time spent doing lookups by setting these on the prototype.
    for (var methodName in ReactCompositeComponentInterface) {
      if (!Constructor.prototype[methodName]) {
        Constructor.prototype[methodName] = null;
      }
    }

    var ConvenienceConstructor = function(props, children) {
      var instance = new Constructor();
      instance.construct.apply(instance, arguments);
      return instance;
    };
    ConvenienceConstructor.componentConstructor = Constructor;
    ConvenienceConstructor.originalSpec = spec;
    return ConvenienceConstructor;
  },
  // ......
}
可以看出,createClass方法的源码框架是这样的:
createClass: function(spec) {
    var Constructor = function() {};

    var ConvenienceConstructor = function(props, children) {
      var instance = new Constructor();
      return instance;
    };

    return ConvenienceConstructor;
  }
第一次调用是由用户完成的,像这样:
const SomeComponent = React.createClass({
    render(){
        return React.DOM.div({},'SomeComponent');
    }
})
而对照上面的源码框架,我们可以知道,其实SomeComponent就是构造函数。再啰嗦点讲其实就是一个自定义类型。对的,组件本质上就是一个自定义类型。
然后,一般情况下,我们会用jsx的方式去消费SomeComponent:
const AnotherComponent = React.createClass({
    render(){
        return <SomeComponent />;
    }
})
我们大家都知道jsx<SomeComponent />会被编译为一个普通的函数调用模样:SomeComponent()。也就是看似声明式的jsx本质是一个命令式的函数调用,就像react的提供给用户的是函数式的开发风格下其实是面向对象式的实现一样的道理:真相往往是dirty的。而这个函数调用就是我们上面所提两次调用里面的最后一次了。SomeComponent()返回的是什么呢?是组件实例。什么?都没有new操作符,如何实例化的呢?客官稍安勿躁,待我娓娓道来。
React.createClass方法调用之后返回的是一个构造函数,代表着一类组件,这个相信大家都有认识了。从源码看,上面的SomeComponent其实就是ConvenienceConstructor函数。现在我们聚焦一下ConvenienceConstructor函数的具体实现:
var ConvenienceConstructor = function(props, children) {
      var instance = new Constructor();
      instance.construct.apply(instance, arguments);
      return instance;
    };
相信大家看到了SomeComponent组件实例其实就是里面的instance,而instance就是通过new Constructor来返回的。也就是说,我们的ReactCompositeComponent组件实例的构造函数就是这个Constructor。虽然组件实例的构造函数是它,但是实际的实例化工作并不是它来完成的。它只是一个“空壳公司”,啥事也没干。两处代码可证:
// 函数声明
var Constructor = function() {};

// 实际的实例化
instance.construct.apply(instance, arguments);
我们可以看到,Constructor函数只做了声明,并没有具体的实现代码。它最后在闭包里面,把实例化的工作交给了实例对象的construct方法。而new出来的实例对象[自身属性]上根本没有该方法,于是乎,我们就得往原型链上去找这个方法了。
在createClass方法的源码的开头处,我们可以看到有两个地方是往构造函数的原型对象上挂载方法的。
第一个:
Constructor.prototype = new ReactCompositeComponentBase();
第二个:
mixSpecIntoComponent(Constructor, spec);
显然,我们传入的spec对象里面并没有construct方法,那肯定是在ReactCompositeComponentBase类里面了。一番代码导航追溯下来,我们发现了这个construct方法是ReactCompositeComponentMixin.construct:
 construct: function(initialProps, children) {
    // Children can be either an array or more than one argument
    ReactComponent.Mixin.construct.apply(this, arguments);
    this.state = null;
    this._pendingState = null;
    this._compositeLifeCycleState = null;
  },
而方法的主体其实是由ReactComponent.Mixin.construct方法来充当的:
/**
     * Base constructor for all React component.
     *
     * Subclasses that override this method should make sure to invoke
     * `ReactComponent.Mixin.construct.call(this, ...)`.
     *
     * @param {?object} initialProps
     * @param {*} children
     * @internal
     */
    construct: function(initialProps, children) {
      this.props = initialProps || {};
      // Record the component responsible for creating this component.
      this.props.__owner__ = ReactCurrentOwner.current;
      // All components start unmounted.
      this._lifeCycleState = ComponentLifeCycle.UNMOUNTED;

      this._pendingProps = null;
      this._pendingCallbacks = null;

      // Children can be more than one argument
      // 从这段代码可以看出,this.props.children值的类型是:对象 或者 对象组成的数组
      var childrenLength = arguments.length - 1;
      if (childrenLength === 1) {
        if ("production" !== process.env.NODE_ENV) {
          validateChildKeys(children);
        }
        this.props.children = children;
      } else if (childrenLength > 1) {
        var childArray = Array(childrenLength);
        for (var i = 0; i < childrenLength; i++) {
          if ("production" !== process.env.NODE_ENV) {
            validateChildKeys(arguments[i + 1]);
          }
          childArray[i] = arguments[i + 1];
        }
        this.props.children = childArray;
      }
    }
因为在createClass方法里面Constructor构造函数和ReactCompositeComponentBase构造函数都是个空函数,所以我们可以用伪代码做个总结一下ReactCompositeComponent组件的实例化过程就是:
ReactCompositeComponent实例化 = ReactCompositeComponentMixin.construct() + ReactComponent.Mixin.construct()
具体的实例化细节,我在这里就不深入讲述了。不过,有一点我们倒是可以再看看,那就ReactComponent.Mixin.construct方法的注释:
Base constructor for all React component.
我们可以看出,react中所有类型组件的实例化接口都是一样的,都是:
(initialProps, children) => componentInstance
ReactCompositeComponent组件的实例化过程所涉及的两个函数调用都是由用户来完成的。如果,从用户角度来看,ReactDOMComponent组件的实例化过程就不是这样了。因为react帮我们做了第一次调用,而我们只需要做第二次调用。下面来看看。
ReactDOMComponent的实例化过程
ReactDOMComponent实例化构造函数的构造过程大体跟ReactCompositeComponent是相同的。它也是有一个createDOMComponentClass的方法用于创建同一类别DOM组件所需要的constructor:
/**
 * Creates a new React class that is idempotent and capable of containing other
 * React components. It accepts event listeners and DOM properties that are
 * valid according to `DOMProperty`.
 *
 *  - Event listeners: `onClick`, `onMouseDown`, etc.
 *  - DOM properties: `className`, `name`, `title`, etc.
 *
 * The `style` property functions differently from the DOM API. It accepts an
 * object mapping of style properties to values.
 *
 * @param {string} tag Tag name (e.g. `div`).
 * @param {boolean} omitClose True if the close tag should be omitted.
 * @private
 */
function createDOMComponentClass(tag, omitClose) {
  var Constructor = function() {};
  Constructor.prototype = new ReactDOMComponent(tag, omitClose);
  Constructor.prototype.constructor = Constructor;
  Constructor.displayName = tag;

  var ConvenienceConstructor = function(props, children) {
    var instance = new Constructor();
    instance.construct.apply(instance, arguments);
    return instance;
  };
  ConvenienceConstructor.componentConstructor = Constructor;
  return ConvenienceConstructor;
}
不同的是,ReactDOMComponent这个构造函数是有具体实现的,而construct方法是全权指向ReactComponent.Mixin.construct。所以,针对ReactDOMComponent实例化过程,我们有以下的总结:
ReactDOMComponent实例化 = new ReactDOMComponent() + ReactComponent.Mixin.construct()
上以小节也提到了,ReactDOMComponent的实例化所需要的第一次函数调用其实是react帮我们做了。怎么做法呢?其实就是使用上面提到的那个createDOMComponentClass方法:
/**
 * Creates a mapping from supported HTML tags to `ReactDOMComponent` classes.
 * This is also accessible via `React.DOM`.
 *
 * @public
 */
var ReactDOM = objMapKeyVal({
  a: false,
  abbr: false,
  address: false,
  area: false,
  article: false,
  aside: false,
  audio: false,
  b: false,
  base: false,
  bdi: false,
  bdo: false,
  big: false,
  blockquote: false,
  body: false,
  br: true,
  button: false,
  canvas: false,
  caption: false,
  cite: false,
  code: false,
  col: true,
  colgroup: false,
  data: false,
  datalist: false,
  dd: false,
  del: false,
  details: false,
  dfn: false,
  div: false,
  dl: false,
  dt: false,
  em: false,
  embed: true,
  fieldset: false,
  figcaption: false,
  figure: false,
  footer: false,
  form: false, // NOTE: Injected, see `ReactDOMForm`.
  h1: false,
  h2: false,
  h3: false,
  h4: false,
  h5: false,
  h6: false,
  head: false,
  header: false,
  hr: true,
  html: false,
  i: false,
  iframe: false,
  img: true,
  input: true,
  ins: false,
  kbd: false,
  keygen: true,
  label: false,
  legend: false,
  li: false,
  link: false,
  main: false,
  map: false,
  mark: false,
  menu: false,
  menuitem: false, // NOTE: Close tag should be omitted, but causes problems.
  meta: true,
  meter: false,
  nav: false,
  noscript: false,
  object: false,
  ol: false,
  optgroup: false,
  option: false,
  output: false,
  p: false,
  param: true,
  pre: false,
  progress: false,
  q: false,
  rp: false,
  rt: false,
  ruby: false,
  s: false,
  samp: false,
  script: false,
  section: false,
  select: false,
  small: false,
  source: false,
  span: false,
  strong: false,
  style: false,
  sub: false,
  summary: false,
  sup: false,
  table: false,
  tbody: false,
  td: false,
  textarea: false, // NOTE: Injected, see `ReactDOMTextarea`.
  tfoot: false,
  th: false,
  thead: false,
  time: false,
  title: false,
  tr: false,
  track: true,
  u: false,
  ul: false,
  'var': false,
  video: false,
  wbr: false,

  // SVG
  circle: false,
  g: false,
  line: false,
  path: false,
  polyline: false,
  rect: false,
  svg: false,
  text: false
}, createDOMComponentClass);
更加具体的函数调用操作是在objMapKeyVal方法的实现代码里面:
function objMapKeyVal(obj, func, context) {
  if (!obj) {
    return null;
  }
  var i = 0;
  var ret = {};
  for (var key in obj) {
    if (obj.hasOwnProperty(key)) {
      ret[key] = func.call(context, key, obj[key], i++);
    }
  }
  return ret;
}
看到没?ret[key] = func.call(context, key, obj[key], i++);是也。
经过objMapKeyVal的一番调用,挂载在React.DOM引用所指向的对象其实是这样的:
React.DOM = {
    a: createDOMComponentClass('a', false),
    abbr: createDOMComponentClass('abbr', false),
    // ......
}
到了这里,我们也看清楚了为什么在实例化ReactDOMComponent组件的过程中,我们并不需要像实例化ReactCompositeComponent组件那样,先构造好构造函数,再进行实例化。那是因为HTML标签就这么几个,react为了我们使用方便,内部已经帮我们做了。我们通过React.DOM.xxx访问到的其实就是xxx这个标签所对应的构造函数了。于是乎,我们只需要直接实例化就好,比如:
const div = React.DOM.div({onClick:()=> {}}, '我是一个div组件的实例')
好,到这里ReactDOMComponent组件的实例化过程已经讲完了。下面我们简单讲讲ReactTextComponent的实例化过程。
ReactTextComponent的实例化过程
上面提到了,其实ReactTextComponent是供给react内部使用的,用来把字符串wrap成组件。具体点讲,react会把我们传递进去的字符串用span包裹起来。 比如我们传进入的是“Parent count 1 times”,那么最终生成是这样的HTML片段:
<span data-reactid=".r[2tqvw].[0]">Parent count 1 times</span>
wrap的这个动作是在ReactTextComponent的mountComponent方法里面完成的:
/**
   * Creates the markup for this text node. This node is not intended to have
   * any features besides containing text content.
   *
   * @param {string} rootID DOM ID of the root node.
   * @param {ReactReconcileTransaction} transaction
   * @param {number} mountDepth number of components in the owner hierarchy
   * @return {string} Markup for this text node.
   * @internal
   */
  mountComponent: function(rootID, transaction, mountDepth) {
    ReactComponent.Mixin.mountComponent.call(
      this,
      rootID,
      transaction,
      mountDepth
    );
    return (
      '<span ' + ReactMount.ATTR_NAME + '="' + escapeTextForBrowser(rootID) + '">' +
        escapeTextForBrowser(this.props.text) +
      '</span>'
    );
  },
那现在就只有一个问题值得探究了,那就是react内部在哪里调用ReactTextComponent构造函数去做实例化呢?答曰:是在traverseAllChildren.js模块里面。
var traverseAllChildrenImpl =
  function(children, nameSoFar, indexSoFar, callback, traverseContext) {
    // 省略其他代码
     else if (type === 'string') {
          var normalizedText = new ReactTextComponent(children);
          callback(traverseContext, normalizedText, storageName, indexSoFar);
          subtreeCount += 1;
        } else if (type === 'number') {
          var normalizedNumber = new ReactTextComponent('' + children);
          callback(traverseContext, normalizedNumber, storageName, indexSoFar);
          subtreeCount += 1;
        }
    //  省略其他代码
  };
看到醒目的new ReactTextComponent()没?
traverseAllChildrenImpl方法会在组件初次挂载的时候调用,对数字类型和字符串类型的值进行包装,使得它们也能融入到react的组件体系里面。
使用span对传入的数字类型和字符串类型的值进行包裹这一特性会在reactv15.0.0 版本去掉,有changlog为证:
No more extra
<span>s. ReactDOM will now render plain text nodes interspersed with comment nodes that are used for demarcation. This gives us the same ability to update individual pieces of text, without creating extra nested nodes. If you were targeting these s in your CSS, you will need to adjust accordingly. You can always render them explicitly in your components. (@mwiencek in #5753)
好,ReactTextComponent组件的实例化简单介绍完毕。
三种类型组件的实例化已经介绍完了。react组件实例化所涉及的源码,无非包含以下几个知识点
- 自定义类型
- 原型继承
- 对象方法的查找过程
- 对函数进行new操作符调用到底发生了什么
这些都是javascript比较基础且重要的知识,这里就不展开讨论。那我们是不是真的结束了该小节的探讨了呢?不,源码还留下了一个问题给我们去思考。什么问题呢?那就是ReactCompositeComponent和ReactDOMComponent组件实例化所需要的构造函数为什么采用层层包裹的方式来实现呢?。就拿ReactCompositeComponent组件来说,相比于当前的实现,createClass方法的实现为什么不是这么写呢:
 createClass: function(spec) {
    mixSpecIntoComponent(ReactCompositeComponentBase, spec);
    return ReactCompositeComponentBase;
}
那是因为这种写法的话,使用createClass方法创建的所有自定义组件都归属于同一种类型了。而源码中用来判断两个组件实例是否属于同一种类型的判断是这样的:
if (currentComponent.constructor === nextComponent.constructor) {
    currentComponent.receiveComponent(nextComponent, transaction);
} else {
// 此处省略了代码
}
假如按照我们上面的的实现,我们自定义了两种类型的组件:
const Component = React.createClass({
    render() { return 'Component';}
});

const AnotherComponent = React.createClass({
    render() { return 'AnotherComponent';}
});
那么上面的if语句的判断条件永远都是为true。因为所有自定义了类型的组件都公用一个constructor:ReactCompositeComponentBase。而且,这种写法还有一个问题就是,我们的传进去的spec挂载在prototype上后会存在相互覆盖的风险,生命周期函数和render函数总是被后者覆盖。
那是不是包一层就好了呢?像下面那样:
  createClass: function(spec) {
    var Constructor = function(props, children) {}
        this.construct.(props, children);
    ;
    Constructor.prototype = new ReactCompositeComponentBase();
    Constructor.prototype.constructor = Constructor;
    mixSpecIntoComponent(Constructor, spec);

    return Constructor;
}
我感觉是可以的,但是某位同学在他的博文中说这样写的话会导致同以类型组件的所有实例都可以去篡改原型上的东西。是的,这种写法是会的,但是包了两层的写法一样会这样的。所以我觉得不是这个理由。不信,我们可以试一试。假设我们有以下代码:
const Child = React.createClass({
    render(){
        return React.DOM.button({}, '我是子组件')
    }
});

const Parent = React.createClass({
    render(){
        return React.DOM.div({},Child())
    }
})

const test = Child();
const testPortotype = Object.getPrototypeOf(test);
testPortotype.render = function () {
    return React.DOM.div({},'Child组件所有的实例的render都被我改了')
};

React.renderComponent(Parent({}), document.getElementById('app-root'));
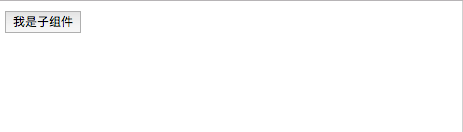
正常情况是这样的:
篡改后是这样的:
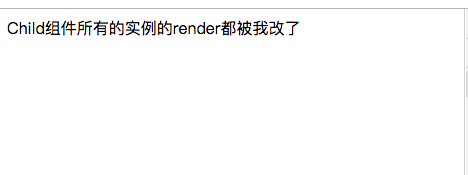
所以说,那个同学的说法是有误的。因为包了两层的写法(也就是react正式版本所采用的写法)所创建的自定义组件所有的实例还是指向同一个原型对象。
那么为什么要采用包了两层的写法呢?真正的原因,我目前无法追溯到了。我猜真正的原因是如第二个构造函数的名字ConvenienceConstructor所言,是为了方便。为了什么方便呢?是为了实例化的时候不用采用new操作符(这也是jsx目前的编译目标,即讲jsx标签编译为普通的函数调用)。也就是说,相比于将<Component />编译为new Component(),react团队更想把它编译为Component()。
也许你的脑袋灵光一闪,为何不这样写:
  createClass: function(spec) {
    var Constructor = function(props, children) {}
        this.construct.(props, children);
        return new Constructor();
    ;
    Constructor.prototype = new ReactCompositeComponentBase();
    Constructor.prototype.constructor = Constructor;
    mixSpecIntoComponent(Constructor, spec);

    return Constructor;
}
哈哈,这个想法太“天才”了。实际上,它会造成call stack溢出的。
好了,我们自我折腾到这就差不多了。如需折腾,请自行探索吧。
组件如何实例化讲完了,那么我们乘热打铁吧-赶紧在此基础上,看看react组件是如何进行初始挂载的。
组件挂载
注意,从源码实现来看(源码中命名也多有不统一和不够严谨之处),“组件挂载”准确地来讲应该是“组件实例的挂载”。本文为了阐述过程中的简便,采用“组件挂载”的说法。
在应用比较广泛的版本,比如reactv15.0.0中,组件初始挂载的入口函数叫render,相信是人尽皆知的。可能很少人知道这个render函数以前是叫renderComponent。那react是在哪个版本中做了这个change呢?我们看看changelog就知道了:
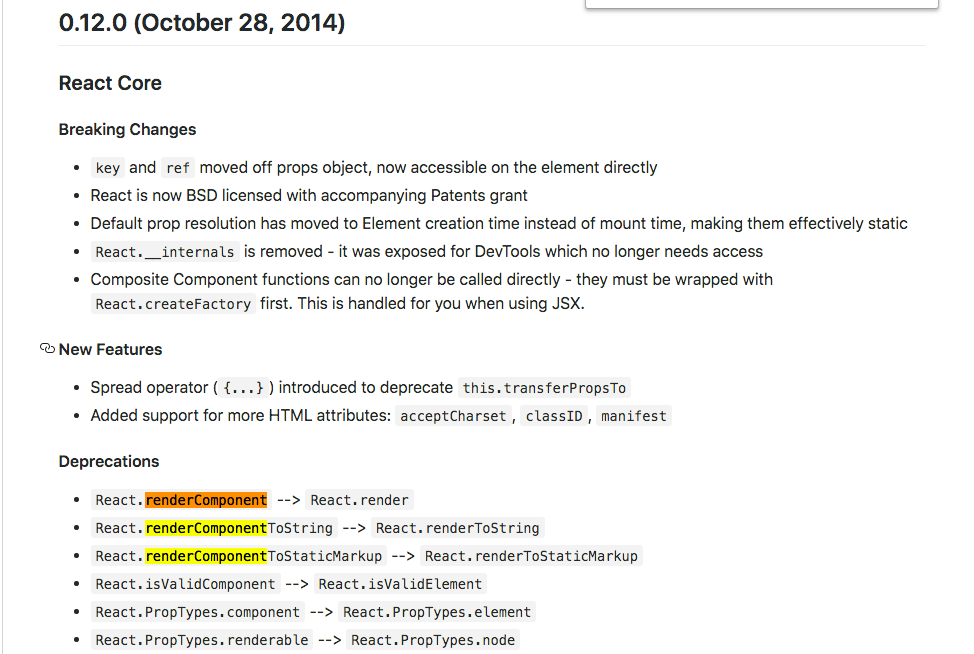
我们可以从上面截图看出,入口函数名变更是从v0.12.0开始的。
我们从renderComponent这个入口函数开始梳理的话,我们可以得到以下的关于react组件初始挂载的大致流程图:
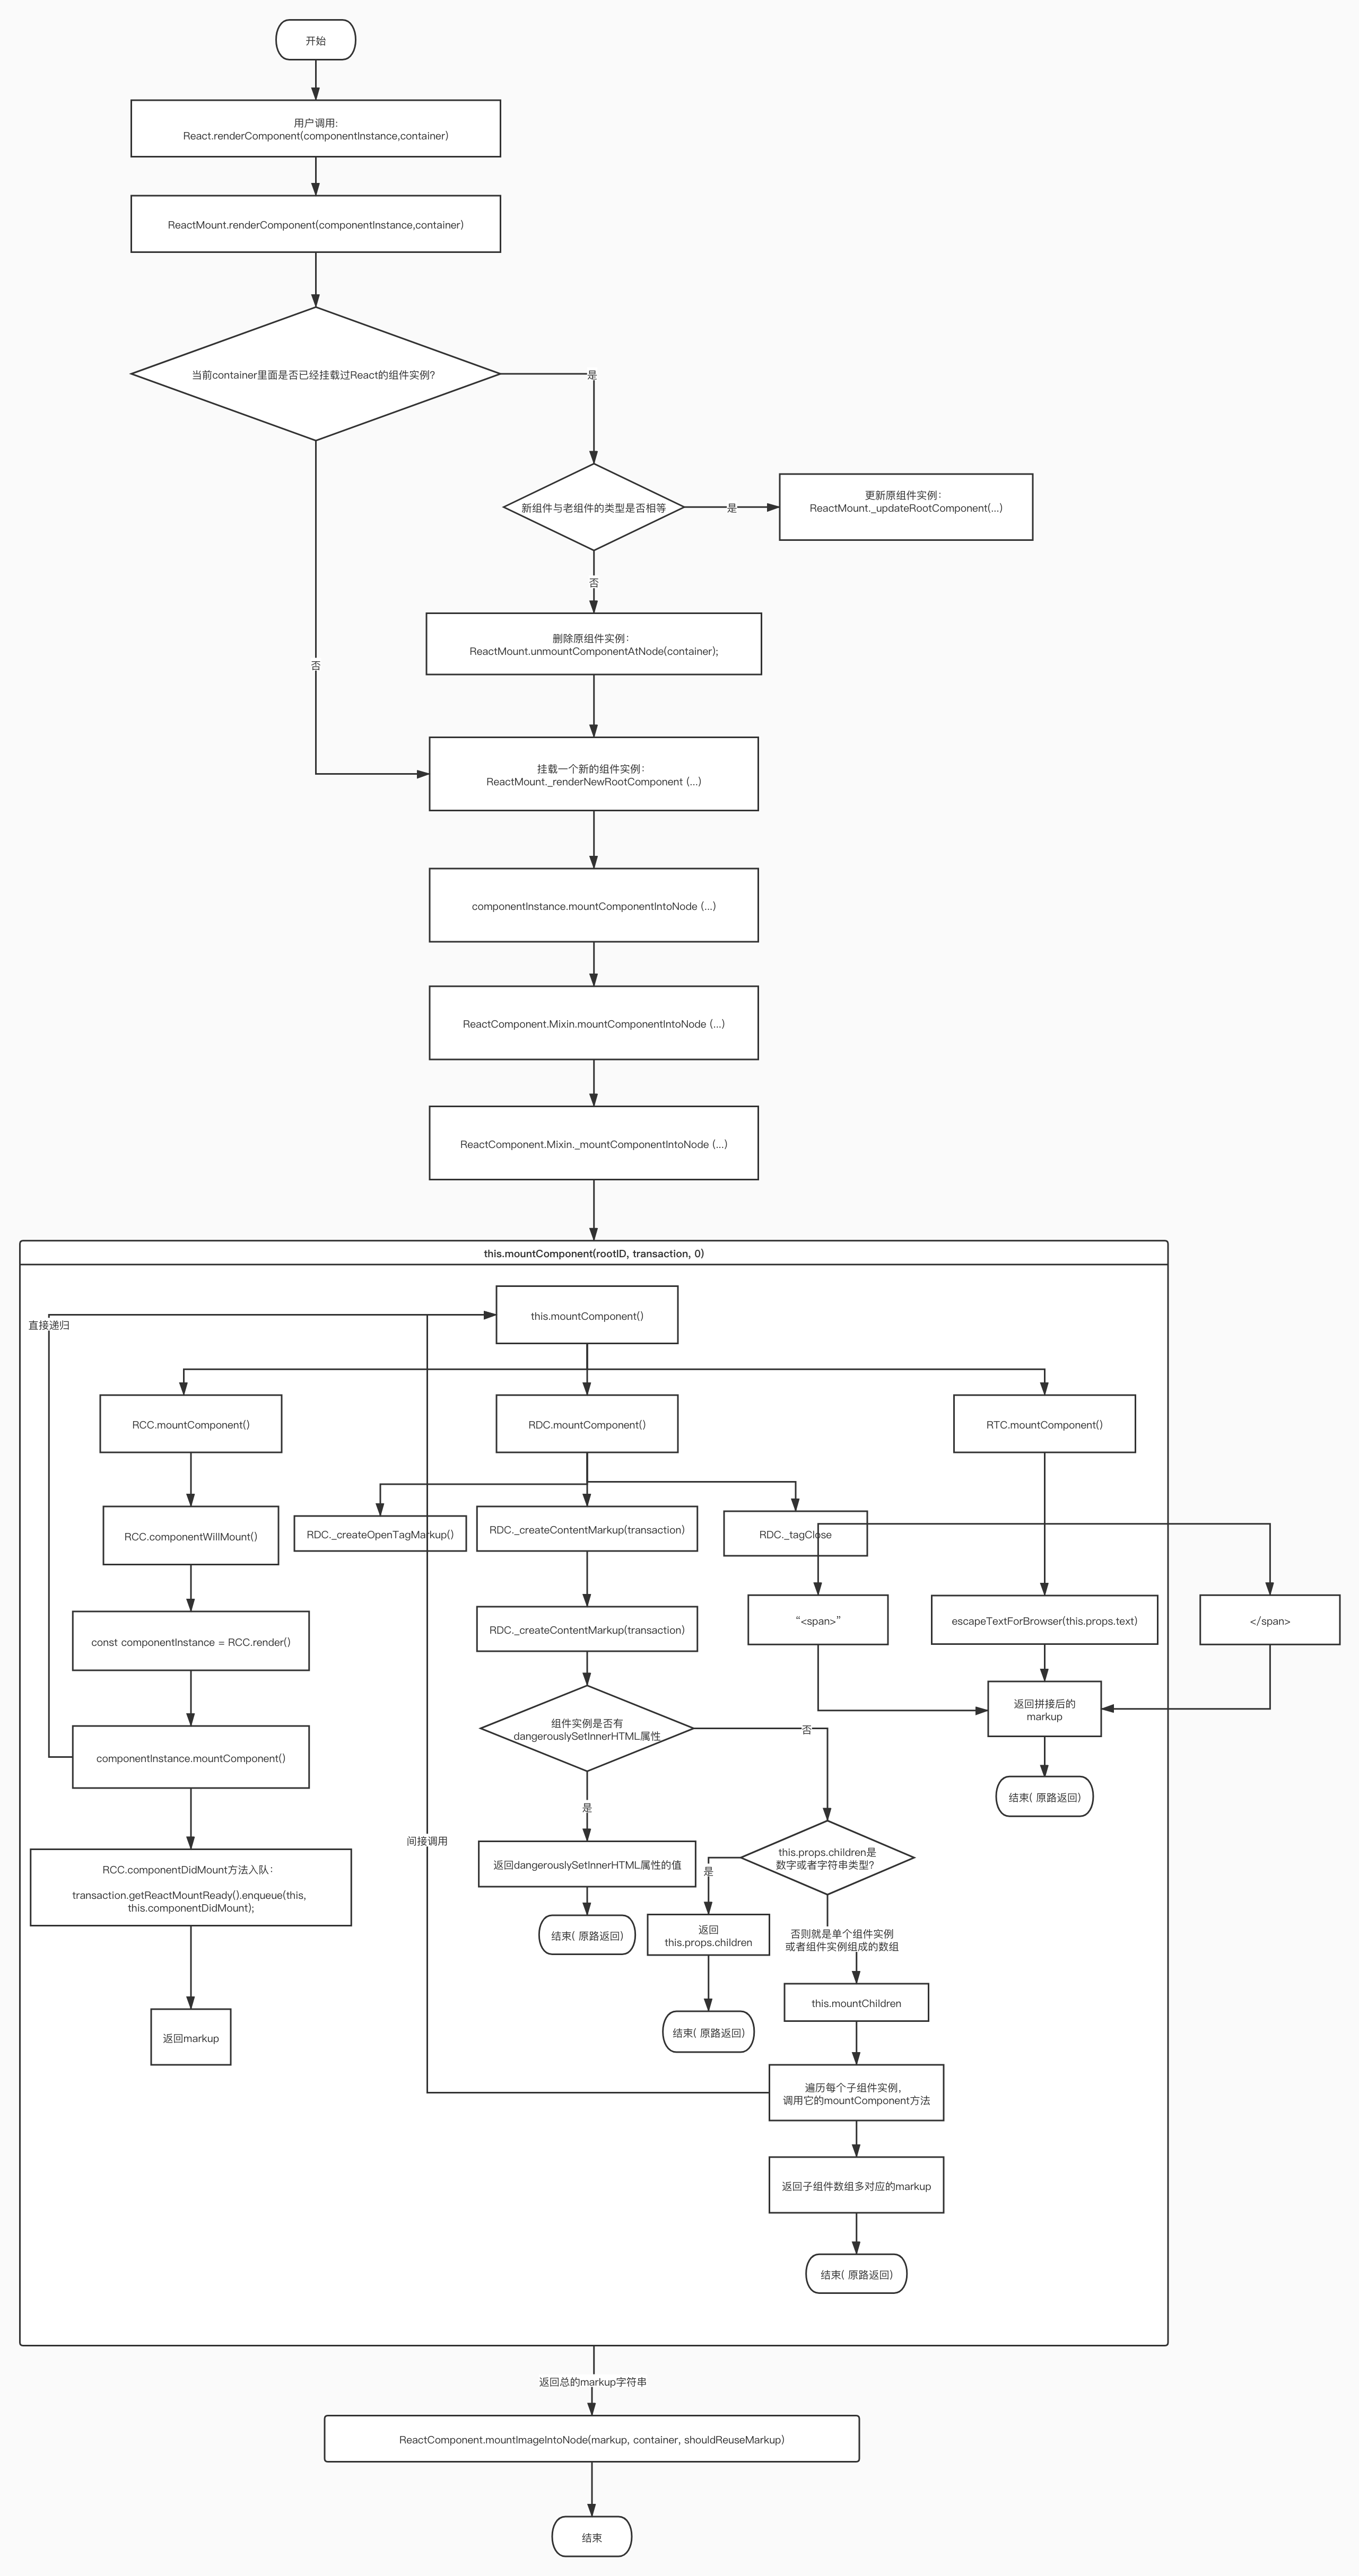
从上面流程可以看出,react组件初始挂载可以划分为两个步骤:
- 使用递归算法把组件树所对应的HTML markup(html字符串)计算出来。
- 使用
container.innerHTML = markup;这种简单的方式将markup插入到文档流中。
显然,要想理解第一个步骤的现实原理,对递归的理解是十分必要的。我们不妨看看百度百科对“递归算法”的释义:
递归算法(英语:recursion algorithm)在计算机科学中是指一种通过重复将问题分解为同类的子问题而解决问题的方法。递归式方法可以被用于解决很多的计算机科学问题,因此它是计算机科学中十分重要的一个概念。绝大多数编程语言支持函数的自调用,在这些语言中函数可以通过调用自身来进行递归。计算理论可以证明递归的作用可以完全取代循环,因此在很多函数编程语言(如Scheme)中习惯用递归来实现循环。
关于对递归的理解,这篇博文值得一看。里面也提到递归算法的应用场景:
- 问题的定义是按递归定义的(Fibonacci函数,阶乘,…);
- 问题的解法是递归的(有些问题只能使用递归方法来解决,例如,汉诺塔问题,…);
- 数据结构是递归的(链表、树等的操作,包括树的遍历,树的深度,…)。
思考一下,在react的组件初始挂载显然是符合第1和第3点。
首先,react的组件系统的结构是递归的。父compositeComponent可以由子compositeComponent,子DOMComponent 和子TextComponent组成,而子DOMComponent成为父组件的时候,它又可以由子compositeComponent组成。而递归结构里面又有终结“递去”的数据结构存在,那就是没有子组件的DOMComponent和TextComponent,这是由当前上下文(DOM文档树)所决定的。这两者是组件系统结构的最底层的数据。所以,react组件存在使用递归算法的充分条件。
其次,因为reactv0.8.0中,react对“挂载(mount)某个组件”的定义是计算该组件实例所对应的HTML markup。所以,react对“挂载react组件”的这个问题的定义也是按照递归来定义的:要想挂载父组件,必须先挂载子组件,而子组件又有子组件......直到到了没有子组件的DOMComponent和TextComponent这一层。
综上两个条件的吻合,react很巧妙地用上了递归算法。
上面的流程图已经画得很明显了。递归开始是在this.mountComponent()方法调用的时候。因为“this”有可能指向compositeComponent,DOMComponent和TextComponent,所以,流程开始分化。即使组件树足够深与广,但是最终的最终肯定会走到树的末端节点,也就是没有子组件的DOMComponent和TextComponent。从上面流程图,我们也可以看出,每一个类型组件的mountComponent方法的职责就是计算markup。总的来看,有去有回,我们通过一个完整的递归过程完成了整一颗组件树所对应的markup计算。
这篇博文提到了两个递归模型:
- 在递去的过程中解决问题
- 在归来的过程中解决问题
我觉得react组件挂载过程是符合“在归来的过程中解决问题 ”这个模型的。我们不妨用伪代码实现一下:
function mountComponent(componentInstance){
    let markup = '';
    if (typeof componentInstance === 'TextComponent'){
        return markup += TextComponent所对应的markup;
    }else if(typeof componentInstance === 'DOMComponent'){
        if(componentInstance没有子组件){
            return markup += DOMComponent所对应的markup;
        }else {
            return markup +=
                    DOMComponent的开标签 +
                    for(let child of DOMComponent.children){
                        return mountComponent(child);// 递去,递到最深处后,不断地归来;
                    } +
                    DOMComponent的闭标签;
        }
    }else { // compositeComponent
        const currentComponent = compositeComponent.render(); // 递去
        mountComponent(currentComponent); // 递到最深处后,不断地归来
    }

    return markup;
}
经过一番阐述,我们可以看出,在reactv0.8.0这个版本中,所谓的“mount”一个组件就是一个纯粹的字符串计算过程。期间,不涉及到任何的DOM操作。最后,react才把计算出来的字符串采用简单的DOM操作插入到container中,简单而粗暴。具体操作是发生在在mountImageIntoNode方法中:
 /**
   * @param {string} markup Markup string to place into the DOM Element.
   * @param {DOMElement} container DOM Element to insert markup into.
   * @param {boolean} shouldReuseMarkup Should reuse the existing markup in the
   * container if possible.
   */
  mountImageIntoNode: function(markup, container, shouldReuseMarkup) {

    // 以上省略了很多代码

    // Asynchronously inject markup by ensuring that the container is not in
    // the document when settings its `innerHTML`.
    var parent = container.parentNode;
    if (parent) {
      var next = container.nextSibling;
      parent.removeChild(container);
      container.innerHTML = markup;
      if (next) {
        parent.insertBefore(container, next);
      } else {
        parent.appendChild(container);
      }
    } else {
      container.innerHTML = markup;
    }
  }
把“mount component”定义为“纯字符串计算”可以算是事关react的架构的事了。不过,在后期版本中,react废弃了这种定义,采用了新的定义。这个变更具体是发生在react的v15.0.0的这个大版本中:
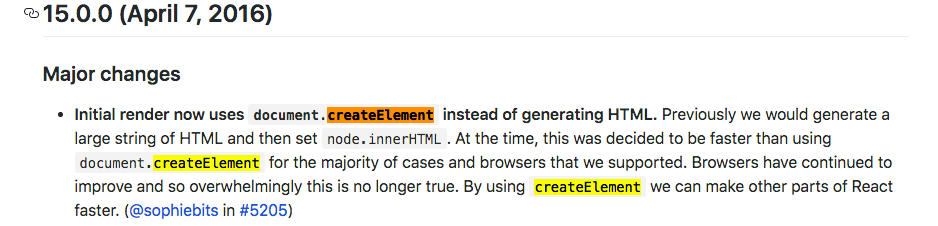
这种变更到底会产生多大的不同呢?这值得我们撰写另一个篇章来阐述。
到了这里,react组件初始挂载过程的探索几乎完成得差不多了。不过,可能阅读得比较细致的同学会有疑惑:“那上个小节所提到组件实例化有啥用呢?”。不急,我们不妨把目光放在ReactCompositeComponent.js中的mountComponent方法的这行代码:
mountComponent(rootID, transaction, mountDepth) {
    // ......
    this._renderedComponent = this._renderValidatedComponent();
    // ......
}
而_renderValidatedComponent方法的实现是怎样的呢:
 _renderValidatedComponent: function() {
    var renderedComponent;
    ReactCurrentOwner.current = this;
    try {
      renderedComponent = this.render();
    } catch (error) {
      // IE8 requires `catch` in order to use `finally`.
      throw error;
    } finally {
      ReactCurrentOwner.current = null;
    }
    ("production" !== process.env.NODE_ENV ? invariant(
      ReactComponent.isValidComponent(renderedComponent),
      '%s.render(): A valid ReactComponent must be returned. You may have ' +
      'returned null, undefined, an array, or some other invalid object.',
      this.constructor.displayName || 'ReactCompositeComponent'
    ) : invariant(ReactComponent.isValidComponent(renderedComponent)));
    return renderedComponent;
  },
可以看到在_renderValidatedComponent方法里面,调用了组件实例的render方法。这个方法的实现就是我们创建自定义组件时传入的spec对象的render方法。而render用纯js是怎么写的呢?我们来复习一下:
render(){
    return SomeComponent(
        {},
        Child(
            {},
            React.DOM.div({},'我是div啦,你晕了没?')
        )
    )
}
我们上面提到过,组件的实例化会经历两个函数调用,而最后一个函数调用才是真正意义上的“实例化”(因为里面涉及到了new操作符)。如今,这一连串的函数调用被延迟执行地包裹在render方法里面。但是,一旦render函数被调用,一连串的组件实例化就发生了。
综上所述,组件的实例化是发生了递归计算组件树markup的过程中的。几乎可以这么说初始挂载过程中,实例化组件就是为了调用该实例的mountComponent方法。其实,从本质来看,这个方法名可以改名为“calculateComponentMarkup”更为贴切。
好了,到了这里,正文算是结束了。最后,我们做个小总结。
总结
在没有引入react element, internalInstance, publicInstance等概念的reactv0.8.0中,react组件的初始挂载是简单而粗暴的。整个过程的实现可以划分为两个步骤:
- 使用递归算法把组件树所对应的HTML markup(html字符串)计算出来,而具体的计算就交给了各个组件实例的mountComponent方法;
- 使用
container.innerHTML = markup;将计算出来的总的markup字符串插入到文档流中。
不过可以看出,这种递归算法的执行是一开始就没有回头路了,是真正的一条路走到黑。这种挂载/渲染的方式,我们可以称之为“全量渲染”。react先是引入react element,到最后的用react fiber架构重写react的核心算法,react目前已经拥有“incremental rendering(增量渲染)”的能力。具体可以查看介绍react fiber architecture的文章。
尽管增量渲染不够完美,但是我还是得对递归算法感叹一番。大师 L. Peter Deutsch 说过:To Iterate is Human, to Recurse, Divine.翻译过来可以是这样:“循环迭代是人类的循环迭代,递归是神的递归”。可想而知,递归算法的应用需要多么优雅而巧妙的思维啊。
理解react组件初始挂载的实现的关键是理解三种不同组件类型的设计,组合和递归算法,尤其是递归算法。react组件初始挂载也算是将递归算法应用得淋漓尽致了。我在想,这淋漓尽致的背后何尝不是建立在将react组件系统设计得精密而其巧妙才行呢?
