

java的maven包管理可以有私服,js的npm包当然也有,这篇是对于linux上部署nexus3,使用Nexus3 Repository Manager 搭建 npm 私服的一个总结。
1. linux安装nexus
1.1. 下载nexus3
链接:https://pan.baidu.com/s/1zBVCb_iW3fhScWU_4ERMVw
提取码:bdsv
1.2. 创建文件夹
cd /usr/local && mkdir nexus && cd nexus
1.3. 解压,重命名
tar -zxvf nexus-3.19.1-01-unix.tar.gz  //解压
mv nexus-3.19.1-01-unix  nexus              //重命名
1.4. 自定义配置虚拟机可打开 nexus.vmoptions 文件进行配置
如果Linux硬件配置比较低的话,建议修改为合适的大小,否则会出现运行崩溃的现象
vim nexus/bin/nexus.vmoptions //虚拟机选项配置文件
1.5. 启动nexus
/usr/local/nexus/nexus/bin/nexus start
/usr/local/nexus/nexus/bin/nexus {start|stop|run|run-redirect|status|restart|force-reload}

- Nexus默认的端口是8081,可以在etc/nexus-default.properties配置中修改。
- Nexus默认的用户名密码是admin/admin123
- 当遇到奇怪问题时,重启nexus,启动时间会比较慢 要1分钟左右后才能访问。
1.6. 访问登录
访问http://ip:8081/
cd /usr/local/nexus/sonatype-work/nexus3,ls 后看到admin.password,这个就是Nexus3的默认密码
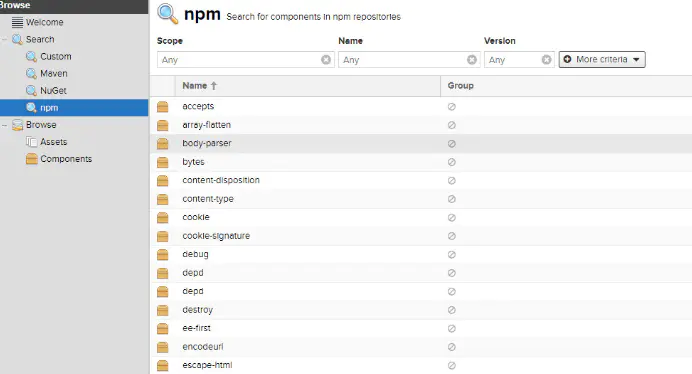
2. 添加npm仓库
点击在左侧菜单Repositories,可以看到仓库类型列表,如下:
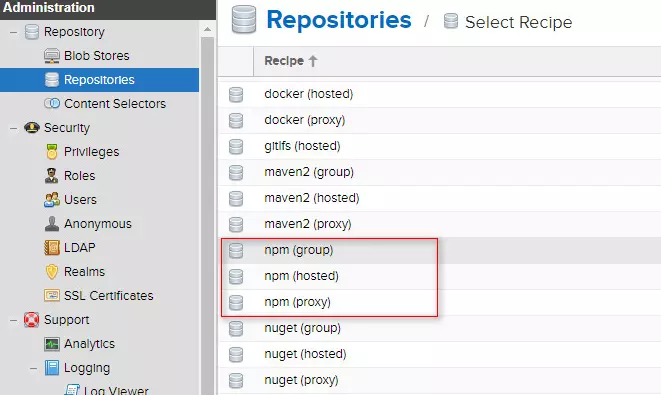
- 点击Create repository按钮创建仓库
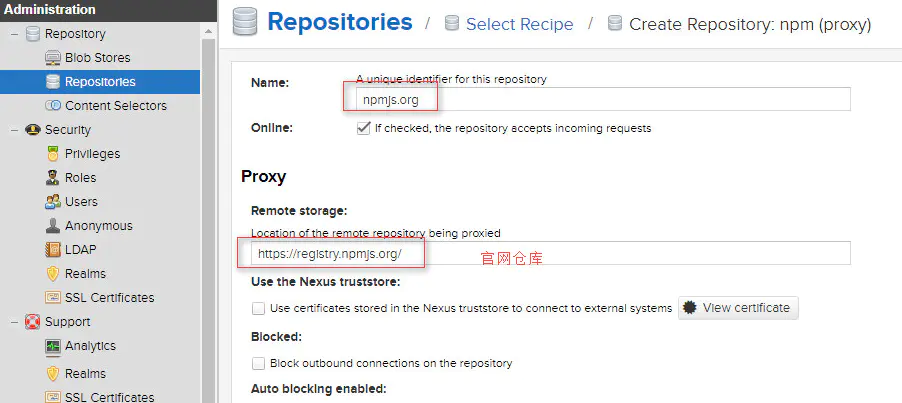
- 选择 npm(proxy), 输入 Name: npm-proxy, remote storage 填写 registry.npm.taobao.org 或 registry.npmjs.org. 用于将包情求代理到地址地址
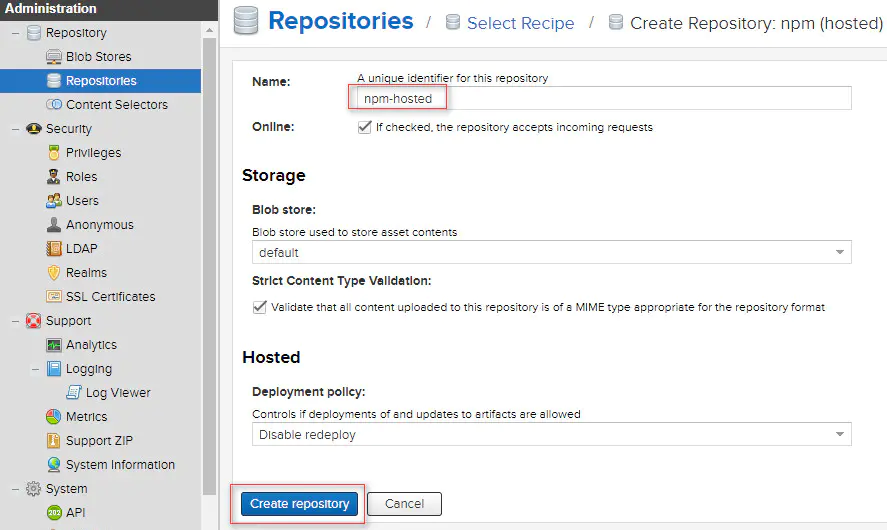
- 再次点击Create repository按钮., 增加 npm(hosted) 输入 Name: npm-hosted 用于存放自己的私有包
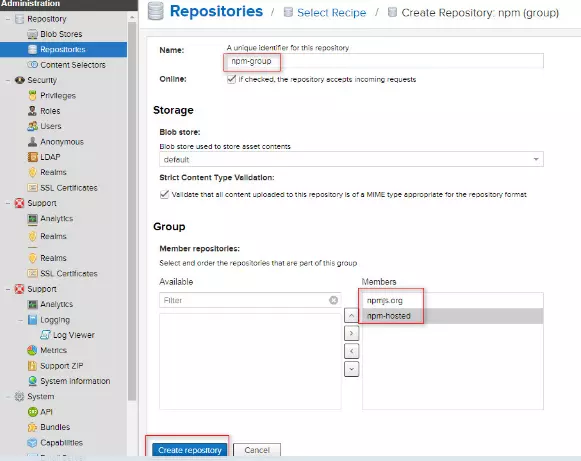
- 再次点击Create repository按钮.,增加npm(group) 输入 Name: npm-all, 下面Member repositories里选择之前添加的2个移动右边
3. 添加角色
npm发布包是需要先登录的,默认是登录到npm官方服务器,若registry已更改为其它地址则可能登录失败,而这里我们只是想把包发布到自己私有的服务器上。
3.1. 添加权限认证
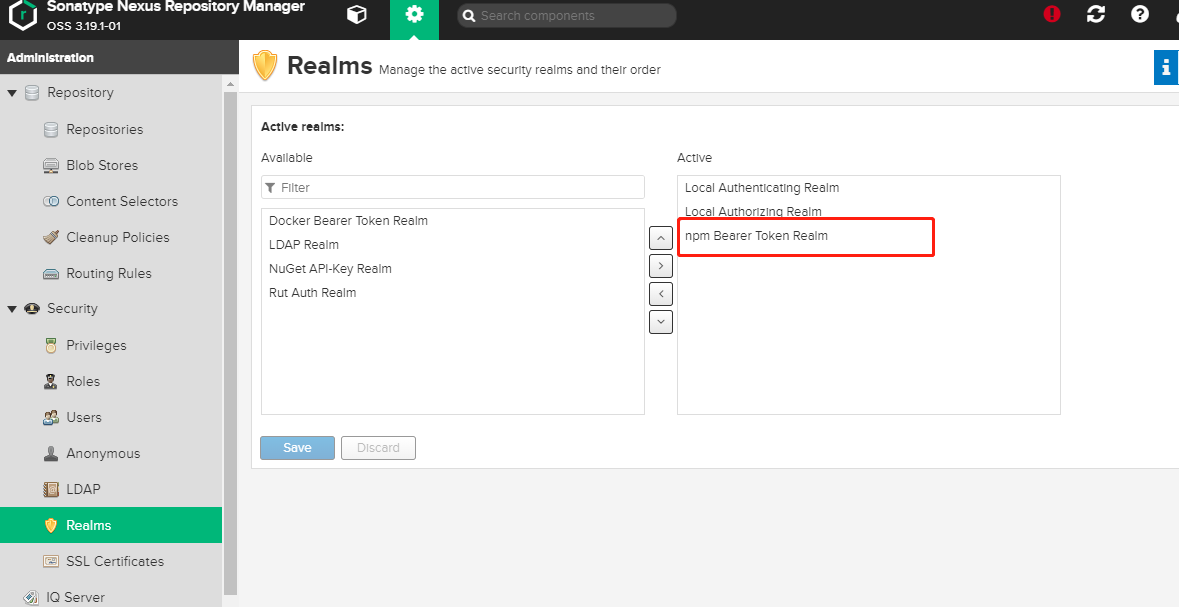
设置权限, Realms 菜单, 将 npm Bearer Token Realm 添加到右边
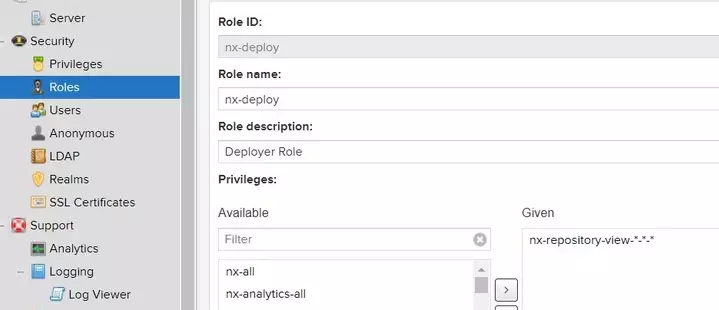
3.2. 创建nx-deploy角色
给角色赋于一个nx-repository-view---*权限
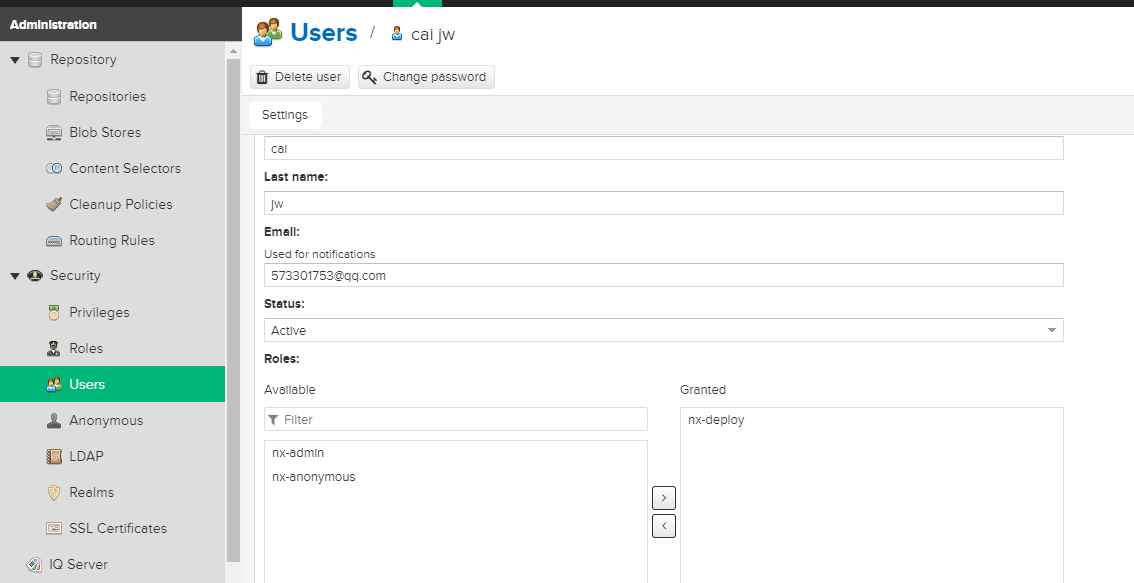
3.3. 创建角色,同时设置角色为nx-deploy
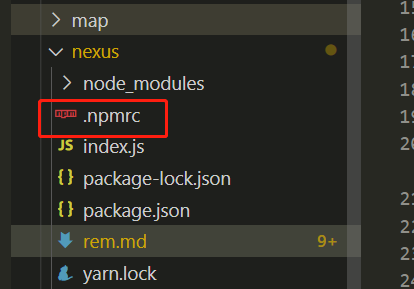
3.4. 客户端的.npmrc配置 (目录文件下创建)
registry=http://127.0.0.1:8081/repository/npm-group/
email=573301753@qq.com
always-auth=true
_auth="Y2FpanclM0FhZG1pbg=="
_auth是 username:password 的base64值,这样设置的好处是publish时就不用login了
4. 验证信息
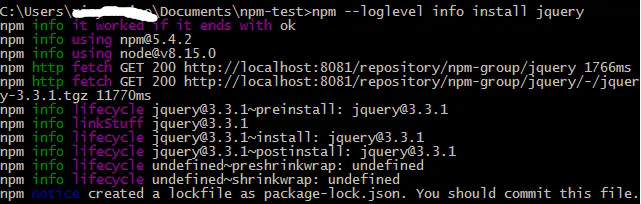
随便进入一个目录, 初始化package, npm init -y, npm --loglevel info install jquery 查看是否从自己的仓库地址拉取包
npm init -y
npm --loglevel info install jquery
#查看本地包的缓存地址(和私服无关)命令
npm config get cache
5. 发布到私服
5.1 入口文件编写
index.js
import PChart from '../packages/PChart';
const components = [
    PChart
];

const install = function(Vue) {
    components.forEach(component => {
        Vue.component(component.name, component);
    });
    Vue.prototype.$pChart = {
        setChartConfig
    };
};

if (typeof window !== 'undefined' && window.Vue) {
    install(window.Vue);
}

export default install;
package/PChart
<template>
    <div ref="chart"></div>
</template>

<script>
import mixin from '../src/util/mixin';
import CONFIG from '../src/config/config_';
export default {
    name: 'PChart',
    mixins: [mixin],
    methods: {
        initChart() {
            this.option.color = this.option.color || CONFIG.COLOR;
            this.option.textStyle = {
                color: CONFIG.FONT_COLOR,
                fontSize: CONFIG.FONT_S
            };
            return this.option;
        }
    }
};
</script>

<style scoped></style>
5.2 打包
"lib": "vue-cli-service build --target lib --name myLib src/chart/src/index.js",
5.3 package.json添加
private 必须改为false,main 为入口文件,publishConfig是上传到对应私服地址(这里一般选择hosted的地址)
"private": false,
 "main": "dist/myLib.umd.min.js",
"publishConfig": {
    "registry": "http://192.168.3.18:8081/repository/npm-power"
},
5.4 在包根目录执行npm publish即可。

