

快速原型开发
免于vue文件的繁杂配置,或者脚手架下载依赖的时间,这次让我们轻装上阵来实现一个notification弹框。
npm install -g @vue/cli  @vue/cli-service-global
npm i less less-loader -D
vue serve 就可以启动了。
用的vue方法api
Vue.extend 这是一个基础Vue构造器,创建一个“子类”。参数是一个包含组件选项的对象(同单文件.vue的参数,或者.vue文件导出的对象)。
// 创建构造器
var Profile = Vue.extend({
  template: '<p>{{firstName}} {{lastName}} aka {{alias}}</p>',
  data: function () {
    return {
      firstName: 'Walter',
      lastName: 'White',
      alias: 'Heisenberg'
    }
  }
})
// 创建 Profile 实例,并挂载到一个元素上。
new Profile().$mount('#mount-point')
extends:允许声明扩展另一个组件(可以是一个简单的选项对象或构造函数),而无需使用 Vue.extend。这主要是为了便于扩展单文件组件。使用他的原因是因为,可以在基础的notifation组件基础扩展一个新的组件来实现api式调用,而不会影响原来组件的正常使用。
var CompA = { ... }

// 在没有调用 `Vue.extend` 时候继承 CompA
var CompB = {
  extends: CompA,
  ...
}
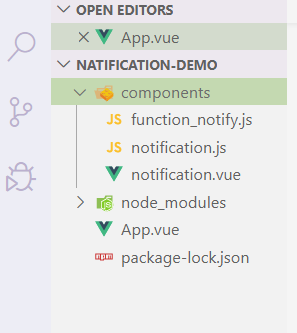
项目介绍
项目基本目录,App.vue是跟组件,components 文件夹是notifation的实现逻辑
基础组件(notification.vue)
- 组件接受
content来展示自定义内容。 - @after-leave 动画结束钩子
- 鼠标事件 主要是为了 后面的独立组件(function_notify)扩展,为了实现 鼠标停留在notifation组件展示,鼠标离开后,组件默认3秒自动消失
<template>
  <transition name="fade" @after-leave="handleLeave">
    <div class="notify-wrap" v-show="visible" :style="style" @mouseenter="handleMouseEnter" @mouseleave="handleMouseLeave">
      <div class="text">{{content || 'nofication'}}</div>
      <a  class="close" @click="close">X</a>
    </div>
  </transition>
</template>
<script>
export default {
  name: 'notification',
  props: {
    content: {
      type: String
    },
  },
  data() {
    return {
      visible: false
    }
  },
  computed: {
    style() {
      return {}
    }
  },
  methods:{
    close() {
      this.$emit('close')
    },
    // 动画消失事件
    handleLeave() {
      // alert('leaved')
      this.$emit('leaved')
    },
    handleMouseEnter() {
    // 后面扩展组件的方法覆盖 这里主要保证不报错
    },
    handleMouseLeave() {
    // 后面扩展组件的方法覆盖 这里主要保证不报错
    }
  }
}
</script>
<style lang="less" scoped>
.notify-wrap {
  position: fixed;
  width: 400px;
  min-height: 100px;
  background-color: #2E2E2E;
  color: antiquewhite;
  right: 10px;
  border-radius: 6px;
  display: flex;
  align-items: center;
  .text {
    flex: 1;
    padding-left: 20px;
    // height: 100%;
  }
  a {
    text-decoration: none;
  }
  .close {
    position: absolute;
    right: 10px;
    top: 6px;
    cursor: pointer;
  }

}
  /* 可以设置不同的进入和离开动画 */
/* 设置持续时间和动画函数 */
.fade-enter-active {
  transition: all .3s ease;
}
.fade-leave-active {
  transition: all .6s cubic-bezier(1.0, 0.5, 0.8, 1.0);
}
.fade-enter, .fade-leave-to
/* .slide-fade-leave-active for below version 2.1.8 */ {
  transform: translateY(10px);
  opacity: 0;
}
</style>
独立扩展组件(function_notify.js)
- screenBottom 记录组件离屏幕底部的距离;timeClock,组件自动消失的时间间隔
- style覆盖基础组件的样式
import Notification from './notification.vue';

export default {
  // 在原有的组件上扩展,不影响Notification 在模板中的正常使用
  extends: Notification,
  computed:{
    style() {
      return {
        bottom: this.screenBottom + 'px'
      }
    }
  },
  data() {
    return {
      screenBottom: 0,
      timeClock: 3000,
    }
  },
  mounted() {
    this.createTimer = setTimeout(()=>{
      this.close();
    },this.timeClock)
  },
  methods: {
    handleMouseEnter() {
      if(this.createTimer) {
        clearTimeout(this.createTimer)
      }
    },
    // 鼠标离开后让其自动消失
    handleMouseLeave() {
      this.createTimer = setTimeout(()=>{
        this.close();
      },this.timeClock)
    }
  }
}
notify方法的实现(notification.js)
- 通过Vue.extend得到了一个构造方法
- instanceArr 收集所有的实例;gap 组件之间的间隔
- 监听‘close’和‘leaved’事件,销毁实例
- 函数detoryIntance,销毁实例方法。
- 要在dom渲染后再获取元素的 offsetHeight
import Vue from 'vue';
import Notify from './function_notify';

// 得到一个构造函数
const constructors = Vue.extend(Notify)

let instanceArr = [];
let gap = 16;

let detoryIntance = (instance)=>{
  let delIndex = instanceArr.findIndex(ins=>ins.id == instance.id);
  if(delIndex>=0) {
    instanceArr.splice(delIndex,1);
    document.body.removeChild(instance.$el);
    instance.$destroy();
    // 更新其余instance 实例的高度
    // instance.$nextTick(()=>{
      instance.screenBottom = instance.$el.offsetHeight * (instanceArr.length-1) + gap * instanceArr.length;
      console.log(instance.screenBottom)
    // })
  }
}


// 暴露给外部的调用方法
export  function notify(options) {
    let { content,timeClock=3000 } = options;
    const instance = new constructors({
      propsData: {
        content
      },
      data: {
        timeClock
      }
    });
    // 如果是在ssr 没有dom操作
    if(instance.$isServer) {
      return false
    }

    instance.$mount()

    instance.id = `instance${instanceArr.length+1}`
    // 保证过渡动画生效
    instance.visible = true;
    // 监听关闭事件
    instance.$on('close',function() {
      instance.visible = false;
      // detoryIntance(instance)
    })
    // 监听动画结束事件
    instance.$on('leaved',function() {
      detoryIntance(instance)
    })

    document.body.appendChild(instance.$el);

    instanceArr.push(instance)
    // 计算实例的位置 要在 $el 加入到body后计算
    instance.$nextTick(()=>{
      instance.screenBottom = instance.$el.offsetHeight * (instanceArr.length-1) + gap * instanceArr.length;
    })
  }
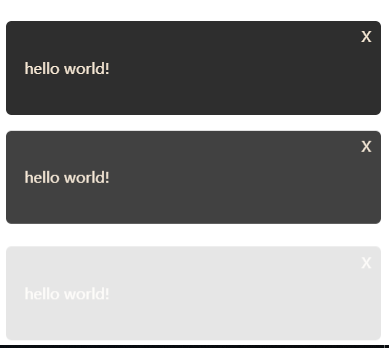
效果预览
最后我们点击页面按钮,组件就会屏幕右下方展示了。
App.vue
<template>
  <div>
    <button @click="showNotify">notify</button>
    <!-- 测试组件样式 -->
    <!-- <Notification></Notification> -->
  </div>
</template>

<script>
// import Notification from "./components/notification.vue";
import { notify } from "./components/notification.js";

export default {
  name: "app",
  // components: {
  //   Notification
  // },
  methods: {
    showNotify() {
      notify({
        content: "hello world!"
      });
    }
  }
};
</script>
