

五、webpack实战配置案例详解
1. Library的打包
我们要开发一个组件库或函数库的时候,如何通过webpack打包成npm包呢?
新建library文件夹,运行npm init -y
npm init -y
// package.json

{
  "name": "library",
  "version": "1.0.0",
  "description": "",
  "main": "index.js",
  "scripts": {
    "build": "webpack"
  },
  "keywords": [],
  "author": "Fruit Bro",
  "license": "MIT",
  "dependencies": {
    "webpack": "^4.41.6",
    "webpack-cli": "^3.3.11"
  }
}
npm install webpack webpack-cli --save
// webpack.config.js

const path = require('path')

module.exports = {
  mode: 'production',
  entry: './src/index.js',
  output: {
    path: path.resolve(__dirname, 'dist'),
    filename: 'library.js',
    ibraryTarget: 'umd', // 通用,不管任何模式引入import、require、script标签等,都可以正确引入到库
  }
}
代码如下:
// index.js

import * as math from './math'
import * as string from './string'

export default { math, string }
// math.js

export function add(a, b) {
  return a + b
}

export function minus(a, b) {
  return a - b
}

export function multiply(a, b) {
  return a * b
}

export function division(a, b) {
  return a / b
}
// string.js

export function join (a, b) {
  return a + ' ' + b
}
npm run build
打包完成,我们该如何使用呢?
// 引入方式
import library from 'library'
const library = require('library')
require(['library'], function () {

})

<script src='library.js'></script>
library.math想要以这种方式使用library需要的配置如下:
// webpack.config.js

const path = require('path')

module.exports = {
  mode: 'production',
  entry: './src/index.js',
  output: {
    path: path.resolve(__dirname, 'dist'),
    filename: 'library.js',
    library: 'library', // 这样就可以用library调用,打包生成的代码挂载到了页面的全局变量上
    libraryTarget: 'umd',
  }
}
在页面上运行
<!DOCTYPE html>
<html lang="en">
<head>
  <meta charset="UTF-8">
  <meta name="viewport" content="width=device-width, initial-scale=1.0">
  <title>Document</title>
</head>
<body>
  <script src='./library.js'></script>
</body>
</html>
library和libraryTarget是我们做库打包是经常要配置的两个参数
library: 'library',
libraryTarget: 'this' // 在全局的this上挂载了library,通过this.library可以获取到
libraryTarget: 'window' // 或在nodejs中用global
当我们希望我们的库中引入别的第三方库的时候,如lodash,写法如下:
npm install lodash --save
// string.js

import _ from 'lodash'

export function join (a, b) {
    return _.join([a, b], '')
}
npm run build
此时,生成的包变为了72.6KB,别人引用的时候也有可能会引入lodash,如下:
import _ from 'lodash'
import library from 'library'
此时需要做如下配置:
// webpack.config.js

const path = require('path')

module.exports = {
  mode: 'production',
  entry: './src/index.js',
  externals: ['lodash'], // 打包的时候,如果遇到了lodash,直接忽略这个库。可以是数组也可以是对象
  output: {
    path: path.resolve(__dirname, 'dist'),
    filename: 'library.js',
    library: 'library',
    libraryTarget: 'umd', // 常用配置,一般为umd
  }
}
参考文档: webpack.docschina.org/configurati…
重新打包
npm run build
此时生成的包,又重新变为了1.64 KiB,此时该如何使用呢?用法如下:
import _ from 'lodash'
import library from 'library'
externals用法
externals: {
    lodash: {
        root: '_', // 以script标签的方式引入,以_的方式注入全局变量,一般不用
        commonjs: 'lodash' // 库在commonjs环境下被使用
    }
}
写法如下
const lodash = require('lodash')  // 以require的方式引入
const library = require('library')
// package.json 修改入口

{
  "name": "library",
  "version": "1.0.0",
  "description": "",
  "main": "./dist/library.js",
  "scripts": {
    "build": "webpack"
  },
  "keywords": [],
  "author": "Fruit Bro",
  "license": "MIT",
  "dependencies": {
    "lodash": "^4.17.15",
    "webpack": "^4.41.6",
    "webpack-cli": "^3.3.11"
  }
}
把包发布到 npm
- 先在npm上注册账号
- 在项目的命令行中
npm adduser添加用户名和密码 - 运行
npm publish
这样其他人就可以通过npm install的方式安装并使用了
2. PWA的打包配置
npm install workbox-webpack-plugin --save-dev
// webpack.prod.js

const MiniCssExtractPlugin = require('mini-css-extract-plugin')
const workboxPlugin = require('workbox-webpack-plugin')
const merge = require('webpack-merge')
const commonConfig = require('./webpack.common.js')
const prodConfig =  {
    mode: 'production',
    devtool: 'cheap-module-source-map',
    module: {
      rules: [
        {
          test: /\.css$/,
          use: [
            {
              loader: MiniCssExtractPlugin.loader,
              options: {
                publicPath: '../'
             }
            },
            "css-loader"
          ]
        }
      ]
    },
    plugin: [
      new MiniCssExtractPlugin({
          filename: '[name].css',  // 被页面直接引用,走这个名字
          chunkFilename: '[name].chunk.css',
      }),
      new workboxPlugin.GenerateSW({ // SW: service worker
          clientsClaim: true,
          skipWaiting: true, // 还有其他很多配置项
      }),
      new OptimizeCssAssetsPlugin({
        assetNameRegExp: /\.optimize\.css$/g,
        cssProcessor: require('cssnano'),
        cssProcessorPluginOptions: {
          preset: ['default', { discardComments: { removeAll: true } }],
        },
        canPrint: true
      })
    ]
}

module.exports = merge(commonConfig, prodConfig)
npm run build
运行后会多出两个文件:1. service-worker.js 2. precache-mainfest.***.js
// index.js

if ('serviceWorker' in navigator) { // 如果浏览器支持serviceworker
    window.addEventListener('load', () => {
        navigator.serviceWorker.register('/service-worker.js')
          .then(registration => { // 注册成功
              console.log('service-worker registed')
          }).catch(error => {
              console.log('service-worker registed error')
          })
    })
}
重新打包代码,重启服务器后,访问页面,然后关闭服务器,刷新页面,依旧可以正常访问。关于PWA的配置项还有很多。
3. TypeScript 的打包配置
规范了我们的代码,提升代码的可维护性,
- 创建文件夹
type-script npm init -y- 创建
webpack.config.js - 新建
src文件夹,新建index.tsx
npm install webpack webpack-cli --save-dev
中文官网: www.tslang.cn/
TypeScript是JavaScript的超集.
// index.tsx

class Greeter {
    greeting: string;
    constructor(message: string) {
        this.greeting = message;
    }
    greet() {
        return "Hello, " + this.greeting;
    }
}

let greeter = new Greeter("world");

let button = document.createElement('button');
button.textContent = "Say Hello";
button.onclick = function() {
    alert(greeter.greet());
}

document.body.appendChild(button);
// webpack.config.js

const path = require('path')
module.exports = {
    mode: 'production',
    entry: './src/index.tsx',
    module: {
        rules: [{
            test: '/\.tsx?$/',
            use: 'ts-loader',
            exclude: /node_modules/
        }]
    },
    output: {
        filename: 'bundle.js',
        path: path.resolve(__dirname, 'dist')
    }
}
npm install ts-loader typescript --save-dev
{
  "name": "type-script",
  "version": "1.0.0",
  "description": "",
  "main": "index.js",
  "scripts": {
    "bulid": "webpack"
  },
  "keywords": [],
  "author": "",
  "license": "ISC"
}
安装ts-loader之后,还需要配置tsconfig.json
// tsconfig.json

{
    "compilerOptions": {
        "outDir": "./dist", // 代码打包到dist下
        "module": "es6", // 以import的方式引入模块
        "target": "es5", // 打包生成的目标语法
        "allowJs": true, // 允许引入js文件
    }
}
npm run build
生成bundle.js
引入lodash库
npm install lodash --save
没有体现出ts的优势
npm install @types/lodash --save-dev

npm install @types/jquery --save-dev
此时引用需要改为如下写法
import * as _ from 'lodash'
如何知道哪些库可以安装对应的类型文件? github.com/DefinitelyT…
可以在如下网站进行搜索:TypeSearch
总结:
ts是js的超集ts支持对属性或方法类型的校验- 打包
ts语法需要tsconfig.json,tsconfig.json配置了对ts打包的配置项 ts引入外部的库,需要安装这些库的类型文件,如@types/lodash
4. 使用WebpackDevServer实现请求转发
参考文档: webpack.docschina.org/configurati…
devServer: {
    proxy: {
        'react/api': 'http://xxx.com',  // 当请求react/api对应的接口时,就会把路由转发到http://xxx.com下
        target: ''
    }
}
更进一步配置
默认情况下,不接受运行在 HTTPS 上,且使用了无效证书的后端服务器。如果你想要接受,修改配置如下:secure: false
devServer: {
    proxy: {
        'react/api': {
            target: 'http://xxx.com',
            secure: false, // 对https网址的请求的转发生效
            pathRewrite: {
                'header.json' : 'demo.json' // 如果请求header.json则把demo.json的数据返回,可做为临时接口使用,转发数据,不需要改源代码,就能拿到转发的数据
            },
            bypass: function(req, res, proxyOptions) { // 拦截
              if (req.headers.accept.indexOf('html') !== -1) { // 要接收的是html的内容时,直接返回/index.html的内容
                console.log('Skipping proxy for browser request.');
                return '/index.html';
              }
            },
            index: '', // 跟路由的代理转发,不能直接用'/'
            changeOrigin: true, // 后端对origin做了限制,解决对origin的限制
            headers: { // 在请求头中自定义内容,模拟登陆行为
                host: 'www.xxx.com'
            }
        },  //
    }
}
是webpackdevserver的proxy
// 多路径的写法
proxy: [{
    context: ['/auth', '/api'],
    target: 'http://localhost:3000',
}],
参考文档: webpack.docschina.org/configurati…
从上述文档可以看出,实际上webapckdevserver底层用了http-proxy-middleware这个库。只会在开发环境生效。
完全可以替代掉charles等代理工具。
5. WebpackDevServer解决单页面应用路由问题
npm install react-router-dom --save
import React, { Component } from 'react'
import { BrowserRouter, Route } from 'react-router-dom'
import ReactDom from 'react-dom'
import Home from './home.js'
import List from './list.js'

class App extends Component {
  render () {
    return (
      <BrowserRouter>
        <div>
          <Route path='/' exact component={Home} />
          <Route path='/list' component={List} />
        </div>
      </BrowserRouter>

      )
  }
}

ReactDom.render(<App />, document.getElementById('root'))
此时,虽然写了/和/list两个路由,但/list路由无法访问到。因为我们没有list.html页面。
参考文档:webpack.docschina.org/configurati…
module.exports = {
  //...
  devServer: {
    historyApiFallback: true // 把所有的路由转换到根路径的请求。可配置内容非常多。这个问题是不能解决线上的问题的,需要在nginx或apache上做相同的配置。
  }
};
module.exports = {
  //...
  devServer: {
    historyApiFallback: {
      rewrites: [ // 通过更具体的规则来控制路由
        { from: /^\/$/, to: '/views/landing.html' },
        { from: /^\/subpage/, to: '/views/subpage.html' },
        { from: /./, to: '/views/404.html' }
      ]
    }
  }
};
此配置底层使用的库如下:
history({
  rewrites: [
    {
      from: /^\/libs\/.*$/, // 访问libs目录
      to: function(context) {
        return '/bower_components' + context.parsedUrl.pathname;
      }
    }
  ]
});
6. ESLint 在webpack中的配置
- ESLint是什么
- 为什么要在webpack中配置ESLint 你的代码写的是否规范呢?
npm install eslint --save-dev
在项目目录下执行如下命令
npx eslint --init
一般选择业界通用的规范Use a popular style guide,然后会有多种通用模板Airnb、 Standard、 Google,一般选择Airnb

生成了.eslintrc.js
运行
npx eslint src
检测src下的文件
参考文档: eslint.bootcss.com/docs/user-g…
"parser": "esprima",官方默认使用的是esprima,我们使用的是babel-eslint
npm install babel-eslint --save-dev
在编辑器vscode上安装eslint插件。编辑器会结合我们的配置文件自动对不规范的语法标红。
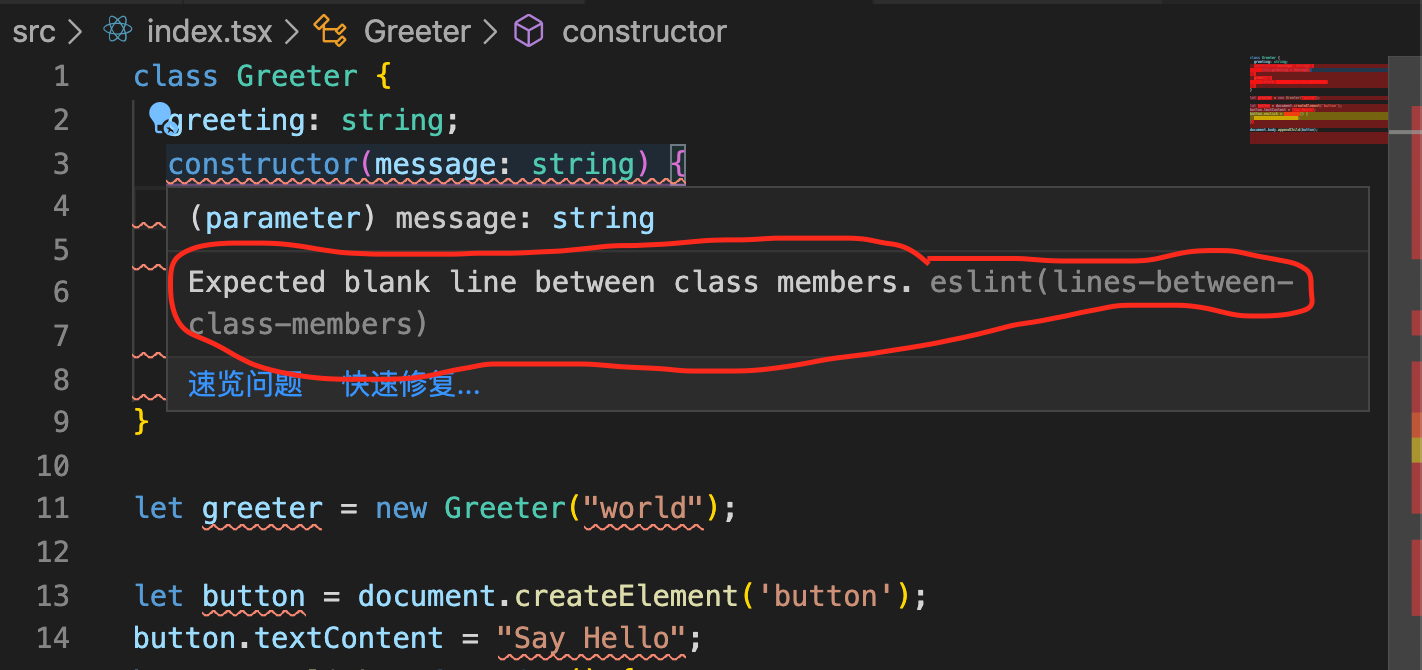
lines-between-class-members,class类之间需要有空行,如果不想使用这条规则,在以在.eslintrc.js中进行如下配置,就不会有上述错误提示了:
// .eslintrc.js
"rules": {
    "lines-between-class-members": 0,
}
如果document提示报错,则进行如下配置:
// .eslintrc.js
"globals": {
    document: false, // document这个全局变量在代码里不允许被覆盖
},
无法保证所有同事都用同一个编辑器,此时可以用webpack中把eslint结合进去,这样不管有没有eslint插件,都可以看到代码的问题。
npm install eslint-loader --save-dev
loader执行顺序,从后到前
// webpack.config.js
rules: [{
    test: /\.js$/,
    exclude: /node_modules/,
    use: ['babel-loader', 'eslint-loader'], // 先用eslint-loader检测对不对,再用babel-loader转化代码
}]
运行时如果代码有错误则报错Module Error (from ./node_modules/eslint-loader/index.js),但报错并不是非常直观,此时我们可以进行如下配置
devServer: {
  overlay: {
    warnings: true,
    errors: true
  },
   cache: true
}
或
devServer: {
  overlay: true
}
则会在页面上直接弹出一个蒙层,提示错误的原因和位置。这样就可以快速定位问题,快速解决问题。
overlay + eslint-loader 就可以做到在页面上提示代码不规范的问题。
参考文档: webpack.js.org/loaders/esl…
// webpack.config.js
rules: [{
    test: /\.js$/,
    exclude: /node_modules/,
    use: ['babel-loader', {
        loader: {
           loader: 'eslint-loader',
           options: {
               fix: true // 会自动帮你解决简单的代码错误
               cache: true, // cache参数可减少eslint对打包代码的性能的损耗
           }
        }
    }],
}]
cache参数可减少eslint对打包代码的性能的损耗。
force: pre 强制某个loader优于其他loader,先执行。
最佳实践:
一般不会把eslint-loader配置在webpack中,因为这样会降低打包速度。一般会配置在git的钩子中,在提交代码的时候,对代码进行eslint的检测,在钩子里运行eslint src,如果不规范则会禁止提交,并报出相应的错误,解决完之后才可以进行代码提交。
在你们的项目中,又是如何做的呢?
7. webpack性能优化
-
提升webpack打包速度的方法
- 跟上技术的迭代(Node、Npm、Yarn)。webpack运行在node之上,新版本更新升级webpack、node、npm、yarn的版本。
- 在尽可能少的模块上应用Loader。不必要就可以删除。
loader: 'imports-loader?this=>window' // 一般不会这么做,可删除

new webpack.ProvidePlugin({
	$: 'jquery',  // 较少用,可删除
	_join: ['lodash', 'join']
}),


optimization: {
	runtimeChunk: {
		name: 'runtime'
	},
	usedExports: true, //
	splitChunks: {
      chunks: 'all',
      cacheGroups: {
        vendors: {
          test: /[\\/]node_modules[\\/]/,
          priority: -10,
          name: 'vendors',
        }
      }
    }
},

rules: [{
	test: /\.js$/,
	exclude: /node_modules/,  // node_modules下的代码已经打包编译过了。或者写成 include: path.resolve(__dirname, '../src')
	use: [{
		loader: 'babel-loader'
	}]
}]
// 图片因为都需要做处理,因此就没有必要配置exclude或include了。
合理的使用exclude或include可以降低loader的执行频率,从而提高打包速度。
Plugin尽可能少的使用,同时确保Plugin的可靠性
一般用官方推荐的插件,经过了官方的性能验证。
optimization: {
	minimizer: [new OptimizeCSSAssetsPlugin({})] // 对css代码进行压缩,在开发环境时不需要对代码进行压缩。
},
(1). 插件要合理的使用,不要使用冗余的没有意义的插件。
(2).选择性能比较好的,官方认可的插件。
resolve参数合理配置
test: /\.jsx?$/ , // ?表示x可有可无,js和jsx都会走babel-loader
module.export = {
  resolve: {
    extensions: ['.js', '.jsx'] // 当引入某个文件的时候,先找以js、jsx结尾的文件。配置resolve之后,就不会有编译之后无法解析的问题了。不要滥用,如写.png .css,因为每次文件的查找,都会调用node底层调用文件的操作。
  }
}
当引入某个文件的时候,先找以js、jsx结尾的文件。配置resolve之后,就不会有编译之后无法解析的问题了。不要滥用,如写.png .css,因为每次文件的查找,都会调用node底层调用文件的操作。因此,一般只有引入js、jsx这类逻辑性文件的时候。才会把他放到extensions这个配置项中。资源类的,如css、png等不建议配置,而是显式的引入。
例如:
import child from './child' // 会优先查找child.js或child.jsx文件
module.export = {
  resolve: {
    extensions: ['.js', '.jsx'],
    mainFiles: ['index', 'child'] // 先找以index开头的文件,再找以child开头的文件
  }
}
如:若child文件夹下包含child.jsx,上面的配置即可生效。这个配置一般不用。
import child from './child'
module.export = {
  resolve: {
    extensions: ['.js', '.jsx'],
    mainFiles: ['index', 'child'],
    alias: {
       '@/src': path.resolve(__dirname, `../src`),  // 当看到@/src这个路径或字符串的时候,实际上指向的是../src目录
    }
  }
}
- 使用
DllPlugin提高打包速度
(1)创建webpack.dll.js
(2)修改webpack.commom.js,引入add-asset-html-wepack-plugin和DllReferencePlugin
(3) 结合引入的第三方模块,同vendors.manifest.json进行分析
splitChunks配置参数主要作用:将所有的第三方模块(node_modules)中的文件都打包到vendor.js文件中。
vendor: {
  test: /[\\/]node_modules[\\/](react|react-dom|react-router-dom)[\\/]/,
  name: 'vendor',
  chunks: 'initial',
  minChunks: 2
}
优化思路:第三方模块代码一般是不会变的。因此可以做优化,可以单独打包生成文件,只在第一次打包的时候分析其中的代码,之后再打包的时候,直接用上一次的结果即可。
创建webpack.dll.js,将第三方模块单独打包到vendor.dll.js中。
// webpack.dll.js

const path = require('path')
module.export = {
    mode: 'production',
    entry: {
        vendors: ['react', 'react-dom', 'lodash'] // 把这三块内容做打包到dll文件夹下
    },
    output: {
        filename: '[name].dll.js',
        path: path.resolve(__dirname, '../dll'),
        library: '[name]' // 打包生成的库,在使用时全局保留的名字。此处为名字为vendors。
    }
}
在浏览器控制台输入vendors,则会打印响应的方法。
// package.json

{
    "scripts": {
        "build:dll": "webpack --config ./build/webpack.dll.js",
    }
}
npm run build:dll
单独配置了第三方模块打包的webpack。
我们还需要把生成的vendor.dll.js文件引入到index.html文件中。我们需要修改一下webpack.common.js的配置。
// 先安装
npm install add-asset-html-wepack-plugin --save-dev // 作用:往html-wepack-plugin 增加一些静态资源
// webpack.common.js

const AddAssetHtmlWebpackPlugin = require('add-asset-html-wepack-plugin')

plugins: [
  new AddAssetHtmlWebpackPlugin({
      filepath: path.resolve(__dirname, ../dll/vendors.dll.js)
  })
]
上述配置将vendors.dll.js,引入到了index.html中。
目标:第三方模块只打包一次。此时该如何使用呢?此时并没有使用vendors.dll.js,而是依旧使用的node_module下的第三方模块。
目标:
- 第三方模块只打包一次。
- 引入第三方模块的时候,使用
vendors.dll.js文件。
配置修改如下:
// webpack.dll.js

const path = require('path')
const webpack = require('webpack')

module.export = {
    mode: 'production',
    entry: {
        vendors: ['react', 'react-dom', 'lodash'] // 把这三块内容做打包到dll文件夹下
    },
    output: {
        filename: '[name].dll.js',
        path: path.resolve(__dirname, '../dll'),
        library: '[name]' // 打包生成的库,在使用时全局保留的名字。此处为名字为vendors。
    },
    plugin: [
      new webpack.DllPlugin({
          name: '[name]',  // 对这个库文件进行分析,分析的文件名,就是上面生成的文件名
          path: path.resolve(__dirname, '../dll/[name].manifest.json'), // 将第三模块的映射关系放到了名字叫做库名字的manifest.json文件下
      })
    ]
}
重新运行npm run prod:dll命令,就会生成vendors.manifest.json文件。之后,在进行webpack打包的时候,就会根据vendors.manifest.json的映射文件,和vendors的全局变量,对我们的源代码进行分析,一旦分析到有lodash、react、react-dom等库是在vendors.dll.js文件中时,就是使用vendors.dll.js中的内容,就不会在node_modules中引入我们的模块了。
如何结合vendors全局变量和vendors.manifest.json文件进行wepack的配置呢?做法如下
// webpack.common.js

const AddAssetHtmlWebpackPlugin = require('add-asset-html-wepack-plugin')

plugins: [
  new AddAssetHtmlWebpackPlugin({
      filepath: path.resolve(__dirname, ../dll/vendors.dll.js)
  }),
  new webpack.DllReferencePlugin({ // dll引入的一个插件
      manifest: path.resolve(__dirname, '../dll/vendors.mainfest.json') // 当打包的时候引入第三方模块的时候,这个插件会在vendors.mainfest.json中找映射关系,找到映射关系就没必要再打包进来了,就会到全局变量里去拿。不在映射关系里时,才会在node_modules中进行查找。
  })
]
结合DllPlugin和DllReferencePlugin能够很大程度的提升代码打包效率。
我们还可以对dll文件进行拆分,如下:
// webpack.dll.js

module.export = {
    mode: 'production',
    entry: {
        vendors: ['lodash'],
        react: ['react', 'react-dom', ], // 将react拆分出来
    },
    output: {
        filename: '[name].dll.js',
        path: path.resolve(__dirname, '../dll'),
        library: '[name]'
    },
    plugin: [
      new webpack.DllPlugin({
          name: '[name]',
          path: path.resolve(__dirname, '../dll/[name].manifest.json'),
      })
    ]
}
生成文件如下:
react.dll.js
react.manifest.json
vendors.dll.js
vendors.manifest.json
在使用的地方也需要修改,即webpack.common.js修改
// webpack.common.js
配置两份

const AddAssetHtmlWebpackPlugin = require('add-asset-html-wepack-plugin')

plugins: [
  new AddAssetHtmlWebpackPlugin({
      filepath: path.resolve(__dirname, '../dll/vendors.dll.js')
  }),
  new AddAssetHtmlWebpackPlugin({
      filepath: path.resolve(__dirname, '../dll/react.dll.js')
  }),
  new webpack.DllReferencePlugin({
      manifest: path.resolve(__dirname, '../dll/vendors.mainfest.json')
  }),
  new webpack.DllReferencePlugin({
      manifest: path.resolve(__dirname, '../dll/react.mainfest.json')
  }),
]
多个dll文件时的配置,思路:plugins为数组。
// 先拆出两个基础plugin
const plugins = [
    new HtmlWebpackPlugin({
        template: 'src/index.html',
    }),
    new CleanWebpackPlugin(['dist'], {
        root: path.resolve(__dirname, '../')
    })
]
然后用node动态分析dll文件夹中有几个js和json文件。
const fs = require('fs')

const plugins = [
    new HtmlWebpackPlugin({
        template: 'src/index.html',
    }),
    new CleanWebpackPlugin(['dist'], {
        root: path.resolve(__dirname, '../')
    })
]

const files = fs.readdirSync(path.resolve(__dirname, '../dll') // 读取dll文件夹的所有内容
console.log(files) // 打印查看files的内容

files.forEach(file => {
    if (/.*\.dll.js/.test(file)) {
        plugins.push(new AddAssetHtmlWebpackPlugin({
            filepath: path.resolve(__dirname, '../dll', file) // 改为file
        }))
    }
    if (/.*\.manifest.json/.test(file)) {
        plugins.push(new webpack.DllReferencePlugin({
          manifest: path.resolve(__dirname, '../dll/', file)  // 改为file
       }))
    }
})
之后,webpack.common.js的plugins就可以做如下修改
// webpack.common.js
plugins: plugins,
因为键和值的名字一样,也可以写成
plugins,
之后,再改动webpack.dll.js的时候,就不用再改动webpack.common.js了。
总结: webpack可以通过DllPlugin的方式来提高打包速度。原因:每次打包的时候,第三方模块基本上是不变的,每次打包都要对模块进行分析,消耗性能。在第一次打包的时候,把第三方模块的文件单独打包,放到dll文件夹下管理,之后直接在dll文件夹里去引入之前打包好的第三方模块。
在webpack.dll.js中,通过webpack.DllPlugin来生成xxx.mainfest.json关系映射文件。然后在webpack.common.js文件中,使用webpack.DllReferencePlugin插件,把对应的映射文件引入进来。这样,在源代码里引入第三方模块的时候,就会到dll目录下找,如果发现已经打包过,就直接用了,就能节约打包时间。最后,我们还要将dll.js文件挂载到index.html上,挂载通过AddAssetHtmlWebpackPlugin插件来实现。
使用DllPlugin提高打包速度,这些修改对于业务来说价值非常大。
- 控制包文件大小
thread-loader,parallel-webpack,happypack多进程打包。借助node的多进程提升打包速度。parallel-webpack用于多页打包,开启多个进程一起打包。- 合理使用
SourceMap,不同环境什么样的SourceMap是最合适的。 - 结合
stats分析打包结果,借助打包分析工具,查看打包情况。 - 开发环境内存编译。开发时,代码放到内存中,内存的读取比硬盘读取快的多。
- 开发环境无用插件剔除。
mode: 'development',development不需要做代码压缩,没有意义。
8. 多页面打包配置
单页面:整个应用中只有一个html文件.
// webpack.common.js

module.exports = {
    entry: {
        main: './src/index.js',
        list: './src/list.js',
    }
}
这样就打包生成了main.js和list.js两个文件,我们希望两个html分别引入两个html文件,而不是都引入到同一个html文件中。需要chunks参数来解决
接下来就来修改HtmlWebpackPlugin,帮我们生成html的插件.
参考文档: github.com/jantimon/ht…
new HtmlWebpackPlugin({
    template: 'src/index.html', // 以src下的index.html作为模板生成html
    filename: 'index.html',
    chunks:   ['runtime', 'vendors', name]// 此html要引入的js文件。如:runtime运行时的代码
})
这样就可以实现在list.html中引入list.js文件,而不引入main.js.
实践配置
chunks: [name, 'vendor', 'antd', `runtime~${name}`],
多页面无非就是配置了多个HtmlWebpackPlugin。
const makePlugins = (configs) => {
    const plugins = [
        new CleanWebpackPlugin(['dist'], {
            root: path.resolve(__dirname, '../')
        })
    ]

    Object.keys(configs.entry).forEach(item => {
        Plugins.push(
          new HtmlWebpackPlugin({
            template: 'src/index.html',
            filename: `${item}.html`,
            chunks:   ['runtime', 'vendors', item]
          })
        )

    })

    // 将dll的配置文件也加入到plugin中

    const files = fs.readdirSync(path.resolve(__dirname, '../dll') // 读取dll文件夹的所有内容
    console.log(files) // 打印查看files的内容

    files.forEach(file => {
        if (/.*\.dll.js/.test(file)) {
            plugins.push(new AddAssetHtmlWebpackPlugin({
                filepath: path.resolve(__dirname, '../dll', file) // 改为file
            }))
        }
        if (/.*\.manifest.json/.test(file)) {
            plugins.push(new webpack.DllReferencePlugin({
              manifest: path.resolve(__dirname, '../dll/', file)  // 改为file
           }))
        }
   })
}

configs.plugins = makePlugins(configs)
这样就能最大程度的自动化的进行多页面打包了。
