我们在开发后台管理系统的时候,很多功能都是类似的,列表页,新增页,详情页,每次开发新模块,就是一顿
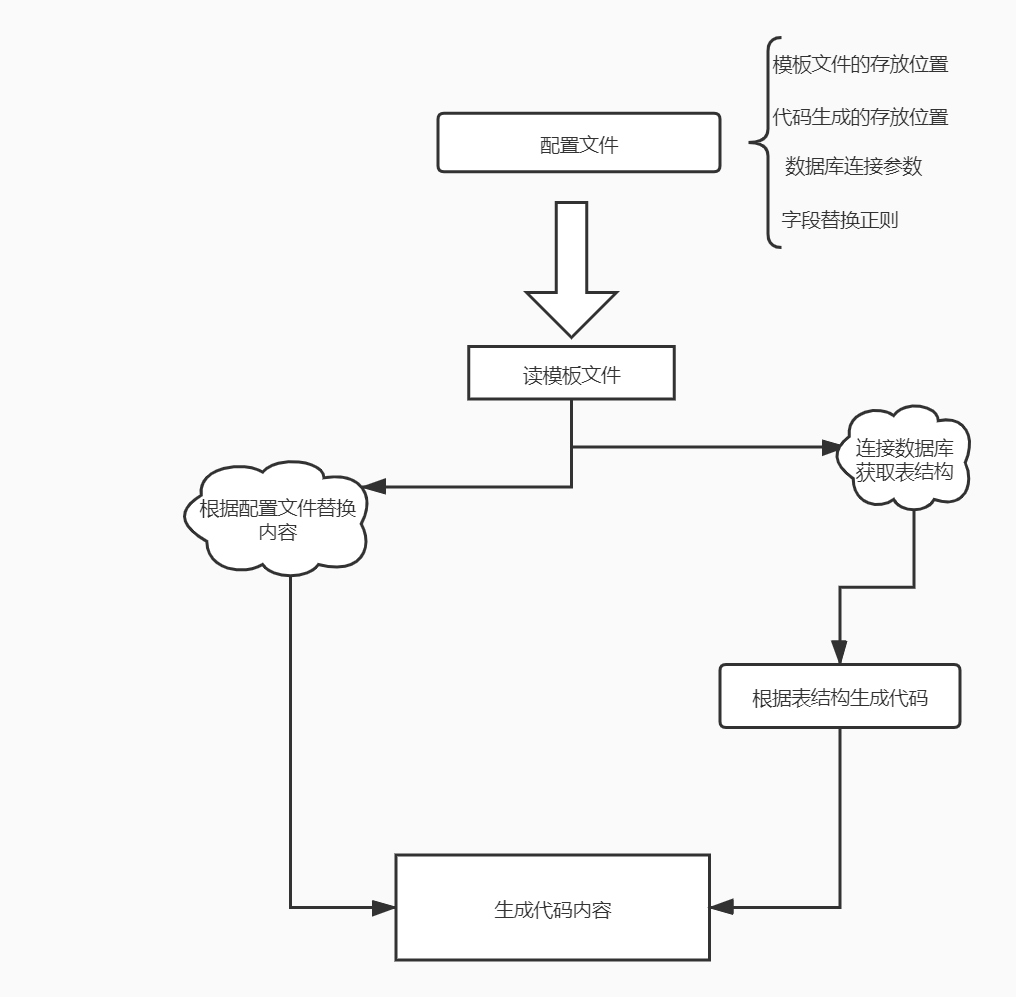
ctrl+c, ctrl+v然后拼命的改字段,改接口,改路由一波操作到下班😖,每天重复工作,不仅没时间提高自己或者逛掘金😛每天都累成狗在这样的背景下我们可以根据前端的页面的公共的部分和后端数据库的表结构生成模板文件少搬一些砖,下面说下我实现的一个简单的前端代码生成器的实现, 下面是流程图, 代码只有60行左右哦,你们都能根据自己的需求,进行改造的,早日脱离ctrl+c, ctrl+v
读写内容
读写文件,用到fs模块和path模块, 读取模板文件的内容 => 替换内容 => 生成代码
- 代码里用到的node内置模块的api
| 函数 | 功能 |
|---|---|
| fs.existsSync | (同步)判断目录或者文件是否存在 |
| fs.mkdirSync | (同步)创建目录 |
| fs.readFile | (异步)读文件 |
| fs.writeFileSync | (同步)写文件 |
| path.resolve | 获取绝对路径 |
const config = require('./config')
const fs = require('fs')
const path = require('path')

function createTpl() {
    // 代码存放的目录
    const dirPath = path.resolve(__dirname, config.dir)
    // 模板存放的目录
    const templatePath = path.resolve(__dirname, './template')
    // 文件列表
    const files = config.files
    // 判断代码存放的目录是否存在
    if (!fs.existsSync(dirPath)) {
        fs.mkdirSync(dirPath)
    }
    // 模板是否存在
    if (fs.existsSync(templatePath)) {
        // 模板文件遍历
        files.map((file) => {
            // 模板文件路径
            let tplFilePath = path.resolve(templatePath, file)
            // 如果模板文件存在
            if (fs.existsSync(tplFilePath)) {
            // 读模板文件
                fs.readFile(tplFilePath, (err, data) => {
                   let text = data.toString() // buffer to string
                   // 其他操作...
                   // ....
                   // 写文件
                    fs.writeFileSync(path.resolve(dirPath,`./${file}`), text)
                })
            }
        }
    }
}
读取表结构
使用了这个包mysql来连接数据库读表结构
var mysql = require('mysql');
function getDatabaseSchema(database, table, callback = () => { }) {
if (R.type(table) === "Function") {
callback = table
table = ''
}
// 创建连接, database.connect为配置文件的配置,配置如下:
/* {
host: '',
user: 'root',
password: '',
database: 'test'
}*/
var connection = mysql.createConnection(database.connect);
connection.connect();
// sql: show full columns from tableName
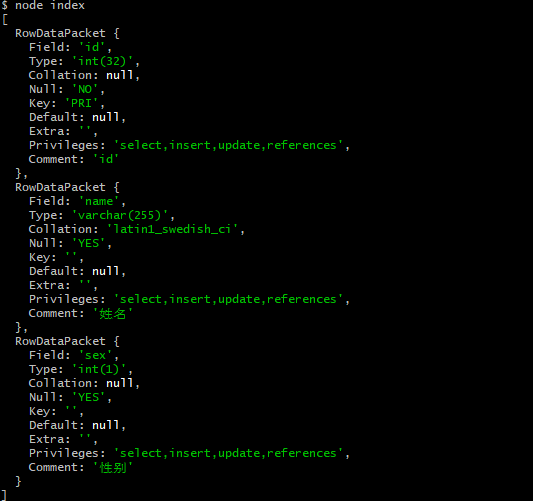
connection.query(`SHOW FULL COLUMNS FROM ${table || database.table}`, function (error, results) {
if (error) throw error;
// results的结构如下图
console.log(results)
// Field: 为字段名, Comment为注释
callback(R.map((item) => {
return [item.Field, item.Comment]
})(results))
});
connection.end();
}
替换规则
替换规则要通过自己写正则表达式定义替换,我定义了2种替换规则,一种是字段替换,一种行替换。
字段替换
// 配置文件的内容
regs: {
ClassName: 'User'
}
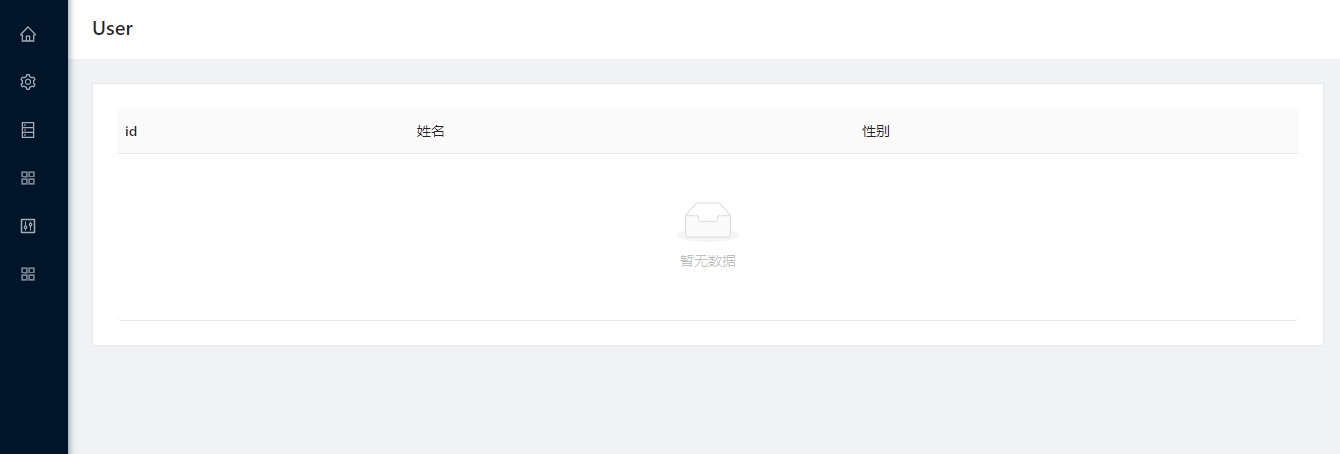
// 模板内容
class { $ClassName$ } extends React.Component{
render(){
return (
<PageHeaderWrapper title="{$ClassName$}">
<Card>
<Table
rowKey="id"
columns={schema.columns}
size="middle"
/>
</Card>
</PageHeaderWrapper>)
}
}
export default { $ClassName$ }
// 代码内容
class User extends React.Component{
render(){
return (
<PageHeaderWrapper title="User">
<Card>
<Table
rowKey="id"
columns={schema.columns}
size="middle"
/>
</Card>
</PageHeaderWrapper>)
}
}
export default User
行替换
// 配置文件的内容, item是上图数据库的RowDataPackets
    lineRegs: [
        ['#!!', item => `{title: '${item[1]}', dataIndex: '${item[0]}'}, `]
    ],
// 模板文件
export const columns = [
    #!!
]
// 代码文件
export const columns = [
    {title: 'id', dataIndex: 'id'},
    {title: '姓名', dataIndex: 'name'},
    {title: '性别', dataIndex: 'sex'},
]
总结
这个小工具由上面3小块(文件读写,数据库表结构,内容替换)组成,大致能满足简单的定制化模板创建(要自己改代码哦),提高开发效率。 代码链接