

1. 全局安装 vue-cli-server
yarn global add @vue/cli-service-global
2. 快速创建项目
vue create projectName
3. vue.config.js
如果要覆盖 webpack 的配置,根目录需要新增 vue.config.js 文件
// 这里的配置,会覆盖默认的webpack的配置

module.exports = {
    devServer: {
        open: true, // 配置自动打开浏览器
        port: 3000 // 配置端口号
    }
};
4. rem 布局-插件 postcss-pxtorem 的配置
4.1 安装插件
yarn add lib-flexible postcss-px2rem
4.2 在 public 中的 index.html 中删除 meta 标签
flexible 会为页面根据屏幕自动添加 标签,动态控制 initial-scale、maximum-scale、minimum-scale等属性的值。
4.3 在 src/main.js 中导入插件包
// 导入 rem 的 js,动态的设置了不同屏幕的 html 根元素的 font-size
import 'lib-flexible';
4.4 配置 vue.config.js
// 这里的配置,会覆盖默认的webpack的配置

module.exports = {
    devServer: {
        open: true, // 配置自动打开浏览器
        port: 3000 // 配置端口号
    },
    // rem 的配置
    css: {
        loaderOptions: {
            css: {},
            postcss: {
                plugins: [
                    require('postcss-px2rem')({
                        // 适配 375 屏幕,设计图 750 中测量出来的尺寸需 / 2
                        // 配置成 37.5 是为了兼容没有适配 rem 布局的第三方 ui 库
                        remUnit: 37.5
                    })
                ]
            }
        }
    }
};
5. 配置代理服务器
webpack 反向代理可以起到一个临时的代理服务器,帮助解决开发过程中的跨域问题
5.1 安装 axios
yarn add axios
5.2 发送请求
views/Home.vue
<template>
<div id="home">
这是 home 组件
</div>
</template>
<script>
import axios from 'axios';
export default {
async created() {
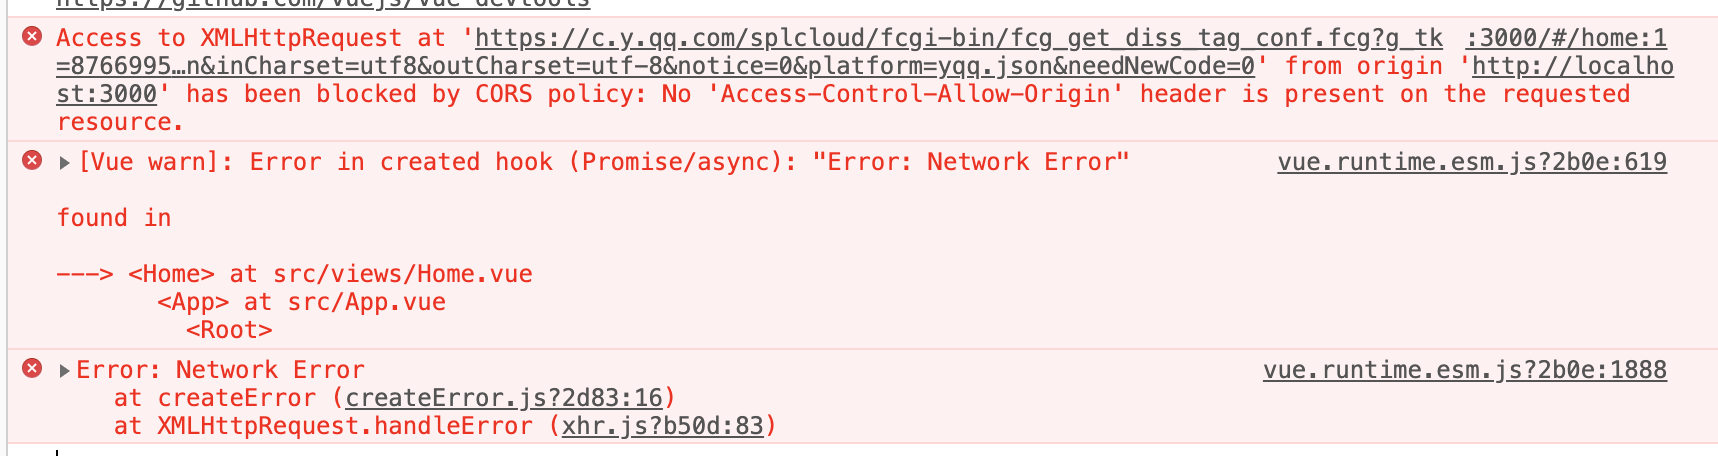
const url = 'https://c.y.qq.com/splcloud/fcgi-bin/fcg_get_diss_tag_conf.fcg?g_tk=876699558&loginUin=1341549382&hostUin=0&format=json&inCharset=utf8&outCharset=utf-8¬ice=0&platform=yqq.json&needNewCode=0';
const res = await axios.get(url);
console.log(res);
}
}
</script>
<style>
</style>
此时会出现跨域问题:
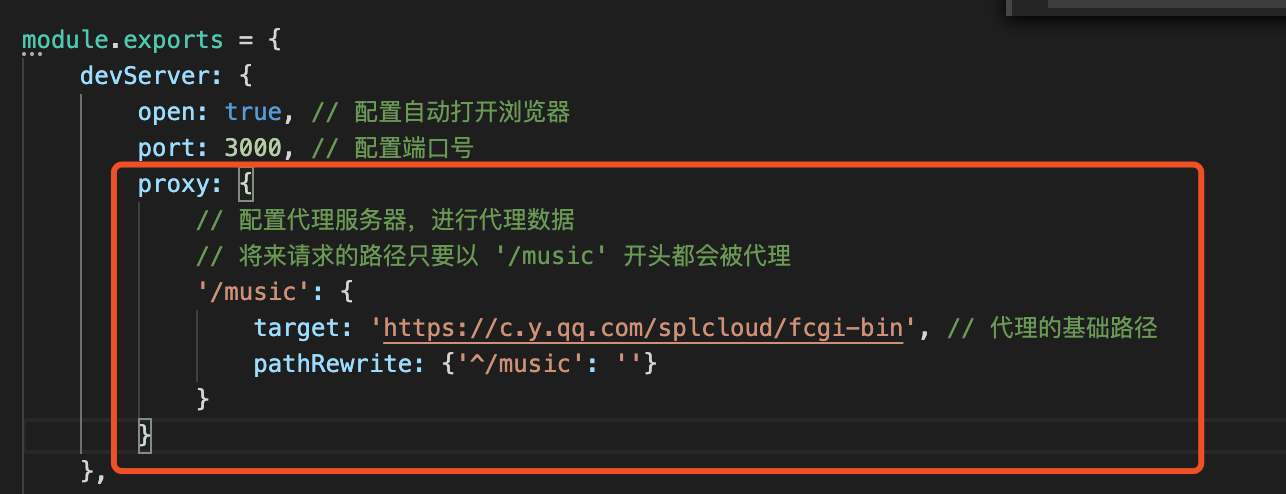
5.3 配置反向代理,解决跨域问题
vue.config.js
// 这里的配置,会覆盖默认的webpack的配置

module.exports = {
    devServer: {
        open: true, // 配置自动打开浏览器
        port: 3000, // 配置端口号
        proxy: {
            // 配置代理服务器,进行代理数据
            // 将来请求的路径只要以 '/music' 开头都会被代理
            '/music': {
                target: 'https://c.y.qq.com/splcloud/fcgi-bin', // 代理的基础路径
                pathRewrite: {'^/music': ''}
            }
        }
    },
    // rem 的配置
    css: {
        loaderOptions: {
            css: {},
            postcss: {
                plugins: [
                    require('postcss-px2rem')({
                        // 适配 375 屏幕,设计图 750 中测量出来的尺寸需 / 2
                        // 配置成 37.5 是为了兼容没有适配 rem 布局的第三方 ui 库
                        remUnit: 37.5
                    })
                ]
            }
        }
    }
};
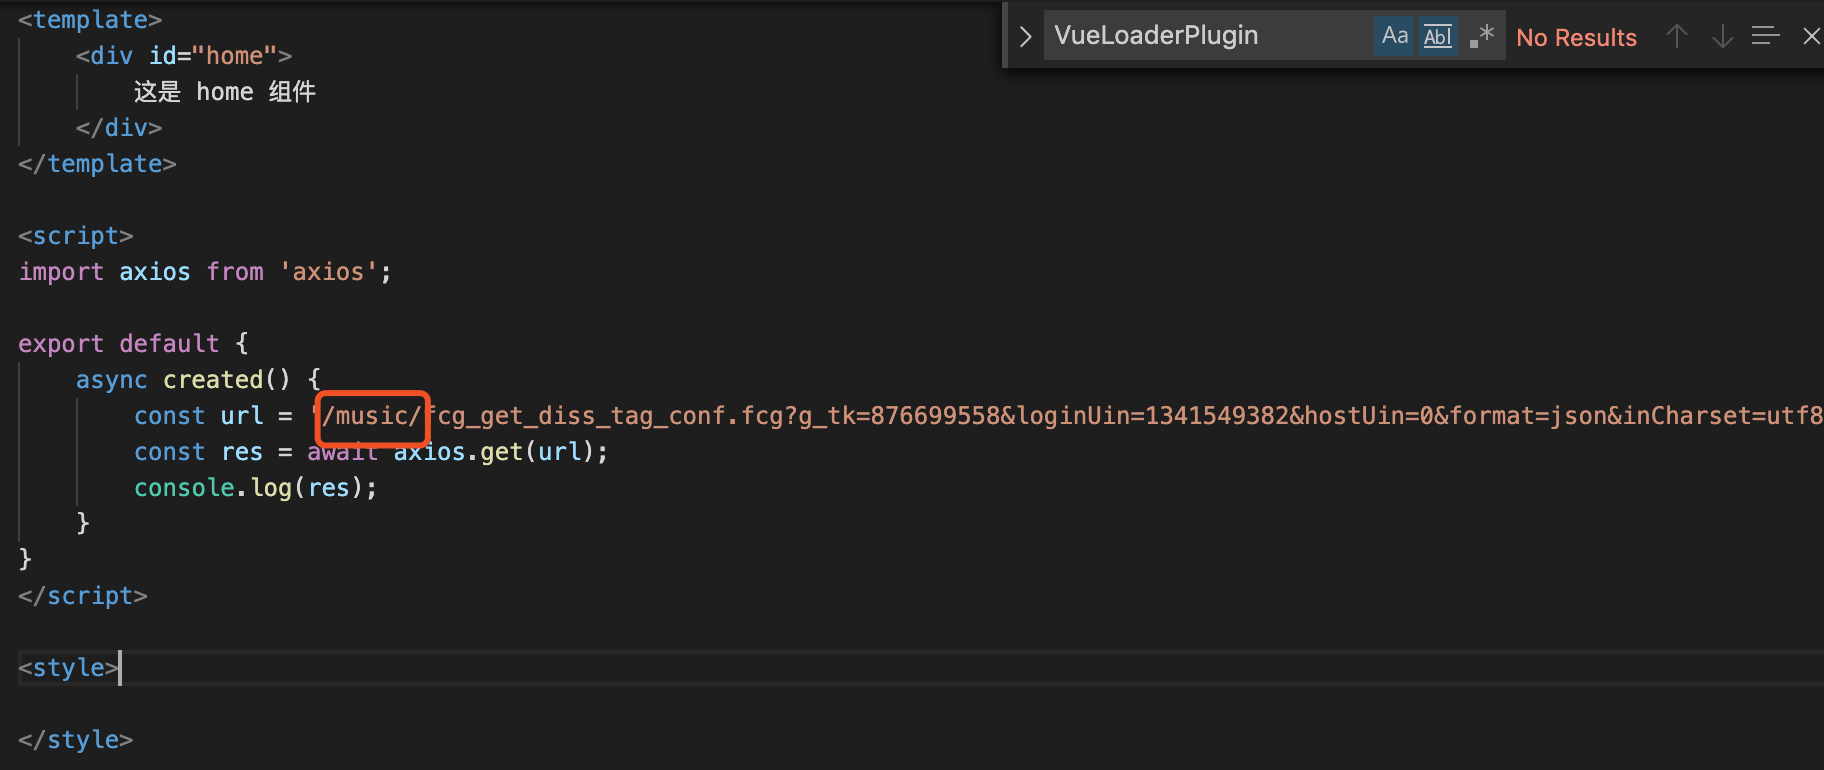
Home.vue修改
<template>
<div id="home">
这是 home 组件
</div>
</template>
<script>
import axios from 'axios';
export default {
async created() {
const url = '/music/fcg_get_diss_tag_conf.fcg?g_tk=876699558&loginUin=1341549382&hostUin=0&format=json&inCharset=utf8&outCharset=utf-8¬ice=0&platform=yqq.json&needNewCode=0';
const res = await axios.get(url);
console.log(res);
}
}
</script>
<style>
</style>
此时控制台可以正确打印出数据,解决了跨域问题。

