前言
因为在不同的环境下可能需要不同的配置,使用不同的功能,所以要区分环境。
开发模式:会额外的用到一些调试功能,比如webpack-dev-server,但是为了加快调试速度,可能不会去用上压缩,tree-shaking之类的功能;
生产模式:为了减少文件体积,会使用压缩,tree-shaking等功能,但是不要如webpack-dev-server或者eslint这样的调试工具;
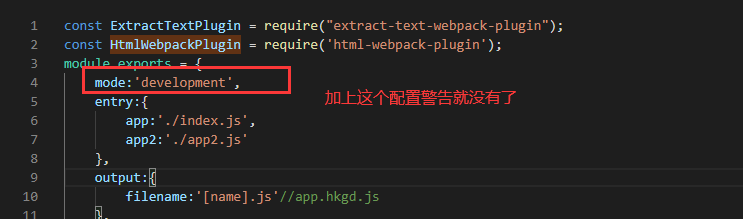
mode区分
production
1、去除无用代码;
2、图片压缩,转码base64,雪碧图;
3、提取公用代码;
development
1、Webpack-dev-server 开发模式;
2、Source-map;
3、代码风格检查;
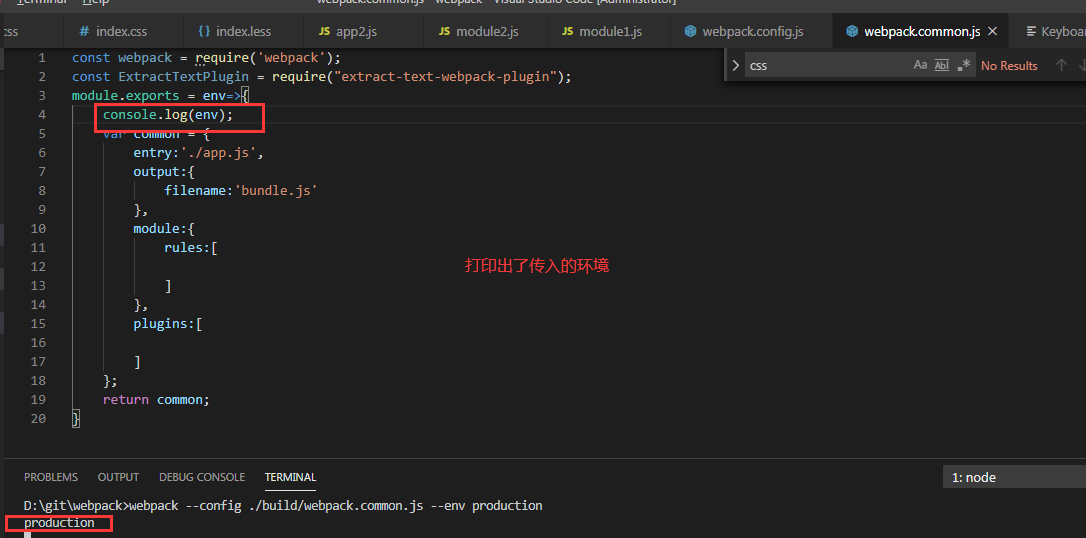
怎么知道是哪个环境?
webpack --config webpack.common.js --env production
编写配置文件
如何编写不同的配置文件来区分环境?
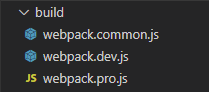
目录结构:
const webpack = require('webpack');
module.exports = {
    devtool: 'cheap-module-source-map',
    devServer: {
        port: 9001,
        overlay: true,
        hot: true,
        hotOnly: true,
    },
    plugins: [
        new webpack.HotModuleReplacementPlugin(),
        new webpack.NamedModulesPlugin(),
    ]
}
2、编写一个生产环境下的配置文件;
const webpack = require('webpack');
const HtmlWebpackPlugin = require('html-webpack-plugin');
module.exports = {
    optimization: {
        minimize: false
    },
    plugins: [
        new HtmlWebpackPlugin({
            filename: 'index.html',0
            template: './index.html',
            minify: {
                collapseWhitespace: true,//压缩
            },
            // //是否将js和css自动引入
            inject: true,
        })
    ]
}
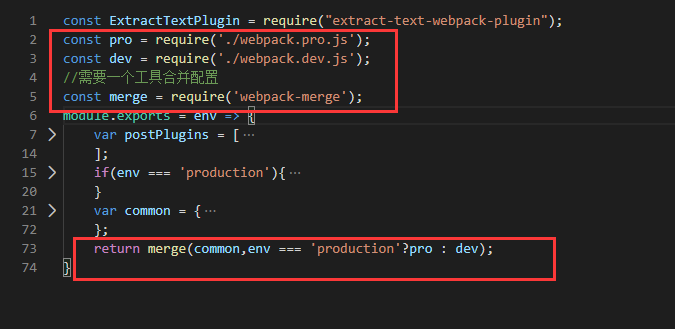
3、在基础配置引入开发和生产配置;
const ExtractTextPlugin = require("extract-text-webpack-plugin");
const pro = require('./webpack.pro.js');
const dev = require('./webpack.dev.js');
//需要一个工具合并配置
const merge = require('webpack-merge');
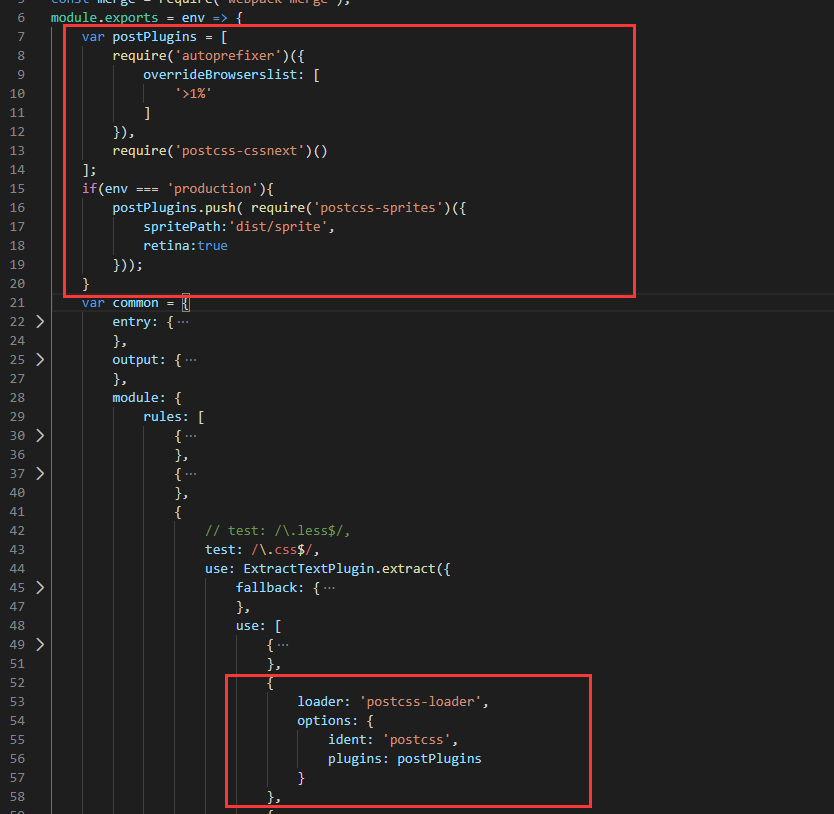
module.exports = env => {
var postPlugins = [
require('autoprefixer')({
overrideBrowserslist: [
'>1%'
]
}),
require('postcss-cssnext')()
];
if(env === 'production'){
postPlugins.push( require('postcss-sprites')({
spritePath:'dist/sprite',
retina:true
}));
}
var common = {
entry: {
app: './index.js',
},
output: {
filename: '[name].js'//app.hkgd.js
},
module: {
rules: [
{
test: /\.js$/,
exclude: '/node_modules/',
use: {
loader: 'babel-loader',
}
},
{
test: /\.tsx?$/,
use: 'ts-loader',
},
{
// test: /\.less$/,
test: /\.css$/,
use: ExtractTextPlugin.extract({
fallback: {
loader: 'style-loader',
},
use: [
{
loader: 'css-loader',
},
{
loader: 'postcss-loader',
options: {
ident: 'postcss',
plugins: postPlugins
}
},
{
loader: 'less-loader'
}
]
})
}
]
},
plugins: [
new ExtractTextPlugin({
filename: env === 'production'?'[name].min.css':'[name].css'
}),
]
};
return merge(common,env === 'production'?pro : dev);
}
4、判断env参数,合并对应的配置;
为了打包方便,在package.json中加入两个自定义命令:


cnpm i webpack-dev-server -g
npm run dev

实战
场景描述:产品模式需要雪碧图功能,但是开发模式不需要
分析
雪碧图是postcss的功能,所以装插件postcss-sprites
cnpm i postcss-sprites --S
配置:
Webpack4中的环境区分
webpack4的设计理念就是干掉配置文件,更简单的指定模式,更舒服的去打包
打包时指定具体的环境
Webpack --mode production/development/none
自动会以某一些固定配置去打包
控制台警告解决