

包地址
1.先下载
dependencies:
  flutter:
    sdk: flutter
  provider: ^4.0.1
2.在使用的地方引入
import 'package:provider/provider.dart';
3.顶层包裹,一般状态管理工具的套路
这里有两种方式,功能都是一样的,使用之前先引用写好的provider方法
class ThemeState with ChangeNotifier{
  int _currentIndex = 0123; //定义好变量
  void changeThemeData(index) { //改变变量的方法
    _currentIndex = index;
    notifyListeners();
  }
  get currentIndex => _currentIndex;//3
}
- a 直接在main里面引入,就可以获取
// void main() => runApp(
//       MultiProvider(
//         providers: [
//           ChangeNotifierProvider<ThemeState>.value(
//               value: ThemeState()),
//         ],
//         child: MyApp(),
//       ),
//     );
- 在使用的Widget里面获取
Provider.of<ThemeState>(context).currentIndex; - b 用一个Wrapper包裹起来
void main() => runApp(Wrapper(child: MyApp()));

class Wrapper extends StatelessWidget {
  final Widget child;
  Wrapper({this.child});

  @override
  Widget build(BuildContext context) {
    final initThemeData = ThemeData(
      //初始主题
      primaryColor: Colors.blue,
    );
    return MultiProvider(
      providers: [
        ChangeNotifierProvider<ThemeState>.value(
          value: ThemeState(),
        ), //语言包CurrentIndex
      ],
      child: child,
    );
  }
}
class MyApp extends StatelessWidget {
  // This widget is the root of your application.
  @override
  Widget build(BuildContext context) {
    return Consumer<ThemeState>(
        builder: (_, state, __) => MaterialApp(
        title: state.currentIndex,//使用currentIndex
        theme: ThemeData(primaryColor: Colors.pink),
        home: MyHomePage(title: 'Flutter Demo Home Page'),
    ));
  }
}
4.在其他地方调用,当然使用之前先引入你写的方法
onTap: (){
    Provider.of<ThemeState>(context,listen: false).changeThemeData(2);
},
5.新建一个主题名为theme的文件
/**
 * 主题选项
 */
import 'package:flutter/material.dart';

final ThemeData themeDataRed = new ThemeData(
  primaryColor: Colors.red,
);
final ThemeData themeDataPink = new ThemeData(
  primaryColor: Colors.pink,
);
final ThemeData themeDataPurple = new ThemeData(
  primaryColor: Colors.purple,
);
final ThemeData themeDataBlack = new ThemeData(
  primaryColor: Colors.black,
);
List themeDataList = [
  themeDataRed,
  themeDataPink,
  themeDataPurple,
  themeDataBlack
];
- 在mian里面设置
theme:themeDataList[state.themeData], - 修改主题的时候只需要传入对应主题色的下标
国际化
1.安装依赖 国际化插件和intl翻译
dependencies: # 库依赖
  ...
  flutter_localizations: #国际化
    sdk: flutter

dev_dependencies:
   #...省略无关项
  intl_translation: ^0.17.2
2.创建lang.dart 文件,建立CjmLocalozitions方法
import 'package:flutter/material.dart';
import 'package:intl/intl.dart';

class CjmLocalozitions {
  static CjmLocalozitions of(BuildContext context) {
    return Localizations.of<CjmLocalozitions>(context, CjmLocalozitions);
  }

  String get title =>Intl.message('hello', name: 'title', desc: 'demo localizations');

  String greet(String name) => Intl.message(
        'hello $name',
        name: 'greet',
        desc: 'greet someone',
        args: [name],
      );
}
3.生成arb文件,终端命令中输入
flutter pub pub run intl_translation:extract_to_arb --output-dir=lib/i18n  lib/i18n/lang.dart
--output-dir//输出文件的位置
lib/i18n/lang.dart //我们创建lang的位置
//成功后会生成arb文件  复制arb文件 把里面的文字改成你要国家化的语言
{
  "@@last_modified": "2020-01-16T10:53:50.834970",
  "title": "您好",
  "@title": {
    "description": "这是一个描述",
    "type": "text",
    "placeholders": {}
  },
  "greet": "您好 {name}",
  "@greet": {
    "description": "操作什么",
    "type": "text",
    "placeholders": {
      "name": {}
    }
  }
}
**********************************************
{
  "@@last_modified": "2020-01-16T10:53:50.834970",
  "title": "こんにちは",
  "@title": {
    "description": "demo localizations",
    "type": "text",
    "placeholders": {}
  },
  "greet": "こんにちは {name}",
  "@greet": {
    "description": "greet someone",
    "type": "text",
    "placeholders": {
      "name": {}
    }
  }
}
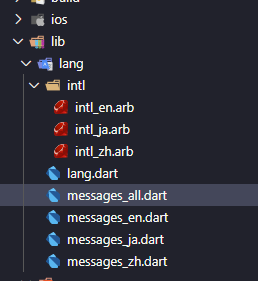
4.生成dart代码,根据arb生成dart文件:
flutter pub pub run intl_translation:generate_from_arb --output-dir=lib/i18n/intl
--no-use-deferred-loading lib/i18n/lang.dart lib/i18n/intl_*.arb
--output-dir//输出位置
lib/i18n/lang.dart //CjmLocalozitions文件位置
// 成功后会生成dart文件
5.修改lang.dart文件
import 'package:flutter/material.dart';
import 'package:intl/intl.dart';
import 'messages_all.dart';

class CjmLocalozitions {
  static CjmLocalozitions of(BuildContext context) {
    return Localizations.of<CjmLocalozitions>(context, CjmLocalozitions);
  }
// 新增
  static Future<CjmLocalozitions> load(Locale locale) {
    final String name =
        locale.countryCode.isEmpty ? locale.languageCode : locale.toString();
    final String localeName = Intl.canonicalizedLocale(name);
    //2
    return initializeMessages(localeName).then((b) {
      Intl.defaultLocale = localeName;
      return new CjmLocalozitions();
    });
  }

  String get title =>
      Intl.message('hello', name: 'title', desc: 'demo localizations');
  String greet(String name) => Intl.message(
        'hello $name',
        name: 'greet',
        desc: 'greet someone',
        args: [name],
      );
}

// 新增 Locale代理类
class DemoLocalizationsDelegate
    extends LocalizationsDelegate<CjmLocalozitions> {
  const DemoLocalizationsDelegate();

  //是否支持某个Local
  @override
  bool isSupported(Locale locale) {
    return true;
    // return languages.contains(locale.languageCode);
  }

  // Flutter会调用此类加载相应的Locale资源类
  @override
  Future<CjmLocalozitions> load(Locale locale) {
    //3
    return CjmLocalozitions.load(locale);
  }

  // 当Localizations Widget重新build时,是否调用load重新加载Locale资源.
  @override
  bool shouldReload(DemoLocalizationsDelegate old) => false;
}
6.入口文件引入
import 'package:flutter_localizations/flutter_localizations.dart';
import 'package:test1/lang/lang.dart';
class MyApp extends StatelessWidget {
  // This widget is the root of your application.
  @override
  Widget build(BuildContext context) {
    return Consumer2<ThemeState, LocaleState>(
        builder: (_, themeState, localeState, __) => MaterialApp(
            locale: Locale('en', 'US'), //设置当前的语言环境
            localizationsDelegates: [
               // 本地化的代理类
            DemoLocalizationsDelegate(),
                GlobalMaterialLocalizations.delegate,
                GlobalWidgetsLocalizations.delegate,
                DemoLocalizationsDelegate(),
            ],
            supportedLocales: [
                localeState.locale
            ]
            title:'321231231',
            theme: themeDataList[themeState.themeData],
        ));
  }
7.provider定义切换语言的方法
import 'package:flutter/material.dart';

class LocaleState extends ChangeNotifier{
  Locale _locale;//语言
  LocaleState(this._locale);

  factory LocaleState.zh()=>
      LocaleState(Locale('zh', 'CH'));

  factory LocaleState.en()=>
      LocaleState(Locale('en', 'US'));

  void changeLocaleState(LocaleState state){
    _locale=state.locale;
    notifyListeners();
  }

  Locale get locale => _locale; //获取语言
}
8.动态切换语言
 Locale myLocale = Localizations.localeOf(context);


 void _incrementCounter(myLocale) {
    print(myLocale.toString());
    if (myLocale.toString() == "en_US") {
        Provider.of<LocaleState>(context, listen: false)
            .changeLocaleState(LocaleState.zh());
    } else {
        Provider.of<LocaleState>(context, listen: false)
            .changeLocaleState(LocaleState.en());
        }
  }
- 获取本地的语言环境
Locale myLocale = Localizations.localeOf(context);
- 其他状态管理工具详细请查看
