

前言
在慕客网上买了黄轶老师的Vue2.0开发企业级移动端音乐WebApp,在这里做个学习感受和经验分享。
预览地址:http://47.103.123.83/music/
概览
技术栈
Vue:用于构建用户界面的 MVVM 框架。它的核心是响应的数据绑定和组系统件
vue-router:为单页面应用提供的路由系统,项目上线前使用了 Lazy Loading Routes 技术来实现异步加载优化性能
vuex:Vue 集中状态管理,在多个组件共享某些状态时非常便捷
vue-lazyload:第三方图片懒加载库,优化页面加载速度
better-scroll:iscroll 的优化版,使移动端滑动体验更加流畅
stylus:css 预编译处理器
ES6:ECMAScript 新一代语法,模块化、解构赋值、Promise、Class 等方法非常好用
Node.js:利用 Express 起一个本地测试服务器
jsonp:服务端通讯。抓取 QQ音乐(移动端)数据
axios:服务端通讯。结合 Node.js 代理后端请求,抓取 QQ音乐(PC端)数据
目录结构
├── api //封装的请求api
├── assets
│ ├── fonts //字体图标
│ ├── image
│ ├── js // 公用JS方法
│ └── stylus // 公用 stylus 样式与方法
├── base // 通用组件
│ ├── confirm
│ ├── listview
│ ├── loading
│ ├── no-result
│ ├── progress-bar
│ ├── progress-circle
│ ├── scroll
│ ├── search-box
│ ├── search-list
│ ├── slider
│ ├── song-list
│ ├── switches
│ └── top-tip
├── components // APP组件
│ ├── add-song // 添加歌曲页面
│ ├── disc // 专辑页面
│ ├── m-header
│ ├── music-list // 歌曲列表
│ ├── player // 播放器内核页面
│ ├── playlist // 播放歌曲列表
│ ├── rank // 排名列表
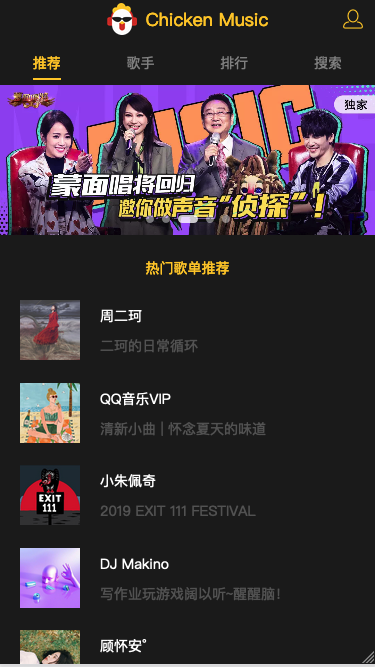
│ ├── recommend // 推荐主页面
│ ├── search // 搜索页面
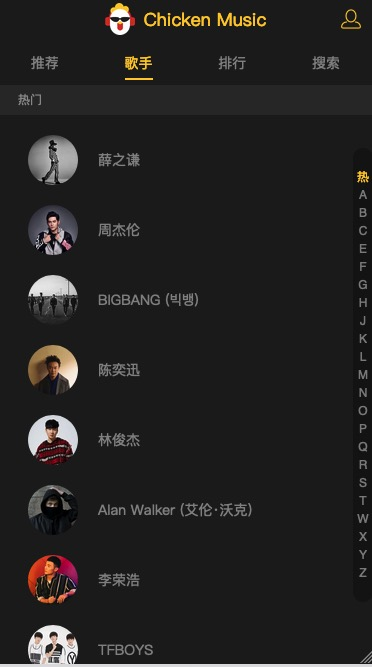
│ ├── singer // 歌手列表
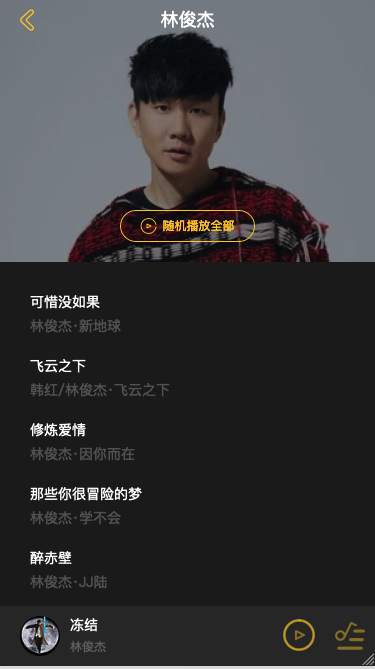
│ ├── singer-detail // 歌手详情页面
│ ├── suggest // 推荐页面
│ ├── tab // 导航栏
│ ├── top-list
│ └── user-center // 个人中心
└── store
通用组件学习经验
slide组件
使用better-scroll辅助实现slide轮播组件。
better-scroll初始化相关api:
     this.slider = new BScroll(this.$refs.slider, {
        scrollX: true, // 横向的轮播图
        scrollY: false,
        momentum: false, // /关闭动量动画,能提升效能
        snap: {
          loop: this.loop,// 是否无缝轮播
          threshold: 0.3,// 拉取当前图片的多少,作为播放下一张图片一句
          speed: 400 // 播放间隔
        }
      })
达成better-scroll滚动,需要满足一下条件:
- 必须包含两个大的div,外层和内层div
- 外层div设置可视的大小(宽或者高)-有限制宽或高
- 内层div,包裹整个可以滚动的部分
- 内层div高度一定大于外层div的宽或高,才能滚动 所以初始化完成后,须要设置完成内部图片的总宽度:
    _setSliderWidth (isResize) {
      this.children = this.$refs.sliderGroup.children
      let width = 0
      let sliderWidth = this.$refs.slider.clientWidth // slider 可见宽度
      for (let i = 0; i < this.children.length; i++) {
        let child = this.children[i]
        addClass(child, 'slider-item')
        child.style.width = sliderWidth + 'px' // 设置每个子元素的样式及高度
        width += sliderWidth // 计算总宽度
      }
      if (this.loop && !isResize) {
        width += 2 * sliderWidth // 无缝循环的原理在于首尾隔添加一个slider,所以总宽度是多两个slider宽度的
      }
      this.$refs.sliderGroup.style.width = width + 'px'
    },
值得注意的是需要控制显示的时机,是由于slider.vue中设置html的宽度等是在mounted(即已完成模板渲染后执行),而recommend.vue 当还未获取数据的时候,mounted 已经执行,为了确保元素的存在再渲染,所以添加判断
v-if="recommneds.length" // 即在获取到图片后,再进行渲染。
这样基本的轮播图就构建完成。 继续完善细节部分。
- dots
<span class="dot" :class="{active: currentPageIndex === index }" v-for="(item,index) in dots":key="index"></span>
// 只有到达了对应的图片,dot样式才发生变化
   _initDots () {
      this.dots = new Array(this.children.length)// 先进行初始化
    },
    this.slider.on('scrollEnd', this._onScrollEnd)
    _onScrollEnd () {
        let pageIndex = this.slider.getCurrentPage().pageX // 获取当前图片的index
        this.currentPageIndex = pageIndex
      }
    },
- autoplay 设置自动播放功能,在mounted中设置方法。
 if (this.autoPlay) {
    this._play()
}
    _play () {
      clearTimeout(this.timer) //清除上一个闹钟
      this.timer = setTimeout(() => {
        this.slider.next() // 新版BS组件已经提供跳转下一页api
      }, this.interval)
    }
后面在播放一次后,需要再触发scrollEnd事件后再次设置this._play()。同时如果手动拖拽,也需要设置touchEnd事件后的this._play()。
- resize 窗口大小改变后,会导致slider宽度与窗口宽度不一致此时需要刷新slider重新设置。在mounted添加回调
    window.addEventListener('resize', () => {
      if (!this.slider) {
        return
      }
      this._setSliderWidth(true) // 因为设置宽度时会自动拓展两个slider宽度,重新计算尺寸是不需要在进行此操作,加入一个判断
      this.slider.refresh()
    })
- 优化 加入两个生命周期钩子
 destroyed() {
  clearTimeout(this.timer) // 生命周期destroyed销毁清除定时器,有利于内存释放
 },
 deactivated () {
    this.slider.disable()
    clearTimeout(this.timer)// 配合keep-alive,将DOM缓存到内存中,切换不会重新请求,并且没有一闪而过的画面,重置闹钟。
  },
Tips:
- slider组件的父元素必须给他一个100%的宽度且定义overflow:hidden,否则整个页面会被撑开,整个页面都能横向滚动
- 添加class时使用了两个工具函数
export function hasClass(el, clssName) {
 let reg = new RegExp('(^|\\s)' + className + '(\\s|$)')    //判断className 的开头或结尾无字符或者是空格
 return reg.test(el.className)
}

export function addClass(el, className) {
 if (hasClass(el, className)) {    //有这个类名就返回
   return
 }

 let newClass = el.className.split(' ')  //split() 将原本的className字符串按空格分割成数组
 newClass.push(className)        //将新的className 添加到上面的数组中
 el.className = newClass.join(' ')        //join() 以空格为连接符链接成class字符串
}
scroll组件
用better-scroll封装一个通用的scroll组件。
  <div ref="wrapper">
   <slot></slot>
 </div>
 // 使用的vue的slot插槽,但要注意的是插槽内容如果是异步加载的,需要进行刷新。
props: {
     probeType: {
       type: Number,
       default: 1
       // 作用:有时候我们需要知道滚动的位置。当 probeType 为 1 的时候,会非实时(屏幕滑动超过一定时间后)派发scroll 事件;当 probeType 为 2 的时候,会在屏幕滑动的过程中实时的派发 scroll 事件;当 probeType 为 3 的时候,不仅在屏幕滑动的过程中,而且在 momentum 滚动动画运行过程中实时派发 scroll 事件。
     },
     click: {
       type: Boolean,
       default: true
       // 设置scroll可点击
     },
     data: {
       type: Array,
       default: null
       // 设置数据,即数据发生变动时,scroll组件刷新。
     },
     listenScroll: {
       type: Boolean,
       default: false
     },
     pullup: {
       type: Boolean,
       default: false
     },
     beforeScroll: {
       type: Boolean,
       default: false
     },
     refreshDelay: {
       type: Number,
       default: 20
     },
     direction: {
       type: String,
       default: DIRECTION_V
     },
     pullup: {
       type: Boolean,
       default: false
     },
     beforeScroll: {
       type: Boolean,
       default: false
     }
   },
    watch: {
     data () {
       setTimeout(() => {
         this.refresh()
       }, this.refreshDelay)
     }
   }
   // 监听data数据变化
     enable () {
        this.scroll && this.scroll.enable()
      },
      disable () {
        this.scroll && this.scroll.disable()
      },
      refresh () {
        this.scroll && this.scroll.refresh()
      },
      scrollTo () {
        this.scroll && this.scroll.scrollTo.apply(this.scroll, arguments) //滚动到制定位置
      },
      scrollToElement () {
        this.scroll && this.scroll.scrollToElement.apply(this.scroll, arguments)//滚动到制定元素
      }
最后初始化better-scroll
      _initScroll () {
       if (!this.$refs.wrapper) {
         return
       }
       this.scroll = new BScroll(this.$refs.wrapper, {
         probeType: this.probeType, //设置两个属性
         click: this.click
       })
       if (this.listenScroll) {
         let me = this
         this.scroll.on('scroll', (pos) => {
           me.$emit('scroll', pos) //触发scroll方法,向组件传递pos位置信息
         })
       }
       if (this.pullup) {
         this.scroll.on('scrollEnd', () => {
           if (this.scroll.y <= this.scroll.maxScrollY + 50) {
             this.$emit('scrollToend')
           }
         })
       }
       if (this.beforeScroll) {
         this.scroll.on('beforeScrollStart', () => {
           this.$emit('beforeScroll')
         })
       }
list-view组件
- 右侧快速入口滑动或点击,左侧可以快速定位到相关区域。左侧滚动,右侧高亮显示。
- 吸顶效果 首先完成基础的滚动,就是使用scroll组件,渲染数据即可。 然后做右侧的list-shortcut。
top: 50%
transform: translateY(-50%)
//  设置绝对定位到右侧
传入数据列表渲染即可得到静态效果。
下面做滑动效果:
绑定touchstart和touchmove两个事件
@touchstart.stop.prevent="onShortcutTouchStart"
@touchmove.stop.prevent="onShortcutTouchMove"
// 加.stop .prevent修饰符阻止冒泡和默认事件
在onShortcutTouchStart默认会传入事件event,获取其中data-index属性,这个属性的值即为元素的Index。之后触发betterscroll的scrollToElement函数即可。
export function getData(el, name, val) {
  const prefix = 'data-'
  name = prefix + name
  if (val) {
    return el.setAttribute(name, val)
  } else {
    return el.getAttribute(name)
  }
}
//  工具函数
为了实现在右侧提示的滚动页面相应滚动,需要记住滑动的开始和结束坐标,以及开始坐标所在的列表索引,根据开始索引加上移动的索引数即可得到滑动后的索引数,再次触发scrollToElement函数即可。 移动索引数可以用滑动结束y轴坐标减去开始y轴坐标除以每一个索引高度即可。
onShortcutTouchStart (e) {
        let anchorIndex = getData(e.target, 'index')
        let firstTouch = e.touches[0]
        this.touch.y1 = firstTouch.pageY
        this.touch.anchorIndex = anchorIndex // 记录起始坐标信息
        this._scrollTo(anchorIndex) // 左侧滑动到相应的区域
      },
onShortcutTouchMove (e) {
        let firstTouch = e.touches[0]
        this.touch.y2 = firstTouch.pageY
        let delta = (this.touch.y2 - this.touch.y1) / ANCHOR_HEIGHT | 0 // 计算得移动索引数
        let anchorIndex = parseInt(this.touch.anchorIndex) + delta
        this._scrollTo(anchorIndex)
      },
如果要实现左侧滚动,右侧高亮,那么必须记住页面滚动的位置,算出滚动到哪个区间,再得到这个区间对应右端哪个索引,使其高亮。要监听页面滚动到哪,需要在scroll组件中添加listenScroll事件。
if (this.listenScroll) {
        let me = this
        this.scroll.on('scroll', (pos) => {
            //监听到后向上派发scroll事件
            me.$emit('scroll', pos)
          })
      }
在listview中添加@scroll接收派发的scroll方法,触发listview组件中的scroll方法
<scroll class="listview" :data="data"
  ref="listview"
  :listenScroll="listenScroll"
  //@scroll为接收派发的scroll方法,
  @scroll="scroll"
  :probeType="probeType">

//scroll方法
scroll(pos) {
      this.scrollY = pos.y
    },
本地的scroll方法得到scroll组件中传入的y坐标,监听y坐标的值的变化进行相应操作。
      _calculateHeight () {
        this.listHeight = []
        const list = this.$refs.listGroup
        let height = 0
        this.listHeight.push(height)
        for (let i = 0; i < list.length; i++) {
          height += list[i].clientHeight
          this.listHeight.push(height)
        }
      }
      // 计算每个scroll区间的累计高度

           scrollY (newY) { // 监听scrollY 达到 联动效果
        const listHeight = this.listHeight
        // 当滚动到顶部时
        if (newY > 0) {
          this.currentIndex = 0
          return
        }
        // 中间部分移动
        for (let i = 0; i < listHeight.length - 1; i++) {
          let height1 = listHeight[i]
          let height2 = listHeight[i + 1]
          if (-newY >= height1 && -newY < height2) {
            this.currentIndex = i
            this.diff = height2 + newY
            return
          }
        }
        // 当滚动到底部时,且-new Y大于最后元素的最大高度
        this.currentIndex = listHeight.length - 2
      },
下面完成吸顶固定的效果
   <div class="list-fixed" ref="fixed" v-show="fixedTitle">
      <h1 class="fixed-title">{{fixedTitle}}</h1>
    </div>
----------------------------------------------------------------------------------
      fixedTitle () {
        if (this.scrollY > 0) {
          return ''
        }
        return this.data[this.currentIndex] ? this.data[this.currentIndex].tilte : ''
      }
以上完成基本的样式。
但此时,又一个问题,就是顶上去的动画效果未完成,需要监控区块与顶部的差:
this.diff = height2 + newY

      diff (newVal) {
        let fixedTop = (newVal > 0 && newVal < TITLE_HEIGHT) ? newVal - TITLE_HEIGHT : 0 // 判断此时的距离
        if (this.fixedTop === fixedTop) {
          return
        } // 未顶到顶上时,不做任何改动。
        this.fixedTop = fixedTop
        this.$refs.fixed.style.transform = `translate3d(0,${fixedTop}px,0)`
      }
各个页面的学习总结
推荐页面
歌手列表页面
歌手详情页面
    .bg-image
      position: relative
      width: 100%
      height: 0
      padding-top: 70%
      transform-origin: top
      // 用这样把背景图片位置占住
添加一个bg-layer层,并监听滚动的距离,达到歌曲列表向上背景消失的效果。
 <scroll :data="songs"
            class="list"
            ref="list"
            :listen-scroll="listenScroll" // 监听scroll事件
            :probe-type="probeType" // 设置probetype为3,实时触发事件
            @scroll="scroll">
      <div class="song-list-wrapper">
        <song-list :rank="rank" @select="selectItem" :songs="songs"></song-list>
      </div>
      <div v-show="!songs.length" class="loading-container">
        <loading></loading>
      </div>
    </scroll>
      scrollY (newY) {
        let translateY = Math.max(this.minTranslateY, newY) //layer 向上偏移的高度,未高于背景图片则使用newY,高于背景图片则最高为minTranslateY
        let zIndex = 0
        let scale = 1
        let blur = 0
        const percent = Math.abs(newY / this.imageHeight) // 下拉,背景图片可以按比例放大,这里求出newY和背景图片高度比值来算比例
        if (newY > 0) {
          scale = 1 + percent// 设置放大倍数
          zIndex = 10 // 改变z-index值,保证图片放大不会遮住
        } else {
          blur = Math.min(20, percent * 20)// 向上则设置模糊效果
        }
        this.$refs.layer.style[transform] = `translate3d(0,${translateY}px,0)` // 修改样式 发生偏移
        this.$refs.filter.style[backdrop] = `blur(${blur}px)`
        if (newY < this.minTranslateY) {
          zIndex = 10
          this.$refs.bgImage.style.paddingTop = 0
          this.$refs.bgImage.style.height = `${RESERVED_HEIGHT}px`
          this.$refs.playBtn.style.display = 'none'
        } else {
          this.$refs.bgImage.style.paddingTop = '70%'
          this.$refs.bgImage.style.height = 0
          this.$refs.playBtn.style.display = ''
        }
        // 此处判断在于滚动条向上滚动时,图片可以遮住多余的滚动字幕。当newY < this.minTranslateY,修改zindex值,取消padding-top高度,不再保持比例,保留标题高度,用来完成效果。反之则恢复。
        this.$refs.bgImage.style[transform] = `scale(${scale})`
        this.$refs.bgImage.style.zIndex = zIndex
      }
播放器组件

    <transition name="normal"
                @enter="enter"
                @after-enter="afterEnter"
                @leave="leave"
                @after-leave="afterLeave">
                // 利用vue的transition组件提供的事件钩子 完成动画
      enter (el, done) {
        const { x, y, scale } = this._getPosScale() // 获取动画参数
        let animation = {
          0: {
            transform: `translate3d(${x}px,${y}px,0) scale(${scale})`
          },
          60: {
            transform: `translate3d(0,0,0) scale(1.1)`
          },
          100: {
            transform: `translate3d(0,0,0) scale(1)`
          } // 动画效果
        }
        animations.registerAnimation({ // 使用create-animation-keyframe 注册动画
          name: 'move',
          animation,
          presets: {
            duration: 400,
            easing: 'linear'
          }
        })
        animations.runAnimation(this.$refs.cdWrapper, 'move', done) // 运行动画,加载的dom,注册的动画名,执行完成后的回调
      },
      afterEnter () {
        animations.unregisterAnimation('move') // 注销动画
        this.$refs.cdWrapper.style.animation = ''
      },
      leave (el, done) {
        this.$refs.cdWrapper.style.transition = 'all 0.4s' // 添加css 过渡效果
        const { x, y, scale } = this._getPosScale() // 获取目标位置
        this.$refs.cdWrapper.style[transform] = `translate3d(${x}px,${y}px,0) scale(${scale})`
        const timer = setTimeout(done, 400)
        this.$refs.cdWrapper.addEventListener('transitioned', () => { // 监听到transitionend事件,触发done
          clearTimeout(timer)
          done()
        })
      },
      afterLeave () {
        this.$refs.cdWrapper.style.transition = '' // 卸载动画
        this.$refs.cdWrapper.style[transform] = ''
      },
      _getPosScale () {
        const targetWidth = 40 // 小圆的宽度
        const paddingLeft = 40 // 小圆圆心的左偏移
        const paddingBottom = 30 // 小圆圆心的底部偏移
        const paddingTop = 80 // 大圆圆心到顶部的宽度
        const width = window.innerWidth * 0.8 // 大圆的宽度
        const scale = targetWidth / width // 放大倍数
        const x = -(window.innerWidth / 2 - paddingLeft) // x轴 偏移量
        const y = window.innerHeight - paddingTop - width / 2 - paddingBottom // y轴 偏移量
        return {
          x,
          y,
          scale
        }
动画效果搞定,来实现核心的播放歌曲的功能
    <audio ref="audio" @canplay="ready" @error="error" @timeupdate="updateTime"
           @ended="end"></audio>
           // 核心就是html5的audio实现音频播放功能,由vuex定义全局的播放状态
控制播放状态
    togglePlaying () {
        if (!this.songReady) {
          return
        }
        this.setPlayingState(!this.playing) // 由修改vuex中的状态
        if (this.currentLyric) {
          this.currentLyric.togglePlay() // 控制歌曲播放状态的同时也要控制歌词的滚动状态
        }
      },
    cdCls () {
        return this.playing ? 'play' : '' // cd背景图片不断旋转效果直接动态切换class实现
      },
    syncWrapperTransform (wrapper, inner) { // 这里需要记录切换class时,cd的位置以保证后面的同步
        if (!this.$refs[wrapper]) {
          return
        }
        let imageWrapper = this.$refs[wrapper]
        let image = this.$refs[inner]
        let wTransform = getComputedStyle(imageWrapper)[transform]
        let iTransform = getComputedStyle(image)[transform]
        imageWrapper.style[transform] = wTransform === 'none' ? iTransform : iTransform.concat(' ', wTransform)
      },
      playing (newPlaying) {
        const audio = this.$refs.audio
        this.$nextTick(() => {
          newPlaying ? audio.play() : audio.pause() // nextTick来保重不会报错
        })
        if (!newPlaying) { // 同步cd旋转的位置
          this.syncWrapperTransform('imageWrapper', 'image')
        } else {
          this.syncWrapperTransform('miniWrapper', 'miniImage')
        }
      }
切换歌曲,在vuex中添加currentIndex来控制当前歌曲在歌单中的位置
      prev () {
        if (!this.songReady) {
          return // 只有audio已经准备完毕,触发canplay钩子,则可以切换
        }
        if (this.playlist.length === 1) {
          this.loop() // 循环播放
        } else {
          let index = this.currentIndex - 1 // 前一首需要-1
          if (index === -1) {
            index = this.playlist.length - 1
          }
          this.setCurrentIndex(index) // vuex状态设置
          if (!this.playing) {
            this.togglePlaying() // 若暂停状态在播放
          }
        }
      },
      next () {
        if (!this.songReady) {
          return
        }
        if (this.playlist.length === 1) {
          this.loop()
        } else {
          let index = this.currentIndex + 1
          if (index === this.playlist.length) {
            index = 0
          }
          this.setCurrentIndex(index)
          if (!this.playing) {
            this.togglePlaying()
          }
        }
      },
进度条组件的实现
利用audio的timeupdateapi实现获取播放进度
      setProgressOffset (percent) {
        if (percent >= 0 && !this.touch.initiated) {
          const barWidth = this.$refs.progressBar.clientWidth - progressBtnWidth // 减去小球宽度
          const offsetWidth = percent * barWidth // 获取百分比宽度
          this._offset(offsetWidth)// 设置进度条样式变化
        }
      },
      _offset (offsetWidth) {
        this.$refs.progress.style.width = `${offsetWidth}px`
        this.$refs.progressBtn.style[transform] = `translate3d(${offsetWidth}px,0,0)`
      },
          watch: { // 通过watch监控percent变化来进行改变
      percent (newVal) {
        this.setProgressOffset(newVal)
      }
    }
实现拖动进度条控制播放进度
 progressTouchStart (e) {
        this.touch.initiated = true // 初始化状态
        this.touch.startX = e.touches[0].pageX // 记录小圆点的初始位置
        this.touch.left = this.$refs.progress.clientWidth // 记录小圆点的做偏移位置
      },
      progressTouchMove (e) {
        if (!this.touch.initiated) {
          return
        }
        const deltaX = e.touches[0].pageX - this.touch.startX // 计算小圆点移动差值
        const offsetWidth = Math.min(this.$refs.progressBar.clientWidth - progressBtnWidth, Math.max(0, this.touch.left + deltaX))// 获取小于进度条长度的总偏移量
        this._offset(offsetWidth)// 设置偏移样式
        this.$emit('percentChanging', this._getPercent())
      },
      progressTouchEnd () {
        this.touch.initiated = false
        this._triggerPercent() // 将百分比返回给父组件
      },
         _triggerPercent () {
        this.$emit('percentChange', this._getPercent())
      },
      _getPercent () {
        const barWidth = this.$refs.progressBar.clientWidth - progressBtnWidth
        return this.$refs.progress.clientWidth / barWidth
      },
实现点击切换进度
      progressClick (e) {
        const rect = this.$refs.progressBar.getBoundingClientRect()
        const offsetWidth = e.pageX - rect.left
        this._offset(offsetWidth)
        this._triggerPercent()
      },
播放模式的切换 播放分随机播放,列表循环,单曲循环
export function shuffle (arr) {
  let _arr = arr.slice()
  for (let i = 0; i < _arr.length; i++) {
    let j = getRandomInt(0, i)
    let t = _arr[i]
    _arr[i] = _arr[j]
    _arr[j] = t
  }
  return _arr
}
 function getRandomInt (min, max) {
   return Math.floor(Math.random() * (max - min + 1) + min)
 }
 // 随机播放需要用的的洗牌函数
      const mode = (this.mode + 1) % 3
      this.setPlayMode(mode)
      let list = null
      if (mode === playMode.random) {
        list = shuffle(this.sequenceList) // 重新打乱顺序播放,但currentSong不能改变
      } else {
        list = this.sequenceList
      }
      this.resetCurrentIndex(list) // 重置currentIndex
      this.setPlaylist(list)
      --------------------------------------------
      resetCurrentIndex (list) {
      let index = list.findIndex((item) => {
        return item.id === this.currentSong.id
      })
      this.setCurrentIndex(index)
    },
