

在前端开发工作中,大家最熟悉的打包工具应该都是 webpack、rollup 等。他们虽然功能都很强大,但在正式开发前需要花费许多时间去配置项目。今天来介绍一款相对比较新潮的打包工具 - Parcel 。
Parcel 的官方网站非常亲民,可以切换多种语言,其中也包括简中和繁中。在网站上最明显的位置可以看到 Parcel 的六大优势:
极速打包
Parcel 使用 worker 进程去启用多核编译。同时有文件系统缓存,即使在重启构建后也能快速再编译。虽然 webpack 中也可以通过插件来达成类似的效果,但是 Parcel 重在无需配置。
将你所有的资源打包
Parcel 具备开箱即用的对 JS, CSS, HTML, 资源文件 及其他更多文件类型的支持,而且不需要插件。如字面意思,不再需要安装各种各样的 loader 来支持多种类型的文件格式了。
自动转换
如若有需要,Babel, PostCSS, 和 PostHTML 甚至 node_modules 包会被用于自动转换代码。只需要自定义好 babelrc.json、postcss.config.js、tsconfig.json 等配置文件就可以直接转换代码,如果 Parcel 发现打包时有缺少的依赖(如 babel plugin 等)就会自动帮你安装并且加到 package.json 的 devDependencies 中,如果不看控制台,你甚至对此无感。
零配置代码分拆
使用动态 import() 语法, Parcel 将你的输出文件束 (bundles) 分拆,因此你只需要在初次加载时加载你所需要的代码。在 Parcel 出现早期,不支持 code-split 和 tree-shaking 等功能都是它被放弃进一步使用的原因,但如今他们都以得到支持了,又要强调一遍,无需配置。
热模块替换
Parcel 无需配置,在开发环境的时候会自动在浏览器内随着你的代码更改而去更新模块。没错,真正零配置的 HMR 。
友好的错误日志
当遇到错误时,Parcel 会输出语法高亮的代码片段,帮助你定位问题。
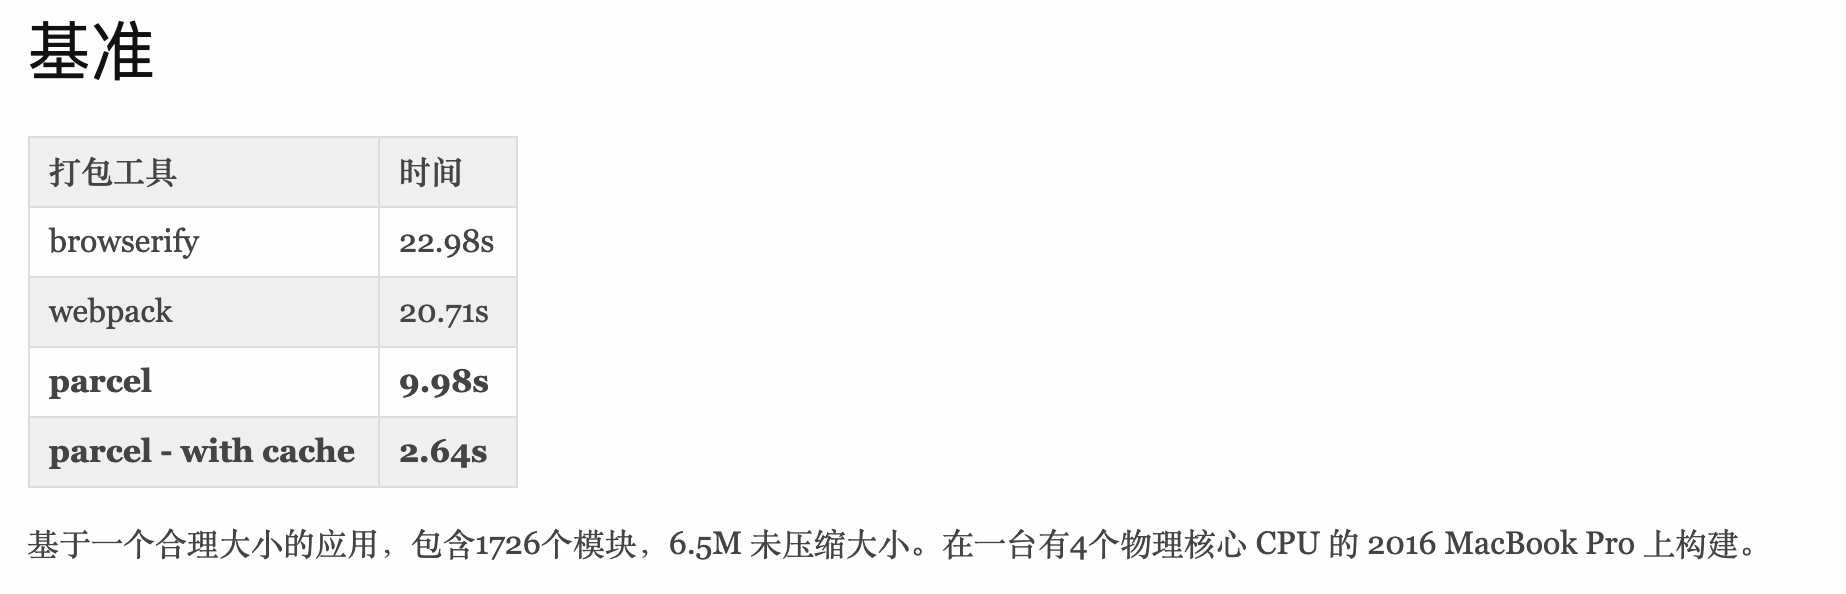
上图可以看到 Parcel 官网放出的打包速度对比,虽然只是一家之辞,但是我们也可以看出使用多核编译和缓存对于加速打包有多么明显的作用了。
了解了 Parcel 的优势之后,让我们实操体验一下吧~
搭建一个最简单的 Parcel 打包工程
在新建的项目下安装 Parcel
Yarn 方式安装:
yarn add parcel-bundler --dev
NPM 方式安装:
npm install parcel-bundler --save-dev
创建入口文件 index.html 和 index.js
document.body.innerText = 'Hello Parcel!';
然后,在 package.json 中添加脚本命令。可以看到这里将 index.html 作为入口文件,但这不是强制的。
{
  "scripts": {
    "dev": "parcel index.html",
    "watch": "parcel watch index.html",
    "build": "parcel build index.html"
  }
}
如果你没有自己的本地服务,那就执行 dev 命令,Parcel 会为你创建一个 node 服务;如果你有自己的服务,可以使用 watch 命令监听变化并重新打包。
Ok ,浏览器打开 localhost:1234 就可以看到我们的页面了!注意,此时 HMR 已经生效了! 查看源代码
搭建包含样式文件的工程
项目中一般都会使用 css 预处理工具,这里我们以 Less 为例。(当然,直接使用 css 也是可以的)
创建样式文件 index.less
body {
  color: violet;
}
然后直接在 index.html 中引入
<link rel="stylesheet" href="index.less" />
或者在 index.js 中引入
import './index.less';
可以惊喜地发现,项目 HMR 过程中控制台输出了正在安装 Less 依赖的提示,而我们并没有将 Less 添加到 devDependencies 中。 抬头就可以看见页面上的文字变色了,这个过程中如果没有去看控制台,你甚至会忘了有 Less 依赖这回事。
使用 postcss,在根目录添加 .postcssrc 文件
{
  "modules": true,
  "plugins": {
    "autoprefixer": {
      "grid": true
    }
  }
}
同样,Parcel 在检测到这个配置文件后会在 HMR 时自动安装依赖 postcss-modules 和 autoprefixer。现在来试用下:
body {
  color: violet;
  display: flex;
}
生成代码如下:
body {
    color: violet;
    display: -webkit-box;
    display: flex;
}
现在,你可以根据自己的需要配置 .postcssrc 来添加插件。查看源代码
使用 babel 或 typescript 来编译 react 项目
Parcel 默认使用 @babel/preset-env 转换你的代码。我们可以添加 .babelrc 文件来进行进一步配置。
{
  "plugins": [
    [
      "transform-decorators-legacy"
    ]
  ],
  "presets": [
    [
      "env",
      {
        "targets": {
          "browsers": [
            "last 2 versions",
            "safari >= 7"
          ]
        }
      }
    ],
    "react",
    "stage-0"
  ]
}
相关 babel 依赖应该已经自动被安装了。
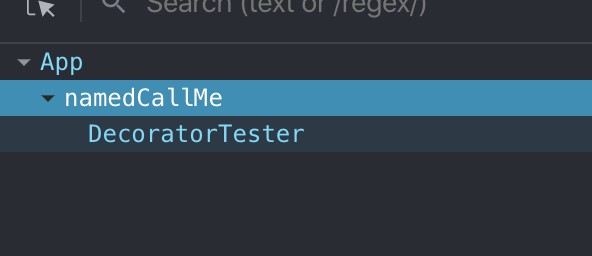
接着我们参考 react 官网中高阶组件的一个例子,用装饰器语法来包装 DecoratorTester 组件,然后从外部传入组件名。
index.js
const App = () => <div className="app-container">
  Hello React!
  <DecoratorTester name="CallMe" />
</div>;
/components/DecoratorTester.js
@name
export default class DecoratorTester extends React.Component {
  render() {
    return <div>I'm the DecoratorTester</div>;
  }
}
/components/named.js
export default function named(Component) {
  const NamedComponent = ({ name, ...restProps }) => {
    NamedComponent.displayName = `named${name || Component.displayName || Component.name || 'Component'}`;
    return <Component {...restProps} />;
  };
  return NamedComponent;
}
可以看到组件名已经被修改了
如果希望使用 typescript 来编译项目,将 .babelrc 改为 tsconfig.json 文件并修改配置就可以了,值得一提的是 ts 依赖的声明文件还是需要手动安装的。这里不再赘述。查看源代码
code splitting 和 tree shaking
首先推荐一个打包分析插件 parcel-plugin-bundle-visualiser ,它的作用和 webpack 的插件 webpack-bundle-analyzer 类似,能帮助分析生产包的内容构成和依赖关系。
在你的项目中安装 parcel-plugin-bundle-visualiser
yarn add --dev parcel-plugin-bundle-visualiser
或者
npm install -d parcel-plugin-bundle-visualiser
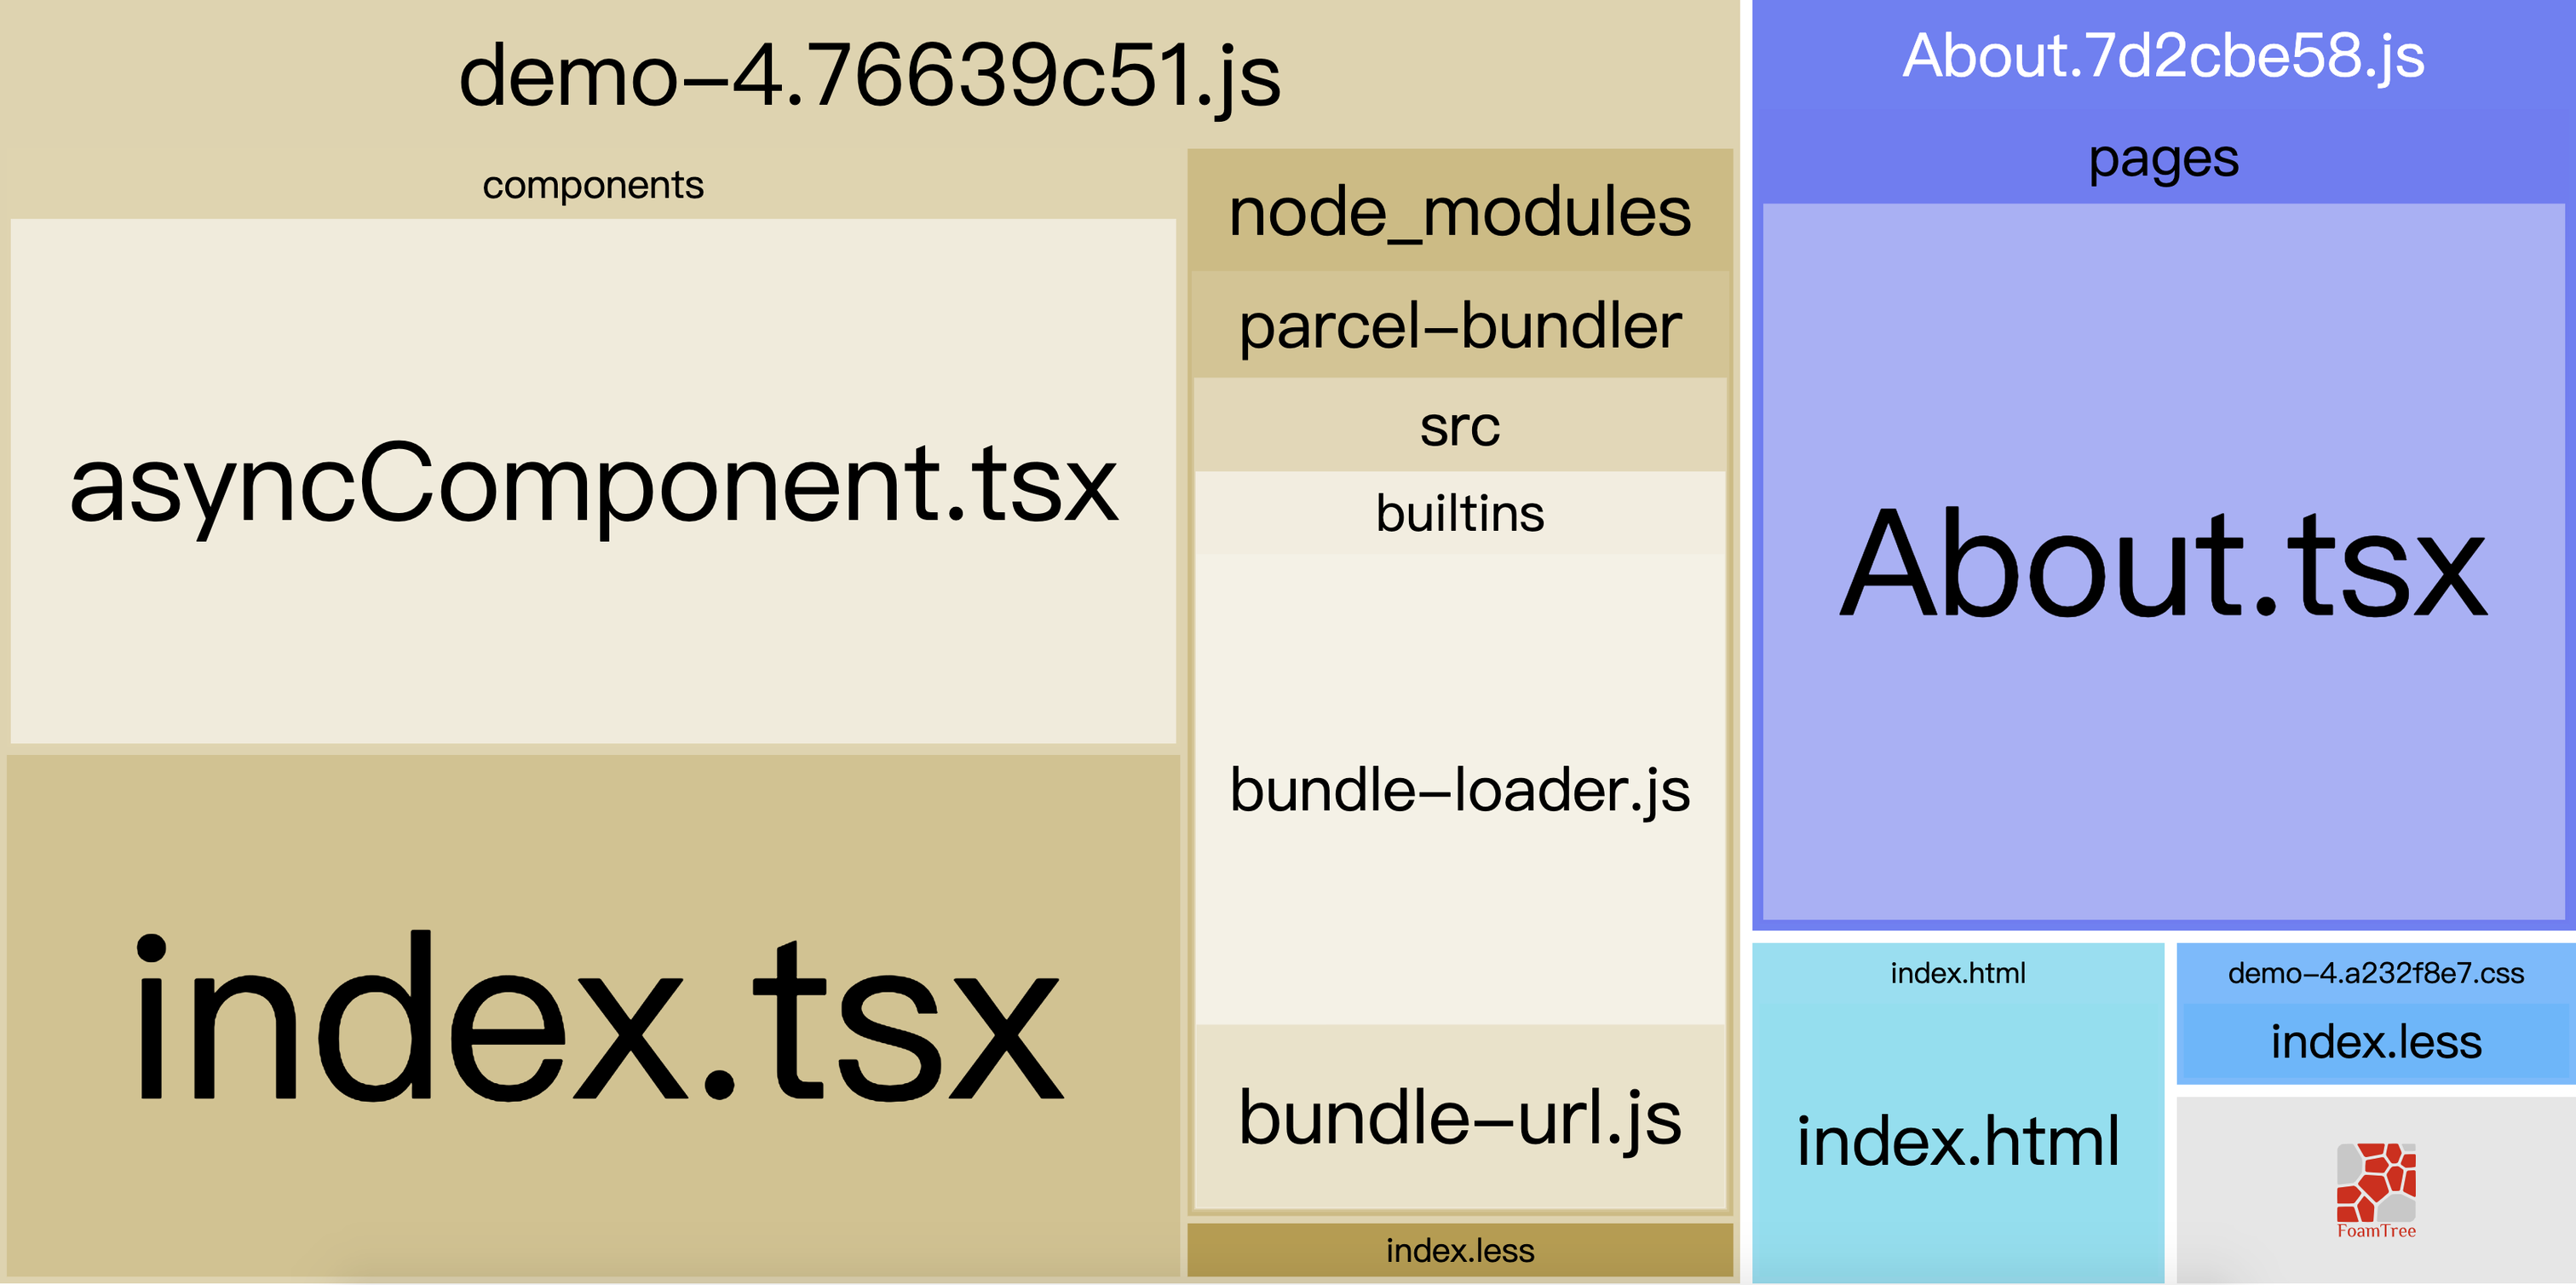
然后在生产环境下打包项目(NODE_ENV 为 production),就可以在 dist 目录中发现 report.html ,在浏览器中打开就可以看到我们项目的 bundle 构成图了。
我在这里重新创建了一个 typescript 版本的 react 项目,它的 bundle 分析图如下(为了方便分析用 --no-source-maps 启动项禁用了 source-maps ,且用 --target node 启动项剔除了 dependencies 中的依赖)

接下来我们将 About 组件作为异步依赖来加载。
// /components/asyncComponent.tsx
import React from 'react';

export default function asyncComponent(importComponent) {
  class AsyncComponent extends React.Component {
    constructor(props) {
      super(props);
      this.state = { component: null };
    }
    async componentDidMount() {
      const { default: component } = await importComponent();
      this.setState({ component });
    }
    render() {
      const Comp = (this.state as any).component;
      return Comp ? <Comp {...this.props} /> : null;
    }
  }
  return AsyncComponent;
}
// index.tsx
ReactDom.render(<BrowserRouter>
  <div className={styles.nav}>
    <NavLink to="/" exact>Home</NavLink>
    <NavLink to="/about" exact>About</NavLink>
  </div>
  <Switch>
    <Route exact path="/" component={App} />
    <Route path="/about" component={asyncComponent(() => import('./pages/About'))} />
  </Switch>
</BrowserRouter>, document.getElementById('root'));
效果如下
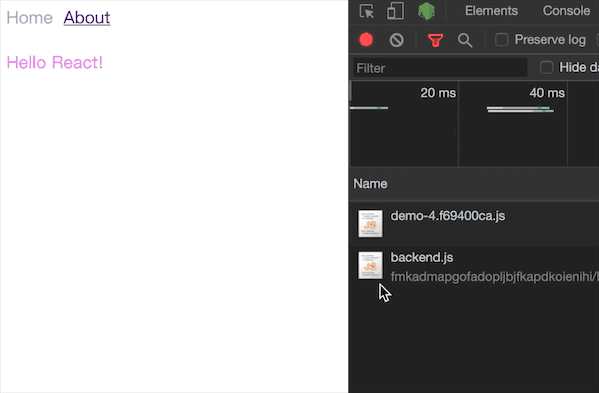
可以看到 code splitting 已经生效,About.js 被单独打包且异步加载了。此时的 bundle 图成了这样
最后来测试下 tree shaking 的效果,直接在一个组件依赖中增加一个方法导出,但没有在主模块中引用,执行 build ,可以看到 bundle 中依然有这串字符串 tree shaking do not work! 。
// /components/asyncComponent.tsx
export const treeShakingTester = () => console.log('tree shaking do not work!');
根据官方文档说明,tree shaking 和 scope hoisting 任然是实验性功能,需要添加启动项 --experimental-scope-hoisting 才能开启。
"build": "rm -rf ./dist && parcel build index.html --no-source-maps --experimental-scope-hoisting",
重新打包之后,我们设置的魔法字符已经搜不到了。查看源代码
小结
经过一系列的尝(cai)鲜(keng)。我们已经能充分体验到 Parcel 为前端项目的构建带来了多大的便利。可是有利就有弊,治好懒癌晚期的同时,它也丧失了一些定制化和自由度,最关键的一点,对于打包工具来说,生态仍然是第一考虑要素,这也是它现今人气没有 webpack 高的主要原因,期待 Parcel2 能更进一步。
