

前言
一般在团队开发中每个人的代码习惯都不太一样,这样就会导致代码风格不一致,以致于维护和修改bug的时候看别人的代码成为一种痛苦... 这种情况尤其在前端开发中尤为明显。因为关于前端的开发规范貌似也没有行业权威标准。为了方便开发,此次列举了react开发的基本规范。
ES6规范
声明变量
使用let和const来代替var
箭头函数(arrow函数)
rest 参数 (Rest Operator)
function howMany(...args) {
    return "You have passed " + args.length + " arguments.";
}
console.log(howMany(0, 1, 2)); // 传入三个参数
console.log(howMany("string", null, [1, 2, 3], { }));  // 传入四个参数

function push(array, ...items) {
    items.forEach(function(item) {
      array.push(item);
      console.log(item);
    });
}

let a = [];
push(a, 1, 2, 3)
console.log(a)  //输出 [1, 2, 3]
扩展运算符 (Spread Operator)
console.log(...[1, 2, 3])
// 1 2 3
console.log(1, ...[2, 3, 4], 5)
// 1 2 3 4 5
[...document.querySelectorAll('div')]
// [<div>, <div>, <div>]
// 请注意,扩展运算符...只在某些特定的情况下才可以使用,比如函数的参数中,或者数组中。裸用扩展运算符程序会报错:
解构赋值(Destructuring Assignment)
// es5
var voxel = {x: 3.6, y: 7.4, z: 6.54 };
var x = voxel.x; // x = 3.6
var y = voxel.y; // y = 7.4
var z = voxel.z; // z = 6.54
// es6 赋值为相同的变量
const { x, y, z } = voxel; // x = 3.6, y = 7.4, z = 6.54
// 赋值为不同的变量
const { x : a, y : b, z : c } = voxel // a = 3.6, b = 7.4, c = 6.54
// 解构赋值也可以作用于嵌套的对象
const a = {
    start: { x: 5, y: 6},
    end: { x: 6, y: -9 }
};
const { start : { x: startX, y: startY }} = a;
console.log(startX, startY); // 5, 6
// 数组使用解构赋值
const [a, b] = [1, 2, 3, 4, 5, 6];
console.log(a, b); // 1, 2
const [a, b,,, c] = [1, 2, 3, 4, 5, 6];
console.log(a, b, c); // 1, 2, 5

const [a, b, ...arr] = [1, 2, 3, 4, 5, 7];
console.log(a, b); // 1, 2
console.log(arr); // [3, 4, 5, 7]
模板字符串 (Template String)
`` 使用方法
class方法
创建组件的时候一直在使用
async
promise
React代码开发规范
框架层面
文件结构:路由、图片、公用组件、主组件、mobx文件、theme(皮肤)、工具
图片文件 一般命名为 assets
- 一般有特殊模块就新建一个文件夹
- 图片不是特别多的话就全部放在image文件夹内,多的话就新建文件夹,放在新建文件夹内
- 新建一个index.js 文件,把所有图片全部暴露出去, 并写上注释是哪一个模块,哪一个功能的图片 如下:
export { default as form_bg } from './icon/form_bg.png';
export { default as icon_catch } from './icon/icon_catch.png';
export { default as icon_check_off } from './icon/icon_check_off.png';
export { default as icon_check_on } from './icon/icon_check_on.png';
这样在引用图片的时候就会很方便,不用在考虑路径问题了
路由 一般文件名为 router
新建index.js 文件 在里面配置路由
公共组件 一般文件名为 components
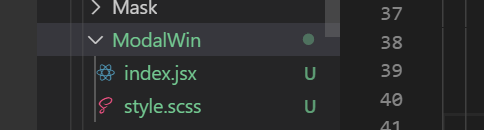
在里面根据公共组件的功能来命名新建的文件夹,注意使用帕斯卡命名。且在里面新建一个index.jsx和style.scss(或index.scss)
如下图
和img一样在components文件中新建一个index.js文件,把所有组件暴露出去
export {default as Button} from './Button/Button';
export {default as NavHeader} from './NavHeader/NavHeader';
export {default as NavBread} from './NavBread';
主组件
和公共组件差不多
mobx文件
theme
工具文件夹 一般命名为utils
里面是各种公用的处理方法
ajax或featch封装
最好使用async和await
组件层面
每个文件只包含一个React组件。
创建组件的方法
// 基础组件
class Listing extends React.Component {
  render() {
    return <div>{this.props.hello}</div>;
  }
}
// 无状态组件
function Listing({ hello }) {
  return <div>{hello}</div>;
}
组件命名
拓展名:React组件使用.jsx扩展名;
文件名:文件名使用帕斯卡命名:HomePage.jsx
引用命名:React组件使用帕斯卡命名,引用实例采用驼峰式命名:eslint: react/jsx-pascal-case)(个人不喜欢这样,引用命名还是按照帕斯卡命名)
// bad
import reservationCard from './ReservationCard';

// good
import ReservationCard from './ReservationCard';

// bad
const ReservationItem = <ReservationCard />;

// good
const reservationItem = <ReservationCard />;
对齐
// bad
<Foo superLongParam="bar"
     anotherSuperLongParam="baz" />

// good
<Foo
  superLongParam="bar"
  anotherSuperLongParam="baz"
/>

// 如果组件的属性可以放在一行就保持在当前一行中
(个人觉得如果只有一个属性就放在一行)
<Foo bar="bar" />

// 多行属性采用缩进
<Foo
  superLongParam="bar"
  anotherSuperLongParam="baz"
>
  <Quux />
</Foo>
括号
使用括号包裹多行JSX标签
// bad
render() {
  return <MyComponent className="long body" foo="bar">
           <MyChild />
         </MyComponent>;
}

// good
render() {
  return (
    <MyComponent className="long body" foo="bar">
      <MyChild />
    </MyComponent>
  );
}

// good, when single line
render() {
  const body = <div>hello</div>;
  return <MyComponent>{body}</MyComponent>;
}
空格
// 反例
<Foo/>
// 反例
<Foo                 />
// 反例
<Foo
 />
// 正例
<Foo />
属性
属性采用驼峰命名法
// 反例
<Foo
  UserName="hello"
  phone_number={12345678}
/>
// 正例
<Foo
  userName="hello"
  phoneNumber={12345678}
/>
标签
// 当标签没有子元素的时候,始终使用自闭合的标签
// bad
<Foo className="stuff"></Foo>

// good
<Foo className="stuff" />
// 如果控件有多行属性,关闭标签要另起一行。
// bad
<Foo
  bar="bar"
  baz="baz" />

// good
<Foo
  bar="bar"
  baz="baz"
/>
方法
// 不要对 React 组件的内置方法使用 underscore (下划线)前缀
// 反例
React.createClass({
  _onClickSubmit() {
    // do stuff
  }
  // other stuff
});

// 正例
class extends React.Component {
  onClickSubmit() {
    // do stuff
  }
  // other stuff
});
class extends React.Component的顺序
- static静态方法
- constructor
- getChildContext
- componentWillMount
- componentDidMount
- componentWillReceiveProps
- shouldComponentUpdate
- componentWillUpdate
- componentDidUpdate
- componentWillUnmount
- 点击回调或者事件回调 比如 onClickSubmit() 或者 onChangeDescription()
- render函数中的 getter 方法 比如 getSelectReason() 或者 getFooterContent() 可选的 render 方法 比如 renderNavigation() 或者 renderProfilePicture()
import React, { PropTypes } from 'react';

const propTypes = {
  id: PropTypes.number.isRequired,
  url: PropTypes.string.isRequired,
  text: PropTypes.string,
};

const defaultProps = {
  text: 'Hello World',
};

class Link extends React.Component {
  static methodsAreOk() {
    return true;
  }

  render() {
    return <a href={this.props.url} data-id={this.props.id}>{this.props.text}</a>
  }
}

Link.propTypes = propTypes;
Link.defaultProps = defaultProps;

export default Link;
