

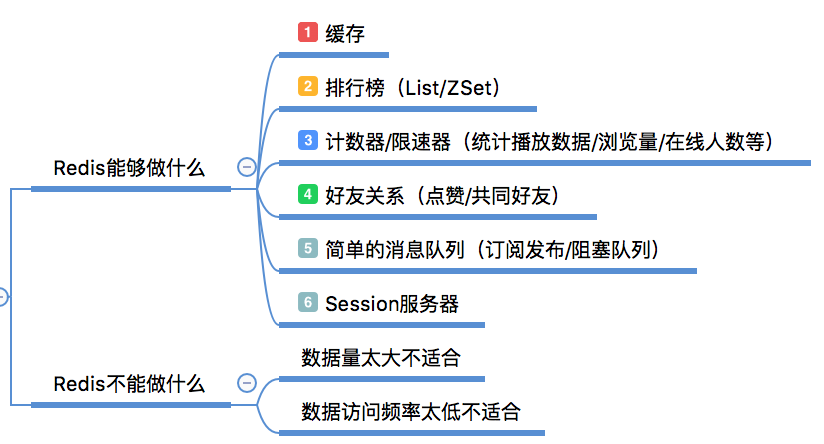
redis 能干啥?
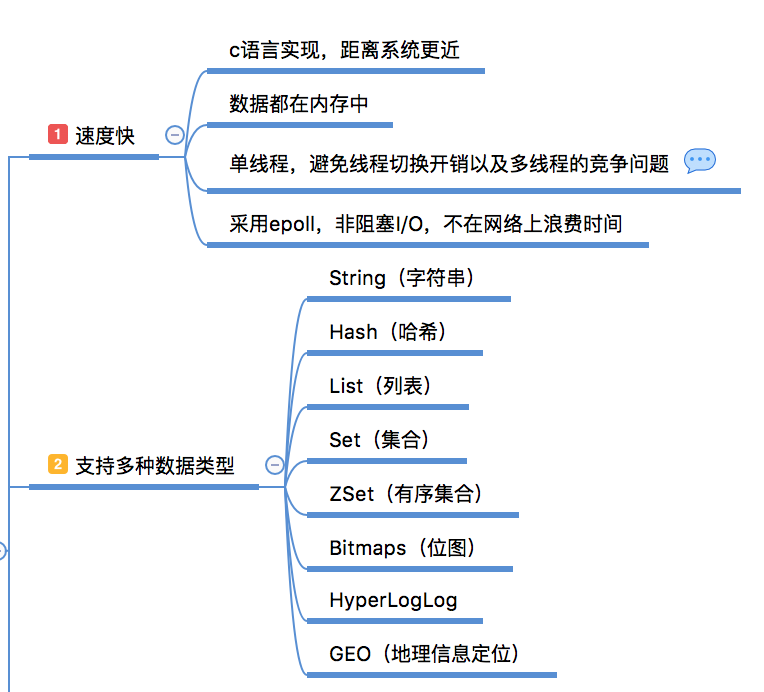
为什么选择redis?
redis 常用命令:
systemctl start redis.service #启动redis服务器

systemctl stop redis.service #停止redis服务器

systemctl restart redis.service #重新启动redis服务器

systemctl status redis.service #获取redis服务器的运行状态

systemctl enable redis.service #开机启动redis服务器

systemctl disable redis.service #开机禁用redis服务器
1、安装redis数据库
在CentOS和Red Hat系统中,首先添加EPEL仓库,然后更新yum源:
sudo yum install epel-release
sudo yum update

然后安装Redis数据库:
sudo yum -y install redis

安装好后启动Redis服务即可:

sudo systemctl start redis
3、查看redis是否开启
ps -ef | grep redis
4、进入redis服务
redis-cli
5、关闭服务
redis-cli shutdown
6、Redis开启远程登录连接
vi  /etc/redis.conf
bind 127.0.0.1 改成了bind 0.0.0.0
7、设置密码
vi  /etc/redis.conf

#requirepass foobared去掉注释,foobared改为自己的密码,我在这里改为

requirepass 123456
重新连接:
输入 auth 123456   你刚才设置的密码
然后重启Redis服务,使用的命令如下:
sudo systemctl restart redis
开机启动:
systemctl enable redis.service
卸载 redis 安装一个软件时 yum -y remove redis
错误:
Job for redis.service failed because the control process exited with error code.
See "systemctl status redis.service" and "journalctl -xe" for details.
解决: 参考
chown redis:redis /var/log/redis/redis.log
错误:
 Response received : -MISCONF Redis is configured to save RDB snapshots,
but is currently not able to persist on disk.
 Commands that may modify the data set are disabled.
Please check Redis logs for details about the error.

Connection: AUTH ERROR
解决:
redis3.2版本后新增protected-mode配置,默认是yes,即开启
关闭protected-mode模式,此时外部网络可以直接访问

vi  /etc/redis.conf
protected-mode no
/var/log/redis/redis.log 转自: 警告:
WARNING: The TCP backlog setting of 511 cannot be enforced because /proc/sys/net/core/somaxconn is set to the lower value of 128.

**解决办法:**

[root@centos224]# echo 511 >/proc/sys/net/core/somaxconn
[root@centos224]# echo "net.core.somaxconn = 551" > /etc/sysctl.conf</pre>

**警告:**

WARNING overcommit_memory is set to 0! Background save may fail under low memory condition.
To fix this issue add 'vm.overcommit_memory = 1' to /etc/sysctl.
conf and then reboot or run the command 'sysctl vm.overcommit_memory=1' for this to take effect.

**解决办法:**

[root@centos224]# echo 1 > /proc/sys/vm/overcommit_memory
[root@centos224]# echo "vm.overcommit_memory=1" >> /etc/sysctl.conf</pre>

**警告:**

WARNING you have Transparent Huge Pages (THP) support enabled in your kernel.
This will create latency and memory usage issues with Redis.
To fix this issue run the command 'echo never > /sys/kernel/mm/transparent_hugepage/enabled' as root,
and add it to your /etc/rc.local in order to retain the setting after a reboot. Redis must be restarted after THP is disabled.

**解决办法:**


[root@centos224]# echo never > /sys/kernel/mm/transparent_hugepage/enabled
[root@centos224]# vi /etc/rc.local if test -f /sys/kernel/mm/transparent_hugepage/enabled; then
   echo never > /sys/kernel/mm/transparent_hugepage/enabled fi
if test -f /sys/kernel/mm/transparent_hugepage/defrag; then
   echo never > /sys/kernel/mm/transparent_hugepage/defrag fi
