

一、需求:
利用SpringMVC实现上传文件的功能
二、思路:
1.我们可以在SpringMVC中,通过配置一个MultipartResolver来上传文件。
2.通过MultipartFile file来接收文件,通过MultipartFile[] files接收多个文件上传。
1.添加pom文件
<!-- 添加上传文件依赖 -->
		<!-- https://mvnrepository.com/artifact/commons-fileupload/commons-fileupload -->
		<dependency>
			<groupId>commons-fileupload</groupId>
			<artifactId>commons-fileupload</artifactId>
			<version>1.3.1</version>
		</dependency>
		<!-- 非必须,可简化I/O操作 -->
		<!-- https://mvnrepository.com/artifact/commons-io/commons-io -->
		<dependency>
			<groupId>commons-io</groupId>
			<artifactId>commons-io</artifactId>
			<version>2.3</version>
		</dependency>
2.JSP页面
上传页面,需要在src/main/resources/views下面新建一个upload.jsp文件
<%@ page language="java" contentType="text/html; charset=UTF-8"
	pageEncoding="UTF-8"%>
<!DOCTYPE html>
<html>
<head>
<meta http-equiv="Content-Type" content="text/html; charset=UTF-8">
<title>upload page</title>
</head>
<body>
	<div class="upload">
		<form action="upload" enctype="multipart/form-data" method="post">
			<input type="file" name="file" /><br>
			<input type="submit" value="上传">
		</form>
	</div>
</body>
</html>
3.跳转页面
添加能跳转到upload页面的ViewController。需要在MyMvcConfig.java下面添加。
// 添加转向upload页面的ViewController
	public void addViewControllers(ViewControllerRegistry registry) {
		registry.addViewController("/index").setViewName("/index");
		registry.addViewController("/toUpdate").setViewName("/upload");
	}
4.MultipartResolver配置
同样,在MyMvcConfig.java下面添加。
// MultipartResolver配置
	@Bean
	public MultipartResolver multipartResolver() {
		CommonsMultipartResolver multipartResolver = new CommonsMultipartResolver();
		multipartResolver.setMaxUploadSize(1000000);
		return multipartResolver;
	}
5.控制器(控制层)
package com.eleven.controller;

import java.io.File;
import java.io.IOException;

import org.apache.commons.io.FileUtils;
import org.springframework.stereotype.Controller;
import org.springframework.web.bind.annotation.RequestMapping;
import org.springframework.web.bind.annotation.RequestMethod;
import org.springframework.web.bind.annotation.ResponseBody;
import org.springframework.web.multipart.MultipartFile;

@Controller	// 在@controller注解中,返回的是字符串,或者是字符串匹配的模板名称,即直接渲染视图,与html页面配合使用的
public class UploadController {

	// @RequestMapping:是用来处理地址映射的注解
	// value:指定请求的实际地址
	// method:指定请求的方法类型,有get、post、put、delete
	@RequestMapping(value = "/upload", method = RequestMethod.POST)

	// 使用MultipartFile file接收上传的文件
	// @ResponseBody:将java对象转为json格式的数据。
	public @ResponseBody String upload(MultipartFile file) {
		try {
			// 使用FileUtils.writeByteArrayToFile快速写文件到磁盘
			FileUtils.writeByteArrayToFile(new File("D:upload/" + file.getOriginalFilename()), file.getBytes());
			return "ok";
		} catch (IOException e) {
			// TODO Auto-generated catch block
			e.printStackTrace();
			return "wrong";
		}
	}

}
6.运行
访问路径: http://localhost:8080/springmvc/upload 即可。
7.小插曲 问题一:
Request method 'GET' not supported:不支持请求方法“GET”
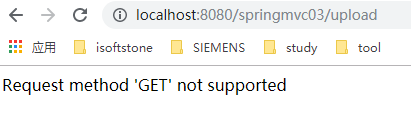
1.addViewControllers写成了addViewsControllers,所以导致该方法没有找到,无法访问下面的路径。
2.另外如果跳过toUpload,直接访问upload,也会报该错。
3.建议文件放置的目录和对外暴露的访问路径最好不要一样。
public void addViewControllers(ViewControllerRegistry registry) {
		// addResourceLocations指的是文件放置的目录
		// addResourceHandler指的是对外暴露的访问路径
  registry.addViewController("/indexs").setViewName("/index");
		registry.addViewController("/toUpload").setViewName("/upload");	// 添加转向到upload.jsp页面
	}
