


知识点扫盲
构建
- 概念:把源代码转换成发布线上可执行的
js,css,html代码的过程 - 特点:
- 1.代码转换(
ts—>js,less/scss—>css等) - 2.文件优化(压缩
js,css,html代码;压缩合并图片等) - 3.代码分割(提取多个页面的公共代码,提取首屏不需要执行部分的代码让其异步加载)
- 4.模块合并(把多个模块文件分类合并成一个文件)
- 5.自动刷新(在开发过程中监听本地源代码的变化,自动重新构建、刷新浏览器)
- 6.代码校验(在代码被提交到仓库之前需要校验代码是否符合规范,以及单元测试是否通过)
- 7.自动发布(更新完代码后,自动构建出线上发布代码并传输给发布系统)
- 1.代码转换(
怎么用
注:如果你是初学者,希望你能跟着我的步骤操作一下
安装
- 1、为了版本一直我们推荐使用本地安装(
npm install webpack --save-dev) - 2、安装
webpack-cli(npm install webpack-cli --save-dev),以便解析用户传参(核心yargs)
零配置打包
文件目录创建
- 根目录创建
src文件夹并在其中创建index.js文件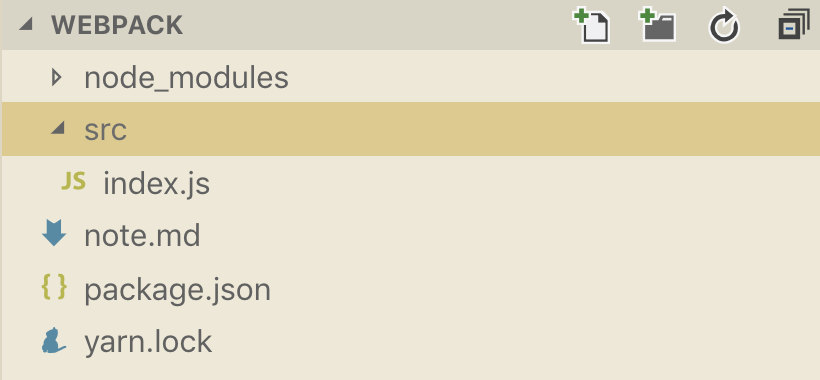
// index.js
console.log('hello webpack')
简单实现一(入口无依赖文件)
- 运行
npx webpack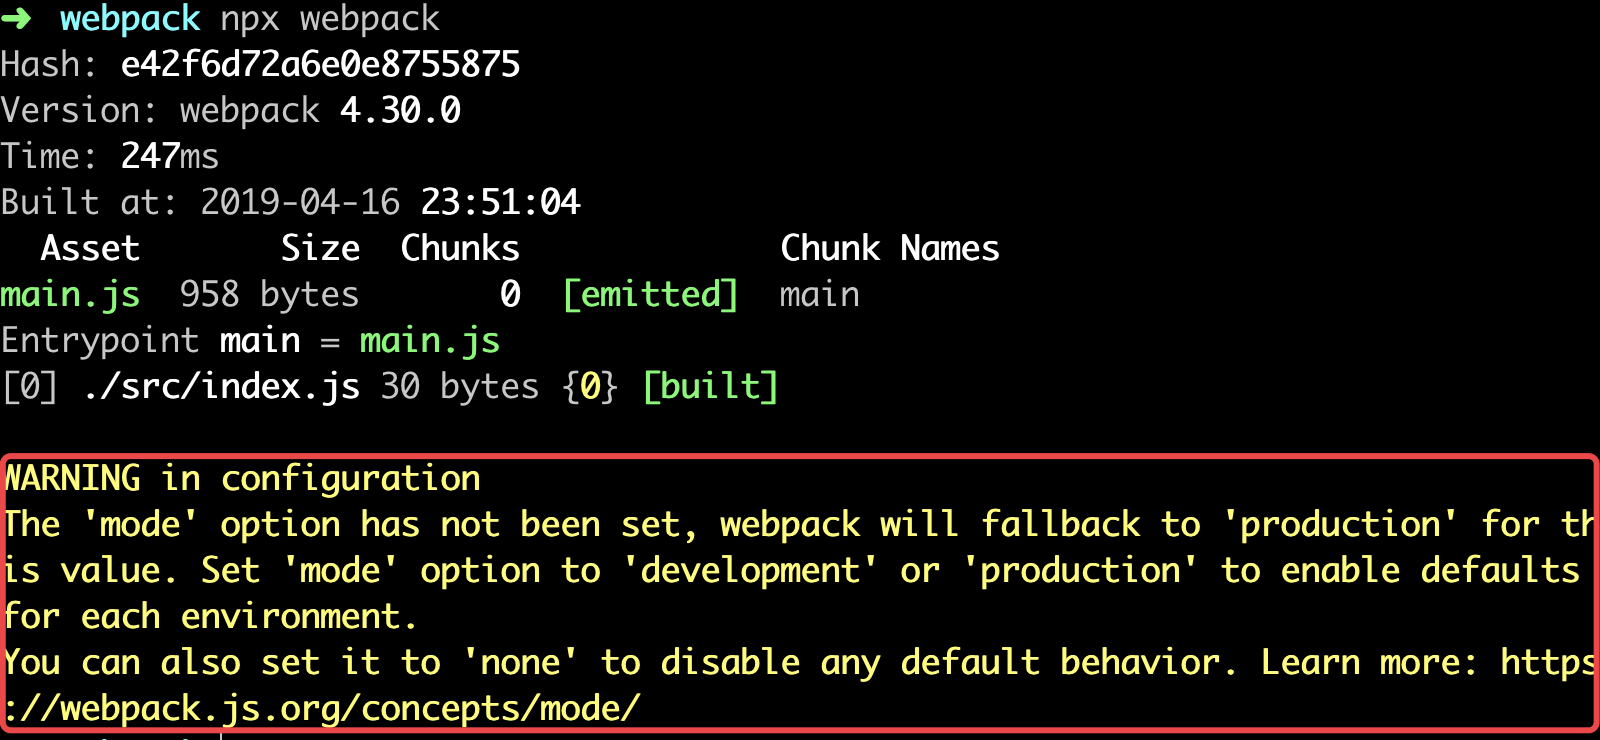
- 此时发现,根目录下会出现一个包含
main.js文件的dist文件夹;同时你也一定注意到了如上图中红框所圈出的WARNING,是因为我们没有指定mode(模式:包含生产(production)和开发(development)两种),不传会默认production模式
- 此时发现,根目录下会出现一个包含
- 运行
npx webpack --mode development- 此时不会出现上图中的
WARNING,比较一下此时main.js和之前的区别
- 此时不会出现上图中的
简单实现二(入口有依赖文件)
- 在
src文件夹中再创建一个other.js,在index.js通过require引入
// other.js
module.exports = 'hello webpack'

// index.js
const other = require('./other.js')
console.log(other)
- 运行
npx webpack --mode development - 在生成的
dist文件夹下创建一个index.html文件并引入产生的main.js文件,在浏览器中查看index.html的console
- 再尝试一下在
index.html中直接引入src文件夹下的index.js,在浏览器中查看index.html的console
后者的原因是因为我们的浏览器不支持
coomonjs,这里我不做过多解释;我们来分析一下前者是如何实现的
// 删除掉冗余部分的main.js文件
(function (modules) {
  var installedModules = {};
  function __webpack_require__(moduleId) { // ./src/index.js  ./src/other.js
    if (installedModules[moduleId]) { // 类似Commonjs中的缓存处理
      return installedModules[moduleId].exports;
    }
    var module = installedModules[moduleId] = {
      i: moduleId,
      l: false,
      exports: {}
    };
    modules[moduleId].call(module.exports, module, module.exports, __webpack_require__);
    module.l = true;
    return module.exports;
  }
  return __webpack_require__("./src/index.js");
})
  ({
    "./src/index.js":
      (function (module, exports, __webpack_require__) {
       // 默认会调用 require("./src/other.js")
        eval("const other = __webpack_require__(\"./src/other.js\");console.log(other);");

      }),
    "./src/other.js":
      (function (module, exports) {
        eval("module.exports = 'hello webpack';");
      })
  });
  /* webpack打包流程
   * 1.找到入口文件(index.js)
   * 2.找到入口文件中的依赖模块(other.js)  ast解析加载依赖模块
   * 3.从入口文件开始执行 require方法改写成 __webpack_require__
   * 内部自己实现了一个Commonjs模块(需要找到入口,需要找到入口中的所有依赖,加载依赖 + 模板——>渲染后的结果)
   */
增加配置打包
真正的开发中我们肯定不会零配置打包,肯定根据我们的需要来手动配置
webpack
配置入口文件
- 在全局创建
webpack.config.js或webpackfile.js文件。(本文以webpack.config.js为例)
- 编辑
webpack.config.js(采用coomonjs规范)
// webpack.config.js
module.exports = { // 导出一个对象;对象中放置配置;会调用这个配置进行构建
}
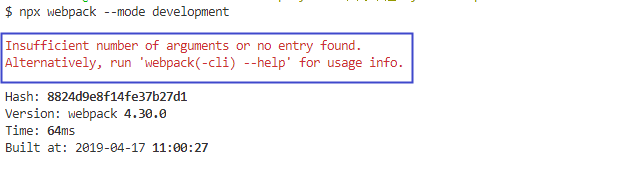
- 修改
src文件夹下index.js文件名为guYan.js,执行npx webpack --mode development,报错显示找不到入口文件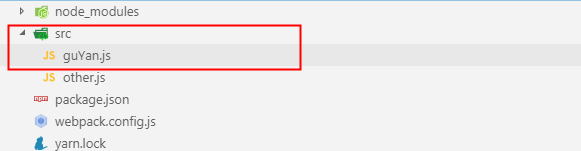
- 在
webpack.config.js文件中增加入口的位置,并执行npx webpack --mode development;无报错
// webpack.config.js
module.exports = {
    entry: './src/guYan.js' //当前入口文件的位置
}
注:我们可以通过执行
npx webpack --mode development时增加config参数来实现修改默认配置文件webpack.config.js的名字。比如我们现在修改webpack.config.js文件名为webpack.guYan.js然后执行npx webpack --mode development --config webpack.guYan.js效果和之前一样
配置出口文件
- 在
webpack.config.js文件中增加出口文件的配置,并执行npx webpack --mode development,效果如图
// webpack.config.js
const path = require('path');
module.export = {
    entry: './src/guYan.js',
    output:{ // 配置当前出口文件
        filename: 'bundle.js',  // 出口文件名
        path: path.resolve(__dirname,'./build') // 出口目录,该配置项必须是绝对路径,默认dist目录
    }
}

配置HTML模板
- 在根目录创建
public目录,并在其中创建index.html文件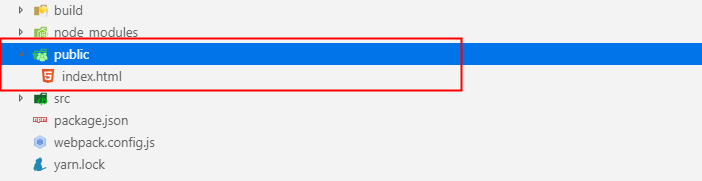
- 下载
html-webpack-plugin插件(npm install html-webpack-plugin --save-dev)- 作用:根据模板产生一个打包后的
html
- 作用:根据模板产生一个打包后的
- 在
webpack.config.js文件中增加HTML模板的配置(使用html-webpack-plugin插件)
// webpack.config.js
const path = require('path');
const HtmlWebpackPlugin = require('html-webpack-plugin');// 1.引入插件
module.exports = {
    entry:'./src/guYan.js',
    output:{
        filename:'bundle.js',
        path:path.resolve(__dirname,'./build')
    },
    plugins:[ // 2.在plugins中注册插件
        new HtmlWebpackPlugin({
            template:'./public/index.html', // 指定模板
            filename:'gy.html' // 指定打包后的文件名,默认为index.html
        })
    ]
}
- 执行
npx webpack --mode development,输出文件目录如图,并且你会发现在输出的gy.html中自动引入了打包后的bundle.js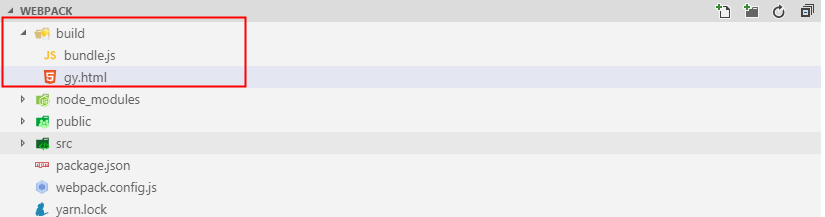
- 上述虽然已经完成了动态引入,但是执行
npx webpack --mode production会发现打包后的bundle.js被压缩,但是gy.html没有被压缩,还有就是引用的文件一直是一个我们不清楚会不会出现缓存的问题,这上线肯定是不允许的啊,所以我们需要继续配置
// webpack.config.js
const path = require('path');
const HtmlWebpackPlugin = require('html-webpack-plugin');
module.export = {
    entry:'./src/guYan.js',
    output:{
        filename:'bundle.js',
        path:path.resolve(__dirname,'./build')
    },
    plugins:[
        new HtmlWebpackPlugin({
            template: './public/index.html',
            filename:'gy.html',
            minify:{ // 配置压缩形式
                removeAttributeQuotes: true, // 删除所有属性的引号
                collapseWhitespace: true // 删除所有空白
            },
            hash:true // 每次引用js文件都加入哈希戳
        })
    ]
}
- 执行
npx webpack --mode production后对比之前的效果查看
配置mode(模式)
- 上文中我们执行打包命令的时候都会传一个
mode参数,其实没有必要这么麻烦,我们可以在webpack.config.js中配置mode;执行npx webpack结果和上文一样
// webpack.config.js
const HtmlWebpackPlugin = require('html-webpack-plugin');
module.exports= {
    mode: 'production', // 默认两个参数 development production
    entry: './src/guYan.js',
    ...
}
配置clean-webpack-plugin(清理文件夹)
在开发构建的过程中我们更希望在打包后的文件夹中一直是最新的打包文件,即先删除掉之前打包产生的文件夹及文件
- 安装
clean-webpack-plugin(npm install clean-webpack-plugin --save-dev) - 在
webpack.config.js文件中进行配置
// webpack.config.js
const path = require('path');
const HtmlWebpackPlugin = require('html-webpack-plugin');
const CleanWebpackPlugin = require('clearn-webpack-plugin'); // 1.引入插件
module.exports = {
    mode:'development',
    entry: './src/guYan.js',
    output: {
        filename: 'bundle.js',
        path: path.resolve(__dirname,'./build')
    },
    plugins: [
        new HtmlWebpackPlugin({
            template: './public/index.html',
            filename: 'gy.html',
            minify: {
                removeAttributeQuotes: true,
                collapseWhitespace: true
            },
            hash:true
        }),
        /*清空文件的插件*/
        new CleanWebpackPlugin({ // 2.注册插件
            cleanOnceBeforeBuildPatterns:['**/*'], // 匹配目录下的所有文件清空,默认也是所有
        })
    ]
}
配置多入口打包
- 上述示例中所有
webpack.config.js中的entry的值都是一个路径字符串的格式('./src/guYan.js'),当我们的入口只有一个的时候我们这样写ok,但是当我们需要同时打包多个文件的时候呢?我们如何处理呢?对的,它的值还可以是个对象 - 首先我们准备再准备一个入口文件
guYan2.js
// src/guYan2.js
console.log('I am GuYan');
- 在
webpack.config.js中修改我们的配置,并执行npx webpack打包后的文件夹变化效果
// webpack.config.js
const path = require('path');
const HtmlWebpackPlugin = require('html-webpack-plugin');
const CleanWebpackPlugin = require('clean-webpack-plugin');
module.exports = {
    mode:'development',
    entry:{ // 配置多入口
        index:'./src/guYan.js',
        other:'./src/guYan2.js'
    },
    output:{
        filename: '[name].js',// 为了响应多入口出口文件名需要动态创建,保证每个入口都有输出
        path: path.resolve(__dirname,'./bundle')
    },
    plugins:[
        new HtmlWebpackPlugin({
            template:'./public/index.html',
            filename:'index.html',
            minify:{
                removeAttributeQuotes:true,
                collapseWhitespace:true
            },
            hash:true
        }),
        new CleanWebpackPlugin({
            clearnOnceBeforeBuildPatterns:['**/*']
        })
    ]
}
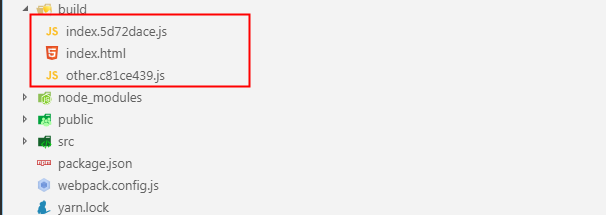
- 在上文中我们为了打包后的
html文件引入打包后的js文件不出现缓存给我们造成的困扰,我们在使用html-webpack-plugin的时候配了一个hash,我们也可以在出口文件名的位置加入[contentHash]参数
// webpack.config.js
...
output:{
    filenama:'[name].[contentHash:8].js' // :后面的是代表长度
}
...
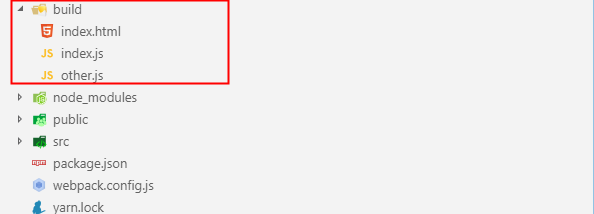
- 上文打包之后我们发现现在打包出两个
js文件一个html文件中引用了两个js文件,那如果我们想分别引用呢?怎么处理?对的,再new一次html-webpack-plugin。所以我们写一个循环来处理一个plugin需要多次引用的问题
// webpack.config.js
const path = require('path');
const HtmlWebpackPlugin = require('html-webpack-plugin');
const CleanWebpackPlugin = require('clean-webpack-plugin');
let htmlPlugins = ['index','other'].map(chunkName=>(new HtmlWebpackPlugin({
    filename:`${chunkName}.html`,
    chunks:[chunkName] // 保证按需引入 即index.html文件只引入index.js;other.html只引入other.js
})));
modeule.exports = {
    mode:'development',
    entry:{
        index:'./src/guYan.js',
        other:'./src/guYan2.js'
    },
    output:{
        filename:'[name].[contentHash:8].js',
        path:path.resolve(__dirname,'./build')
    },
    plugins:[
        new CleanWebpackPlugin(),
        ...htmlPlugins
    ]
}
配置devServer(webpack-dev-server)
在开发过程中我们更希望的是我们一边修改代码页面自动更新,当然这种处理我们有两种方案一个是通过编译的时候传入
--watch不推荐使用(所以我就不做介绍了),另一种就是通过webpack-dev-server来启动,这种方式不会产生构建好的文件,并且会给我们启动一个服务
注:本小节的例子我们采用单入口输入,示例如下
// webpack.config.js
const HtmlWebpackPlugin = require('html-webpack-plugin');
const CleanWebpackPlugin = require('clean-webpack-plugin');
let htmlPlugins = ['index'].map(chunkName=>(new HtmlWebpackPlugin({
  filename:`${chunkName}.html`,
  chunks:[chunkName]
})));
module.exports = {
  devServer:{
    port:3000, //指定端口号
    open:true, // 是否自动打开浏览器
    compress:true, // 是否启用gzip压缩
    contentBase:'./dist' // 指定启动静态服务的文件目录
    // 通过webpack-dev-server打包的结果放到内存中,而且目录是当前的根目录
  },
  mode: 'development',
  entry: {
    index: './src/guYan.js',
  },
  output: {
    filename: '[name].js',
  },
  plugins: [
    new CleanWebpackPlugin({
      cleanOnceBeforeBuildPatterns: ['**/*']
    }),
    ...htmlPlugins,
  ]
}
- 通过
npx webpack-dev-sever启动来查看结果
配置loader
- 作用:
webpack只能理解JavaScript和JSON文件。loader让webpack能够去处理其他类型的文件,并将它们转换为有效 模块,以供应用程序使用,以及被添加到依赖图中。 - 特点
- 执行顺序:从右向左,从下到上
- 分类:前置(
enforce:'pre')、普通(enforce:'normal')、后置(enforce:'post') - 参数类型:数组,字符串,对象
处理css
- 全局创建一个
style文件夹,并在其中创建一个index.css文件,并在src/guYan.js中引入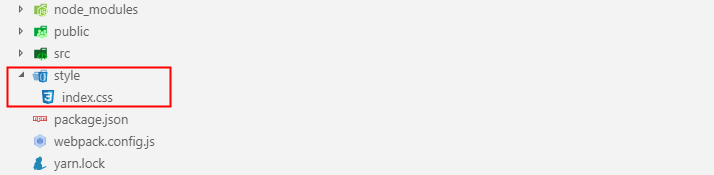
/*index.css*/
body{
    background:yellow;
}
- 安装
css-loader,style-loader(npm install css-loader style-loader --save-dev)- 原理:通过
css-loader将css文件处理成字符传形式,通过style-loader在html中创建<style>标签并将css-loader处理后的字符串插入其中
- 原理:通过
- 在
webpack.config.js中配置loader
// webpack.config.js
const HtmlWebpackPlugin = require('html-webpack-plugin');
const CleanWebpackPlugin = require('clean-webpack-plugin');
let htmlPlugins = ['index'].map(chunkName=>(new HtmlWebpackPlugin({
    template:'./public/index.html',
    filename:`${chunkName}.html`,
    chunks:[chunkName],
    minify:{
        removeAttributeQuotes:true,
        collapseWhitespace:true
    },
    hash:true
})))
module.exports = {
    mode:'development',
    devServer:{
      port:3000,
      open:true,
      compress:ture,
      contentBase:'./dist'
    },
    entry:{
        index:'./src/guYan.js'
    },
    output:{
        filename:'[name].js'
    },
    plugins:[
        new CleanWebpackPlugin(),
        ...htmlPlugins
    ],
    module:{
        rules:[
            {
                test:/\.css$/,
                use:['style-loader','css-loader']
            }
        ]
    }
}
- 运行
npx webpack-dev-server结果如下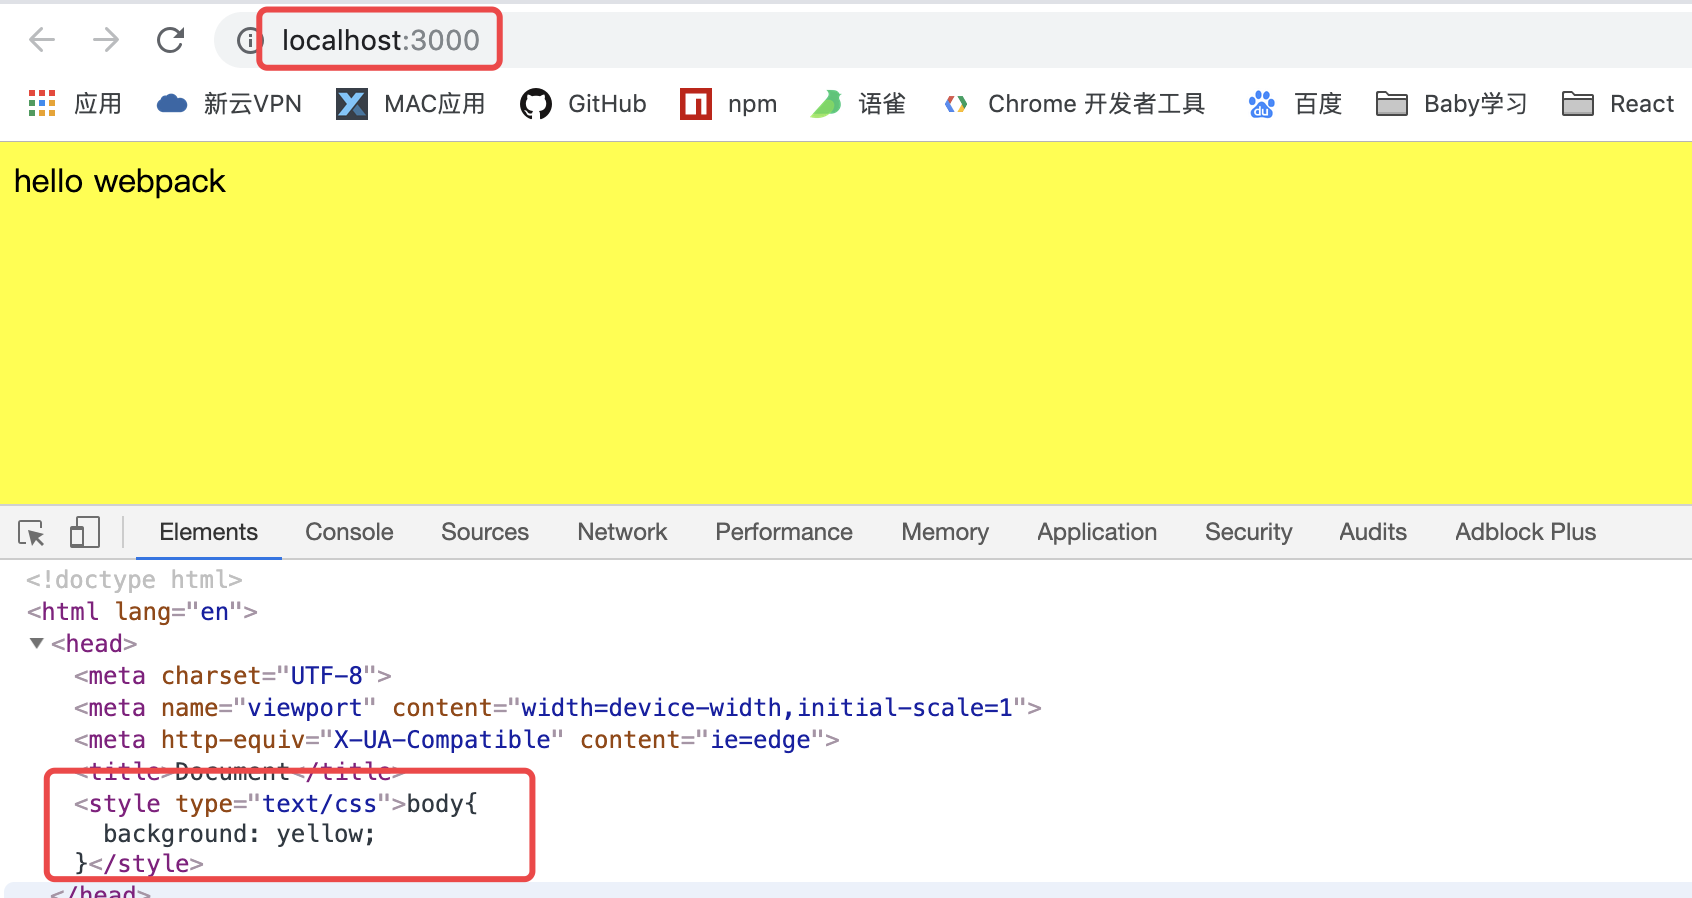
CSS相关
配置css-modules
- 在日常的开发中我们通常会将一些公共的样式抽离到一个
common.css文件中,然后在我们js文件中按需引入;这样我们就会遇到css模块化的问题(css-modules),我们举例说明如何配置解决这个问题 - 修改
src/guYan.js,在style目录下创建一个common.css文件
// guYan.js
import { other } from './other';
import '../style/index.css';
import commonStyle from '../style/common.css';
let div = document.createElement('div');
div.className = commonStyle.guYan;
div.innerHTML = 'GuYan';
document.body.appendChild(div);
console.log(other);
/*common.css*/
.guYan{
    color:red;
}
- 配置
webpack.config.js
// webpack.config.js
...
    module:{
        rules:[
            {
                test:/\.css$/,
                use:['style-loader',
                     {
                         loader:'css-loader',
                         options:{
                             modules:true
                         }
                     }
                ]
            }
        ]
    }
...
- 运行
npx webapck-dev-server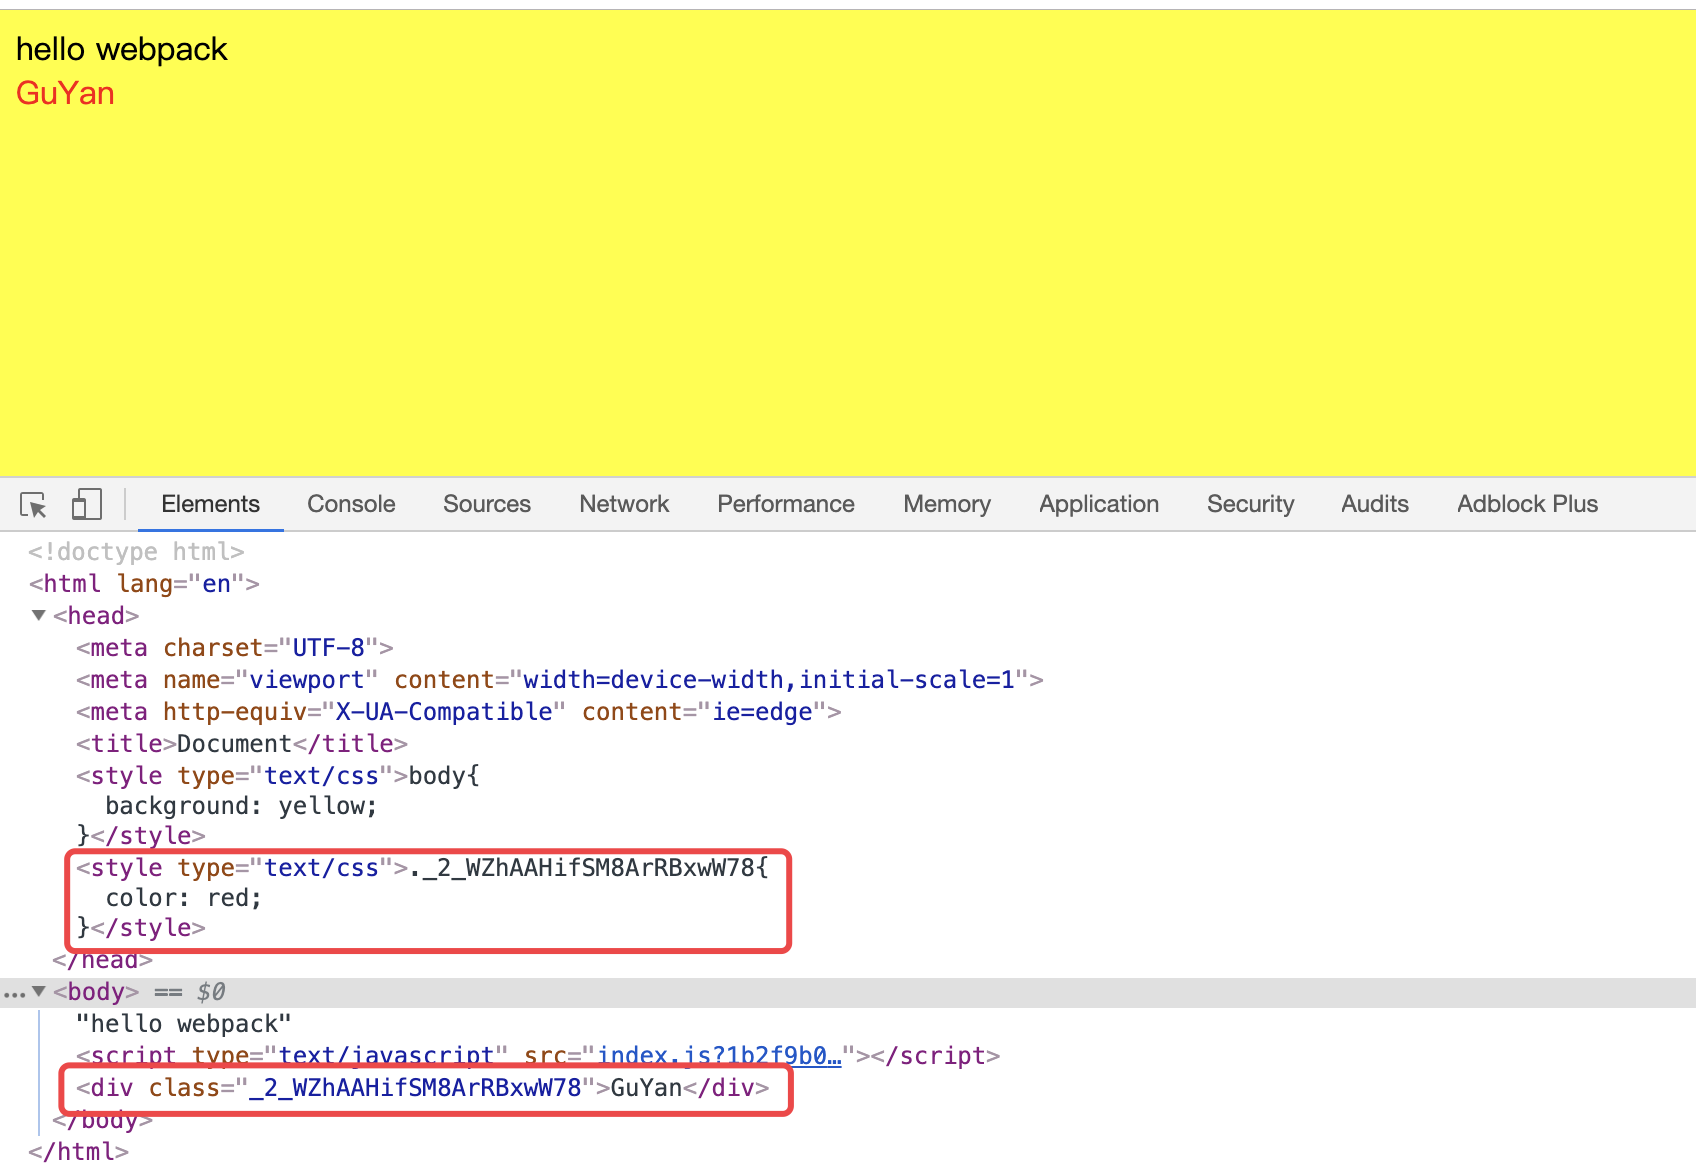
特殊注意:
loader的顺序一定要特别注意,如果就想把style-loader写在后面需要在其options中增加enforce:'post'参数或者在css-loader的options中增加enforce:'pre'参数
配置css3增加浏览器内核前缀
- 修改
style/common.css如下
/*common.css*/
.guYan{
  color: red;
  background: green;
  transform: rotateY(180deg);
}
- 安装
postcss-loader(npm install postcss-loader --save-dev) postcss-loader只是一个干活的,它不知道干什么活,所以需要一个东西来告诉它,它需要做的是增加前缀,这个东西就是autoprefixer,所以我们安装autoprefixer(npm install autoprefixer --save-dev)- 现在我们干活的(
postcss-loader)有了,指挥干活的(autoprefixer)也有了,但是呢这个干活的(postcss-loader)比较装X,它要求这个指挥干活的(autoprefixer)不能像其他loader那样你随随便便在options对象中指挥我,你必须专门在我的配置文件(postcss.config.js)中指挥我干活,所以我们需要在根目录下创建一个postcss.config.js文件
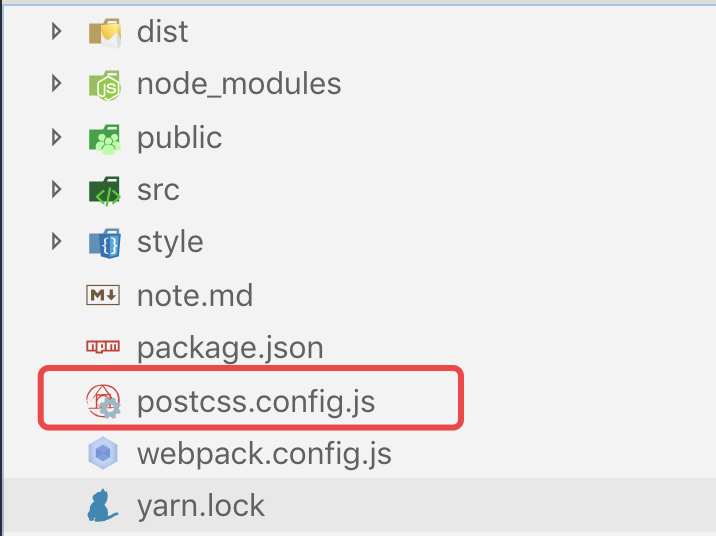
- 配置
postcss.config.js文件
// postcss.config.js
module.exports = {
    plugins:[
        require('autoprefixer')
    ]
}
- 配置
webpack.config.js
// webpack.config.js
...
module:{
    rules:[
        {
            test:/\.css$/,
            use:[
                'style-loader',
                {
                    loader:'css-loader',
                    options:{
                        modules:true
                    }
                },
                'postcss-loader'
            ]
        }
    ]
}
...
- 运行
npx webpack-dev-server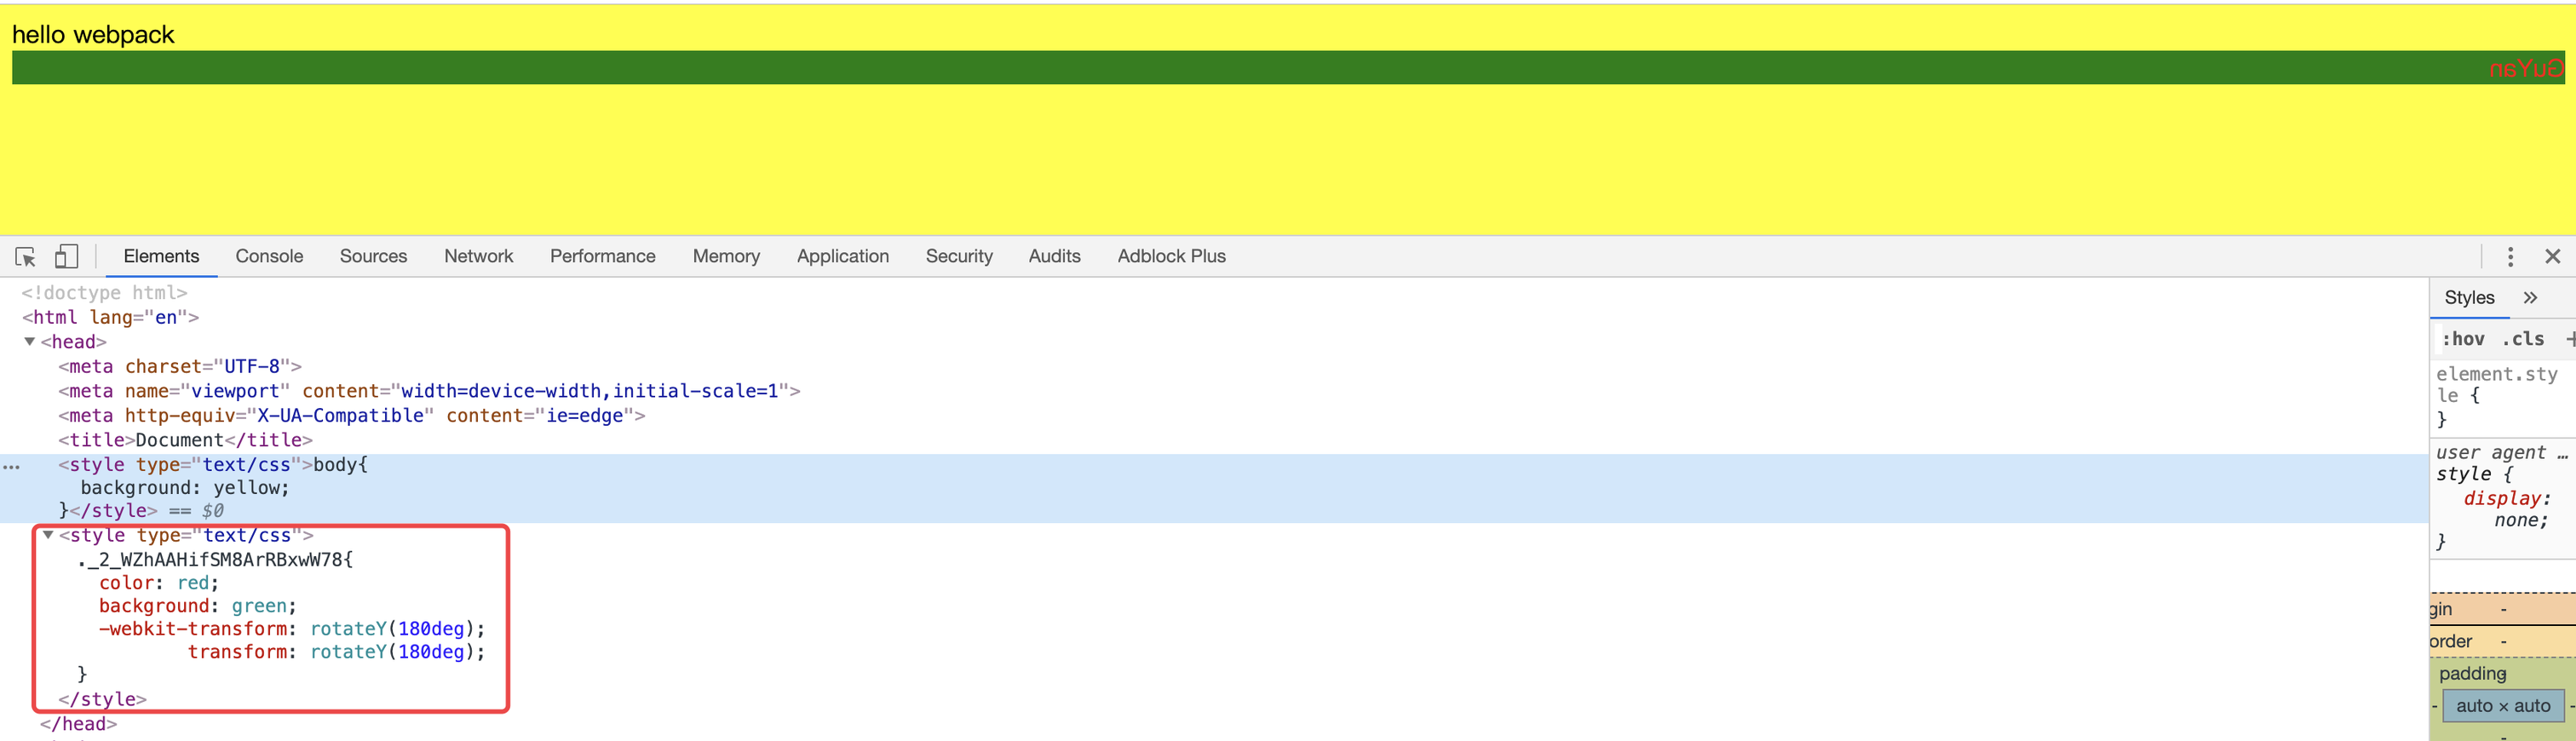
配置css预处理器
- 预处理器分类
less,sass(node-sass),stylus
- 预处理器对应
loaderless-loader,sass-loader,stylus-loader
- 引入预处理器文件的位置
js文件- 配置对应的
loader(以less为例)// webpack.config.js ... module:{ rules:[ { test:/\.less$/, use:[ 'style-loader', { loader:'css-loader', options:{ modules:true } }, 'postcss-loader', 'less-loader' ] } ] } ...
- 配置对应的
css文件- 配置对应的
loader(以less为例)// webpack.config.js ... module:{ rules:[ { test:/\.css$/, use:[ 'style-loader', { loader:'css-loader', options:{ modules:true } }, 'postcss-loader', 'less-loader' ] } ] } ...
- 配置对应的
配置抽离css样式
上文中提到的样式,不难发现都是嵌套在
html文件中的head里的<style>标签中的,但是在日常的开发中我们一般都是单独在xxx.css文件中写样式,然后通过<link>引入,所以我们接下来抽离css样式吧
- 安装
mini-css-extract-plugin(npm install mini-css-extract-plugin --save-dev) - 配置
webpack.config.js,需要注意的是:- 1.这个插件做的工作是将
css-loader处理后的字符串写到一个指定的文件中,想要使其以<link>标签的形式引入,需要配合其自带的loader使用,即下文的MiniCssExtractPlugin.loader - 2.官方建议生产模式下使用
MiniCssExtractPlugin.loader,开发模式使用style-loader
// webpack.config.js const MiniCssExtractPlugin = require('mini-css-extract-plugin');// 引入插件 ... module.exports = { ... plugins:[ new CleanWebpackPlugin(), ...htmlPlugins, new MiniCssExtractPlugin({ // 注册插件 filename:'index.css'//指定抽离的文件名 }) ... ], module:{ rules:[ { test:/\.css$/, use:[ // 'style-loader' MiniCssExtractPlugin.loader, // 配合插件自身loader使用 ... ] } ] } } - 1.这个插件做的工作是将
- 运行
npx webpack-dev-server结果如下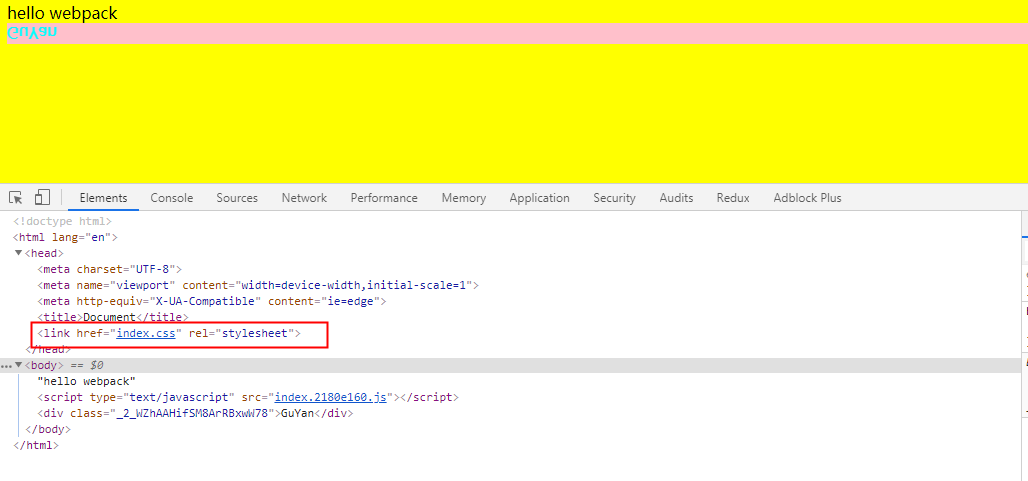
配置压缩抽离的css样式文件
- 上述代码执行
npx webpack --mode production,查看打包后的文件,你会发现我们抽离的css文件并没有像js,html文件一样被压缩,这在我们上线的时候肯定是不允许的,所以我们需要压缩它 - 安装
optimize-css-assets-webpack-plugin(npm install optimize-css-assets-webpack-plugin --save-dev) - 配置
webpack.config.js文件// webpack.config.js const OptimizeCssAssetsWebpackPlugin = require('optimize-css-assets-webpack-plugin'); ... module.exports = { ... optimization:{ // 配置优化项 minimizer:[ // 手动指定压缩项 new OptimizeCssAssetsWebpackPlugin({}) ] } mode:'production' ... } - 执行
npx webpack查看结果,发现我们提取的css文件已经实现压缩
- 但是你再看
js文件没有压缩,这是因为当我们没有手动配置压缩项的时候webpack内部自己实现了配置其自带的terser-webpack-plugin插件进行压缩,而我们配置后覆盖掉了它内部自己的配置,所以我们需要手动将terser-webpack-plugin配置到minimizer中
// webpack.config,js
const TerserJSPlugin  = require('terser-webpack-plugin'); //webpack的内部插件
const OptimizeCssAssetsWebpackPlugin = require('optimize-css-assets-webpack-plugin');
...
module.exports = {
  ...
  optimization:{
      minimizer:[
      new TerserJSPlugin({}),// 手动加上压缩js
      new OptimizeCssAssetsWebpackPlugin({})
      ]
  }
  mode:'production'
  ...
}
- 执行
npx webpack查看结果
图片相关
配置图片引入
- 在根目录下创建
image文件夹并准备一张guYan.jpg图片放入其中 - 在
src/guYan.js中引入guYan.jpg
// guYan.js
import url from '../image/guYan.jpg';
...
let img = new Image();
img.src = url;
documnt.body.appendChild(img)
- 安装
file-loader(npm install file-loader --save-dev)- 作用:
- 1.拷贝一个文件放到打包后的文件中
- 2.返回拷贝的路径
- 作用:
- 配置
webpack.config.js
//webpack.config.js
...
module.exports={
    ...
    module:{
        rules:[
            ...,
            {
                test:/\.(jpg|png|gif)$/,
                use:'file-loader'
            }
        ]
    }
}
- 执行
npx webpack --mode production查看打包后的文件,会发现生成一个拷贝的图片
配置图片压缩
- 在上一小节我们实现了图片的引入,但是在我们的开发过程中有一些
Icon之类的我们更希望它可以转化为base64的格式压缩,所以这就需要我们配置另一个可以处理图片的loader,url-loader - 安装
url-loader(npm install url-loader --save-dev) - 配置
webpack.config.js
// webpack.config.js
...
module.exports={
    ...
    module:{
        rules:[
            ...,
            {
                test:/\.(jpg|png|gif)$/,
                use:{
                    loader:'url-loader',
                    options:{
                        limit:100*1024 // 指定压缩文件的最大字节,超过最大限制会自动调用file-loader处理
                    }
                }
            }
        ]
    }
}
- 执行
npx webpack --mode production,查看打包后的文件目录并没有生成拷贝的文件(尝试修改limit参数的大下感受一下变化)
特殊注意:字体图标(
xxx.eot,xxx.svg,xxx.ttf,xxx.woff,xxx.woff2)只能用file-loader
如果你给的
limit过大,也就是说会将大的图片也会转成base64的格式会导致打包的时候会有一个性能的警告提示你文件过大,这样的时候你可以给一个performance:false属性来使打包的时候忽略性能问题的提示,但是一般我们上线肯定考虑性能的问题的,也就是说我们一般不会将limit的值设置过大
- 上面我们只举例了在
js文件中引用图片的例子,其实在开发中我们也有可能直接在html文件中引用图片,安装我们之前的打包方式你会发现会出现找不到图片,因为路径变了,解决这个问题我们需要配置一个html-withimg-loader
// webpack.config.js
...
    {
        test:/\.html$/,
        use:'html-withimg-loader'
    }
...
配置输出的图片增加公共前缀比如需要加域名
- 给
url-loader的options增加publicPath属性即可
//webpack.config.js
...
    options:{
        limit:2*1024,
        publicPath:'https://juejin.cn/user/219558056066749'
    }
...
同理
css``js增加前缀一个套路
配置分类打包
- 图片
- 在
options中增加outputPath属性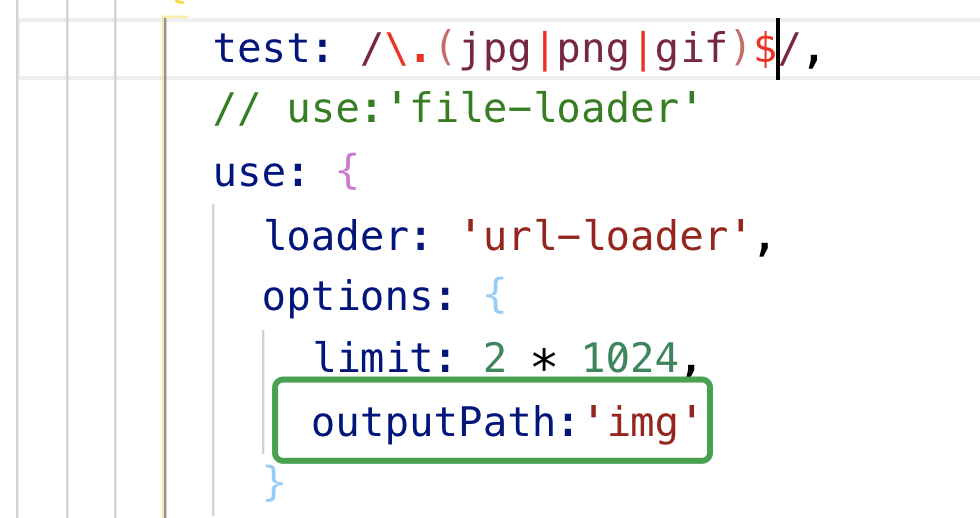
- 在
css- 在抽离插件的
filename参数属性前面配置文件夹的名字
- 在抽离插件的
html- 在
html-webpack-plugin插件的filename属性前面配置文件夹的名字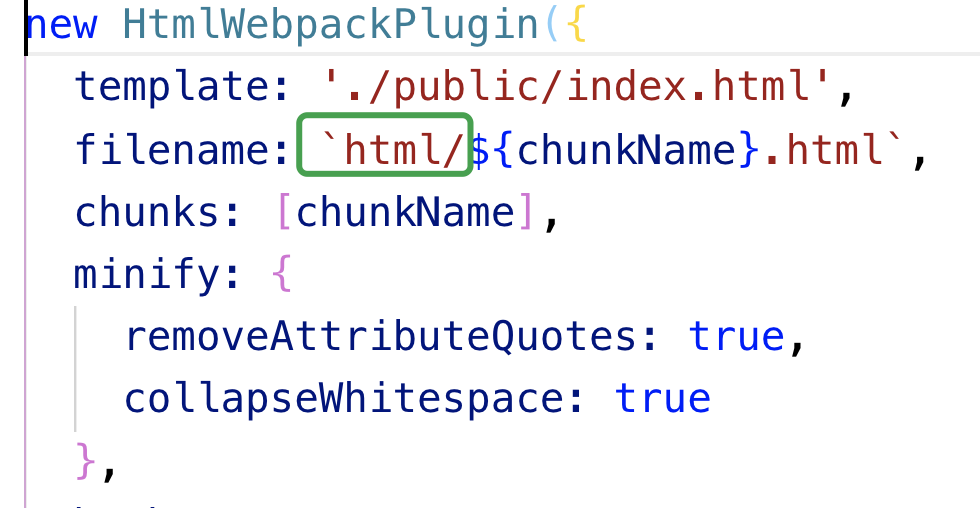
- 在
js- 在出口参数(
output)里的filename属性前面配置文件夹的名字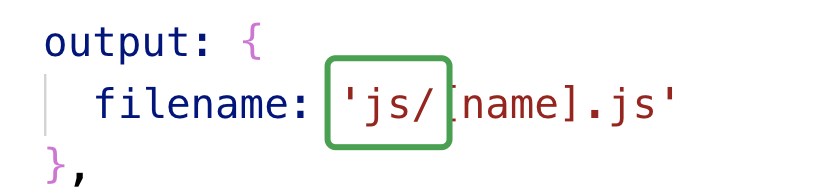
- 在出口参数(
- 执行
npx webpack --mode production查看打包后的文件变化吧
JS相关
配置JS高级语法降级(通过babel一系列包)
- 修改
guYan.js文件如下
// guYan.js
class Animal{
    constructor(type){
        this.type = type;
    }
    getType(){
        return this.type
    }
}
let animal = new Animal('哺乳类');
console.log(animal.type);
- 安装
babel-loader,@babel/core,@babel/preset-env(npm install babel-loader @babel/core @babel/preset-env --save-dev) - 配置
webpack.config.js
// webpack.config.js
...
module.exports={
    ...,
    module:{
        rules:[
            ...,
            {
                test:/\.js$/,
                use:{
                    loader:'babel-loader',
                    options:{
                        presets:['@babel/preset-env'],// 起指挥loader怎么干活的作用
                    }
                },
                exclude:/node_module/, // 忽略掉不想用loader处理的文件
                include:path.resolve(__dirname,'./src') // 指定需要loader处理的文件
            }
        ]
    }
}
- 执行
npx webpack --mode development,查看打包后的js文件,我们发现,他内部实现了一个_classCallCheck,来作为转化我们的class类。
// 删除后冗余的代码后的打包文件
(function(modules) {
	var installedModules = {};
	function __webpack_require__(moduleId) {
		if(installedModules[moduleId]) {
			return installedModules[moduleId].exports;
		}
		var module = installedModules[moduleId] = {
			i: moduleId,
			l: false,
			exports: {}
		};
		modules[moduleId].call(module.exports, module, module.exports, __webpack_require__);
		module.l = true;
		return module.exports;
	}
	return __webpack_require__(__webpack_require__.s = "./src/guYan.js");
})
({
 "./src/guYan.js":
 (function(module, exports) {
eval(`function _classCallCheck(instance, Constructor) {
   if (!(instance instanceof Constructor)) {
      throw new TypeError(\"Cannot call a class as a function\");
    }
  }
  function _defineProperties(target, props) {
     for (var i = 0; i < props.length; i++) {
        var descriptor = props[i];
        descriptor.enumerable = descriptor.enumerable || false;
        descriptor.configurable = true;
        if (\"value\" in descriptor) descriptor.writable = true;
        Object.defineProperty(target, descriptor.key, descriptor);
      }
    }
    function _createClass(Constructor, protoProps, staticProps) {
       if (protoProps) _defineProperties(Constructor.prototype, protoProps);
        if (staticProps) _defineProperties(Constructor, staticProps);
        return Constructor;
      }
      var Animal =function () {
        function Animal(type) {
           _classCallCheck(this, Animal);
           this.type = type;
          }
           _createClass(Animal, [{
              key: \"getType\",
              value: function getType() {
                return this.type;
              }
            }]);
            return Animal;
          }();
          var animal = new Animal('哺乳类');
          console.log(animal.type);`);
 })
});
- 新建一个
src/otherEs6.js文件,在其中再用class定义一个类导出,在src/guYan.js中引入这个文件,再执行编译。你会发现他内部实现这个公共的_classCallCheck代码,实现了两次,所以我们需要提取这个公共的代码 - 安装
@babel/runtime,@babel/plugin-transform-runtime(npm install @babel/runtime @bebel/plugin-transform-runtime --save-dev) - 配置
webpack.config.js文件
// webapack.config.js
...
    test:/\.js$/,
    use:{
        loader:'babel-loader',
        options:{
            presets:['@babel/preset-env'],
            plugins:['@babel/plugin-transform-runtime']
        }
    }
...
- 执行
npx webpack --mode development,查看打包后的js文件,比较两次有什么不同
配置JS的一些API降级处理,如promise(为了兼容IE)
- 方案一,通过
@babel/preset-env+core-js@3- 安装
core-js@3(npm install core-js@3 --save) - 配置
webpack.config.js
// webpack.config.js ... test:/\.js$/, use:{ loader:'babel-loader', options:{ preset:[ [ '@babel/preset-env', { useBuiltIns:'usage',// 只转化使用的API corejs:{version:3} } ] ] } } ... - 安装
- 方案二在入口文件中引入
@babel/polyfill - 方案三,通过
@babel/plugin-transform-runtime+@babel/runtime-corejs3- 安装
@babel/runtime-corejs3(npm install @babel/runtime-corejs3) - 配置
webpack.config.js
// webapck.config.js ... test:/\.js$/, use:{ loader:'babel-loader', options:{ presets:['@babel/preset-env'], plugins:[ [ '@babel/plugin-transform-runtime', { "absoluteRuntime": false, "corejs": {version:3}, "helpers": true, "regenerator": true, "useESModules": false } ] ] } } ... - 安装
像装饰器和类的属性这些更高级的需要再去配插件去处理,这里我就不一一举例了(
@babel/plugin-proposal-decorators,@babel/plugin-proposal-class-properties)
ESlint相关
- 安装
eslint,eslint-loader(npm install eslint eslint-loader --save-dev) - 配置
webpack.config.js
// webpack.config.js
...
    test:/\.js$/,
    use:'eslint-loader',
    enforce:'pre' // 强制在编译之前执行
...
- 配置
eslint- 方案一,在eslint中去选择自动生成然后引入项目列表
- 方案二,自己手动配置
- 运行
npx eslint --init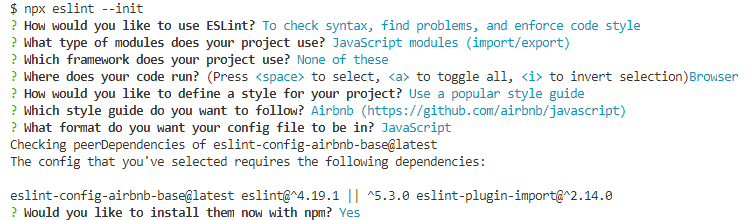
- 运行
- 配置
webpack.config.js
// we
配置TS
ts-loadertsconfig.json
配置代理
优化策略
常见plugin和loader的原理及实现
基于create-react-app实现一个简单的脚手架
注: 参考文档
