

在Android中启动service基本上有两种方式,一种是直接调用startService,一种则是bindService。我们分别来看看这两种方式的启动过程
首先是startService
public ComponentName startService(Intent service) {
    return mBase.startService(service);
}
它会调用ContextWrapper中的startService方法,可以看到这里调用的事mBase中的这个方法,而mBase是Context,是一个抽象类,它的实现为ContextImpl,所以我们直接看一下这个类中的startService方法
@Override
public ComponentName startService(Intent service) {
    warnIfCallingFromSystemProcess();
    return startServiceCommon(service, false, mUser);
}
它调用了自己的startServiceCommon方法
private ComponentName startServiceCommon(Intent service, boolean requireForeground,
        UserHandle user) {
    try {
        validateServiceIntent(service);
        service.prepareToLeaveProcess(this);
        ComponentName cn = ActivityManager.getService().startService(
            mMainThread.getApplicationThread(), service, service.resolveTypeIfNeeded(
                        getContentResolver()), requireForeground,
                        getOpPackageName(), user.getIdentifier());
       ...
        }
        return cn;
    }
}
可以看到它调用了ActivityManagerService中的startStartService方法
@Override
public ComponentName startService(IApplicationThread caller, Intent service,
        String resolvedType, boolean requireForeground, String callingPackage, int userId)
        throws TransactionTooLargeException {
   ...
    synchronized(this) {
   ...
        ComponentName res;
        try {
            res = mServices.startServiceLocked(caller, service,
                    resolvedType, callingPid, callingUid,
                    requireForeground, callingPackage, userId);
        } finally {
            Binder.restoreCallingIdentity(origId);
        }
        return res;
    }
}
真正起作用的事mService.startServiceLocked方法,这个mService是ActiveService
ComponentName startServiceLocked(IApplicationThread caller, Intent service, String resolvedType,
        int callingPid, int callingUid, boolean fgRequired, String callingPackage, final int userId)
        throws TransactionTooLargeException {


    final boolean callerFg;
...

    ServiceLookupResult res =
        retrieveServiceLocked(service, resolvedType, callingPackage,
                callingPid, callingUid, userId, true, callerFg, false, false);
    if (res == null) {
        return null;
    }
    if (res.record == null) {
        return new ComponentName("!", res.permission != null
                ? res.permission : "private to package");
    }

    ServiceRecord r = res.record;

...


    final ServiceMap smap = getServiceMapLocked(r.userId);
    boolean addToStarting = false;
 ...

    ComponentName cmp = startServiceInnerLocked(smap, service, r, callerFg, addToStarting);
    return cmp;
}
首先是获取一个ServiceLookupResult对象,这个对象封装了一个ServiceRecord和一个String类型的permission,这个record跟之前的ActivityRecord功能类似。至于这个retrieveServiceLocked方法则是从一个ServiceMap中找当前要启动的Service,如果找到了直接构造成这个Result对象返回,没找到则通过PMS创建一个ServiceRecord,然后再构造一个Result对象返回。最终会调用startServiceInnerLocked方法,参数为刚刚构建的那些,比如ServiceRecord,serviceMap等,因为是首次启动所以会新建一个ServiceRecord
ServiceRecord(ActivityManagerService ams,
        BatteryStatsImpl.Uid.Pkg.Serv servStats, ComponentName name,
        Intent.FilterComparison intent, ServiceInfo sInfo, boolean callerIsFg,
        Runnable restarter) {
    this.ams = ams;
   ...
}
可以看到这里是对ServiceRecord中的变量进行赋值,接着看startServiceInnerLocked方法
ComponentName startServiceInnerLocked(ServiceMap smap, Intent service, ServiceRecord r,
        boolean callerFg, boolean addToStarting) throws TransactionTooLargeException {
    ...
    String error = bringUpServiceLocked(r, service.getFlags(), callerFg, false, false);
    if (error != null) {
        return new ComponentName("!!", error);
    }
 ...
    return r.name;
}
这里其实就是调用了bringUpServiceLocked方法
private String bringUpServiceLocked(ServiceRecord r, int intentFlags, boolean execInFg,
        boolean whileRestarting, boolean permissionsReviewRequired)
        throws TransactionTooLargeException {
    //Slog.i(TAG, "Bring up service:");
    //r.dump("  ");

    if (r.app != null && r.app.thread != null) {
        sendServiceArgsLocked(r, execInFg, false);
        return null;
    }

  ...


    final boolean isolated = (r.serviceInfo.flags&ServiceInfo.FLAG_ISOLATED_PROCESS) != 0;
    final String procName = r.processName;
    String hostingType = "service";
    ProcessRecord app;

    if (!isolated) {
        app = mAm.getProcessRecordLocked(procName, r.appInfo.uid, false);
        if (DEBUG_MU) Slog.v(TAG_MU, "bringUpServiceLocked: appInfo.uid=" + r.appInfo.uid
                    + " app=" + app);
        if (app != null && app.thread != null) {
            try {
                app.addPackage(r.appInfo.packageName, r.appInfo.longVersionCode, mAm.mProcessStats);
                realStartServiceLocked(r, app, execInFg);
                return null;
            } catch (TransactionTooLargeException e) {
                throw e;
            } catch (RemoteException e) {
                Slog.w(TAG, "Exception when starting service " + r.shortName, e);
            }

            // If a dead object exception was thrown -- fall through to
            // restart the application.
        }
    }
...
    return null;
}
这个方法首先判断了ServiceRecord中的app属性,也就是ProcessRecord,从上面得知我们是新建的ServiceRecord,而并没有对这个属性进行赋值,所以它的app属性为null,之所以介绍这个方法是因为sendServiceArgsLocked最终会调用Service中的onStartCommand方法,这个我们稍后会详细说明,从这一点也可以看出重复调用startService方法会重复调用onStartCommand方法。既然这里的ProcessRecord为空,那么系统会利用ActivityManagerService来构造一个ProgressRecord,也就是getProcessRecordLocked所实现的功能。构造完成之后调用realStartServiceLocked方法
private final void realStartServiceLocked(ServiceRecord r,
        ProcessRecord app, boolean execInFg) throws RemoteException {
   ...
    app.thread.scheduleCreateService(r, r.serviceInfo,
                    mAm.compatibilityInfoForPackageLocked(r.serviceInfo.applicationInfo),
                    app.repProcState);

    requestServiceBindingsLocked(r, execInFg);

 ...

    sendServiceArgsLocked(r, execInFg, true);

 ...
}
第一个方法最终会调用service中的onCreate方法,第二则会调用service中的onBind,最后一个则会调用service的onStartCommand方法,当然这里采用的是startService方法,那么第二个方法中的内部逻辑所以并不会真的调用onBind方法,这个我们稍后会看。所以先看看scheduleCreateService方法,它是ApplicationThread中的方法
public final void scheduleCreateService(IBinder token,
        ServiceInfo info, CompatibilityInfo compatInfo, int processState) {
    updateProcessState(processState, false);
    CreateServiceData s = new CreateServiceData();
    s.token = token;
    s.info = info;
    s.compatInfo = compatInfo;

    sendMessage(H.CREATE_SERVICE, s);
}
其实就是向主线程发送一条消息,我们看看消息时如何处理的
case CREATE_SERVICE:
    Trace.traceBegin(Trace.TRACE_TAG_ACTIVITY_MANAGER, ("serviceCreate: " + String.valueOf(msg.obj)));
    handleCreateService((CreateServiceData)msg.obj);
    Trace.traceEnd(Trace.TRACE_TAG_ACTIVITY_MANAGER);
    break;
它调用了ActivityThread中的handleCreateService方法
private void handleCreateService(CreateServiceData data) {

    Service service = null;
    try {
        java.lang.ClassLoader cl = packageInfo.getClassLoader();
        service = packageInfo.getAppFactory()
                .instantiateService(cl, data.info.name, data.intent);
    }

    try {
        if (localLOGV) Slog.v(TAG, "Creating service " + data.info.name);

        ContextImpl context = ContextImpl.createAppContext(this, packageInfo);
        context.setOuterContext(service);

        Application app = packageInfo.makeApplication(false, mInstrumentation);
        service.attach(context, this, data.info.name, data.token, app,
                ActivityManager.getService());
        service.onCreate();
        mServices.put(data.token, service);
     ...
}
首先获取了一个service实例,然后创建了ContextImpl和Application,最后利用这些参数调用了service的attach方法和onCreate方法,至此它的onCreate流程就结束了。所以之前说的scheduleCreateService确实最终调用了onCreate方法。注意到这里的ContexImpl就是Service中的Context,那是因为它调用了service的attach方法。
public final void attach(
            Context context,
            ActivityThread thread, String className, IBinder token,
            Application application, Object activityManager) {
        attachBaseContext(context);
        mThread = thread;           // NOTE:  unused - remove?
        mClassName = className;
        mToken = token;
        mApplication = application;
        mActivityManager = (IActivityManager)activityManager;
        mStartCompatibility = getApplicationInfo().targetSdkVersion
                < Build.VERSION_CODES.ECLAIR;
    }
这里又调用了attachBaseContext方法,这个方法是ContextWrapper中的
protected void attachBaseContext(Context base) {
        if (mBase != null) {
            throw new IllegalStateException("Base context already set");
        }
        mBase = base;
    }
可以看到我们把ContextImpl赋值给了mBase,而这个mBase则是Context类型的变量,所以service中的context其实就是在这一步创建的。
那么我们在继续看看之前说的 sendServiceArgsLocked方法
private final void sendServiceArgsLocked(ServiceRecord r, boolean execInFg,
        boolean oomAdjusted) throws TransactionTooLargeException {
    ...
    try {
        r.app.thread.scheduleServiceArgs(r, slice);
    }
    ...
}
这里真正起作用的就是这行代码,他其实就是调用了ApplicationThread中的scheduleServiceArgs方法
public final void scheduleServiceArgs(IBinder token, ParceledListSlice args) {
    List<ServiceStartArgs> list = args.getList();

    for (int i = 0; i < list.size(); i++) {
        ServiceStartArgs ssa = list.get(i);
        ServiceArgsData s = new ServiceArgsData();
        s.token = token;
        s.taskRemoved = ssa.taskRemoved;
        s.startId = ssa.startId;
        s.flags = ssa.flags;
        s.args = ssa.args;

        sendMessage(H.SERVICE_ARGS, s);
    }
}
同create时一样,也是向主线程中发送一条消息,同样我们看看如何处理这条消息
case SERVICE_ARGS:
    Trace.traceBegin(Trace.TRACE_TAG_ACTIVITY_MANAGER, ("serviceStart: " + String.valueOf(msg.obj)));
    handleServiceArgs((ServiceArgsData)msg.obj);
    Trace.traceEnd(Trace.TRACE_TAG_ACTIVITY_MANAGER);
    break;
它调用了ActivityThread中的handleServiceArgs
private void handleServiceArgs(ServiceArgsData data) {
    Service s = mServices.get(data.token);
    if (s != null) {
        try {
            if (data.args != null) {
                data.args.setExtrasClassLoader(s.getClassLoader());
                data.args.prepareToEnterProcess();
            }
            int res;
            if (!data.taskRemoved) {
                res = s.onStartCommand(data.args, data.flags, data.startId);
            } else {
                s.onTaskRemoved(data.args);
                res = Service.START_TASK_REMOVED_COMPLETE;
            }

    }
}
可以看到首先根据token从ActivityThread中保存的service中取出当前的service,如果这个service没有被标记移除,那么就执行他的onStartCommand方法,至此startService的启动以及传参过程就结束了。
接下来看看bindService
@Override
public boolean bindService(Intent service, ServiceConnection conn,
        int flags) {
    return mBase.bindService(service, conn, flags);
}
它会调用ComtextImpl中的bindService方法
@Override
public boolean bindService(Intent service, ServiceConnection conn,
        int flags) {
    warnIfCallingFromSystemProcess();
    return bindServiceCommon(service, conn, flags, mMainThread.getHandler(), getUser());
}
他会调用自己的bindServiceCommon方法
private boolean bindServiceCommon(Intent service, ServiceConnection conn, int flags, Handler
        handler, UserHandle user) {
    // Keep this in sync with DevicePolicyManager.bindDeviceAdminServiceAsUser.
    IServiceConnection sd;
  ...
    validateServiceIntent(service);
    try {
        IBinder token = getActivityToken();
        if (token == null && (flags&BIND_AUTO_CREATE) == 0 && mPackageInfo != null
                && mPackageInfo.getApplicationInfo().targetSdkVersion
                < android.os.Build.VERSION_CODES.ICE_CREAM_SANDWICH) {
            flags |= BIND_WAIVE_PRIORITY;
        }
        service.prepareToLeaveProcess(this);
        int res = ActivityManager.getService().bindService(
            mMainThread.getApplicationThread(), getActivityToken(), service,
            service.resolveTypeIfNeeded(getContentResolver()),
            sd, flags, getOpPackageName(), user.getIdentifier());
       ...

}
其实这里主要是获取一个IBinder对象,然后调用ActivityManagerService中的bindService方法
public int bindService(IApplicationThread caller, IBinder token, Intent service,
        String resolvedType, IServiceConnection connection, int flags, String callingPackage,
        int userId) throws TransactionTooLargeException {
    enforceNotIsolatedCaller("bindService");

...

    synchronized(this) {
        return mServices.bindServiceLocked(caller, token, service,
                resolvedType, connection, flags, callingPackage, userId);
    }
}
这里则是调用了ActiveService中的bindServiceLocked方法
int bindServiceLocked(IApplicationThread caller, IBinder token, Intent service,
        String resolvedType, final IServiceConnection connection, int flags,
        String callingPackage, final int userId) throws TransactionTooLargeException {
  ...

    ServiceLookupResult res =
        retrieveServiceLocked(service, resolvedType, callingPackage, Binder.getCallingPid(),
                Binder.getCallingUid(), userId, true, callerFg, isBindExternal, allowInstant);
    if (res == null) {
        return 0;
    }
    if (res.record == null) {
        return -1;
    }
    ServiceRecord s = res.record;

    boolean permissionsReviewRequired = false;

   ...
    try {
   ...

        AppBindRecord b = s.retrieveAppBindingLocked(service, callerApp);
        ConnectionRecord c = new ConnectionRecord(b, activity,
                connection, flags, clientLabel, clientIntent);

        IBinder binder = connection.asBinder();
        ArrayList<ConnectionRecord> clist = s.connections.get(binder);
        if (clist == null) {
            clist = new ArrayList<ConnectionRecord>();
            s.connections.put(binder, clist);
        }
        clist.add(c);
        b.connections.add(c);
        if (activity != null) {
            if (activity.connections == null) {
                activity.connections = new HashSet<ConnectionRecord>();
            }
            activity.connections.add(c);
        }
        b.client.connections.add(c);
        if ((c.flags&Context.BIND_ABOVE_CLIENT) != 0) {
            b.client.hasAboveClient = true;
        }
        if ((c.flags&Context.BIND_ALLOW_WHITELIST_MANAGEMENT) != 0) {
            s.whitelistManager = true;
        }
        if (s.app != null) {
            updateServiceClientActivitiesLocked(s.app, c, true);
        }
        clist = mServiceConnections.get(binder);
        if (clist == null) {
            clist = new ArrayList<ConnectionRecord>();
            mServiceConnections.put(binder, clist);
        }
        clist.add(c);

        if ((flags&Context.BIND_AUTO_CREATE) != 0) {
            s.lastActivity = SystemClock.uptimeMillis();
            if (bringUpServiceLocked(s, service.getFlags(), callerFg, false,
                    permissionsReviewRequired) != null) {
                return 0;
            }
        }

    ...

    return 1;
}
这里跟之前startService中的startServiceLocked很像,这里首先会获取一个ServiceLookupResult对象,从而获取ServiceRecord对象,然后又通过AppBindRecord构造了ConnectionRecord,最后如果调用bindService传入的是BIND_AUTO_CREATE的话(一般都会这样),那么就会调用bringUpServiceLocked方法,这个方法跟之前startService调用的是同一个方法,通过上面的分析可以得知,在realStartServiceLocked方法中多了一步bind方法,requestServiceBindingsLocked,上衣步骤中获取AppBindRecord方法为
public AppBindRecord retrieveAppBindingLocked(Intent intent,
        ProcessRecord app) {
    Intent.FilterComparison filter = new Intent.FilterComparison(intent);
    IntentBindRecord i = bindings.get(filter);
    if (i == null) {
        i = new IntentBindRecord(this, filter);
        bindings.put(filter, i);
    }
    AppBindRecord a = i.apps.get(app);
    if (a != null) {
        return a;
    }
    a = new AppBindRecord(this, i, app);
    i.apps.put(app, a);
    return a;
}
可以看到它将IntentBindRecord中的apps变量赋值了,至于他有什么用我们接着看
private final void requestServiceBindingsLocked(ServiceRecord r, boolean execInFg)
        throws TransactionTooLargeException {
    for (int i=r.bindings.size()-1; i>=0; i--) {
        IntentBindRecord ibr = r.bindings.valueAt(i);
        if (!requestServiceBindingLocked(r, ibr, execInFg, false)) {
            break;
        }
    }
}
可以看到很简单,只是调用了requestServiceBindingLocked方法
private final boolean requestServiceBindingLocked(ServiceRecord r, IntentBindRecord i,
        boolean execInFg, boolean rebind) throws TransactionTooLargeException {
    if (r.app == null || r.app.thread == null) {
        return false;
    }
    if (DEBUG_SERVICE) Slog.d(TAG_SERVICE, "requestBind " + i + ": requested=" + i.requested
            + " rebind=" + rebind);
    if ((!i.requested || rebind) && i.apps.size() > 0) {
        try {
        ...
            r.app.thread.scheduleBindService(r, i.intent.getIntent(), rebind,
                    r.app.repProcState);
           ...
    return true;
}
可以看到这里判断了i.apps.size,也就是上面我们构造的IntentBindRecord,由于我们赋值了所以会继续执行其中的scheduleBindService方法(这里就可以看出来之前startService为什么最终没有调用bind方法的原因)。他其实就是调用ApplicationThread中的这个方法,我们看一下他的具体实现
public final void scheduleBindService(IBinder token, Intent intent,
        boolean rebind, int processState) {
    updateProcessState(processState, false);
    BindServiceData s = new BindServiceData();
    s.token = token;
    s.intent = intent;
    s.rebind = rebind;

    if (DEBUG_SERVICE)
        Slog.v(TAG, "scheduleBindService token=" + token + " intent=" + intent + " uid="
                + Binder.getCallingUid() + " pid=" + Binder.getCallingPid());
    sendMessage(H.BIND_SERVICE, s);
}
其实跟上面分析的都差不多,就是向主线程中发送消息,what值为BIND_SERVICE。那么我们就看看ActivityThread中handleMessage是如何处理这个条件的
case BIND_SERVICE:
    Trace.traceBegin(Trace.TRACE_TAG_ACTIVITY_MANAGER, "serviceBind");
    handleBindService((BindServiceData)msg.obj);
    Trace.traceEnd(Trace.TRACE_TAG_ACTIVITY_MANAGER);
    break;
这里就是打印一个log然后调用该类中的handleBindService方法
private void handleBindService(BindServiceData data) {
    Service s = mServices.get(data.token);
    if (s != null) {
      ...
            try {
                if (!data.rebind) {
                    IBinder binder = s.onBind(data.intent);
                    ActivityManager.getService().publishService(
                            data.token, data.intent, binder);
                } else {
                    s.onRebind(data.intent);
                    ActivityManager.getService().serviceDoneExecuting(
                            data.token, SERVICE_DONE_EXECUTING_ANON, 0, 0);
                }
...
}
这里首先会从ActivityThread中保存的service中取出当前的service,然后判断是第一次连接还是重连,这里我们就重点看一下第一次连接。如果是第一次连接的话首先会调用service的onBind方法来获取这个binder对象,然后调用ActivityManagerService中的publishService方法
public void publishService(IBinder token, Intent intent, IBinder service) {
   ...

    synchronized(this) {
        if (!(token instanceof ServiceRecord)) {
            throw new IllegalArgumentException("Invalid service token");
        }
        mServices.publishServiceLocked((ServiceRecord)token, intent, service);
    }
}
这里就是调用了ActiveServices中的publishServiceLocked方法
void publishServiceLocked(ServiceRecord r, Intent intent, IBinder service) {

    try {

      ...
                        try {
                            c.conn.connected(r.name, service, false);
                        } ...

            serviceDoneExecutingLocked(r, mDestroyingServices.contains(r), false);
        }
    } finally {
        Binder.restoreCallingIdentity(origId);
    }
}
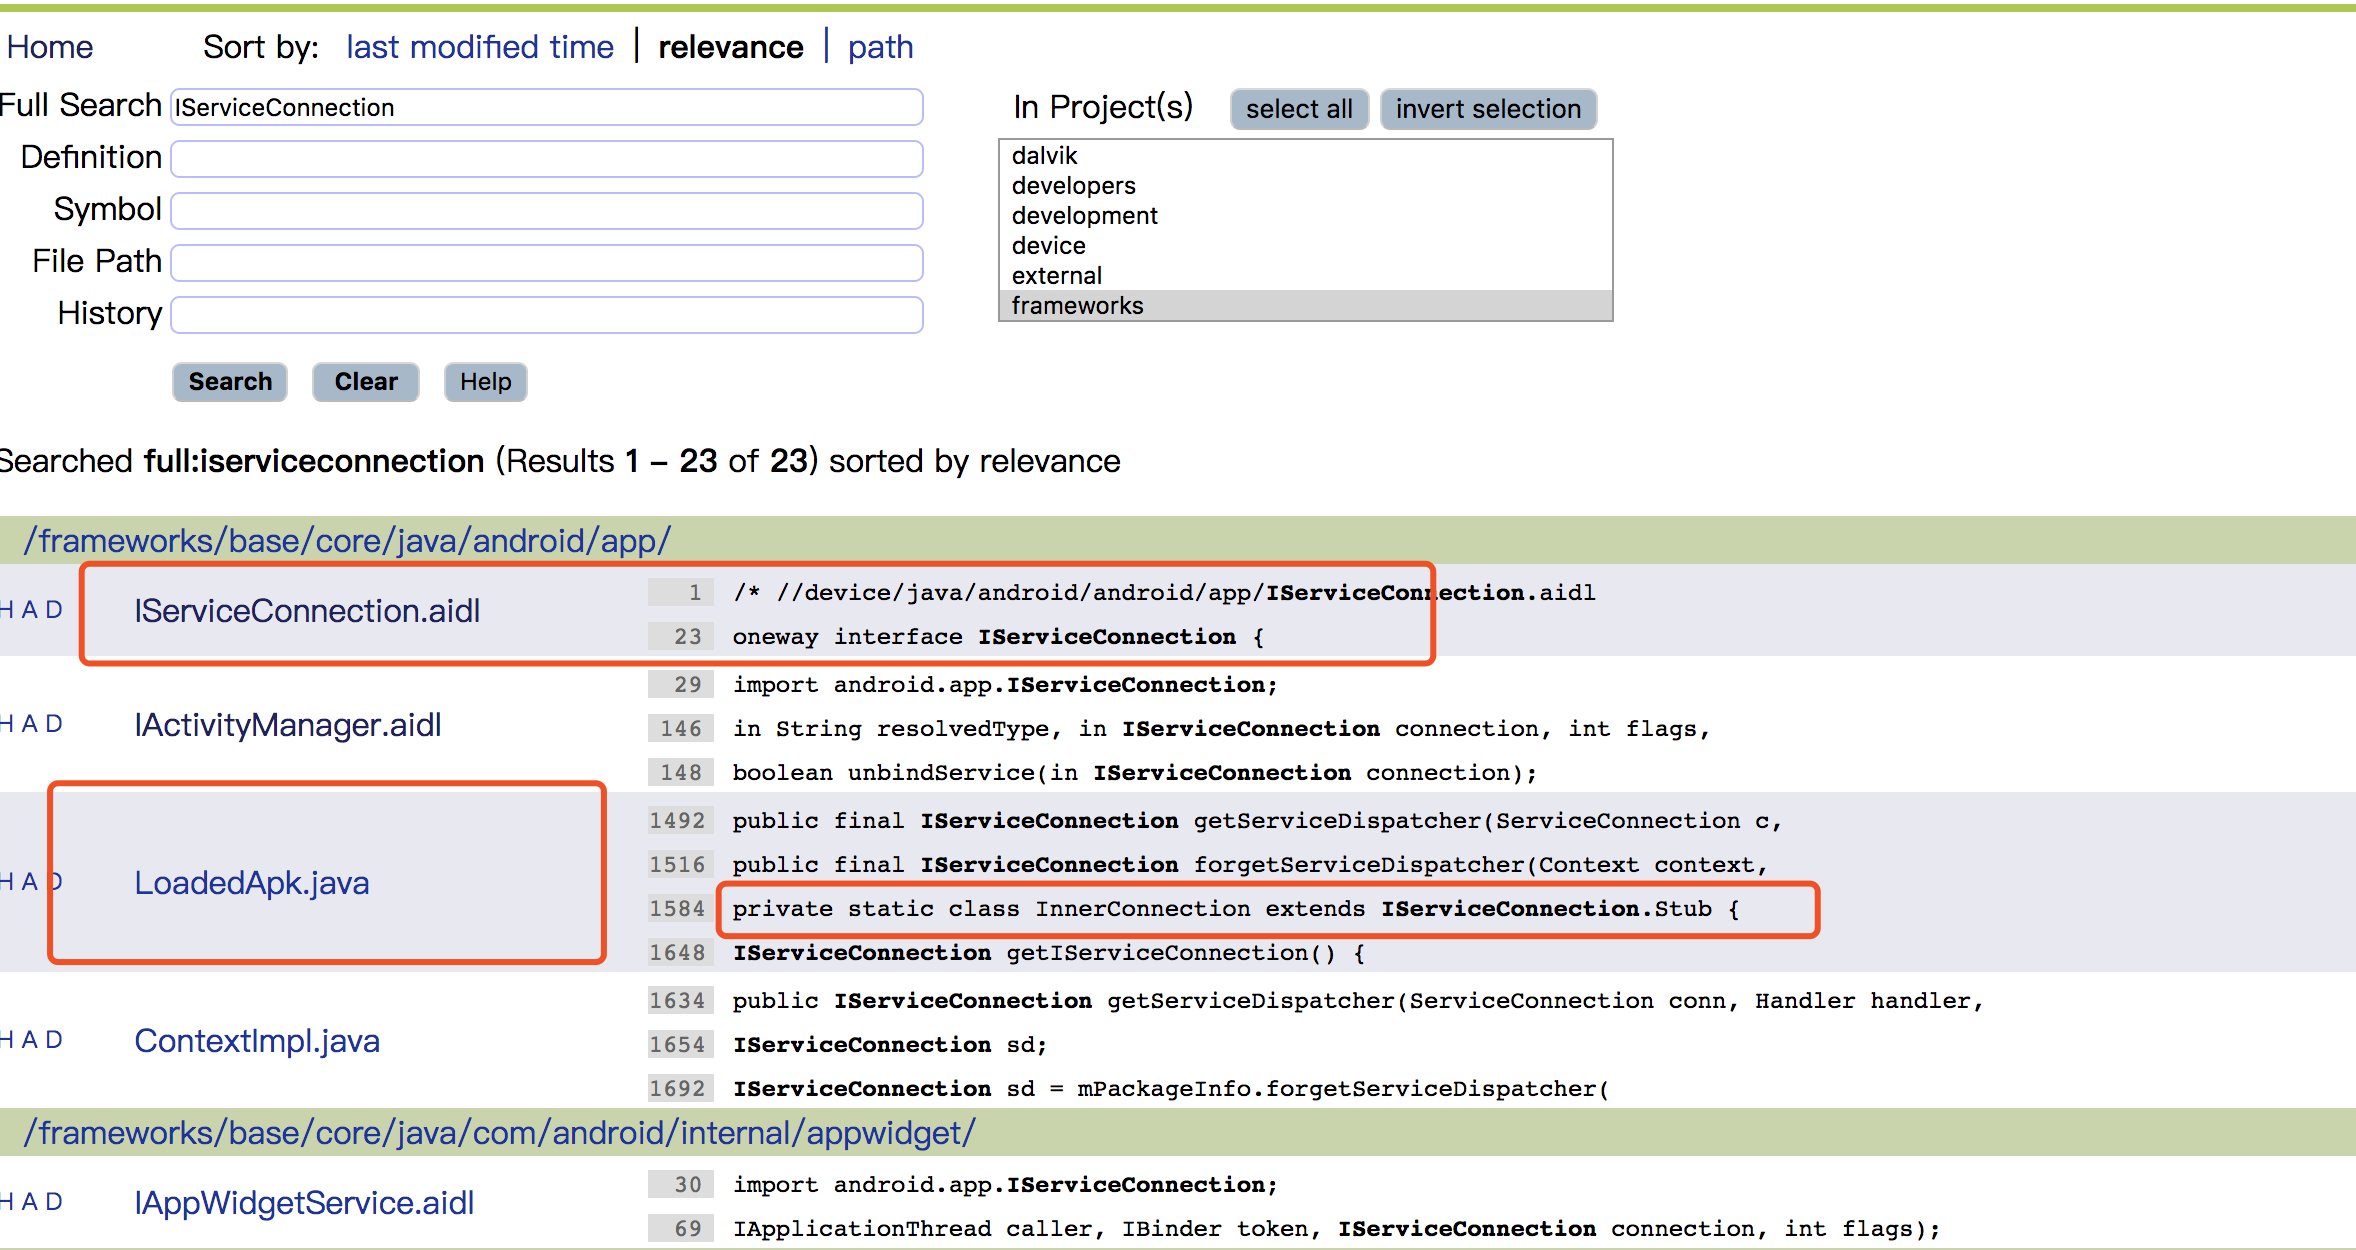
这里其实就是调用了c.conn中的connected方法,这个c.conn是IServiceConnection,至于这个类,它是定义在android.app.IServiceConnection这个中的,所以我们在androidxref.com的9.0.0中的源码搜索一下IServiceConnection,当然它是framework层的,搜索结果如下
static final class ServiceDispatcher {
    private final ServiceDispatcher.InnerConnection mIServiceConnection;
    private final ServiceConnection mConnection;
    private final Context mContext;
    private final Handler mActivityThread;
    private final ServiceConnectionLeaked mLocation;
    private final int mFlags;

    private RuntimeException mUnbindLocation;

    private boolean mForgotten;

    private static class ConnectionInfo {
        IBinder binder;
        IBinder.DeathRecipient deathMonitor;
    }

    private static class InnerConnection extends IServiceConnection.Stub {
        final WeakReference<LoadedApk.ServiceDispatcher> mDispatcher;

        InnerConnection(LoadedApk.ServiceDispatcher sd) {
            mDispatcher = new WeakReference<LoadedApk.ServiceDispatcher>(sd);
        }

        public void connected(ComponentName name, IBinder service, boolean dead)
                throws RemoteException {
            LoadedApk.ServiceDispatcher sd = mDispatcher.get();
            if (sd != null) {
                sd.connected(name, service, dead);
            }
        }

public void connected(ComponentName name, IBinder service, boolean dead) {
    if (mActivityThread != null) {
        mActivityThread.post(new RunConnection(name, service, 0, dead));
    } else {
        doConnected(name, service, dead);
    }
}
    }
...}
可以看到是LoadedApk的静态内部类ServiceDispatcher中的静态内部类InnerConnection继承了这个Stub接口,而它的connect方法中,则是调用了ServiceDispatcher中的connect方法,这里的mActivityThread其实就是主线程的handler,这里不为空所以会执行post方法,也就是handler.post,因此是向主线程中插入一条消息,这个消息则是由其中的runnable决定的,也就是这个RunConnection,我们来具体看一下这个Connection做了什么。
private final class RunConnection implements Runnable {
    RunConnection(ComponentName name, IBinder service, int command, boolean dead) {
        mName = name;
        mService = service;
        mCommand = command;
        mDead = dead;
    }

    public void run() {
        if (mCommand == 0) {
            doConnected(mName, mService, mDead);
        } else if (mCommand == 1) {
            doDeath(mName, mService);
        }
    }

    final ComponentName mName;
    final IBinder mService;
    final int mCommand;
    final boolean mDead;
}
其实没什么就是将几个参数传递过来,然后根据它的command参数来决定执行它的run方法中的条件分支,因为刚刚上面传入的是command值为0,所以这里是调用的doConnect方法
public void doConnected(ComponentName name, IBinder service, boolean dead) {
    ServiceDispatcher.ConnectionInfo old;
    ServiceDispatcher.ConnectionInfo info;

    synchronized (this) {
      ...
        old = mActiveConnections.get(name);
        if (old != null && old.binder == service) {
            // Huh, already have this one.  Oh well!
            return;
        }

        if (service != null) {
            // A new service is being connected... set it all up.
            info = new ConnectionInfo();
            info.binder = service;
            info.deathMonitor = new DeathMonitor(name, service);
            try {
                service.linkToDeath(info.deathMonitor, 0);
                mActiveConnections.put(name, info);
            } catch (RemoteException e) {
                mActiveConnections.remove(name);
                return;
            }

        } else {
            // The named service is being disconnected... clean up.
            mActiveConnections.remove(name);
        }

        if (old != null) {
            old.binder.unlinkToDeath(old.deathMonitor, 0);
        }
    }

    // If there was an old service, it is now disconnected.
    if (old != null) {
        mConnection.onServiceDisconnected(name);
    }
    if (dead) {
        mConnection.onBindingDied(name);
    }
    // If there is a new viable service, it is now connected.
    if (service != null) {
        mConnection.onServiceConnected(name, service);
    } else {
        // The binding machinery worked, but the remote returned null from onBind().
        mConnection.onNullBinding(name);
    }
}
在这里首先会判断从当前保存的service中有没有当前的service,如果有的话直接return。然后为这个binder注册一个通知,是通过调用ibinder的linkToDeath方法,这个方法的参数是一个IBinder.DeathRecipient对象和int型的flag,当这个binder对象异常消失时,它会回调IBinder.DeathRecipient中的binderDied方法,在这里我们可以做一些断线重连等操作,当然也需要在binderDied中解除对本个binder对象的监听即调用它的unlinkToDeath方法。如果之前的那个service不是当前要启动的而且没销毁的话则会调用它的onServiceDisConnected方法,最后会调用新的service的onServiceConnected方法。关于这个bind方式与aidl的联合使用,我们举一个binder连接池的例子
binder连接池:一个AIDL接口需要一个service,那么一百个AIDL难道需要建100个service吗?显然不可行。我们要将所有的AIDL放在一个service中去管理。每个业务模块有自己的AIDL接口并实现此接口,这时候不同的业务模块之间是不能耦合的,所有实现细节要单独开来,然后向服务端提供自己的维一标识符和其对应的binder对象,对于服务端来说只需要提供一个service即可,服务端提供一个queryBuilder接口,这个接口能够根据业务模块的特征来返回相应的binder对象给它们。不同的业务模块拿到所需的Binder对象后就可以进行远程方法调用了。 下面来具体实现以下,比如两个业务模块,一个是加解密,一个是加法运算,定义两个AIDL
// ICompute.aidl
package com.mwy.test.binderpooldemo;

// Declare any non-default types here with import statements

interface ICompute {
   int add(int a,int b);
}

// ISecurityCenter.aidl
package com.mwy.test.binderpooldemo;

// Declare any non-default types here with import statements

interface ISecurityCenter {
    String encrypt(String conetnt);
    String decrypt(String password);
}
然后再定义一个BindPool来进行具体的分发,他只有一个方法,用于返回不同的IBinder对象
// IBinderPool.aidl
package com.mwy.test.binderpooldemo;

// Declare any non-default types here with import statements

interface IBinderPool {
   IBinder queryBinder(int binderCode);

}
第三步我们定义上面两个业务AIDL的具体实现
class SecurityCenterImpl extends com.mwy.test.binderpooldemo.ISecurityCenter.Stub {
    private static final char SECRET_CODE = '^';
    @Override
    public String encrypt(String conetnt) throws RemoteException {
        char[] chars = conetnt.toCharArray();
        for (int i = 0; i < chars.length; i++) {
            chars[i] ^= SECRET_CODE;
        }
        return new String(chars);
    }

    @Override
    public String decrypt(String password) throws RemoteException {
        return encrypt(password);
    }
}

public class ComputeImpl extends com.mwy.test.binderpooldemo.ICompute.Stub {
    @Override
    public int add(int a, int b) throws RemoteException {
        return a + b;
    }
}
在BindPool的内部类中实现BindPool的具体实现
public static class BinderPoolImpl extends com.mwy.test.binderpooldemo.IBinderPool.Stub {

    public BinderPoolImpl() {
        super();
    }

    @Override
    public IBinder queryBinder(int binderCode) throws RemoteException {
        IBinder binder = null;
        switch (binderCode) {
        case BINDER_SECURITY_CENTER: {
            binder = new SecurityCenterImpl();
            break;
        }
        case BINDER_COMPUTE: {
            binder = new ComputeImpl();
            break;
        }
        default:
            break;
        }

        return binder;
    }
}
第四步实现service:
public class BinderPoolService extends Service {
    private static final String TAG = "BinderPoolService";

    private Binder mBinderPool = new BinderPool.BinderPoolImpl();

    @Override
    public void onCreate() {
        super.onCreate();
    }

    @Override
    public IBinder onBind(Intent intent) {
        Log.d(TAG, "onBind");
        return mBinderPool;
    }

    @Override
    public void onDestroy() {
        super.onDestroy();
    }
}
就是创建一个BindPool对象并将其返回。那么剩下就是BindPool的具体实现了
public class BinderPool {
    private static final String TAG = "BinderPool";
    public static final int BINDER_NONE = -1;
    public static final int BINDER_COMPUTE = 0;
    public static final int BINDER_SECURITY_CENTER = 1;

    private Context mContext;
    private com.mwy.test.binderpooldemo.IBinderPool mBinderPool;
    private static volatile BinderPool sInstance;
    private CountDownLatch mConnectBinderPoolCountDownLatch;

    private BinderPool(Context context) {
        mContext = context.getApplicationContext();
        connectBinderPoolService();
    }

    public static BinderPool getInsance(Context context) {
        if (sInstance == null) {
            synchronized (BinderPool.class) {
                if (sInstance == null) {
                    sInstance = new BinderPool(context);
                }
            }
        }
        return sInstance;
    }

    private synchronized void connectBinderPoolService() {
        mConnectBinderPoolCountDownLatch = new CountDownLatch(1);
        Intent service = new Intent(mContext, BinderPoolService.class);
        mContext.bindService(service, mBinderPoolConnection,
                Context.BIND_AUTO_CREATE);
        try {
            mConnectBinderPoolCountDownLatch.await();
        } catch (InterruptedException e) {
            e.printStackTrace();
        }
    }


    public IBinder queryBinder(int binderCode) {
        IBinder binder = null;
        try {
            if (mBinderPool != null) {
                binder = mBinderPool.queryBinder(binderCode);
            }
        } catch (RemoteException e) {
            e.printStackTrace();
        }
        return binder;
    }

    private ServiceConnection mBinderPoolConnection = new ServiceConnection() {

        @Override
        public void onServiceDisconnected(ComponentName name) {
            // ignored.
        }

        @Override
        public void onServiceConnected(ComponentName name, IBinder service) {
            mBinderPool = com.mwy.test.binderpooldemo.IBinderPool.Stub.asInterface(service);
            try {
                mBinderPool.asBinder().linkToDeath(mBinderPoolDeathRecipient, 0);
            } catch (RemoteException e) {
                e.printStackTrace();
            }
            mConnectBinderPoolCountDownLatch.countDown();
        }
    };

    private IBinder.DeathRecipient mBinderPoolDeathRecipient = new IBinder.DeathRecipient() {
        @Override
        public void binderDied() {
            Log.w(TAG, "binder died.");
            mBinderPool.asBinder().unlinkToDeath(mBinderPoolDeathRecipient, 0);
            mBinderPool = null;
            connectBinderPoolService();
        }
    };

    public static class BinderPoolImpl extends com.mwy.test.binderpooldemo.IBinderPool.Stub {

        public BinderPoolImpl() {
            super();
        }

        @Override
        public IBinder queryBinder(int binderCode) throws RemoteException {
            IBinder binder = null;
            switch (binderCode) {
            case BINDER_SECURITY_CENTER: {
                binder = new SecurityCenterImpl();
                break;
            }
            case BINDER_COMPUTE: {
                binder = new ComputeImpl();
                break;
            }
            default:
                break;
            }

            return binder;
        }
    }

}
这里写成单例,在同一个进程中只会初始化一次,所以可以放在Application中提前初始化BIndPool。这里加入了断线重连机制。当远程服务意外终止时,BindPool会重新建立连接,这个时候如果业务模块中的Binder调用出现了异常,需要手动去获取最新的Binder对象。这里通过CountDownLatch将bindService这一异步操作转换成了同步操作,这就意味着他有可能是耗时的,然后就是Binder方法的调用过程也可能是耗时的,因此不建议放在主线程执行,下面来真正的验证一下 在MainActivity中添加如下代码
public class MainActivity extends AppCompatActivity {

    private static final String TAG = "MainActivity";

    private com.mwy.test.binderpooldemo.ISecurityCenter mSecurityCenter;
    private com.mwy.test.binderpooldemo.ICompute mCompute;

    @Override
    protected void onCreate(Bundle savedInstanceState) {
        super.onCreate(savedInstanceState);
        setContentView(R.layout.activity_main);
        new Thread(new Runnable() {

            @Override
            public void run() {
                doWork();
            }
        }).start();
    }

    private void doWork() {
        BinderPool binderPool = BinderPool.getInsance(MainActivity.this);
        IBinder securityBinder = binderPool
                .queryBinder(BinderPool.BINDER_SECURITY_CENTER);
        mSecurityCenter = SecurityCenterImpl
                .asInterface(securityBinder);
        Log.d(TAG, "visit ISecurityCenter");
        String msg = "helloworld-安卓";
        System.out.println("content:" + msg);
        try {
            String password = mSecurityCenter.encrypt(msg);
            System.out.println("encrypt:" + password);
            System.out.println("decrypt:" + mSecurityCenter.decrypt(password));
        } catch (RemoteException e) {
            e.printStackTrace();
        }

        Log.d(TAG, "visit ICompute");
        IBinder computeBinder = binderPool
                .queryBinder(BinderPool.BINDER_COMPUTE);
        mCompute = ComputeImpl.asInterface(computeBinder);
        try {
            System.out.println("3+5=" + mCompute.add(3, 5));
        } catch (RemoteException e) {
            e.printStackTrace();
        }
    }
}
运行结果为

