

1 node环境安装
从 node官网下载安装包
2 vue-cli
npm install vue-cli -g
3 新建项目
vue init webpack vue-project
可保持默认,一路回车 完成后
cd vue-project
npm run dev
工程启动成功,访问 http://localhost:8080 可看到页面
4 安装并引入 elementui
npm install element-ui --save
编辑 src/main.js , 修改为
import Vue from 'vue'
import App from './App'
import router from './router'
import ElementUI from 'element-ui'
import 'element-ui/lib/theme-chalk/index.css'
import Api from './api/index'

Vue.use(ElementUI)
Vue.prototype.$api = Api
Vue.config.productionTip = false
/* eslint-disable no-new */
new Vue({
el: '#app',
router,
components: { App },
template: '<App/>'
})
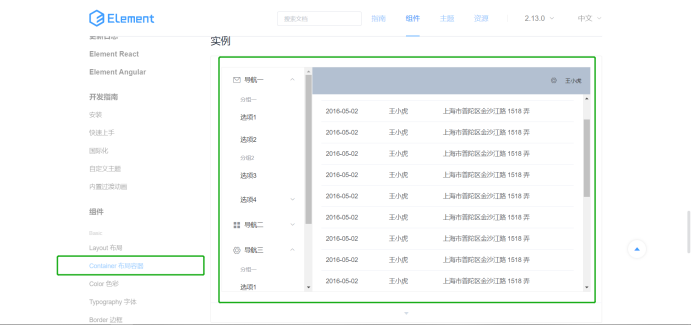
5 编写table页面
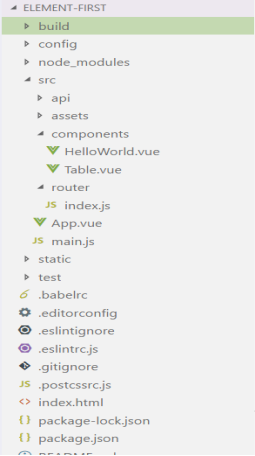
在src/components(默认组件即页面展示的文件夹)下添加Table.vue
改文件内容我们取自elementui官网如图所示组件的代码:
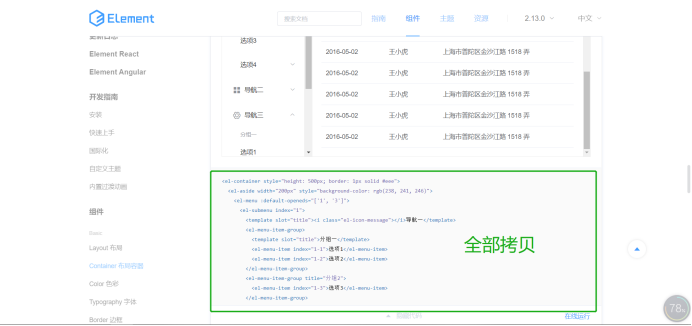
<el-container style="height: 500px; border: 1px solid #eee">
嵌套在
<template><div id=”table”>
中(div的id=”table”必须有) 结构如下:
<template>
<div id="table">
<el-container style="height: 500px; border: 1px solid #eee">
......
</el-container>
</div>
</template>
<style>
......
</style>
<script>
...
</script>
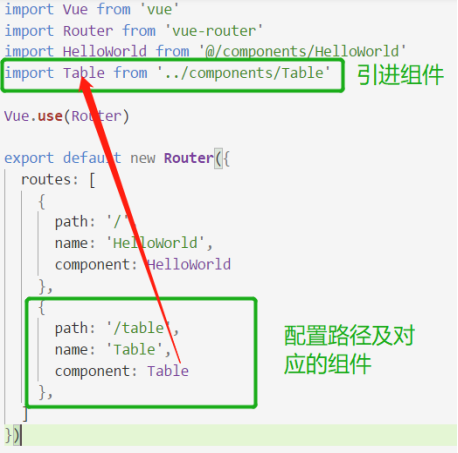
6 增加路由
访问 table要跳转到table页面,路由就是我跳转哪个url才能访问到对应的页面
修改 router/index.js 为:
import Vue from 'vue'
import Router from 'vue-router'
import HelloWorld from '@/components/HelloWorld'
import Table from '../components/Table'
Vue.use(Router)
export default new Router({
routes: [
{
path: '/',
name: 'HelloWorld',
component: HelloWorld
},
{
path: '/table',
name: 'Table',
component: Table
},
]
})
7 修改两个文件:
一.App.vue(全局组件,如果访问table页,App.vue的页面也会带过去,从而table页在其下方展示)
<template>
<div id="app">
<router-view/>
</div>
</template>

<style>
#app {
background-color: #E7E7EA;
position: absolute;
top: 0px;
left: 0px;
width: 100%;
height: 100%;
overflow: auto;
}
</style>
二.build/webpack.base.conf.js注释掉第43行
用于空格或者行检验 有空格或者少空格或者有多余的行就会报错,注释掉即可
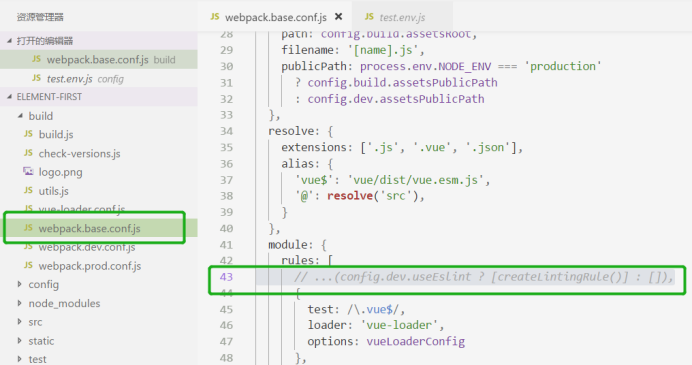
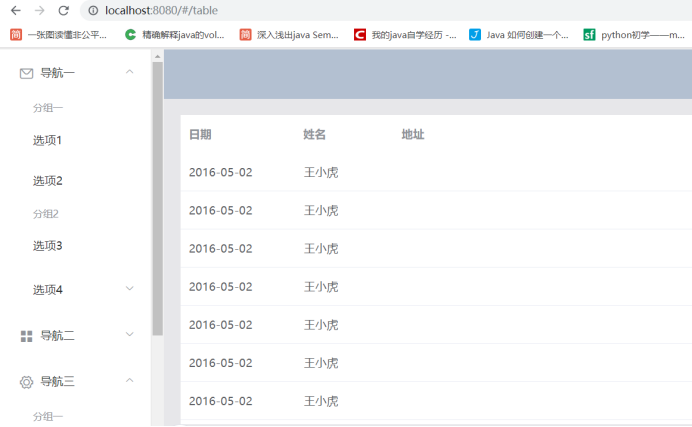
执行 npm run dev 访问 http://localhost:8080/#/table出现table页面:
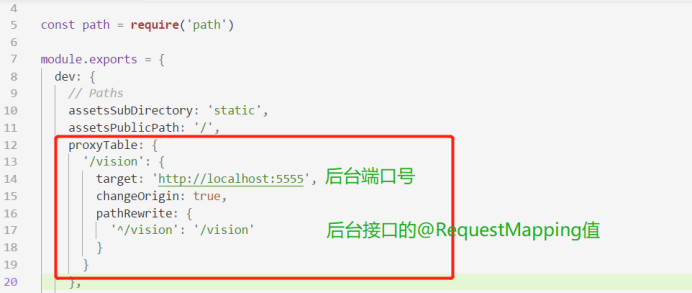
10 前端添加跨域代理设置(config/index.js)

一.npm install axios -S
二.配置axios
src下新建api/index.js
import axios from 'axios';

let http = axios.create({
baseURL: 'http://localhost:8080/',
withCredentials: true,
headers: {
'Content-Type': 'application/x-www-form-urlencoded;charset=utf-8'
},
transformRequest: [function (data) {
let newData = '';
for (let k in data) {
if (data.hasOwnProperty(k) === true) {
newData += encodeURIComponent(k) + '=' + encodeURIComponent(data[k]) + '&';
}
}
return newData;
}]
});

function apiAxios(method, url, params, response) {
http({
method: method,
url: url,
data: method === 'POST' || method === 'PUT' ? params : null,
params: method === 'GET' || method === 'DELETE' ? params : null,
}).then(function (res) {
response(res);
}).catch(function (err) {
response(err);
})
}

export default {
get: function (url, params, response) {
return apiAxios('GET', url, params, response)
},
post: function (url, params, response) {
return apiAxios('POST', url, params, response)
},
put: function (url, params, response) {
return apiAxios('PUT', url, params, response)
},
delete: function (url, params, response) {
return apiAxios('DELETE', url, params, response)
}
}
三.使用axios
main.js中引入axios配置文件:
import Api from './api/index'

Vue.prototype.$api = Api
.vue组件中某个方法内使用:
 this.$api.post('user/login.do(地址)', {
    "参数名": "参数值"}, response => {
     if (response.status >= 200 && response.status < 300) {
        console.log(response.data);\\请求成功,response为成功信息参数
     } else {
        console.log(response.message);\\请求失败,response为失败信息
     }});
