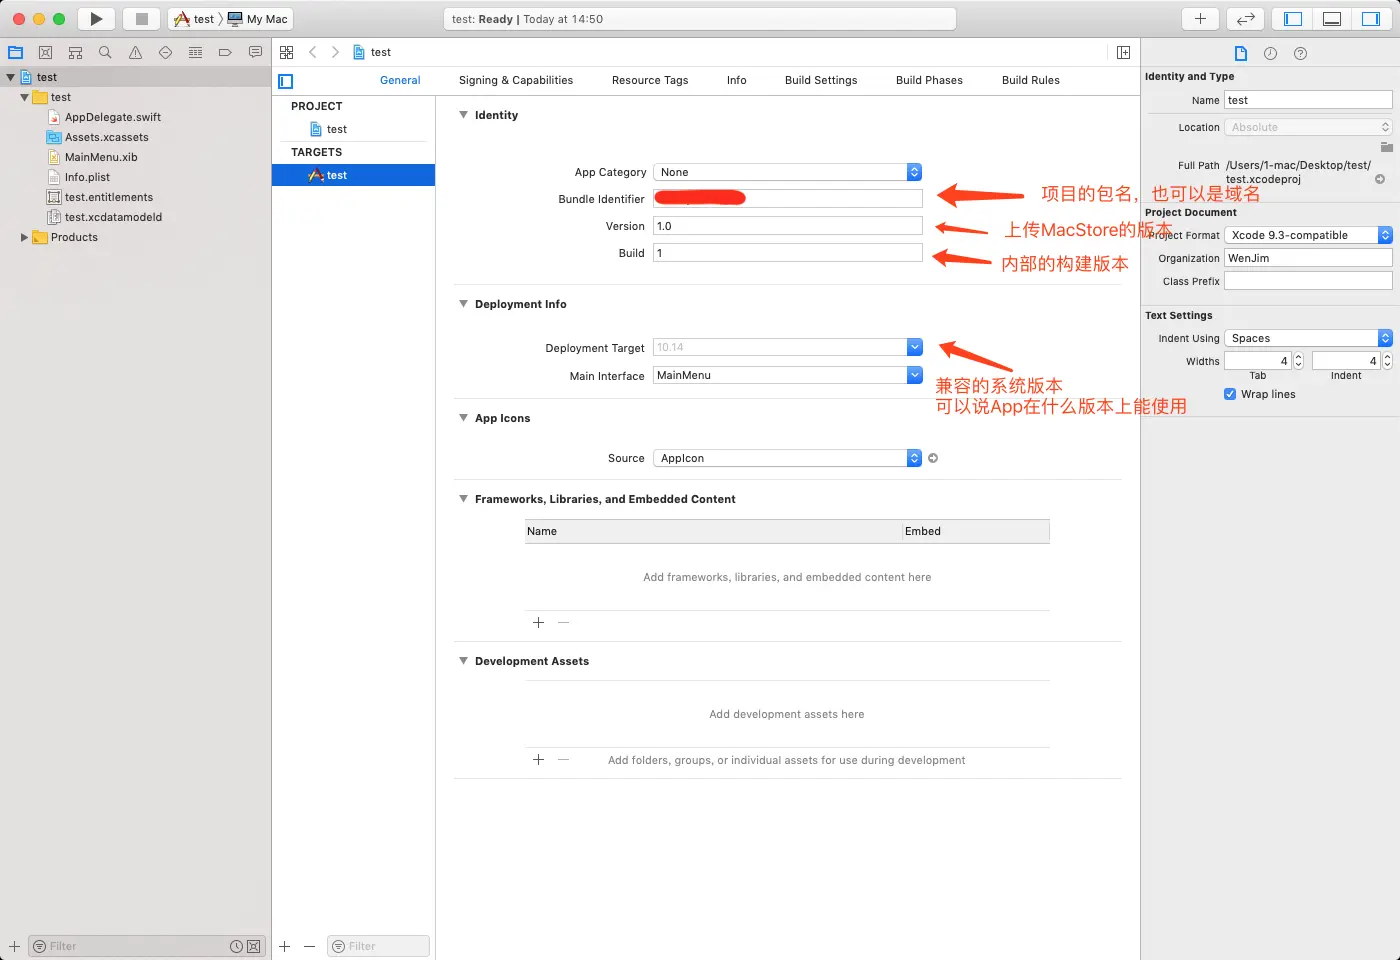
1. Storyboard(故事面板,通常用于个人开发,协作开发不怎么友好)
1.1 后续补充
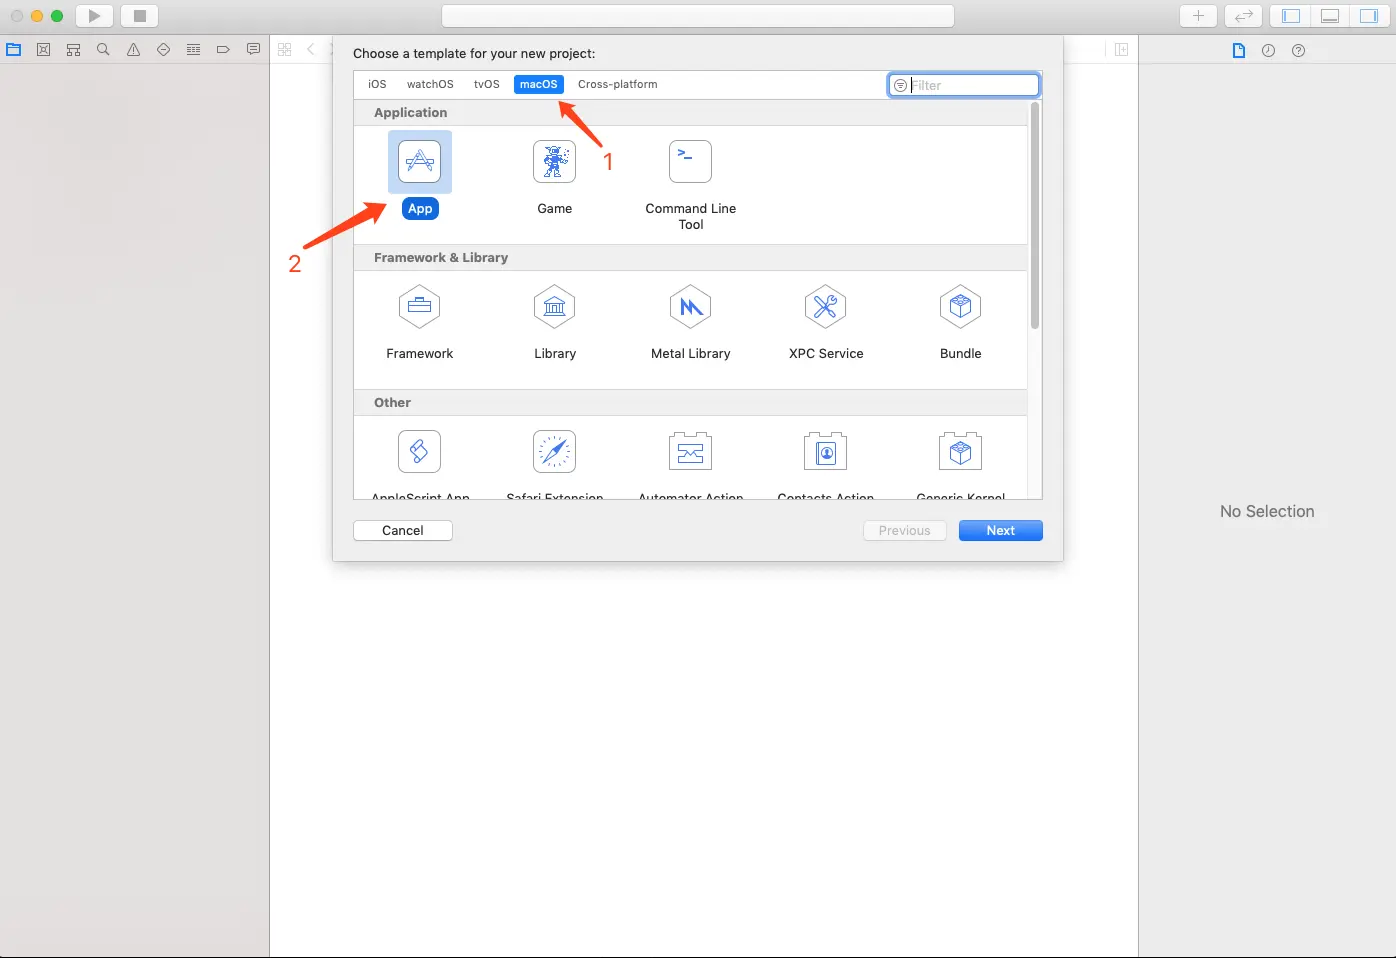
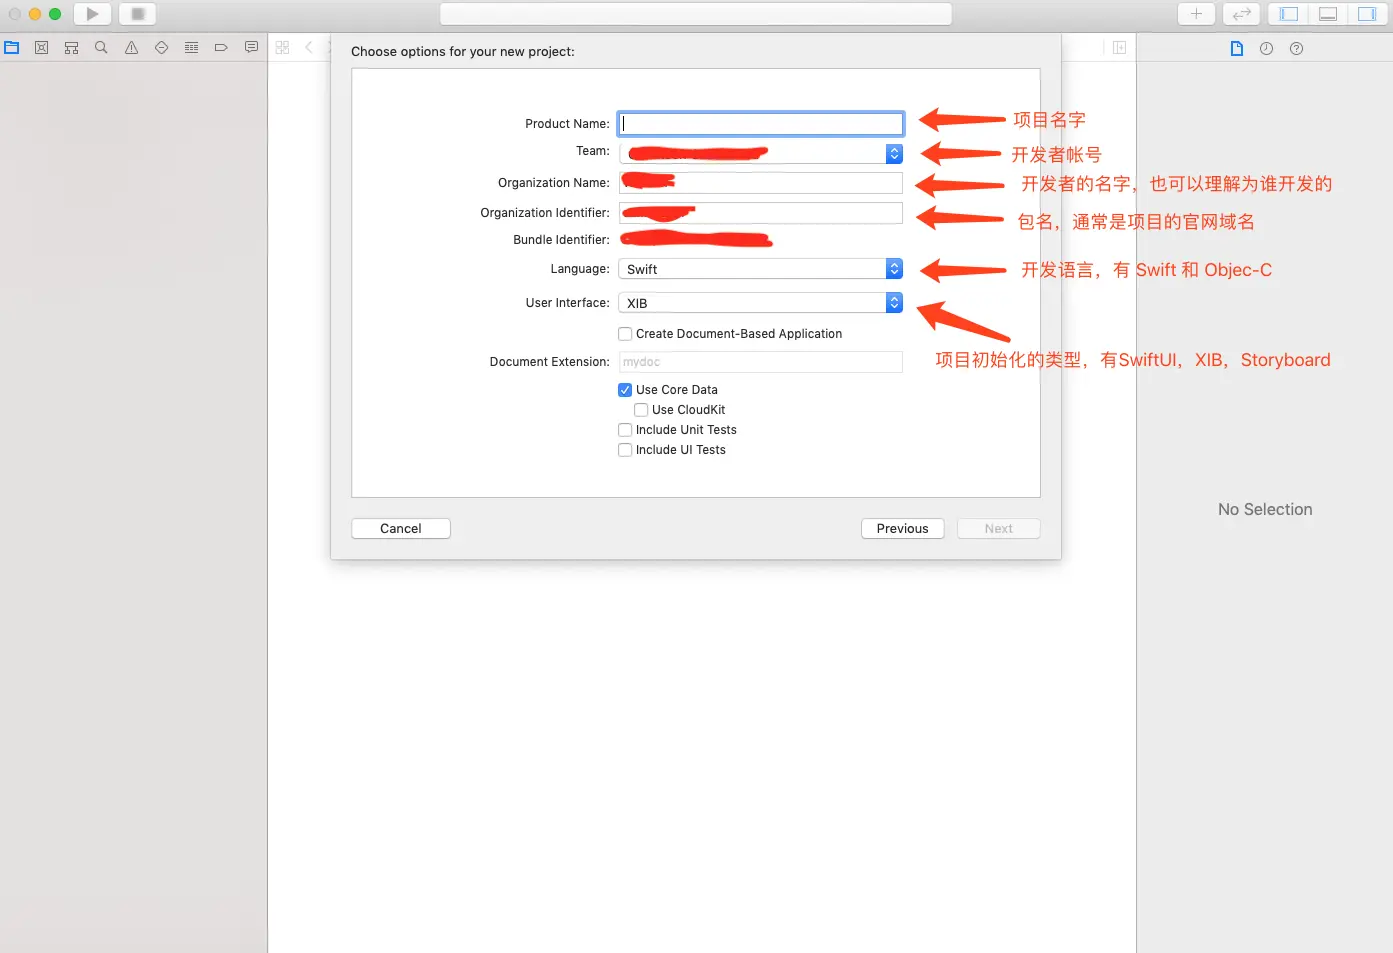
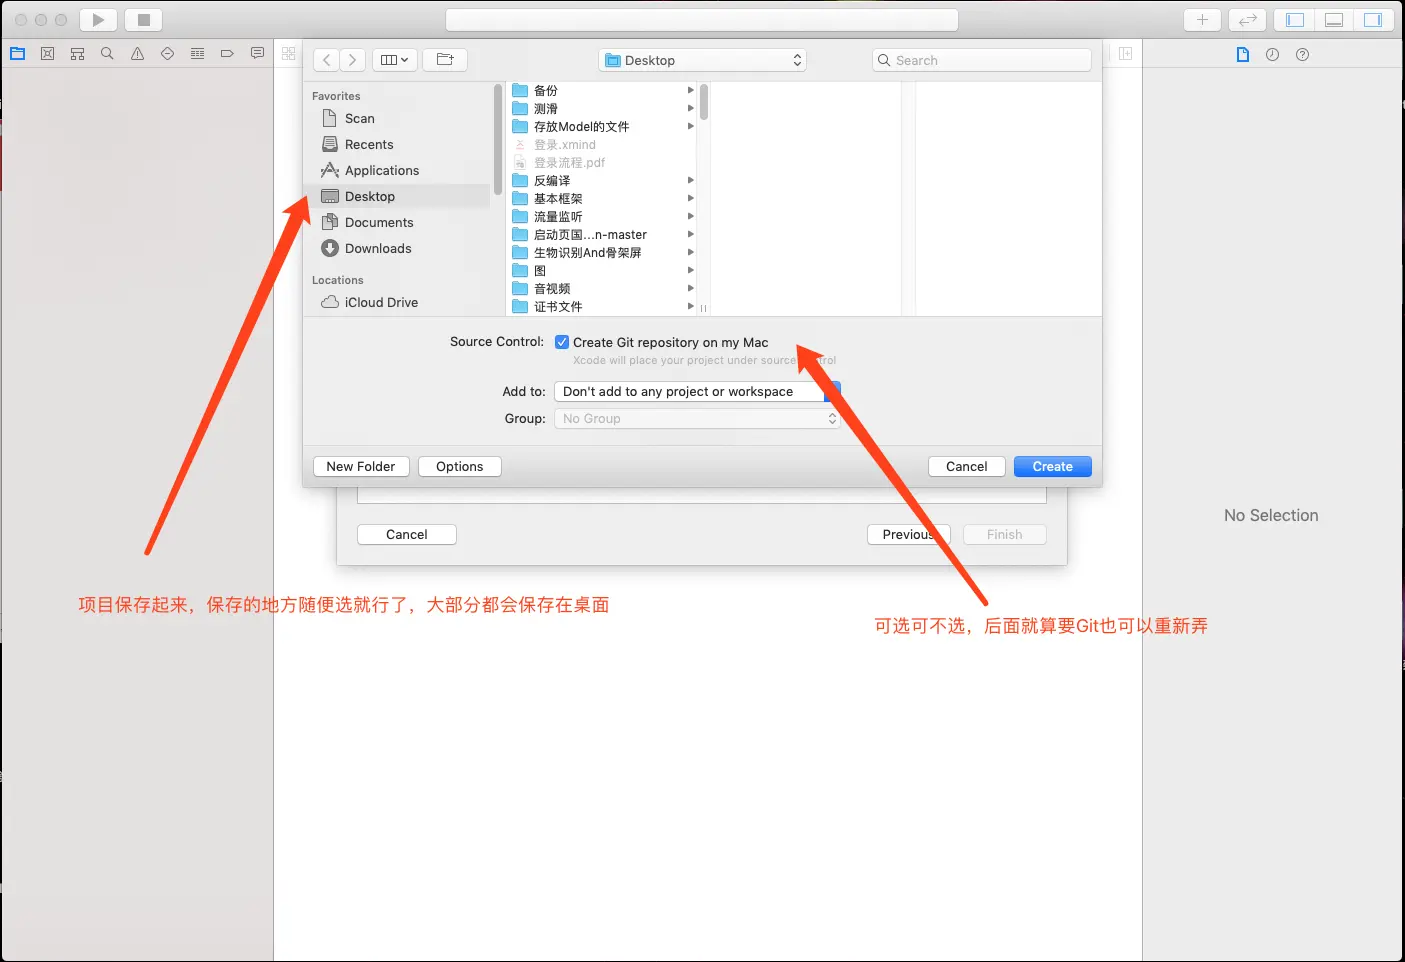
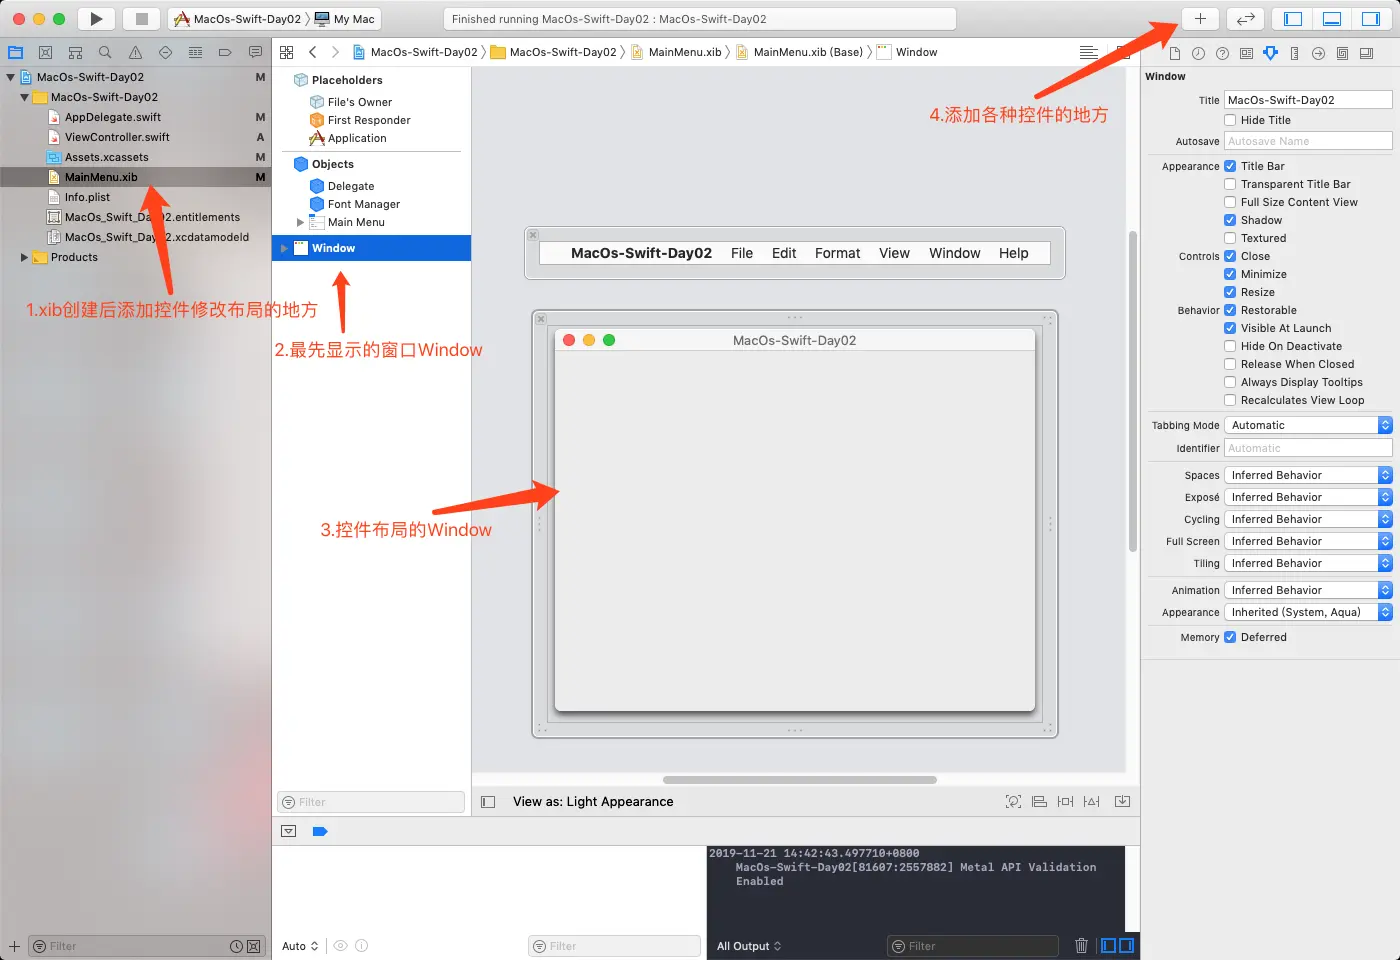
2. Xib
2.1 xib创建项目
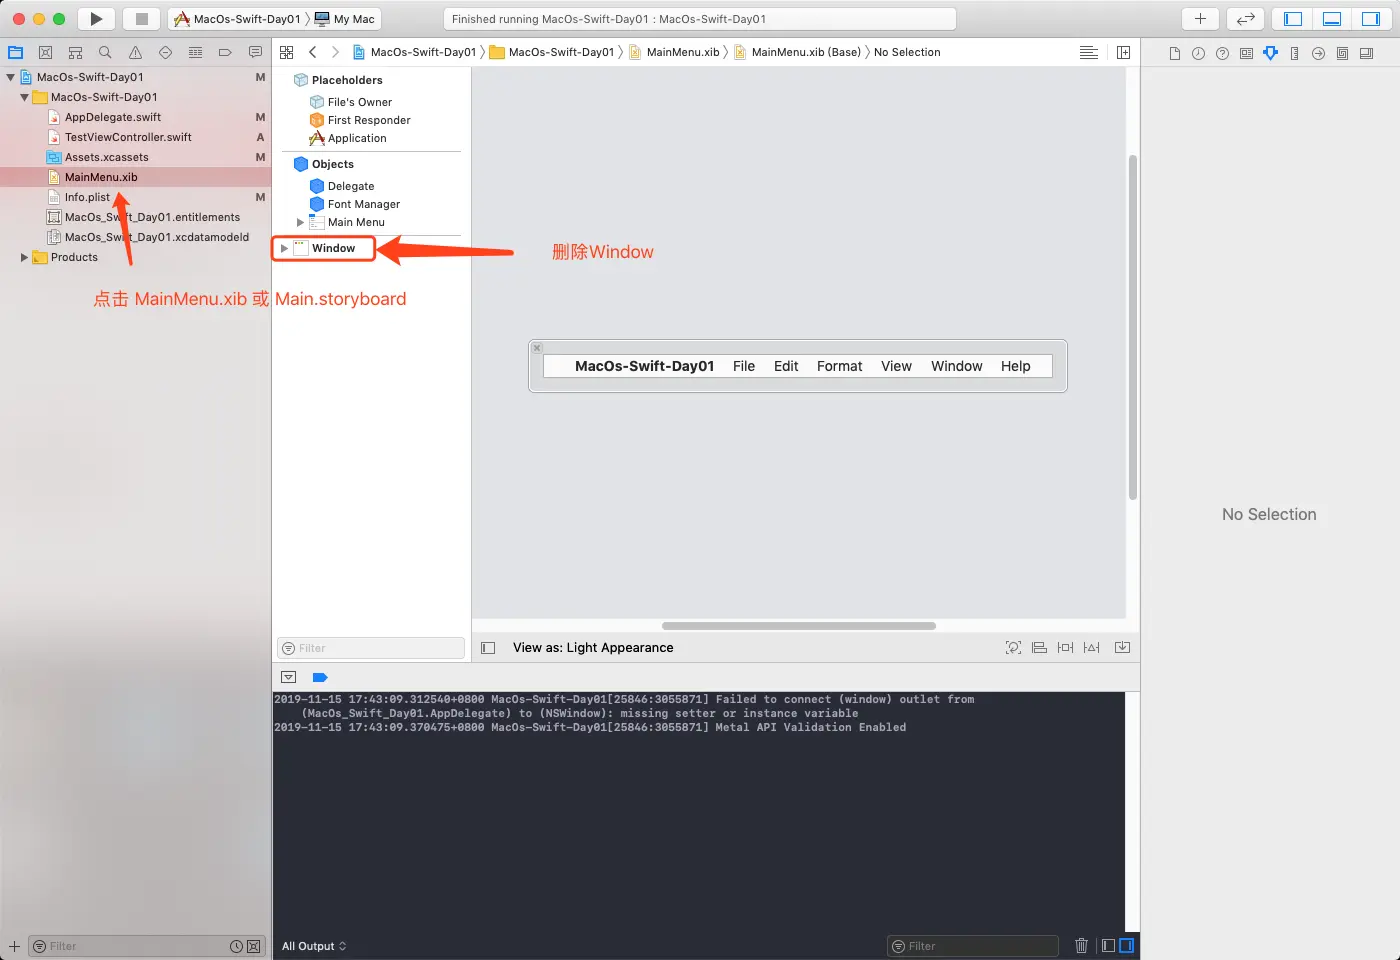
3. 纯代码创建window
- 点击MainMenu.xib 或 Main.storyboard 删除里面的Window
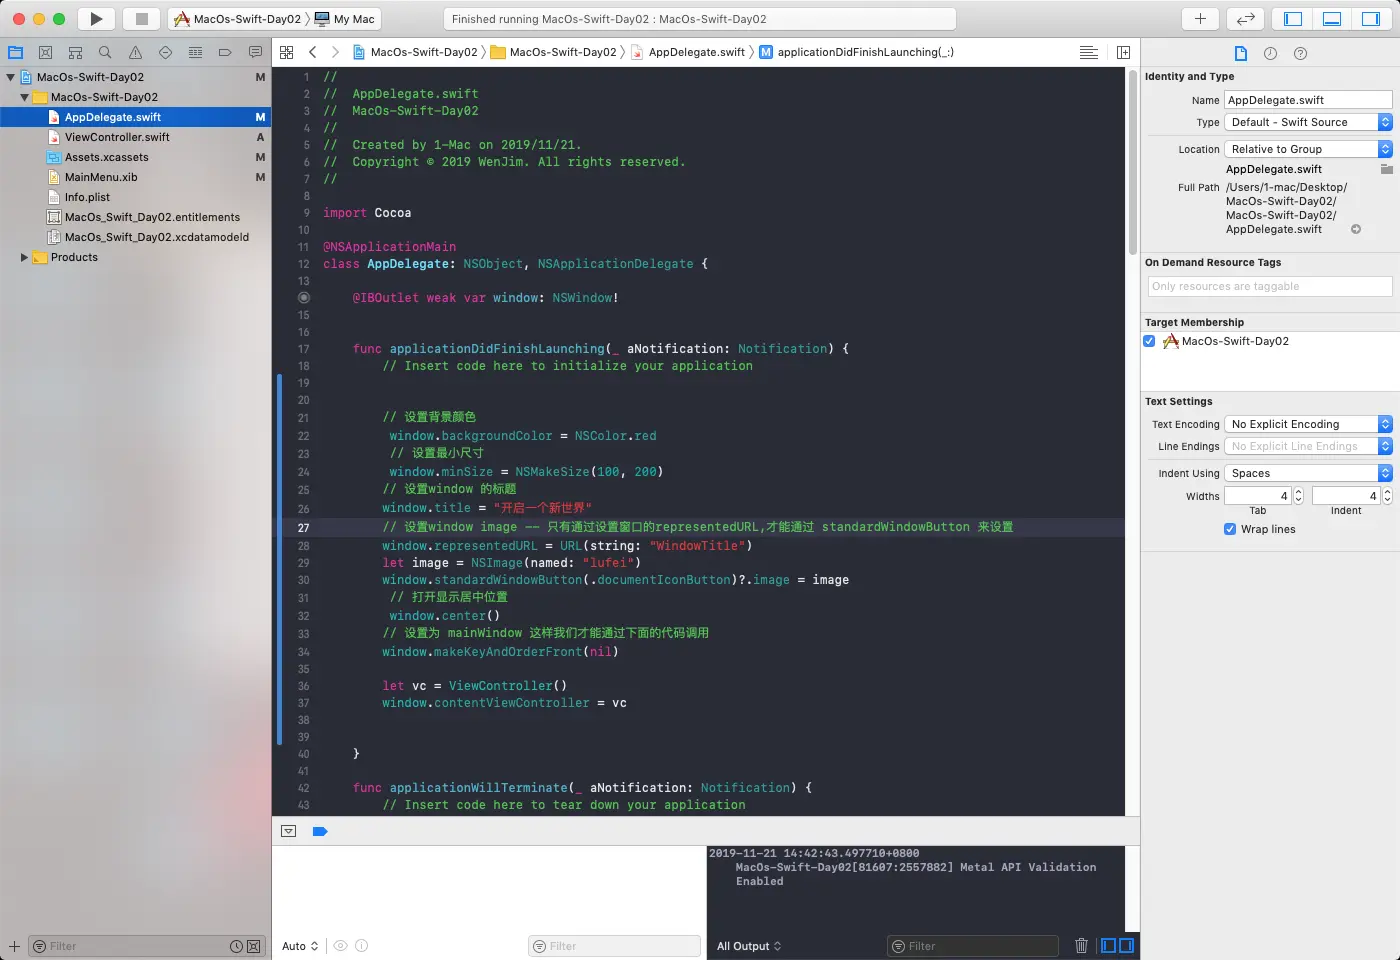
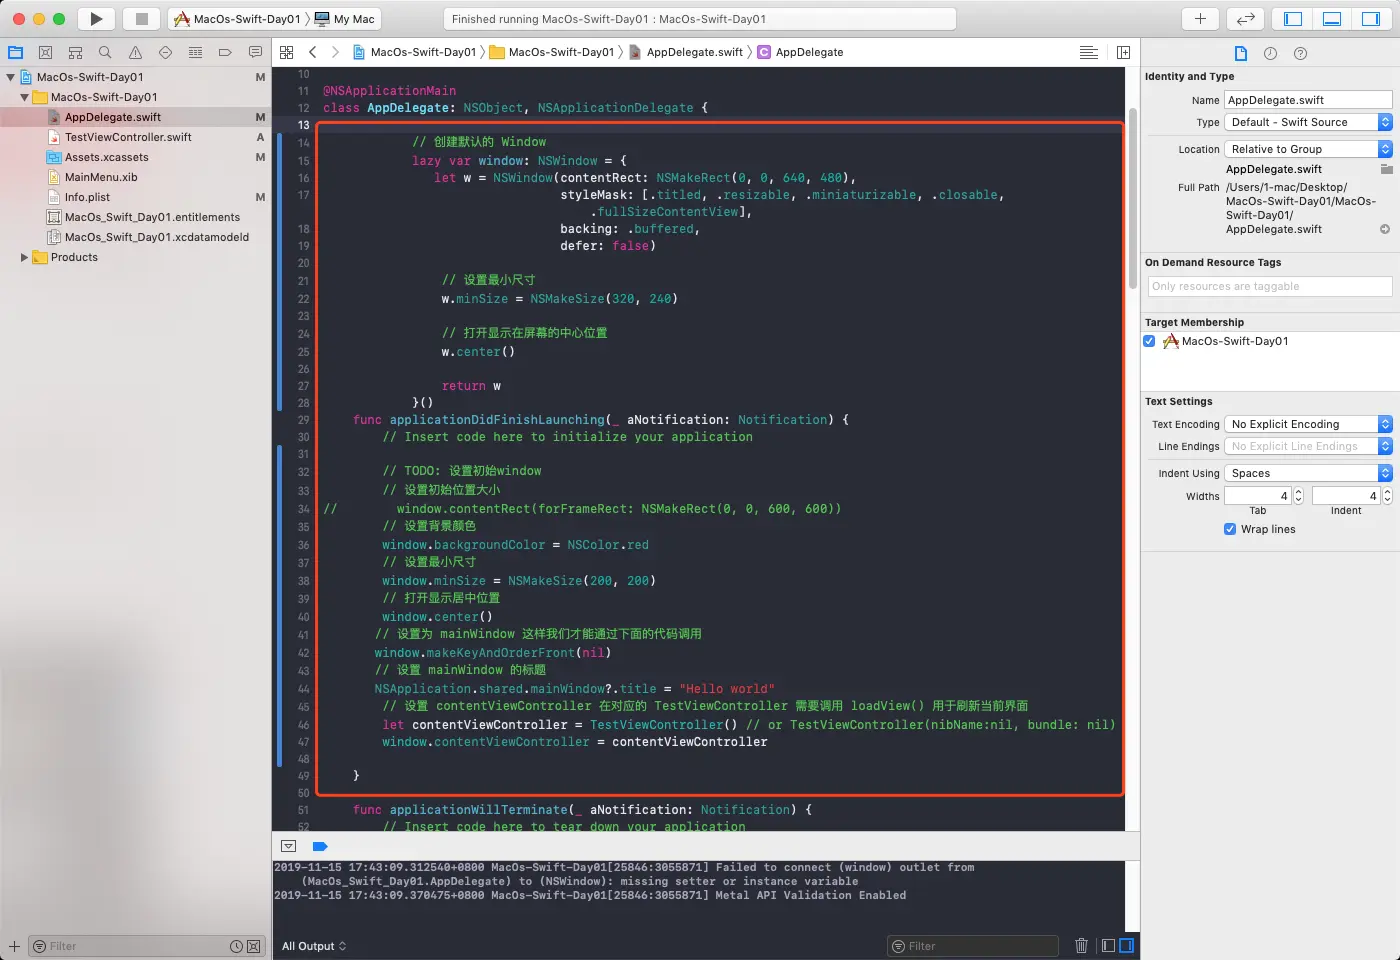
- 点击AppDelegate.swift,1.在 class AppDelegate: NSObject, NSApplicationDelegate{} 里面创建一个新的NSWindow。2.在 applicationDidFinishLaunching 函数里面编写对应的代码,具体代码(部分主要代码)如下
class AppDelegate: NSObject, NSApplicationDelegate {
    // 创建默认的 Window
    lazy var window: NSWindow = {
       let w = NSWindow(contentRect: NSMakeRect(0, 0, 640, 480),
                        styleMask: [.titled, .resizable, .miniaturizable, .closable, .fullSizeContentView],
                        backing: .buffered,
                        defer: false)

        // 设置最小尺寸
        w.minSize = NSMakeSize(320, 240)

        // 打开显示在屏幕的中心位置
        w.center()

        return w
    }()

    var btn:NSButton!

    func applicationDidFinishLaunching(_ aNotification: Notification) {
        // Insert code here to initialize your application

        // TODO: 设置初始window
        window.contentRect(forFrameRect: NSMakeRect(0, 0, 100, 100))
        // 设置背景颜色
        window.backgroundColor = NSColor.red
        // 设置最小尺寸
        window.minSize = NSMakeSize(500, 500)
        // 打开显示居中位置
        window.center()

        // 设置为 mainWindow 这样我们才能通过下面的代码调用
        window.makeKeyAndOrderFront(nil)

        // 设置 mainWindow 的标题
        NSApplication.shared.mainWindow?.title = "Hello world"

        // 设置 contentViewController 在对应的 TestViewController 需要调用 loadView() 用于刷新当前界面
        let contentViewController = TestViewController() // or TestViewController(nibName:nil, bundle: nil)
        window.contentViewController = contentViewController
    }
}
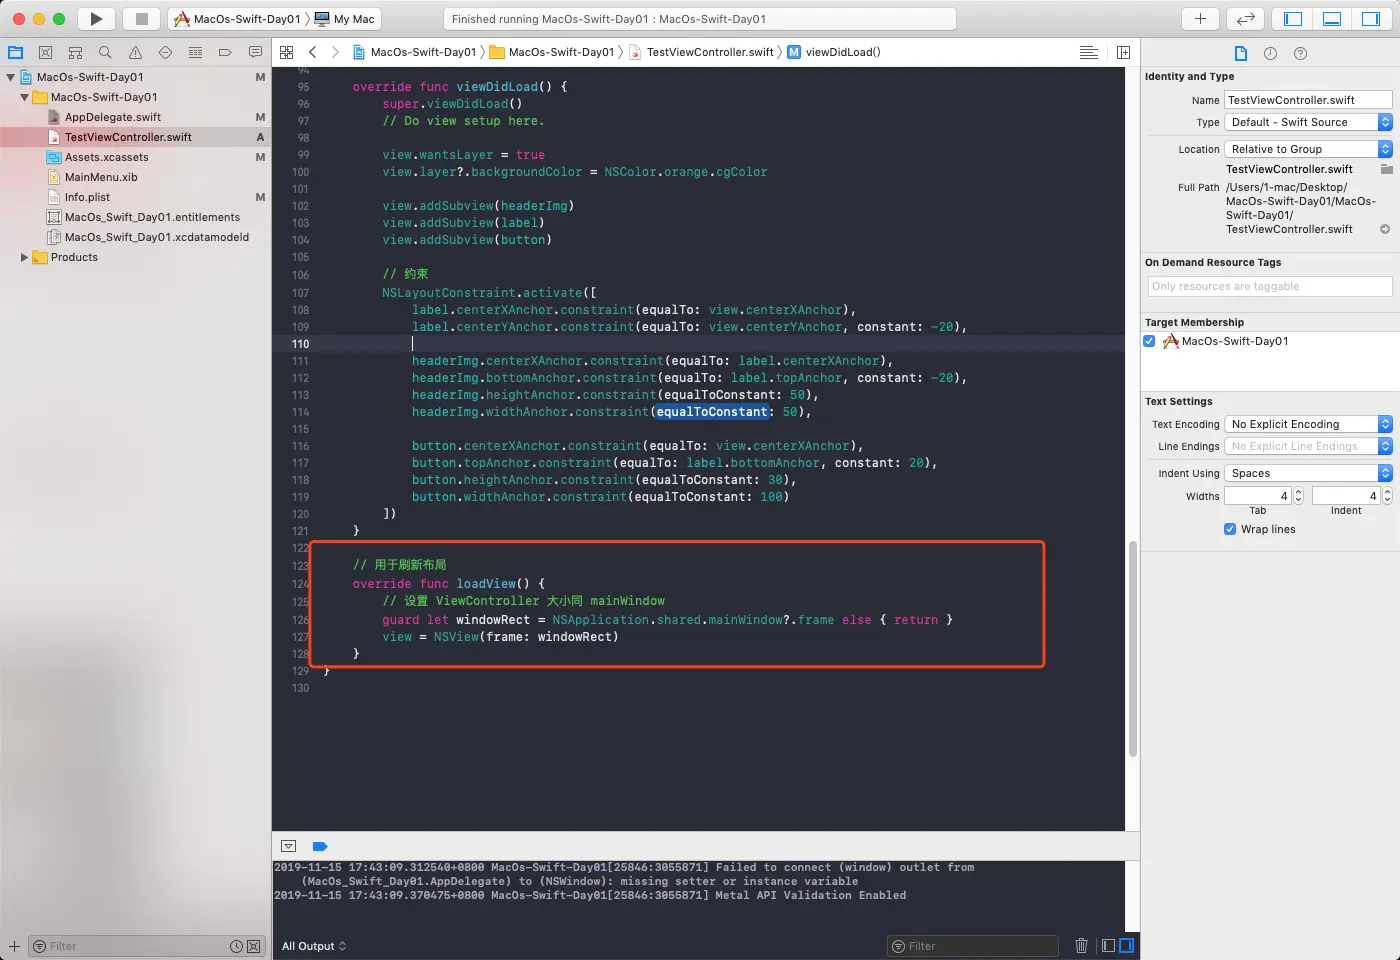
- 点击TestViewController.swift 创建对应的控件或者 做其他的操作
class TestViewController: NSViewController {

    override func viewDidLoad() {
        super.viewDidLoad()
        // Do view setup here.

        view.wantsLayer = true
        view.layer?.backgroundColor = NSColor.orange.cgColor
    }

    // 用于刷新布局
    override func loadView() {
        // 设置 ViewController 大小同 mainWindow
        guard let windowRect = NSApplication.shared.mainWindow?.frame else { return }
        view = NSView(frame: windowRect)
    }
}