

原文链接:How to build a movie search app using React Hooks, by Samuel Omole
译者注:为保证行文简洁,对原文内容做了部分修改,在此告知一下。
React 引入了 Hook API,这套 API 的出现,为组织代码和书写项目提供了新的能力。如果你对此还存在疑问的话,建议阅读 React 团队发布的 这篇文章,讲述了为何引入此功能,以及它试图解决的问题。
最开始时候我没有社区里其他人表现的那么兴奋,我决定等到官方正式发布之后,看看发生了哪些 API 改变。所以,在它发布后的那个周末,我开始阅读文档,令人惊讶的是(实际没有),出现了很多关于 Hook 的介绍文章。
我知道有些人可能会说“又一篇关于 Hook 的文章,是认真的吗?”,我只能说:“是的……而且接下里还会有更多关于 Hooks 的文章会被写出来。” 对于本篇文章,我们将使用 Hooks 构建一个非常简单的项目。我们不会在这个项目里使用类组件。 我会解释一些 API 的工作原理,以及如何使用它们。
下面是项目完成后的效果图:
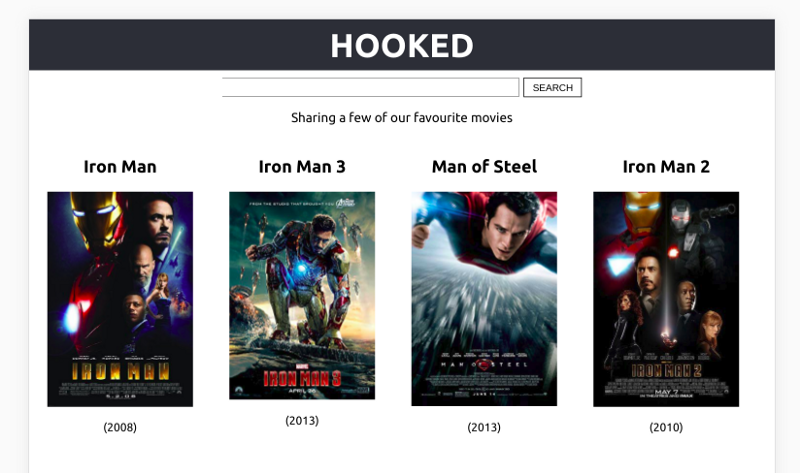
本项目会使用到 OMDB 的 API (译者注:OMDB 全称是 “The Open Movie Database”,即“开放电影数据库”)获取电影列表。这个的项目的目的,是为了帮助我们在“做中学”——在做的过程中,加深对 Hook 的理解,并能在真实项目中实际使用起来。在开始之前,需要准备好开发环境:
- Node(≥6)
- 一个编辑器
- OMDB 的 API key(你可以 自己生成 或者用我的)
本教程使用 create-react-app 创建项目。如果还没安装的话,可以先本地安装一下:
$ npm install -g create-react-app
然后使用 create-react-app 这条命令在命令行创建项目。
$ create-react-app hooked
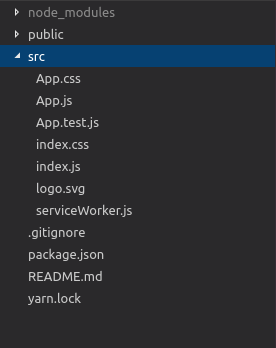
命令执行完毕后,我们会得到一个“hooked”目录,这是我们的项目根目录。用编辑器打开,会看见如下的结构:
这个项目里会用到 4 个组件。下面概括说明一个每个组件的功能:
App.js—— 是其他 3 个组件的父组件。包含了请求接口数据的逻辑,而且最初组件渲染时,会调用一次接口,获取默认要显示的数据。Header.js—— 页面的头部组件,比较简单,接受一个titleprop。Movie.js—— 渲染电影信息的组件。接收一个movie对象作为 prop。Search.js—— 包含一个输入框和搜索按钮的表单组件。负责搜索文本的输入、重置,包含一个调用搜索方法的函数,搜索方法是以 prop 的形式传递进来的。
我们在 src 目录下,新建一个 components 目录,后面所有的组件都会放在这里。将 App.js 移动到此目录内,接着新建一个 Header.js 文件,文件代码如下:
import React from "react";

const Header = (props) => {
  return (
    <header className="App-header">
      <h2>{props.text}</h2>
    </header>
  );
};

export default Header;
这个组件比较简单,会渲染出一个 <header> 标签和 title prop。
不要忘记更新下 index.js 文件里 import 语句(因为我们移动了 App.js 文件的位置):
import React from 'react';
import ReactDOM from 'react-dom';
import './index.css';
import App from './components/App'; // 这里要修改下 ./App -> ./components/App
import * as serviceWorker from './serviceWorker';


ReactDOM.render(<App />, document.getElementById('root'));

// If you want your app to work offline and load faster, you can change
// unregister() to register() below. Note this comes with some pitfalls.


serviceWorker.unregister();
同时,更新下 App.css 样式文件。
.App {
  text-align: center;
}

.App-header {
  background-color: #282c34;
  height: 70px;
  display: flex;
  flex-direction: column;
  align-items: center;
  justify-content: center;
  font-size: calc(10px + 2vmin);
  color: white;
  padding: 20px;
  cursor: pointer;
}

.spinner {
  height: 80px;
  margin: auto;
}

.App-intro {
  font-size: large;
}

/* new css for movie component */

* {
  box-sizing: border-box;
}

.movies {
  display: flex;
  flex-wrap: wrap;
  flex-direction: row;
}

.App-header h2 {
  margin: 0;
}

.add-movies {
  text-align: center;
}

.add-movies button {
  font-size: 16px;
  padding: 8px;
  margin: 0 10px 30px 10px;
}

.movie {
  padding: 5px 25px 10px 25px;
  max-width: 25%;
}

.errorMessage {
  margin: auto;
  font-weight: bold;
  color: rgb(161, 15, 15);
}


.search {
  display: flex;
  flex-direction: row;
  flex-wrap: wrap;
  justify-content: center;
  margin-top: 10px;
}


input[type="submit"] {
  padding: 5px;
  background-color: transparent;
  color: black;
  border: 1px solid black;
  width: 80px;
  margin-left: 5px;
  cursor: pointer;
}


input[type="submit"]:hover {
  background-color: #282c34;
  color: antiquewhite;
}


.search > input[type="text"]{
  width: 40%;
  min-width: 170px;
}

@media screen and (min-width: 694px) and (max-width: 915px) {
  .movie {
    max-width: 33%;
  }
}

@media screen and (min-width: 652px) and (max-width: 693px) {
  .movie {
    max-width: 50%;
  }
}


@media screen and (max-width: 651px) {
  .movie {
    max-width: 100%;
    margin: auto;
  }
}
下一步就是创建 Movie.js 文件,用来渲染电影详情的。代码如下:
import React from "react";

const DEFAULT_PLACEHOLDER_IMAGE =
  "https://m.media-amazon.com/images/M/MV5BMTczNTI2ODUwOF5BMl5BanBnXkFtZTcwMTU0NTIzMw@@._V1_SX300.jpg";


const Movie = ({ movie }) => {
  const poster =
    movie.Poster === "N/A" ? DEFAULT_PLACEHOLDER_IMAGE : movie.Poster;
  return (
    <div className="movie">
      <h2>{movie.Title}</h2>
      <div>
        <img
          width="200"
          alt={`The movie titled: ${movie.Title}`}
          src={poster}
        />
      </div>
      <p>({movie.Year})</p>
    </div>
  );
};


export default Movie;
这个组件的代码需要稍微解释一下,这也只是一个来用展示信息的组件(不包含任何内部状态)——展示电影名、电影海报图片以及上映的年份。DEFAULT_PLACEHOLDER_IMAGE 作为默认占位图片使用的,因为从 API 获取的某些电影缺少海报图片。
接下来在创建 Search 组件。这一块非常有趣,因为在过去,为了处理内部状态,我们会使用类组件。但现在多一个选择,因为 Hook API 的引入,我们可以使用函数组件处理内部状态了。
废话不多说,我们先创建一个 Search.js 文件,添加如下的代码:
import React, { useState } from "react";


const Search = (props) => {
  const [searchValue, setSearchValue] = useState("");

  const handleSearchInputChanges = (e) => {
    setSearchValue(e.target.value);
  }

  const resetInputField = () => {
    setSearchValue("")
  }

  const callSearchFunction = (e) => {
    e.preventDefault();
    props.search(searchValue);
    resetInputField();
  }

  return (
      <form className="search">
        <input
          value={searchValue}
          onChange={handleSearchInputChanges}
          type="text"
        />
        <input onClick={callSearchFunction} type="submit" value="SEARCH" />
      </form>
    );
}

export default Search;
是不是有点小欢喜?这是我们使用的第一个 Hook API——useState。顾名思义,这是在为函数组件添加一个 React 状态。useState 接收一个参数作为状态初始值,它的返回值是一个由当前状态(等价于类组件里的 this.state)和对应的状态更新函数(等价于 this.setState)组成的数组。
在我们的场景里,当前状态与搜索框输入内容绑定了。当输入框触发 change(onChange)事件时,handleSearchInputChanges 函数被调用,我们使用最新输入的值更新状态。resetInputField 函数的作用只是调用一次状态更新方法,将状态值置为空,用来重置输入框。如果想要了解更多 useState API 的用法,可以参见 官方文档。
最后,再修改下 App.js 文件:
import React, { useState, useEffect } from "react";
import "../App.css";
import Header from "./Header";
import Movie from "./Movie";
import Search from "./Search";


const MOVIE_API_URL = "https://www.omdbapi.com/?s=man&apikey=4a3b711b"; // 将这里的 apikey 替换成你的


const App = () => {
  const [loading, setLoading] = useState(true);
  const [movies, setMovies] = useState([]);
  const [errorMessage, setErrorMessage] = useState(null);

  useEffect(() = > {
    fetch(MOVIE_API_URL)
      .then(response => response.json())
      .then(jsonResponse => {
        setMovies(jsonResponse.Search);
        setLoading(false);
    });
  }, []);

    const search = searchValue => {
    setLoading(true);
    setErrorMessage(null);

    fetch(`https://www.omdbapi.com/?s=${searchValue}&apikey=4a3b711b`)
      .then(response => response.json())
      .then(jsonResponse => {
        if (jsonResponse.Response === "True") {
          setMovies(jsonResponse.Search);
          setLoading(false);
        } else {
          setErrorMessage(jsonResponse.Error);
          setLoading(false);
        }
      });
  	};


    return (
     <div className="App">
      <Header text="HOOKED" />
      <Search search={search} />
      <p className="App-intro">Sharing a few of our favourite movies</p>
      <div className="movies">
        {loading && !errorMessage ? (
         <span>loading...</span>
         ) : errorMessage ? (
          <div className="errorMessage">{errorMessage}</div>
        ) : (
          movies.map((movie, index) => (
            <Movie key={`${index}-${movie.Title}`} movie={movie} />
          ))
        )}
      </div>
    </div>
  );
};


export default App;
useEffect 是我们遇到的第二个 React Hook。这个 Hook 用来在函数组件中操作 side effects 的。这里的 side effects 是指向数据获取、订阅、操作 DOM 这类操作。关于这个 Hook 的最好解释来自 React 官方文档:
如果你熟悉 React 类组件的生命周期函数的话,可以认为
useEffectHook 是componentDidMount、componentDidUpdate和componentWillUnmount的组合。
useEffect 会在组件第一次渲染时(componentDidMount)调用,并且会在后续组件每次更新时(componentDidUpdate )调用。如果此 Hook 在每次组件更新后都会调用,那它与 componentDidMount 有何相似之处呢?useEffect 函数接收两个参数,第一个是要执行的回调函数;第二个参数是个数组,React 仅在数组中的值发生变化时,才会在后面组件更新时,触发回调函数。
根据文档说明,相当于我们在 componentDidUpdate 里写了一条条件判断语句:
// 类组件的写法
componentDidUpdate(prevProps, prevState) {
  if (prevState.count !== this.state.count) {
    document.title = `You clicked ${this.state.count} times`;
  }
}


// 使用 Hook API 后的写法
useEffect(() => {
  document.title = `You clicked ${count} times`;
}, [count]); // 只有在 count 值改变时,再去执行一次 useEffect 的回调函数
在我们的例子里,传入的是个空数组——也就是在告诉 React,useEffect 的回调函数,只会调用一次。
useState 这个函数我们使用了 3 次 ,而且通过观察发现,对应的三个状态之间存在着某种相关关系,因此应该存在一种方式,能将它们以某种方式组合在一起。为此,React 为我们设计了 useReducer Hook。我们将 App 组件使用此 Hook 修改,最终的 App.js 看起来是这样的:
import React, { useReducer, useEffect } from "react";
import "../App.css";
import Header from "./Header";
import Movie from "./Movie";
import Search from "./Search";


const MOVIE_API_URL = "https://www.omdbapi.com/?s=man&apikey=4a3b711b";


const initialState = {
  loading: true,
  movies: [],
  errorMessage: null
};


const reducer = (state, action) => {
  switch (action.type) {
    case "SEARCH_MOVIES_REQUEST":
      return {
        ...state,
        loading: true,
        errorMessage: null
      };
    case "SEARCH_MOVIES_SUCCESS":
      return {
        ...state,
        loading: false,
        movies: action.payload
      };
    case "SEARCH_MOVIES_FAILURE":
      return {
        ...state,
        loading: false,
        errorMessage: action.error
      };
    default:
      return state;
  }
};


const App = () => {
  const [state, dispatch] = useReducer(reducer, initialState);

    useEffect(() => {
        fetch(MOVIE_API_URL)
            .then(response => response.json())
            .then(jsonResponse => {
                dispatch({
                    type: "SEARCH_MOVIES_SUCCESS",
                    payload: jsonResponse.Search
                });
            });
    }, []);

    const search = searchValue => {
    	dispatch({
      	  type: "SEARCH_MOVIES_REQUEST"
    	});

        fetch(`https://www.omdbapi.com/?s=${searchValue}&apikey=4a3b711b`)
      	.then(response => response.json())
      	.then(jsonResponse => {
            if (jsonResponse.Response === "True") {
              	dispatch({
                  type: "SEARCH_MOVIES_SUCCESS",
                  payload: jsonResponse.Search
              	});
            } else {
                dispatch({
                  type: "SEARCH_MOVIES_FAILURE",
                  error: jsonResponse.Error
                });
            }
      	});
	  };

    const { movies, errorMessage, loading } = state;

    return (
    <div className="App">
      <Header text="HOOKED" />
      <Search search={search} />
      <p className="App-intro">Sharing a few of our favourite movies</p>
      <div className="movies">
        {loading && !errorMessage ? (
          <span>loading... </span>
        ) : errorMessage ? (
          <div className="errorMessage">{errorMessage}</div>
        ) : (
          movies.map((movie, index) => (
            <Movie key={`${index}-${movie.Title}`} movie={movie} />
          ))
        )}
      </div>
    </div>
  );
};

export default App;
重新访问网页,发现功能依旧。现在我们来解释下 useReducer 这个 Hook 的工作原理。
这个 Hook 接受 3 个参数,我们只用了 2 个。useReducer 的典型使用方式如下:
const [state, dispatch] = useReducer(
    reducer,
    initialState
);
reducer 接受的参数类似于 Redux 中的用法。
const reducer = (state, action) => {
  switch (action.type) {
    case "SEARCH_MOVIES_REQUEST":
      return {
        ...state,
        loading: true,
        errorMessage: null
      };
    case "SEARCH_MOVIES_SUCCESS":
      return {
        ...state,
        loading: false,
        movies: action.payload
      };
    case "SEARCH_MOVIES_FAILURE":
      return {
        ...state,
        loading: false,
        errorMessage: action.error
      };
    default:
      return state;
  }
};
reducer 接受两个参数:initialState 和 action。基于 action.type 决定判断逻辑,并返回一个新的 state 对象。例如,当 dispatch 进来的 action.type 为 SEARCH_MOVIES_REQUEST 的话,那么更新后的状态对象中:loading 值为 true,errorMessage 值为 null。
另一个需要注意的是在 useEffect 中,我们 dispatch 的 action 对象里带有一个 payload(从接口获取的电影列表)。整个项目里包含 3 个可能的 actoin.type 值。
SEARCH_MOVIES_REQUEST:更新状态对象,loading设置为true,errorMessage设置为null。SEARCH_MOVIES_SUCCESS:更新状态对象,loading设置为false,movies设置为action.payload。SEARCH_MOVIES_FAILURE:更新状态对象,loading设置为false,errorMessage设置为action.error。
更多关于 useReducer Hook 的使用说明请查阅 官方文档。
总结
React Hook 的引入让 React 变得对新手更加友好了。我不要再对初学者介绍 JavaScript 中的 class、this、bind 的工作原理。
本教程里只介绍了为数不多的几个 Hook,我们没有讨论创建 自定义 Hook 的知识点。你可以自己实践下其他 Hook 的用例,或者创建一个符合自己需要的自定义 Hook。
在 这里 可以找到本篇文章托管在 Github 上的项目代码。
(完)
