

一、搭建开发环境
1.1 下载miniconda ,并按照文档安装
下载地址: docs.conda.io/projects/co…
1.2 在conda环境下,下载Node.js, JupyterLab,git等
- 创建虚拟环境并下载jupyterlab cookiecutter nodejs git。
conda create -n jupyterlab-ext --override-channels --strict-channel-priority -c conda-forge -c anaconda jupyterlab cookiecutter nodejs git
- 激活虚拟环境
conda activate jupyterlab-ext
二、创建一个jupyterlab插件项目
2.1 初始化一个项目
cookiecutter https://github.com/jupyterlab/extension-cookiecutter-ts --checkout v1.0
按照提示输入
author_name []: Your Name
extension_name [myextension]: jupyterlab_apod
project_short_description [A JupyterLab extension.]: Show a random NASA Astronomy Picture of the Day in a JupyterLab panel
repository [https://github.com/my_name/jupyterlab_myextension]: https://github.com/my_name/jupyterlab_apod
进入目录并列出文件
cd jupyterlab_apod
ls
将会看到以下文件
README.md package.json src style tsconfig.json
2.2 安装初始项目依赖并构建项目
在jupyterlab环境中安装初始项目依赖项
jlpm install
jupyter labextension install . --no-build
打开新的terminal(注意:激活jupyterlab-ext环境,在这个环境下运行命令), 并在监控模式下启动jupyterlab实例
conda activate jupyterlab-ext
jupyter lab --watch
打开浏览器控制台,你应该可以看到 ‘JupyterLab extension jupyterlab_apod is activated!’。若没有,请检查是否缺少了以上某步骤。
三、插件代码开发
JupyterFrontEndPlugin:JupyterFrontEnd应用程序插件的类型,继承了Phosphor 的Iplugin接口。包含:
- id(必需)-可读的插件id,在应用程序中必须是唯一的
- autoStart(可选)-应用程序启动时是否自动激活插件。默认是false
- requires(可选)-插件所需的服务类型。当插件被激活时,实例会按照顺序传递给activate()
- optional(可选)-插件的可选服务的类型。此token对应于插件可以使用的服务,可选服务将在所有必需服务之后传递给
activate()函数。 如果不能提供可选服务,解析后,将传递“ null”代替。 - provides(可选)-插件提供的服务类型。此token对应于插件导出的服务。激活插件后,将使用“activate()”的返回值作为该类型的具体实例。
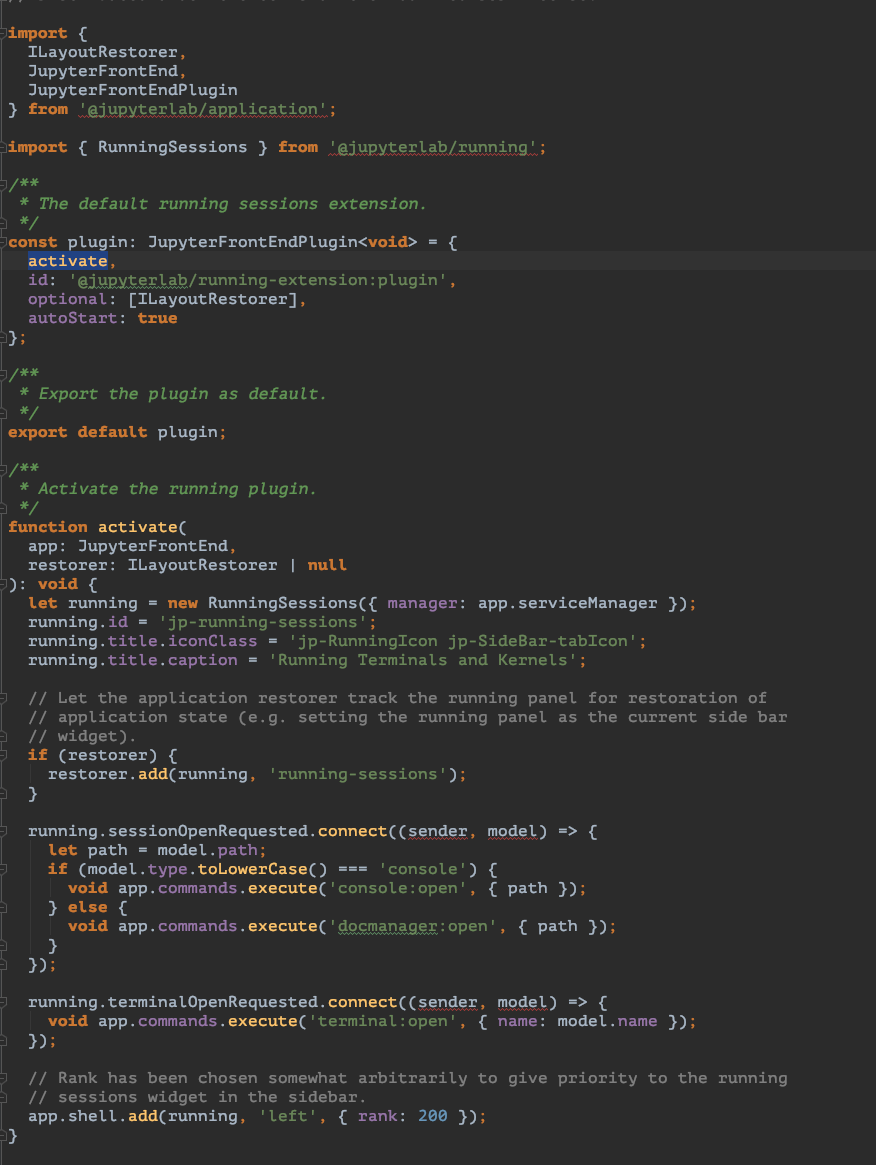
- activate(必需)-调用以激活插件的功能。
以上图为例。(running-extension)每一个插件的activate()方法中都有一个Jupyter前端应用对象(JupyterFrontEnd)。这个对象包含:
- commands-在应用程序中添加和执行命令的可扩展注册表
- commandLinker-将DOM节点与命令注册表连接,以便单击它们即可执行命令。
- docRegistry-包含应用程序能够读取和呈现的文档类型的可扩展注册表。
- restored-应用程序完成加载后执行的promise
- serviceManager-与Jupyter REST API会话的low-level manager
- shell-构成应用程序用户界面的通用的Jupyter前端Shell实例
具体代码可参照官方文档给出的示例。
官方文档例子:
jupyterlab.readthedocs.io/en/stable/d…
四、将插件发布到npmjs.org上
- 将registry切到你要发布的源上
npm set registry http://registry.npmjs.org
- 已注册用户执行下面命令(需输入账号登录,用户名,邮箱,密码)。未注册用户先去注册:www.npmjs.com/
npm login
- 发布插件包
npm publish
发布成功后,即可正常使用了!!!
五、使用已发布插件
jupyter labextension install ‘已发布插件的名字’
