

Taro 简介
Taro 是一套遵循 React 语法规范的 多端开发的解决方案。
Taro 开发微信小程序
首次使用必须安装 Taro 命令行工具
# 使用 npm 安装 CLI
$ npm install -g @tarojs/cli
# OR 使用 yarn 安装 CLI
$ yarn global add @tarojs/cli
项目初始化
$ taro init myApp
运行
# yarn
$ yarn dev:weapp
# npm script
$ npm run dev:weapp
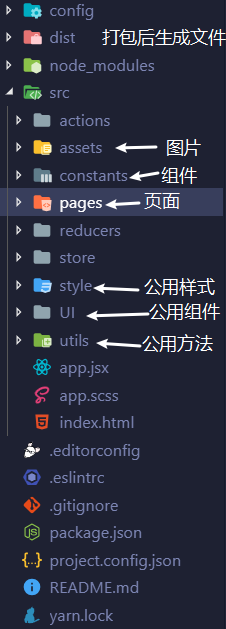
Taro 项目结构
├── config                 配置目录
|   ├── dev.js             开发时配置
|   ├── index.js           默认配置
|   └── prod.js            打包时配置
├── src                    源码目录
|   ├── components         公共组件目录
|   ├── pages              页面文件目录
|   |   ├── index          index 页面目录
|   |   |   ├── banner     页面 index 私有组件
|   |   |   ├── index.js   index 页面逻辑
|   |   |   └── index.css  index 页面样式
|   ├── utils              公共方法库
|   ├── app.css            项目总通用样式
|   └── app.js             项目入口文件
└── package.json
Taro 设计稿及尺寸单位
需要在项目配置 config/index.js 中进行设置
# 目前 Taro 支持 750、 640 、 828 三种尺寸设计稿
const config = {
  projectName: 'businessAC',
  date: '2019-9-23',
  designWidth: 750,
  deviceRatio: {
    '640': 2.34 / 2,
    '750': 1,
    '828': 1.81 / 2
 },
# 行内样式可通过 Taro.pxTransform 来进行转换
Taro.pxTransform(10) // 小程序:rpx,H5:rem
# 默认配置会对所有的 px 单位进行转换,有大写字母的 Px 或 PX 则会被忽略。
{
  onePxTransform: true, # 设置 1px 是否需要被转换
  unitPrecision: 5, # REM 单位允许的小数位。
  propList: ['*'], # 允许转换的属性。
  selectorBlackList: [], # 黑名单里的选择器将会被忽略。
  replace: true, # 直接替换而不是追加一条进行覆盖。
  mediaQuery: false, # 允许媒体查询里的 px 单位转换
  minPixelValue: 0 # 设置一个可被转换的最小 px 值
}
Taro 路由跳转
// 保留当前页面,跳转到应用内的某个页面,调用 navigateTo 跳转时,调用该方法的页面会被加入堆栈,使用wx.navigateBack可以返回到上一级页面。
Taro.navigateTo({
  url: '/pages/page/path/name'
})

// 关闭当前页面,跳转到应用内的某个页面。当前页面将不在路由堆中。
Taro.redirectTo({
  url: '/pages/page/path/name'
})

// 关闭当前页面,返回上一页面或多级页面。可通过 Taro.getCurrentPages() 获取当前的页面栈,决定需要返回几层。
Taro.navigateBack({
  delta: 2
})

// 关闭所有页面,打开到应用内的某个页面。
Taro.reLanch({
  url: 'page/home/home?params=xxx'
})
静态资源的引入
# 引入 scss
import './css/path/name.scss'
# 引入 js
import { functionName } from './css/path/name.js'
# 引入 图片
import namedPng from '../../images/path/named.png'
条件渲染
# 逻辑运算符 &&
{isLoggedIn && <Text>已登录</Text>}
{!isLoggedIn && <Text>未登录</Text>}

# 三元运算符(条件表达式)
{isLoggedIn ? <Text>已登录</Text> : <Text>未登录</Text>}

# 枚举条件渲染 (0.0 看文档才发现还可以这样...)
{
    {
      'loading': loadingText,
      'fail': <View onClick={onRetry}> 加载失败, 点击重试 </View>,
      'no-more': '没有更多了'
    }[loadingStatus] # loadingStatus 是 `loading`、`fail`、`no-more`  其中一种状态
}
组件使用 PropTypes 检查类型 与 defaultProps 设置默认值
export default class Picker extends PureComponent {

  static propTypes = {
    data: PropTypes.array,
    itemHeight: PropTypes.number,
    tempIndex: PropTypes.number,
    onJustTemp: PropTypes.func,
  }

  static defaultProps = {
    data: [],
    itemHeight: 100,
    tempIndex: 1,
    onJustTemp: () => console.log('please attach a method to Card Component')
  }

  render() {
    return (
      <h1>Hello, {this.props.itemHeight}</h1>
    );
  }
外部样式类 可以使用 externalClasses
# CustomComp.js
export default class CustomComp extends Component {
  static externalClasses = ['my-class']

  render () {
    return <View className="my-class">这段文本的颜色由组件外的 class 决定</View>
  }
}

# MyPage.js
export default class MyPage extends Component {
  render () {
    return <CustomComp my-class="red-text" />
  }
}
# MyPage.scss
.red-text {
  color: red;
}
注意:externalClasses 需要使用 短横线命名法 (kebab-case),而不是 React 惯用的 驼峰命名法 (camelCase)。否则无效。
全局样式类
# 使用外部样式类可以让组件使用指定的组件外样式类,
# 如果希望组件外样式类能够完全影响组件内部,
# 可以将组件构造器中的 options.addGlobalClass 字段置为 true。
# CustomComp.js
export default class CustomComp extends Component {
  static options = {
    addGlobalClass: true
  }

  render () {
    return <View className="red-text">这段文本的颜色由组件外的 class 决定</View>
  }
}

# 组件外的样式定义
.red-text {
  color: red;
}
预加载
在微信小程序、支付宝小程序、字节跳动小程序和QQ轻应用中,从调用 Taro.navigateTo、Taro.redirectTo 或 Taro.switchTab 后,到页面触发 componentWillMount 会有一定延时。因此一些网络请求可以提前到发起跳转前一刻去请求。
Taro 提供了 componentWillPreload 钩子,它接收页面跳转的参数作为参数。可以把需要预加载的内容通过 return 返回,然后在页面触发 componentWillMount 后即可通过 this.$preloadData 获取到预加载的内容。
class Index extends Component {
  componentWillMount () {
    console.log('isFetching: ', this.isFetching)
    this.$preloadData
      .then(res => {
        console.log('res: ', res)
        this.isFetching = false
      })
  }

  componentWillPreload (params) {
    return this.fetchData(params.url)
  }

  fetchData () {
    this.isFetching = true
    ...
  }
}
在小程序中,可以使用 this.$preload 函数进行页面跳转传参
用法:this.$preload(key: String | Object, [ value: Any ])
之所以命名为 $preload,因为它也有一点预加载数据的意味。
如果觉得每次页面跳转传参时,需要先把参数 stringify 后加到 url 的查询字符串中很繁琐,可以利用 this.$preload 进行传参。
另外如果传入的是下一个页面的数据请求 promise,也有上一点提到的“预加载”功能,也能够绕过 componentWillMount 延时。不同点主要在于代码管理,开发者可酌情使用。
// 传入单个参数

// A 页面
// 调用跳转方法前使用 this.$preload
this.$preload('key', 'val')
Taro.navigateTo({ url: '/pages/B/B' })

// B 页面
// 可以于 this.$router.preload 中访问到 this.$preload 传入的参数
componentWillMount () {
  console.log('preload: ', this.$router.preload.key)
}

// 传入多个参数

// A 页面
this.$preload({
  x: 1,
  y: 2
})
Taro.navigateTo({ url: '/pages/B/B' })

// B 页面
componentWillMount () {
  console.log('preload: ', this.$router.preload)
}
全局变量
在 Taro 中推荐使用 Redux 来进行全局变量的管理,但是对于一些小型的应用, Redux 就可能显得比较重了,这时候如果想使用全局变量,推荐如下使用。
新增一个自行命名的 JS 文件,例如 global_data.js,示例代码如下
const globalData = {}

export function set (key, val) {
  globalData[key] = val
}

export function get (key) {
  return globalData[key]
}

# 使用
import { set as setGlobalData, get as getGlobalData } from './path/name/global_data'

setGlobalData('test', 1)

getGlobalData('test')
入口文件的生命周期
| 生命周期方法 | 作用 | 说明 |
|---|---|---|
| componentWillMount | 程序被载入 | 在微信小程序中这一生命周期方法对应 app 的 onLaunch |
| componentDidMount | 程序被载入 | 在微信小程序中这一生命周期方法对应 app 的 onLaunch,在 componentWillMount 后执行 |
| componentDidShow | 程序展示出来 | 在微信小程序中这一生命周期方法对应 onShow,在 H5 中同样实现 |
| componentDidHide | 程序被隐藏 | 在微信小程序中这一生命周期方法对应 onHide,在 H5 中同样实现 |
| componentDidCatchError | 错误监听函数 | 在微信小程序中这一生命周期方法对应 onError |
| componentDidNotFound | 页面不存在监听函数 | 在微信小程序中这一生命周期方法对应 onPageNotFound |
微信小程序中 onLaunch 通常带有一个参数 options,在 Taro 中你可以在所有生命周期和普通事件方法中通过 this.$router.params 访问到
页面的生命周期
| 生命周期方法 | 作用 | 说明 |
|---|---|---|
| componentWillMount | 页面被载入 | 在微信小程序中这一生命周期方法对应 onLoad |
| componentDidMount | 页面渲染完成 | 在微信小程序中这一生命周期方法对应 onReady |
| componentWillReceiveProps | props改变 | |
| shouldComponentUpdate | 页面是否需要更新 | |
| componentWillUpdate | 页面即将更新 | |
| componentDidUpdate | 页面更新完毕 | |
| componentWillUnmount | 页面退出 | 在微信小程序中这一生命周期方法对应 onUnload |
| componentDidShow | 页面展示出来 | 在微信小程序中这一生命周期方法对应 onShow,在 H5 中同样实现 |
| componentDidHide | 页面被隐藏 | 在微信小程序中这一生命周期方法对应 onHide,在 H5 中同样实现 |
小程序 navigateBack 返回上一级页面 componentWillMount 周期不再执行
未解决... 由于 navigateBack 的页面会执行 componentDidShow 所以把请求函数写在 componentDidShow 这一周期里 0.0
调用 this.setState 时使用 this.state
this.setState({ value: this.state.value + 1 })   # ✗ 错误
this.setState(prevState => ({ value: prevState.value + 1 }))    # ✓ 正确
在 componentWillUpdate/componentDidUpdate/render 中调用 this.setState
# componentWillReceiveProps 可以在这一生命周期里更新 最新的 props 从 nextProps 获取
componentWillReceiveProps = (nextProps) => {
    this.setState({ pickIndex: nextProps.tempIndex })
}
不能在包含 JSX 元素的 map 循环中使用 if 表达式
# 会被 ESLint 提示警告,同时在 Taro(小程序端)也不会有效
numbers.map((number) => {
  let element = null
  const isOdd = number % 2
  if (isOdd) {
    element = <Custom />
  }
  return element
})
# 可以写成这样
numbers.map((number) => {
  let isOdd = false
  if (number % 2) {
    isOdd = true
  }
  return isOdd && <Custom />
})
