1. Express引入及安装(node web框架)
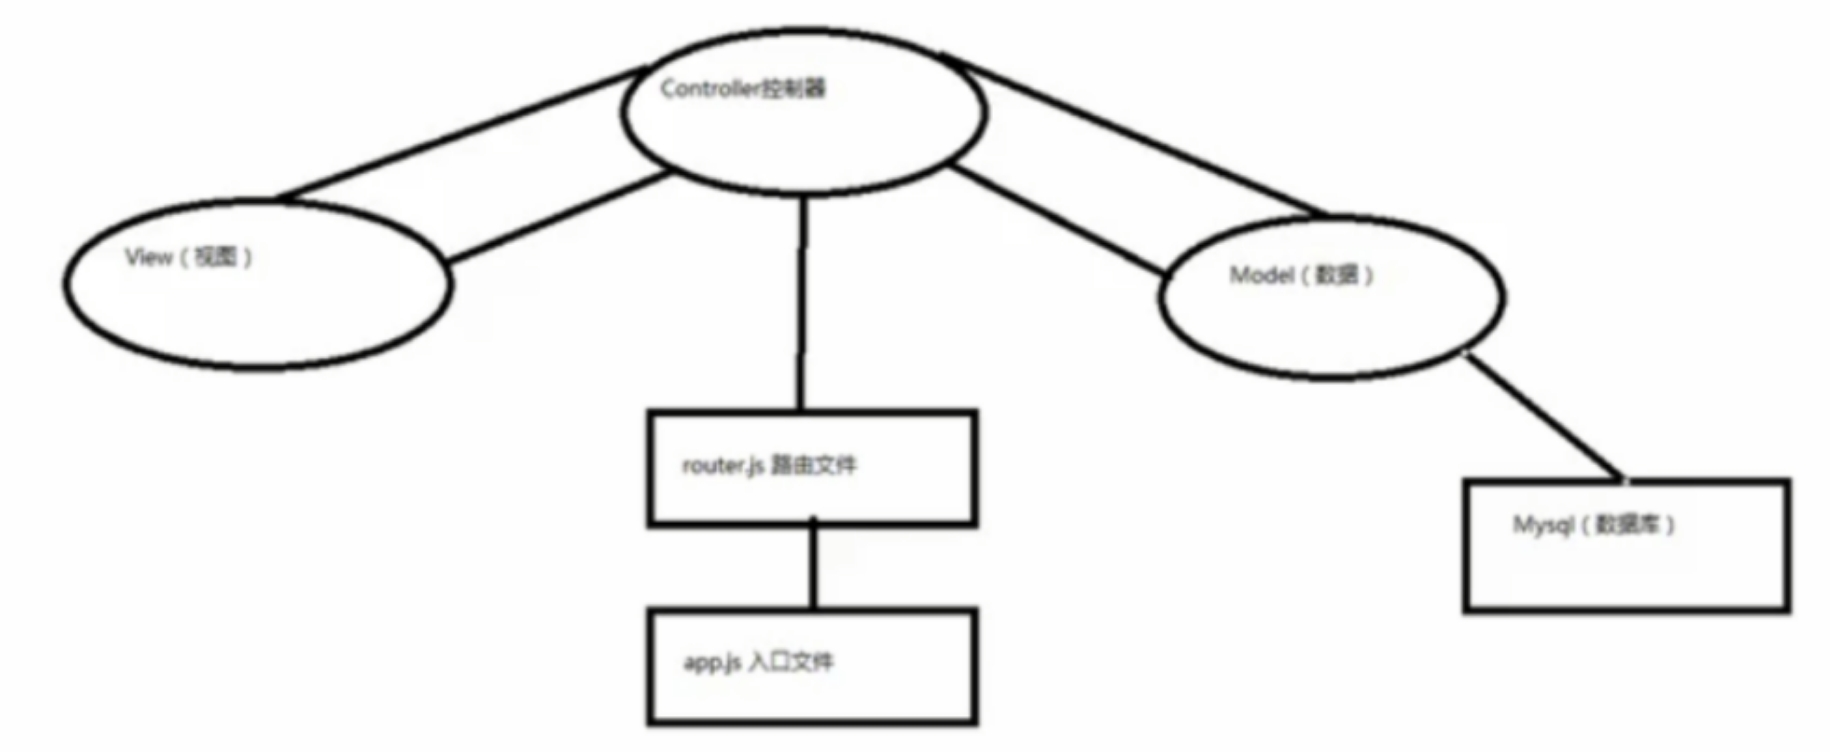
1. MVC
- M -- Model
- v -- View(后端渲染)
- c -- Controller
- 一个controller对应一个model
2. pc -- mobile
- pc 数据和模板在服务器端合成一个数据包传回浏览器
- mobile 前端渲染 模板一次传递 数据多次重传 渲染在前端完成
- express+postman 测接口 json数据
3. express
    npm install -g express
    npm install express-geneator
express -e blog
cd blog
npm install
node ./bin/www
npm install
npm install md5 --save
npm install md5 --save-dev
4. express原理
5. 入口文件
- 设置全局变量和全集方法
- 引入路由
6. express支持模板
7. 测接口
- apiview
- postman
- github
- gitlab
8. req.body
exports.do_login = function (req, res, next) {
var name = req.body.username;
var pass = req.body.pass;
}
9. 连接数据库
mysql包
- mysql
npm install mysql --save
- 启动mysql
- 启动XAMpp -- mysql -- start
- 启动navicat -- 新建连接 -- 新建数据库 -- 字符集
utf8--UTF-8 Unicode -- 排序规则utf8_general_ci -- 右击运行sql文件 -- 表
- user.js引入
    var mysql      = require('mysql');
    var connection = mysql.createConnection({
      host     : 'localhost',
      user     : 'me',
      password : 'secret',
      database : 'my_db'
    });
    connection.connect();
    connection.query('SELECT 1 + 1 AS solution', function (error, results, fields) {
      if (error) throw error;
      console.log('The solution is: ', results[0].solution);
    });

    connection.end();
2. express -- request
3. express -- response
res.json([status|body], [body])
- 返回一个
JSON响应.
- 当
res.send()的参数是一个对象或者数组的时候,会调用这个方法.
- 当然它也在复杂的空值
(null,undefined,etc),JSON转换的时候很有用,因为规范上这些对象不是合法的JSON.
    res.json(null)
    res.json({ user: 'tobi' })
    res.json(500, { error: 'message' })


