

创建项目
1.通过骨架创建

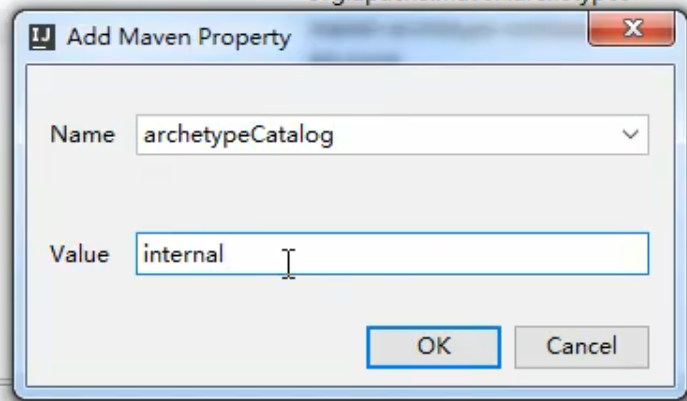
2.添加properties属性避免加载过慢
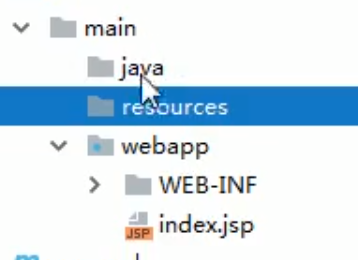
3.补齐目录
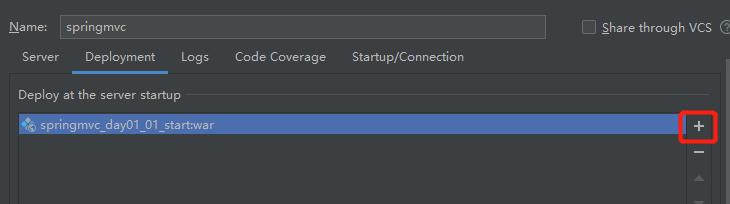
4.Tomcat配置

5.springmvc.xml配置
<beans xmlns="http://www.springframework.org/schema/beans"
       xmlns:mvc="http://www.springframework.org/schema/mvc"
       xmlns:context="http://www.springframework.org/schema/context"
       xmlns:xsi="http://www.w3.org/2001/XMLSchema-instance"
       xsi:schemaLocation="
        http://www.springframework.org/schema/beans
        http://www.springframework.org/schema/beans/spring-beans.xsd
        http://www.springframework.org/schema/mvc
        http://www.springframework.org/schema/mvc/spring-mvc.xsd
        http://www.springframework.org/schema/context
        http://www.springframework.org/schema/mvc/spring-context.xsd">
</beans>
6.开启注解扫描
<context:component-scan base-package="cn.itcatst.controller"></context:component-scan>
7.视图解析器
<!--视图解析器对象-->
    <bean id="internalResourceViewResolver" class="org.springframework.web.servlet.view.InternalResourceViewResolver">
<!--        文件的前缀名-->
        <property name="prefix" value="/WEB-INF/pages/"/>
<!--        文件的后缀名-->
        <property name="suffix" value=".jsp"/>
8.在web.xml中关联控制器类
<!--    全局初始化参数-->
    <init-param>
      <param-name>contextConfigLocation</param-name>
      <param-value>classpath:springmvc.xml</param-value>
    </init-param>
<!--    第一次启动时扫描时加载springmvc.xml配置-->
    <load-on-startup>1</load-on-startup>
9.mvc框架支持配置
<!--    开启SpringMVC框架注解的支持-->
    <mvc:annotation-driven></mvc:annotation-driven>
10.文件路径添加即可运行
