

MyBatis 是一款优秀的持久层框架,它支持定制化 SQL、存储过程以及高级映射。MyBatis 避免了几乎所有的 JDBC 代码和手动设置参数以及获取结果集。MyBatis 可以使用简单的 XML 或注解来配置和映射原生类型、接口和 Java 的 POJO(Plain Old Java Objects,普通老式 Java 对象)为数据库中的记录。
MyBatis官网:https://mybatis.org/mybatis-3/zh/index.html
相信大家对MyBatis都不陌生,在实际开发应用中,应用的比较多,它常常与SpringBoot框架,Spring框架 进行整合,进而开发相关的网站以及服务。
MyBatis有一个强大且实用的功能,就是在经过配置之后,可以帮助我们一键生成代码,减少相关的开发工作量。
下面就利用MyBatis的代码生成器工具(mybatis-generator),为我们生成一套代码,生成的代码实现了CRUD功能,我们就可以直接使用它。具体操作步骤如下:
Mybatis-generator文档:http://mybatis.org/generator/index.html
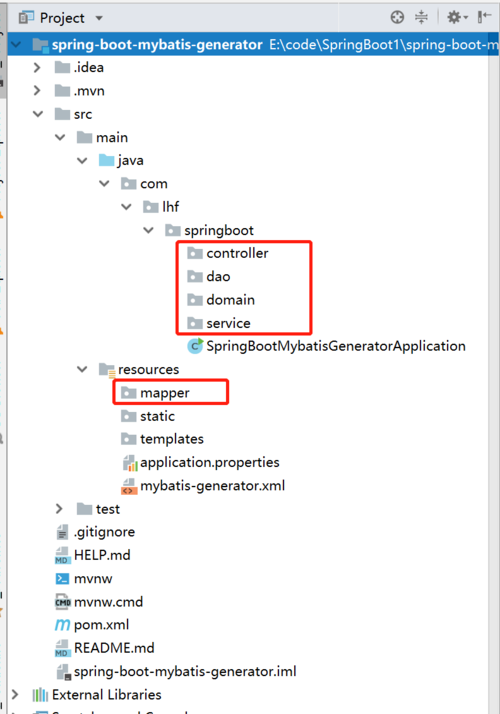
1. 创建SpringBoot工程项目,并创建dao,domain,mapper目录,如下:
2. 创建数据库相关的表,这里省略SQL语句
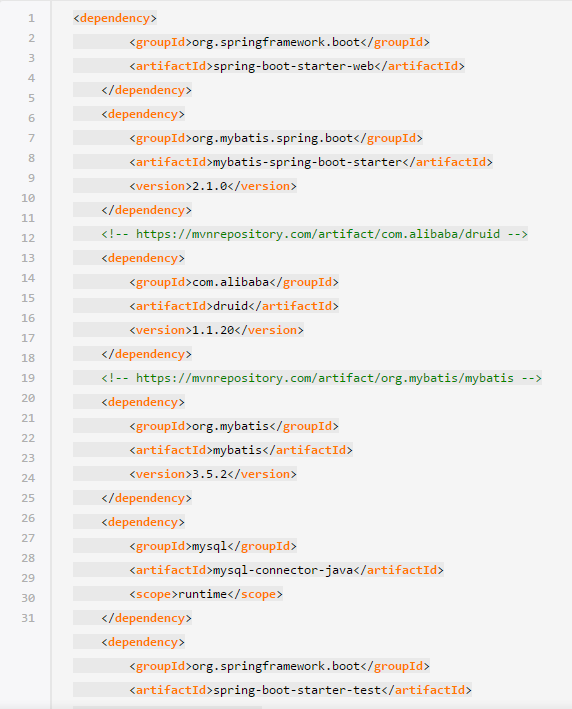
2. 添加pom.xml配置依赖,并修改pom.xml文件
、
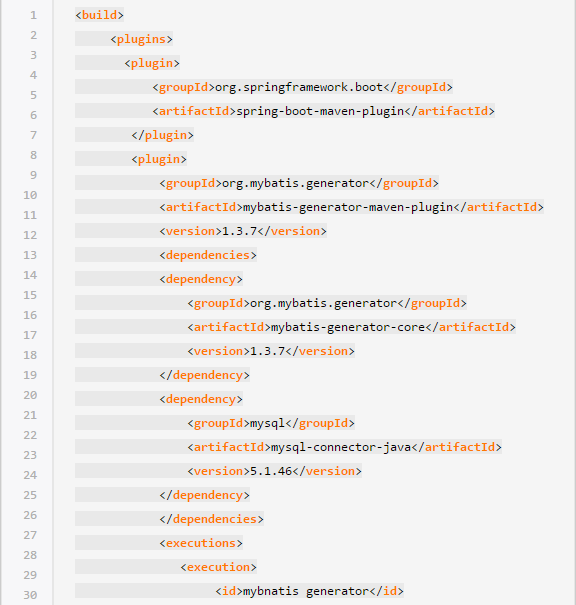
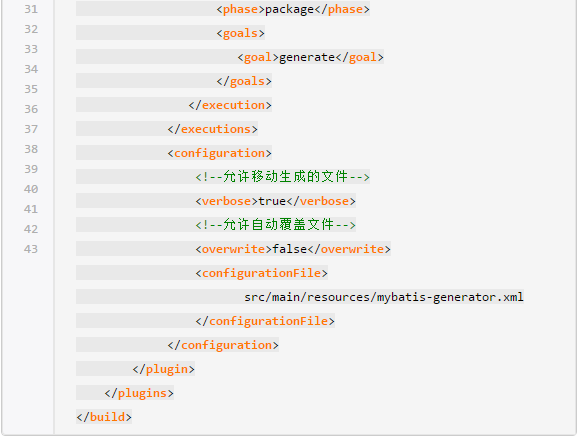
修改pom.xml文件的build结构,完成mybatis-generator的配置,替换为如下配置
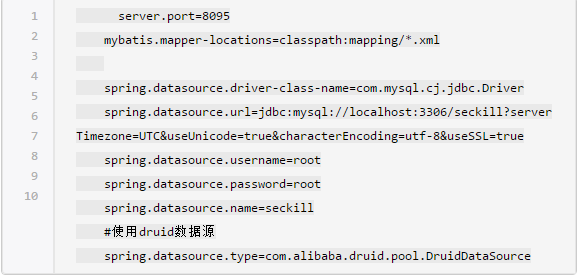
3. 配置属性application.properties文件,如下:
4. 编写mybatis-generator.xml文件,内容如下:
?xml version=1.0 encoding=UTF-8?
!DOCTYPE generatorConfiguration
PUBLIC -//mybatis.org//DTD MyBatis Generator Configuration 1.0//EN
http://mybatis.org/dtd/mybatis-generator-config_1_0.dtd
generatorConfiguration
!--驱动包的路径--
!--classPathEntry location=C:\Users\lhf\.m2\repository\mysql\mysql-connector-java\5.1.46\mysql-connector-java-5.1.46.jar /--
!--数据库连接--
context id=DB2Tables targetRuntime=MyBatis3
!--注释--
commentGenerator
property name=suppressAllComments value=true/
property name=suppressDate value=true/
/commentGenerator
!--数据库连接地址及账号密码--
jdbcConnection driverClass=com.mysql.jdbc.Driver
connectionURL=jdbc:mysql://127.0.0.1:3306/seckill
userId=root
password=root
/jdbcConnection
javaTypeResolver
property name=forceBigDecimals value=false /
/javaTypeResolver
!--生成entity类存放位置--
javaModelGenerator targetPackage=com.lhf.springboot.domain targetProject=src/main/java
!--是否对model添加构造函数--
property name=constructorBased value=false/
!--是否允许子包--
property name=enableSubPackages value=true/
!--建立的model对象是否不可变,也就是生成的model没有setter方法--
property name=immutable value=false/
property name=trimStrings value=true/
/javaModelGenerator
!--生成映射文件存放位置--
sqlMapGenerator targetPackage=mapper targetProject=src/main/resources
property name=enableSubPackages value=true /
/sqlMapGenerator
!--生成Dao类的存放位置--
!-- 客户端代码,生成易于使用的正对Model对象和XML配置文件的代码
type=ANNOTATEDMAPPER, 生成Java Model和基于注解的Mapper对象
type=MIXEDMAPPER, 生成基于注解的Java Model和相应的Mapper对象
type=XMLMAPPER, 生成SQLMap XML文件和独立的Mapper接口
--
javaClientGenerator type=XMLMAPPER targetPackage=com.lhf.springboot.dao targetProject=src/main/java
property name=enableSubPackages value=true /
/javaClientGenerator
!--请根据自己数据库对应的表名进行配置修改,这里仅供参考--
!--生成对应表及类名--
table schema=mybatis tableName=user_info domainObjectName=User
enableInsert=true enableSelectByExample=false
enableDeleteByPrimaryKey=false enableDeleteByExample=false
enableCountByExample=false enableUpdateByExample=false
enableSelectByPrimaryKey=true enableUpdateByPrimaryKey=true/
table tableName=item domainObjectName=Item enableCountByExample=false
enableUpdateByExample=false enableDeleteByExample=false
enableSelectByExample=false selectByExampleQueryId=false
enableInsert=true enableDeleteByPrimaryKey=false /table
table tableName=item_stock domainObjectName=ItemStock enableCountByExample=false
enableUpdateByExample=false enableDeleteByExample=false
enableSelectByExample=false selectByExampleQueryId=false
enableInsert=true enableDeleteByPrimaryKey=false /table
table tableName=order_info domainObjectName=OrderInfo enableCountByExample=false
enableUpdateByExample=false enableDeleteByExample=false
enableSelectByExample=false selectByExampleQueryId=false
enableInsert=true enableDeleteByPrimaryKey=false /table
/context
/generatorConfiguration
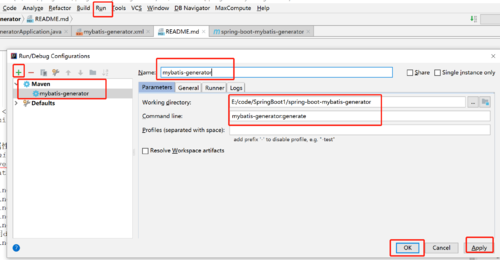
5. 配置执行mybatis-generator文件,配置操作步骤:
Run - Edit Configurations - + - Maven - 配置,如图
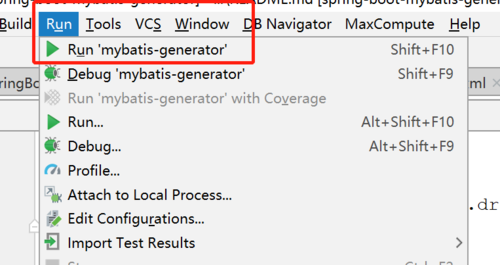
6. 执行生成代码,Run - Run 'mybatis-generator', 点击执行即可生成代码,如图
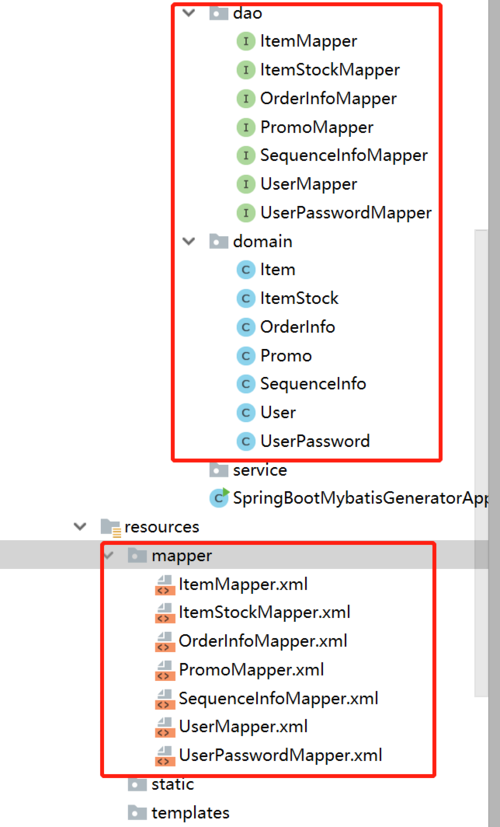
7. 看到日志成功了,到此就完成了代码的自动生成功能了!生成的代码如图:
是不是很简单呢?关于SpringBoot与MyBatis整合相关的知识点,请自行研究。
