

注:先报版本,CentOS7.6.1810+Nginx1.17.4+Tomcat8.5.46。省得弄完不好用,结果发现是版本原因……
1、编辑nginx.conf文件
vim /usr/local/nginx1174/conf/nginx.conf
修改后的信息内容如下:
#user  nobody;
# 核心worker数,一般设置为与cpu核心数相同的数目,避免进程切换造成的上下文切换耗费资源,cpu信息可以从/proc/cpuinfo中查看
worker_processes  8;

#error_log  logs/error.log;
#error_log  logs/error.log  notice;
#error_log  logs/error.log  info;

#pid        logs/nginx.pid;


events {
    # use epoll model使用epoll模型,采用异步非阻塞模型加快处理速度
    use epoll;
    worker_connections  1024;
}


http {
    include       mime.types;
    default_type  application/octet-stream;

    #log_format  main  '$remote_addr - $remote_user [$time_local] "$request" '
    #                  '$status $body_bytes_sent "$http_referer" '
    #                  '"$http_user_agent" "$http_x_forwarded_for"';

    #access_log  logs/access.log  main;

    sendfile        on;
    #tcp_nopush     on;

    #keepalive_timeout  0;
    # 连接活跃时间
    keepalive_timeout  65;

    #gzip  on;

    server {
        listen       80;
        server_name  localhost;
        # 将路径配置至tomcat的web路径下
        root   /usr/local/tomcat8546/webapps/;
        # index  index.html index.htm index.jsp;
        #charset koi8-r;

        #access_log  logs/host.access.log  main;

        # 将gif|jpg|jpeg|png|bmp|swf|flv|mp4|ico交由nginx处理并缓存30天
        location ~ .*\.(gif|jpg|jpeg|png|bmp|swf|flv|mp4|ico)  {
            # Tomcat默认的root中的图片与样式存放在这里,自己写时不需要这么配置
            root   /usr/local/tomcat8546/webapps/ROOT;
            # 缓存天数
            expires 30d;
            # 关闭日志
            access_log off;
        }
        location ~ .*\.(js|css)?$ {
            # Tomcat默认的root中的图片与样式存放在这里,自己写时不需要这么配置
            root   /usr/local/tomcat8546/webapps/ROOT;
            expires 7d;
            access_log off;
        }
        location ~ ^/(\.user.ini|\.ht|\.git|\.svn|\.project|LICENSE|README.md) {
            deny all;
        }
        # 其他页面交给tomcat
        location ~ .(jsp|jspx|do|action)?$ {
            proxy_set_header Host $host;
            proxy_set_header X-Real-IP $remote_addr;
            proxy_set_header X-Forwarded-For $proxy_add_x_forwarded_for;
            # tomcat的访问地址
            proxy_pass http://127.0.0.1:8080;
        }

        #error_page  404              /404.html;

        # redirect server error pages to the static page /50x.html
        #
        error_page   500 502 503 504  /50x.html;
        location = /50x.html {
            root   html;
        }

        # proxy the PHP scripts to Apache listening on 127.0.0.1:80
        #
        #location ~ \.php$ {
        #    proxy_pass   http://127.0.0.1;
        #}

        # pass the PHP scripts to FastCGI server listening on 127.0.0.1:9000
        #
        #location ~ \.php$ {
        #    root           html;
        #    fastcgi_pass   127.0.0.1:9000;
        #    fastcgi_index  index.php;
        #    fastcgi_param  SCRIPT_FILENAME  /scripts$fastcgi_script_name;
        #    include        fastcgi_params;
        #}

        # deny access to .htaccess files, if Apache's document root
        # concurs with nginx's one
        #
        #location ~ /\.ht {
        #    deny  all;
        #}
    }


    # another virtual host using mix of IP-, name-, and port-based configuration
    #
    #server {
    #    listen       8000;
    #    listen       somename:8080;
    #    server_name  somename  alias  another.alias;

    #    location / {
    #        root   html;
    #        index  index.html index.htm;
    #    }
    #}


    # HTTPS server
    #
    #server {
    #    listen       443 ssl;
    #    server_name  localhost;

    #    ssl_certificate      cert.pem;
    #    ssl_certificate_key  cert.key;

    #    ssl_session_cache    shared:SSL:1m;
    #    ssl_session_timeout  5m;

    #    ssl_ciphers  HIGH:!aNULL:!MD5;
    #    ssl_prefer_server_ciphers  on;

    #    location / {
    #        root   html;
    #        index  index.html index.htm;
    #    }
    #}

}
能看懂的直接拿走,修改两个路径应该直接就可以用,看不懂的继续往下看,我说说哪些地方是整合时需要修改或添加的
2、配置文件中需修改的内容
(1)修改资源路径
    # 将路径配置至tomcat的web路径下
    root   /usr/local/tomcat8546/webapps;
将nginx的root直接指向tomcat的webapps,省时省力,我见过有不指的,然后将静态资源上传至一个路径,动态资源再上传至另一个路径下,兄弟,你不累吗?
(2)添加动静分离配置
        # 将gif|jpg|jpeg|png|bmp|swf|flv|mp4|ico交由nginx处理并缓存30天
        location ~ .*\.(gif|jpg|jpeg|png|bmp|swf|flv|mp4|ico)  {
            # Tomcat默认的root中的图片与样式存放在这里,自己写时不需要这么配置
            root   /usr/local/tomcat8546/webapps/ROOT;
            # 缓存天数
            expires 30d;
            # 关闭日志
            access_log off;
        }
        location ~ .*\.(js|css)?$ {
            # Tomcat默认的root中的图片与样式存放在这里,自己写时不需要这么配置
            root   /usr/local/tomcat8546/webapps/ROOT;
            expires 7d;
            access_log off;
        }
        location ~ ^/(\.user.ini|\.ht|\.git|\.svn|\.project|LICENSE|README.md) {
            deny all;
        }
        # 其他页面交给tomcat
        location ~ .(jsp|jspx|do|action)?$ {
            proxy_set_header Host $host;
            proxy_set_header X-Real-IP $remote_addr;
            proxy_set_header X-Forwarded-For $proxy_add_x_forwarded_for;
            # tomcat的访问地址
            proxy_pass http://127.0.0.1:8080;
        }
3、测试配置文件并重启nginx
/usr/local/nginx1174/sbin/nginx -t

/usr/local/nginx1174/sbin/nginx -s reload
如果提示找不到nginx.pid,下面有解决方案。
4、访问页面
http://localhost/
如果没有进行过任何配置,您看到的应该是这样儿的画面
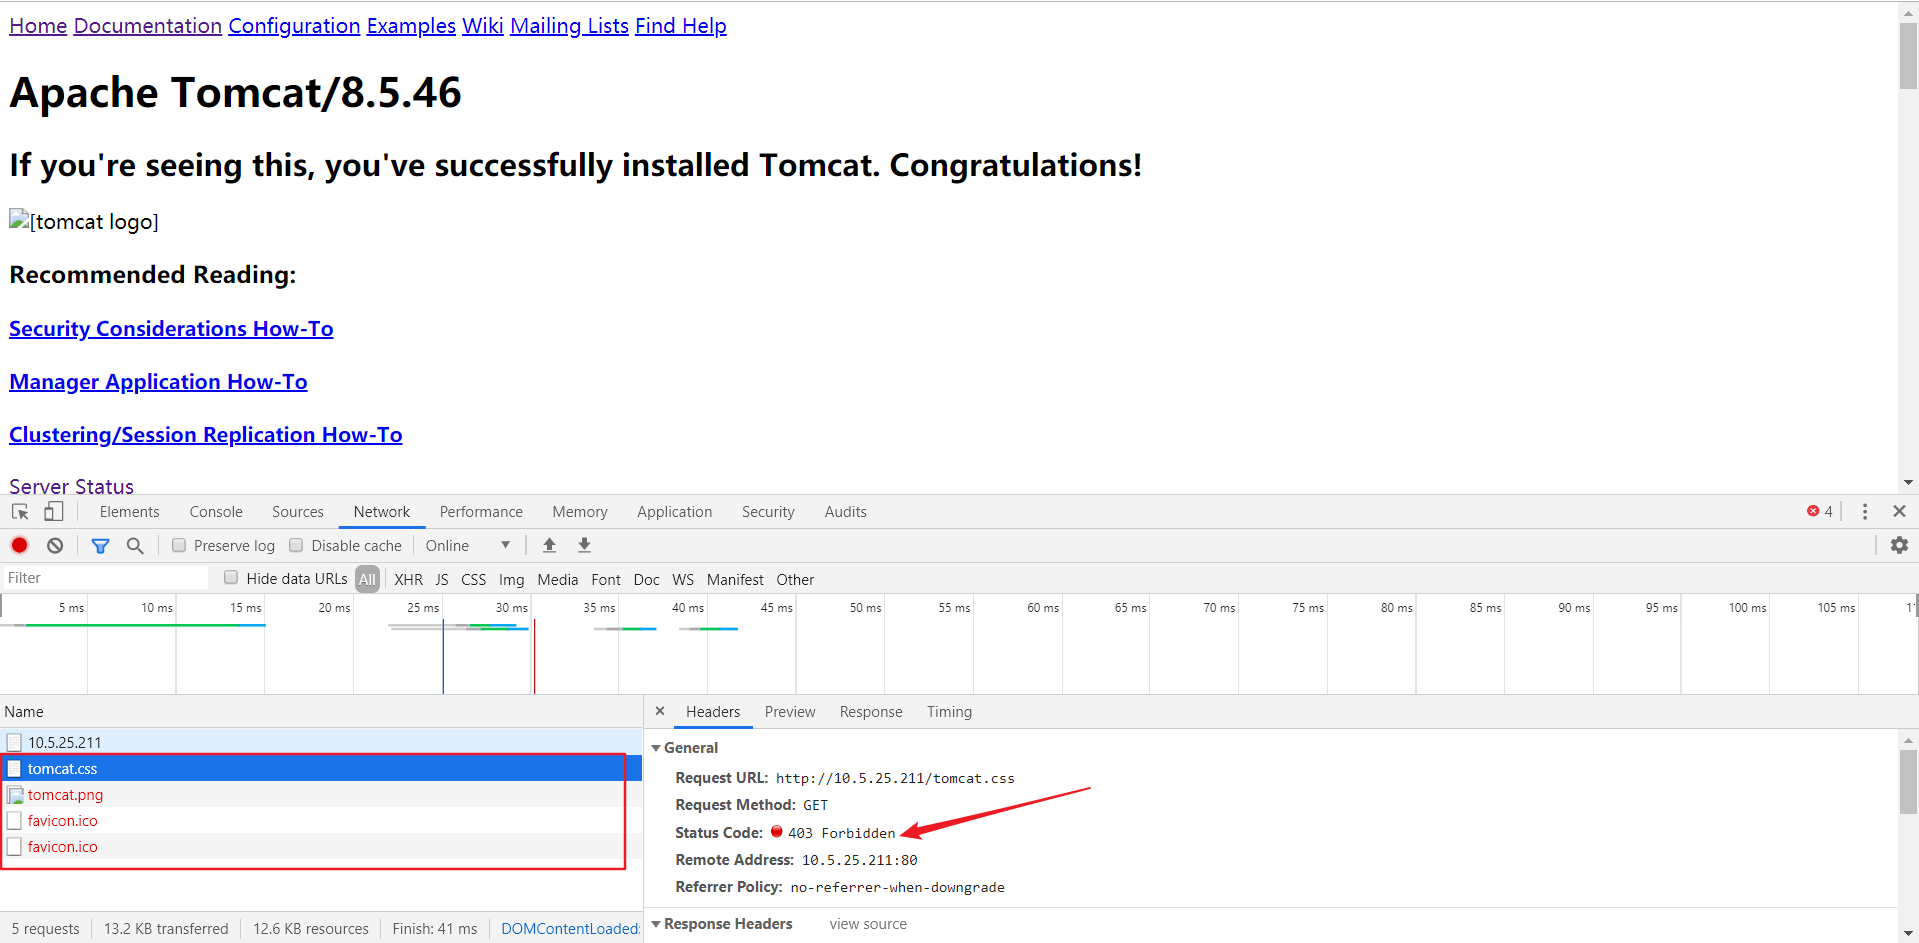
按F12打开调试,发现png/css/ico都没过来,错误是403 Forbidden……
莫慌,修改下权限即可
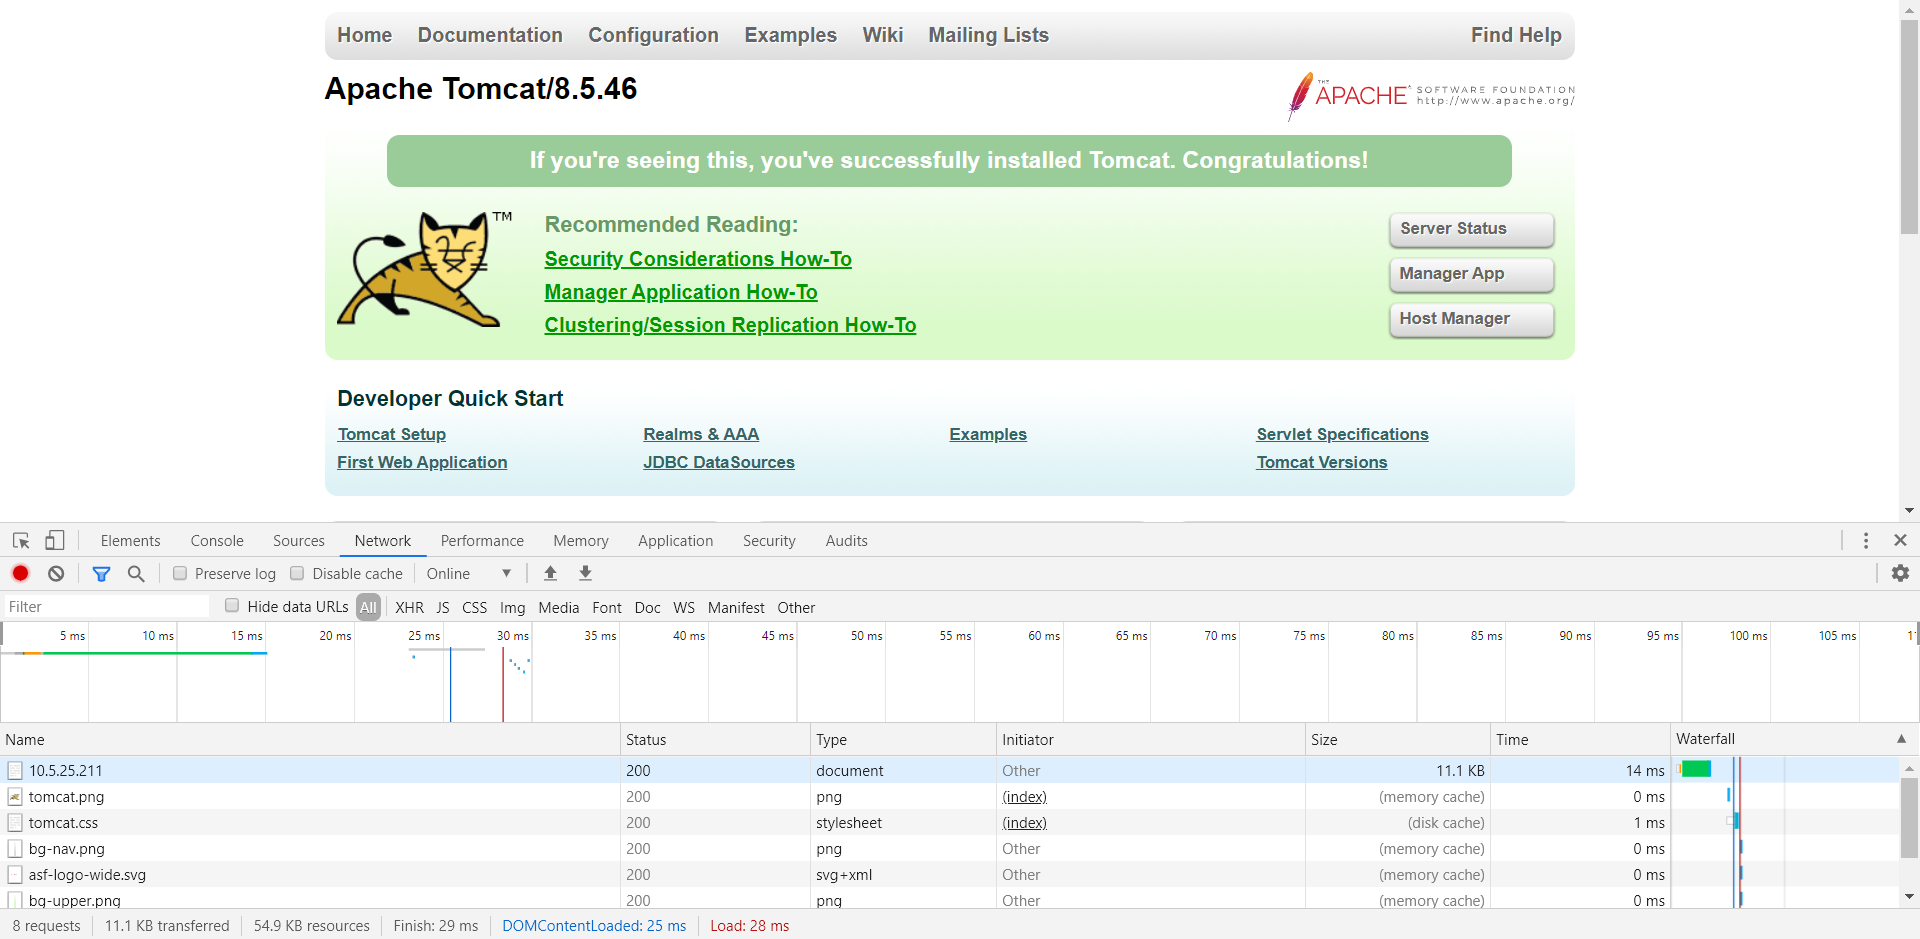
chmod -R 777 /usr/local/tomcat8546/webapps/
重新刷新,看到了我们熟悉的大猫
5、可能会遇到的一些错误 (1)An error occurred.
An error occurred.
Sorry, the page you are looking for is currently unavailable.
Please try again later.

If you are the system administrator of this resource then you should check the error log for details.

Faithfully yours, nginx.
兄弟,你的tomcat忘启动了……
(2)403 Forbidden 查看日志
vim /usr/local/nginx1174/logs/error.log
发现错误原因
2019/09/27 22:28:36 [error] 29712#0: *14 open() "/usr/local/tomcat8546/webapps/001.png" failed (13: Permission denied), client: 10.5.25.102, server: localhost, request: "GET /001.png HTTP/1.1", host: "10.5.25.211"
修改权限
chmod -R 777 /usr/local/tomcat8546/webapps/
(3)nginx.pid问题
nginx: [error] open() “/usr/local/nginx/logs/nginx.pid” failed
重新引用配置文件
/usr/local/nginx/sbin/nginx -c /usr/local/nginx/conf/nginx.conf
完事儿后说点闲白,为什么要整合?这也是我写这篇文章的原因,我检索整合配置的时候,发同网上很多文章,只是将所有请求直接转发给了Tomcat而已……,哦……,从理论上您的确实现了Nginx与Tomcat的整合,但我想弱弱的问一句,这事儿放个Tomcat自己玩得不是挺好的么?为什么还要加个Nginx?
其实我觉得最主要的原因是实现动静分离,就是将静态资源交由Nginx处理(png/css/js),将动态资源交由Tomcat处理(jsp/do/action)。至于负载均衡、域名解析我相信资深一些的程序员用Tomcat自己就实现过。八卦下,曾经还有个面试官用非常质疑的语气反问我,Tomcat能解析域名?兄弟,你还是太年轻,在哥的那个年代用Tomcat连负载均衡都做过……,域名解析?自己写段代码都能解析
那为什么要用Nginx整合Tomcat?以前不是有个叫Apache的哥哥和Tomcat玩得也挺好的么?咋就分手了呢?因为Nginx支持一个叫反向代理的东东,所以自打2013年以后,Nginx网站的数量好像就超过了Apache网站的数量……,那么反向代理是啥玩意儿?下篇再讲吧,我得去玩VUE时间轴了……
