

如效果图,首先向相册获取图片
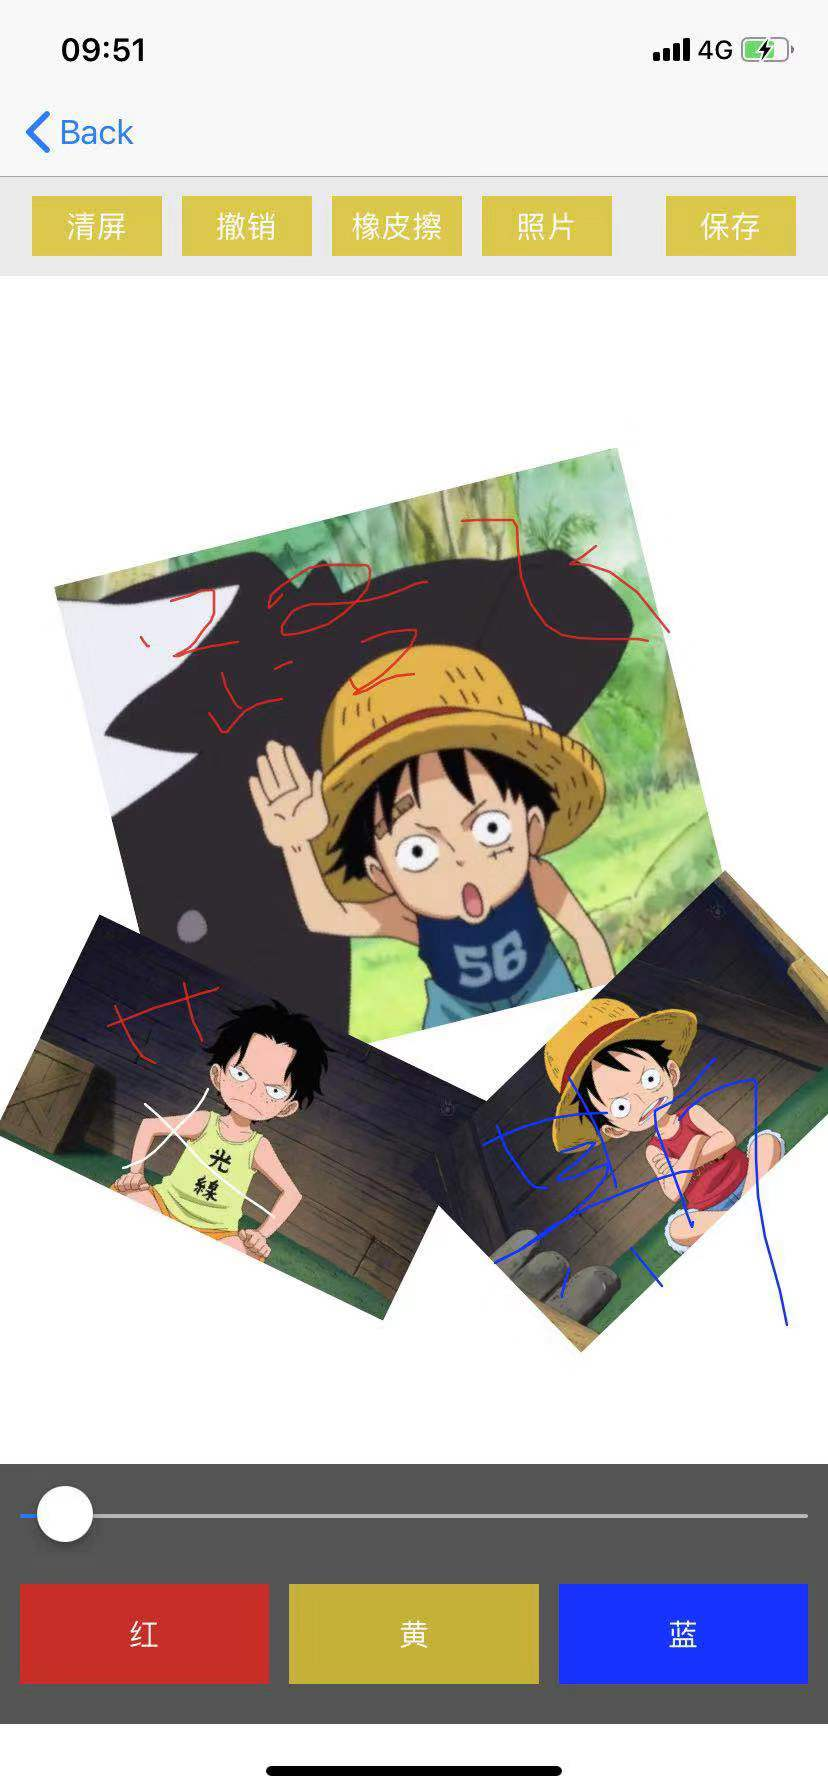
给图片添加多种手势。
- (void)addGes {
    //pan
    //拖拽手势
    UIPanGestureRecognizer *pan = [[UIPanGestureRecognizer alloc] initWithTarget:self action:@selector(pan:)];
    [self.imageView addGestureRecognizer:pan];

    //pinch
    //捏合
     UIPinchGestureRecognizer *pinch = [[UIPinchGestureRecognizer alloc] initWithTarget:self action:@selector(pinch:)];
     pinch.delegate = self;
     [self.imageView addGestureRecognizer:pinch];
    //添加旋转
     UIRotationGestureRecognizer *rotation = [[UIRotationGestureRecognizer alloc] initWithTarget:self action:@selector(rotation:)];
     rotation.delegate = self;
     [self.imageView addGestureRecognizer:rotation];
    //长按手势
     UILongPressGestureRecognizer *longPress = [[UILongPressGestureRecognizer alloc] initWithTarget:self action:@selector(longPress:)];
     [self.imageView addGestureRecognizer:longPress];
}
捏合手势,还要记住图片的状态,复位
//捏合
- (void)pinch:(UIPinchGestureRecognizer *)pinch {
    self.imageView.transform = CGAffineTransformScale(self.imageView.transform, pinch.scale, pinch.scale);
    //复位
    pinch.scale = 1;
}
旋转的时候调用
- (void)rotation:(UIRotationGestureRecognizer *)rotation {
    //旋转图片
    self.imageView.transform = CGAffineTransformRotate(self.imageView.transform, rotation.rotation);
    //复位,只要想相对于上一次旋转就复位
    rotation.rotation = 0;
}
什么时候调用:长按的时候调用,而且只要手指不离开,拖动的时候会一直调用,手指抬起的时候也会调用
- (void)longPress:(UILongPressGestureRecognizer *)longPress {
    if (longPress.state == UIGestureRecognizerStateBegan) {
        //设置透明度
        [UIView animateWithDuration:0.25 animations:^{
            self.imageView.alpha = 0;
        } completion:^(BOOL finished) {
            [UIView animateWithDuration:0.25 animations:^{
                self.imageView.alpha = 1;
            } completion:^(BOOL finished) {
                //对当前的view截屏
                //1.开启一个位图上下文
                /**
                    UIGraphicsBeginImageContext //模糊
                     ---------------------
                    UIGraphicsBeginImageContextWithOptions(CGSize size, BOOL opaque, CGFloat scale)//原图
                    opaque 透明度,不透明设为YES;
                    scale  缩放因子,设0时系统自动设置缩放比例图片清晰;设1.0时模糊
                    ---------------------
                 */
            if (self.isHighDefinition) {
                UIGraphicsBeginImageContextWithOptions(self.bounds.size, NO, 0.0);
            } else {
                UIGraphicsBeginImageContext(self.bounds.size);
            }
            CGContextRef ctx = UIGraphicsGetCurrentContext();
            [self.layer renderInContext:ctx];

            //从上下文当中生成一张新的图片
            UIImage *newImage = UIGraphicsGetImageFromCurrentImageContext();
            //调用代理方法
            if ([self.delegate respondsToSelector:@selector(handleView:newImage:)]) {
                [self.delegate handleView:self newImage:newImage];
             }

            //移除当前view
            [self removeFromSuperview];
            //关闭上下文
            UIGraphicsEndImageContext();
          }];
       }];
    }
}
拖动的时候调用
- (void)pan:(UIPanGestureRecognizer *)pan {
    CGPoint transP = [pan translationInView:pan.view];
    pan.view.transform = CGAffineTransformTranslate(pan.view.transform, transP.x, transP.y);
    //复位
    [pan setTranslation:CGPointZero inView:pan.view];
}
能够同时支持多个手势
- (BOOL)gestureRecognizer:(UIGestureRecognizer *)gestureRecognizer shouldRecognizeSimultaneouslyWithGestureRecognizer:(nonnull UIGestureRecognizer *)otherGestureRecognizer {
    return YES;
}
给图片画像
- (void)pan:(UIPanGestureRecognizer *)pan {
    //获取当前手势所在点
    CGPoint curP = [pan locationInView:self];

    //画线
    if (pan.state == UIGestureRecognizerStateBegan) {
        //创建路径
        YMBezierPath *path = [YMBezierPath bezierPath];
        path.lineWidth = self.width;
        self.path = path;
        path.lineJoinStyle = kCGLineJoinRound;//线的样式
        path.lineCapStyle = kCGLineCapRound;//线头的样式
        //当发现系统的类,没有办法满足我们的要求时,继承系统类,添加属性满足自己的需求
        //颜色必须得要在drawRect方法中进行绘制
        path.lineColor = self.color;
        //设置路径的起点
        [path moveToPoint:curP];

        //保存路径
        [self.pathArr addObject:path];
     } else if (
        pan.state == UIGestureRecognizerStateChanged) {
        //添加一根线到当前手指所在的点
        [self.path addLineToPoint:curP];
        //重绘
        [self setNeedsDisplay];
    }
}
绘制所有路径
- (void)drawRect:(CGRect)rect {
    for (YMBezierPath *path in self.pathArr) {
        if ([path isKindOfClass:[UIImage class]]) {
            UIImage *image = (UIImage *)path;
            [image drawInRect:rect];
        } else {
            [path.lineColor set];
            [path stroke];
        }
    }
}
清屏
- (void)clear {
    //清空数组,然后重绘
    [self.pathArr removeAllObjects];
    [self setNeedsDisplay];
}
撤销
- (void)undo {
    [self.pathArr removeLastObject];
    [self setNeedsDisplay];
}
保存自定以后的图片
- (IBAction)saveBtnClick {
[UIView animateWithDuration:0.25 animations:^{
self.drawView.alpha = 0;
} completion:^(BOOL finished) {
[UIView animateWithDuration:0.25 animations:^{
self.drawView.alpha = 1;
} completion:^(BOOL finished) {
//对画板做截屏
// UIGraphicsBeginImageContext(self.drawView.bounds.size);//模糊
UIGraphicsBeginImageContextWithOptions(self.drawView.bounds.size, NO, 0.0);//原图
//把View的layer的内容渲染到上下文当中
CGContextRef ctx = UIGraphicsGetCurrentContext();
[self.drawView.layer renderInContext:ctx];
//从上下文当中生成一张图片
UIImage *newImage = UIGraphicsGetImageFromCurrentImageContext();
//关闭上下文
UIGraphicsEndImageContext();
//把生成的图片保存到系统相册中
//保存完毕时调用的方法必须得是:image:didFinishSavingWithError:contextInfo:
UIImageWriteToSavedPhotosAlbum(newImage, self, @selector(image:didFinishSavingWithError:contextInfo:), nil);
}];
}];
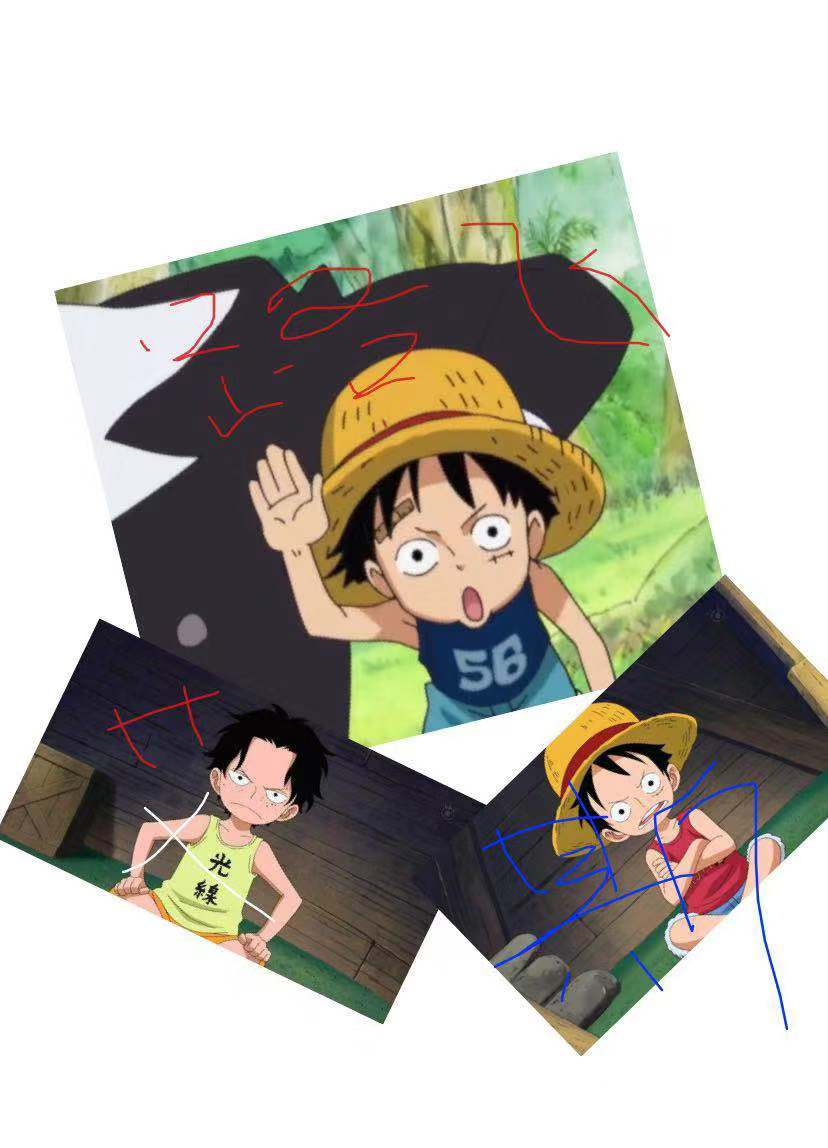
}最后合成的图片如图:
项目Demo:github.com/AndrewLJJ/D…
