

这一篇主要是写基于Netty的服务端实现SpringMVC的过程. 由于工程是基于Maven工程构建,所以第一步就是提前找好需要依赖的GAV坐标,构建一个maven工程,并在pom中加入以下依赖.这里使用了netty和spring的容器作为基础.
       <!-- https://mvnrepository.com/artifact/io.netty/netty-all -->
          <dependency>
              <groupId>io.netty</groupId>
              <artifactId>netty-all</artifactId>
              <version>4.1.36.Final</version>
          </dependency>

          <!-- https://mvnrepository.com/artifact/org.springframework/spring-core -->
          <dependency>
              <groupId>org.springframework</groupId>
              <artifactId>spring-core</artifactId>
              <version>5.1.9.RELEASE</version>
          </dependency>

          <!-- https://mvnrepository.com/artifact/org.springframework/spring-beans -->
          <dependency>
              <groupId>org.springframework</groupId>
              <artifactId>spring-beans</artifactId>
              <version>5.1.9.RELEASE</version>
          </dependency>

          <!-- https://mvnrepository.com/artifact/org.springframework/spring-context -->
          <dependency>
              <groupId>org.springframework</groupId>
              <artifactId>spring-context</artifactId>
              <version>5.1.9.RELEASE</version>
          </dependency>
第二步: 构建一个Server服务端类,Netty提供了基于服务端的构建,
     public static void main(String[] args)throws Exception {
        //启动Spring的容器
        AnnotationConfigApplicationContext annotationConfigApplicationContext = new AnnotationConfigApplicationContext();
        //配置
        annotationConfigApplicationContext.scan("com.netty.mvc");
        annotationConfigApplicationContext.refresh();

        final DispatcherHandler dispatcherHandler = new DispatcherHandler(annotationConfigApplicationContext);

        //创建Even Loop Group
        //配置服务器的NIO线程组
        //两个Reactor 一个用于服务器接收客户端的连接  一个用于经行SocketChannel的网络读写
        EventLoopGroup bossGroup = new NioEventLoopGroup();
        EventLoopGroup workerGroup = new NioEventLoopGroup();
        try{
            //创建ServerBootStrap
            ServerBootstrap b = new ServerBootstrap();
            //指定所使用的NIO传输Channle
            b.group(bossGroup,workerGroup).channel(NioServerSocketChannel.class)
                    .localAddress(8080)
                    .childHandler(new ChannelInitializer<SocketChannel>() {
                        @Override
                        protected void initChannel(SocketChannel socketChannel) {
                            //如果ServerHandler被注为@Shareable的时候,则可以总是使用同样的实例
                            socketChannel.pipeline()
                                    .addLast(new HttpRequestDecoder())
                                    .addLast(new HttpResponseEncoder())
                                    .addLast(new WebServerHandler(dispatcherHandler));
                        }
                    });
            //异步的绑定服务器,调用sync===方法阻塞,直到绑定完成
            ChannelFuture f = b.bind().sync();
            System.out.println("netty服务端启动成功");
            //获取Channel的CloseFuture,并阻塞当前线程直到它完成
            f.channel().closeFuture().sync();
        }finally {
            //关闭EvenLoopGroup,释放所有资源
            bossGroup.shutdownGracefully().sync();
            workerGroup.shutdownGracefully().sync();
        }
    }
第二步: 构建一个WebServerHandler类来处理i 来处理请求.
@ChannelHandler.Sharable
public class WebServerHandler extends ChannelInboundHandlerAdapter{

    private AsciiString contentType = HttpHeaderValues.TEXT_PLAIN;

   //请求分发器
    DispatcherHandler dispatcherHandler;

    public WebServerHandler(DispatcherHandler dispatcherHandler){
        this.dispatcherHandler = dispatcherHandler;
    }
    /**
     * 每个信息入站都会调用
     * @throws Exception
     */
    @Override
    public void channelRead(ChannelHandlerContext ctx, Object msg) throws Exception {

        Object result = "";
        if(msg instanceof HttpRequest){
            result  = dispatcherHandler.handle((HttpRequest)msg);
        }
        DefaultFullHttpResponse response = new DefaultFullHttpResponse(HttpVersion.HTTP_1_1,
                HttpResponseStatus.OK,
                Unpooled.wrappedBuffer(result.toString().getBytes())); // 2

        HttpHeaders heads = response.headers();
        heads.add(HttpHeaderNames.CONTENT_TYPE, contentType + "; charset=UTF-8");
        heads.add(HttpHeaderNames.CONTENT_LENGTH, response.content().readableBytes()); // 3
        heads.add(HttpHeaderNames.CONNECTION, HttpHeaderValues.KEEP_ALIVE);
        //将接受到的消息写给发送者
        ctx.write(response);
    }


    /**
     * 通知处理器最后的channelread是当前批处理中的最后一条信息调用
     * @param ctx
     * @throws Exception
     */
    @Override
    public void channelReadComplete(ChannelHandlerContext ctx) throws Exception {
        //将未决消息冲刷到远程节点,并关闭该Channel
        ctx.writeAndFlush(Unpooled.EMPTY_BUFFER)
                .addListener(ChannelFutureListener.CLOSE);
    }

    @Override
    public void exceptionCaught(ChannelHandlerContext ctx, Throwable cause) throws Exception {
        cause.printStackTrace();  //打印异常栈追踪
        ctx.close(); //关闭该channel
    }
}
第四步: 就是构建一个DispatcherHandler作为请求处理份发器,
@Configuration
public class DispatcherHandler implements WebHandler, ApplicationContextAware {

    //url-->hanlder的映射
    private List<HandlerMapping> handlerMappings;
    //处理器的适配器
    private List<HandlerAdapter> handlerAdapters;

    /**
     * Create a new {@code DispatcherHandler} for the given {@link ApplicationContext}.
     * @param applicationContext the application context to find the handler beans in
     */
    public DispatcherHandler(ApplicationContext applicationContext) {
        initStrategies(applicationContext);
    }


    @Override
    public void setApplicationContext(ApplicationContext applicationContext) {
        initStrategies(applicationContext);
    }

    protected void initStrategies(ApplicationContext context) {

        Map<String, HandlerMapping> mappingBeans = BeanFactoryUtils.beansOfTypeIncludingAncestors(
                context, HandlerMapping.class, true, false);

        ArrayList<HandlerMapping> mappings = new ArrayList<>(mappingBeans.values());
        AnnotationAwareOrderComparator.sort(mappings);
        this.handlerMappings = Collections.unmodifiableList(mappings);

        Map<String, HandlerAdapter> adapterBeans = BeanFactoryUtils.beansOfTypeIncludingAncestors(
                context, HandlerAdapter.class, true, false);

        this.handlerAdapters = new ArrayList<>(adapterBeans.values());
        AnnotationAwareOrderComparator.sort(this.handlerAdapters);

    }

    @Override
    public Object handle(HttpRequest httpRequest) {
      //请求处理器
        for(HandlerMapping handlerMapping : handlerMappings){
           Object handler = handlerMapping.getWebHandler(httpRequest);
           if(handler != null){
               for(HandlerAdapter adapter: handlerAdapters){
                    if(adapter.support(handler)){
                      return  adapter.handle(httpRequest,handler);
                    }
               }
           }
        }
        return null;
    }

}
第五步: 构建SprintMVC中最核心的HandlerMapping中映射处理器的注册,这里是借助了Spring的ComponentScan组件实现对于自定义@Controller的注解的扫描.
@Configuration
public class DefaultWebHandler implements WebHandler {


    public DefaultWebHandler(ApplicationContext applicationContext) {
        registerHandler(applicationContext);
    }

    /**
     * url -> Method对应
     */
    private Map<String, Method> handlerMap = new LinkedHashMap<>();

    /**
     * method—>controller的对应
     */
    private Map<Method, Object> controllerMap = new HashMap<>();

    private void registerHandler(ApplicationContext context) {

        Map<String, Object> annotationControllerClasses = context.getBeansWithAnnotation(Controller.class);

        Set<Class<?>> handlerTypes = new LinkedHashSet<>();
        Class<?> specificHandlerType = null;

        for (Object targetType : annotationControllerClasses.values()) {
            if (!Proxy.isProxyClass(targetType.getClass())) {
                specificHandlerType = ClassUtils.getUserClass(targetType);
                handlerTypes.add(specificHandlerType);
            }
            final Class<?> targetClass = (specificHandlerType != null ? specificHandlerType : targetType.getClass());

            ReflectionUtils.doWithMethods(specificHandlerType, method -> {
                String url = "";
                if (targetClass.isAnnotationPresent(RequestMapping.class)) {
                    url = targetClass.getAnnotation(RequestMapping.class).value();
                }
                Method specificMethod = ClassUtils.getMostSpecificMethod(method, targetClass);
                if (specificMethod.isAnnotationPresent(RequestMapping.class)) {
                    url += specificMethod.getAnnotation(RequestMapping.class).value();
                }
                handlerMap.put(url, specificMethod);
                controllerMap.put(specificMethod, targetType);
            }, ReflectionUtils.USER_DECLARED_METHODS);
        }
    }

    @Override
    public Object handle(HttpRequest httpRequest) {
        Method method = handlerMap.get(httpRequest.uri());

        if(method != null){
            try {
                return method.invoke(controllerMap.get(method));
            }catch (IllegalAccessException e){
                e.printStackTrace();
            }catch (InvocationTargetException e){
                e.printStackTrace();
            }
        }
        return null;
    }
}
第六步构建测试用例
@Controller
@RequestMapping(value = "/test")
@Configuration
public class TestController {
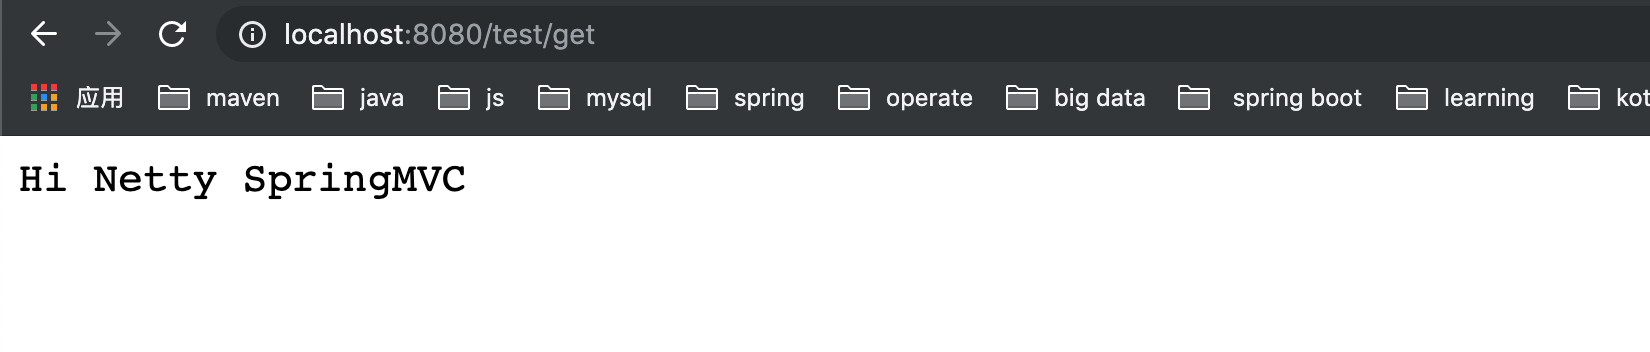
@RequestMapping(value = "/get",method = RequestMethod.GET)
public String test(){
return "Hi Netty SpringMVC";
}
}
测试结果
总结
今天主要实现了基于Netty服务端和Spring容器来实现SpringMVC的功能, 虽然还不是很完善
但是基本功能已经实现.希望给读者领悟到实现的思路,后面会继续优化.
