

世界的构成,由点开始
睁开你的美丽的大眼睛,看看你周围的世界,它是多么好看的3D世界呀。3D世界由啥玩意组成的,除了夸父和女娲,还有谁能回答呢? 但在计算机里,计算机可以告诉你3D世界是由啥玩意组成的。
1.3D世界的组成
在计算机这个神秘的国度里,3D世界是由点组成,两个点构成一条直线,三个不在同一条直线上的点就能够组成一个三角形面,无数三角形面就能够组成各种物体的形状
我们通常把这种网格模型叫做Mesh模型。给物体贴上皮肤或者专业点就叫做纹理,那这个物体就活灵活现了。最后无数的物体构成了我们的3D世界
在Three.js中定义一个点
在三维空间中的某一个点可以用一个坐标点来表示。一个坐标由x,y,z三个分量构成。在Three.js中,点可以在右手坐标系里表示。
空间几何中,点可以用一个向量来表示,在Three.js中也是用一个向量来表示。代码如下:
        Three.Vector3 = function(x=0,y=0,z=0){
            this.x = x;
            this.y = y;
            this.z = z
        }
    代码分析:THREE是Three.js引擎的一个全局变量。只要你想用它,就可以在任何地方使用它。
    那么THREE.Vector3呢,就是表示Vector3是定义在THREE下面的一个类。以后要用Vector3,就必须要加THREE前缀。
点的操作
在3D世界中点可以用THREE.Vector3D来表示。对应源码为src/math/Vector3.js。
如何定义一个点呢?
        //第一种方式
        let point1 = new THREE.Vector3(4,8,9);
    //第二种方式
    let point1 = new THREE.Vector3();
    point.set(4,8,9)
</code>
画一条彩色线
几何里有定理:两个不重合的点能够决定一条直线。在Three.js中,也可以通过定义两个点来画一条直线。
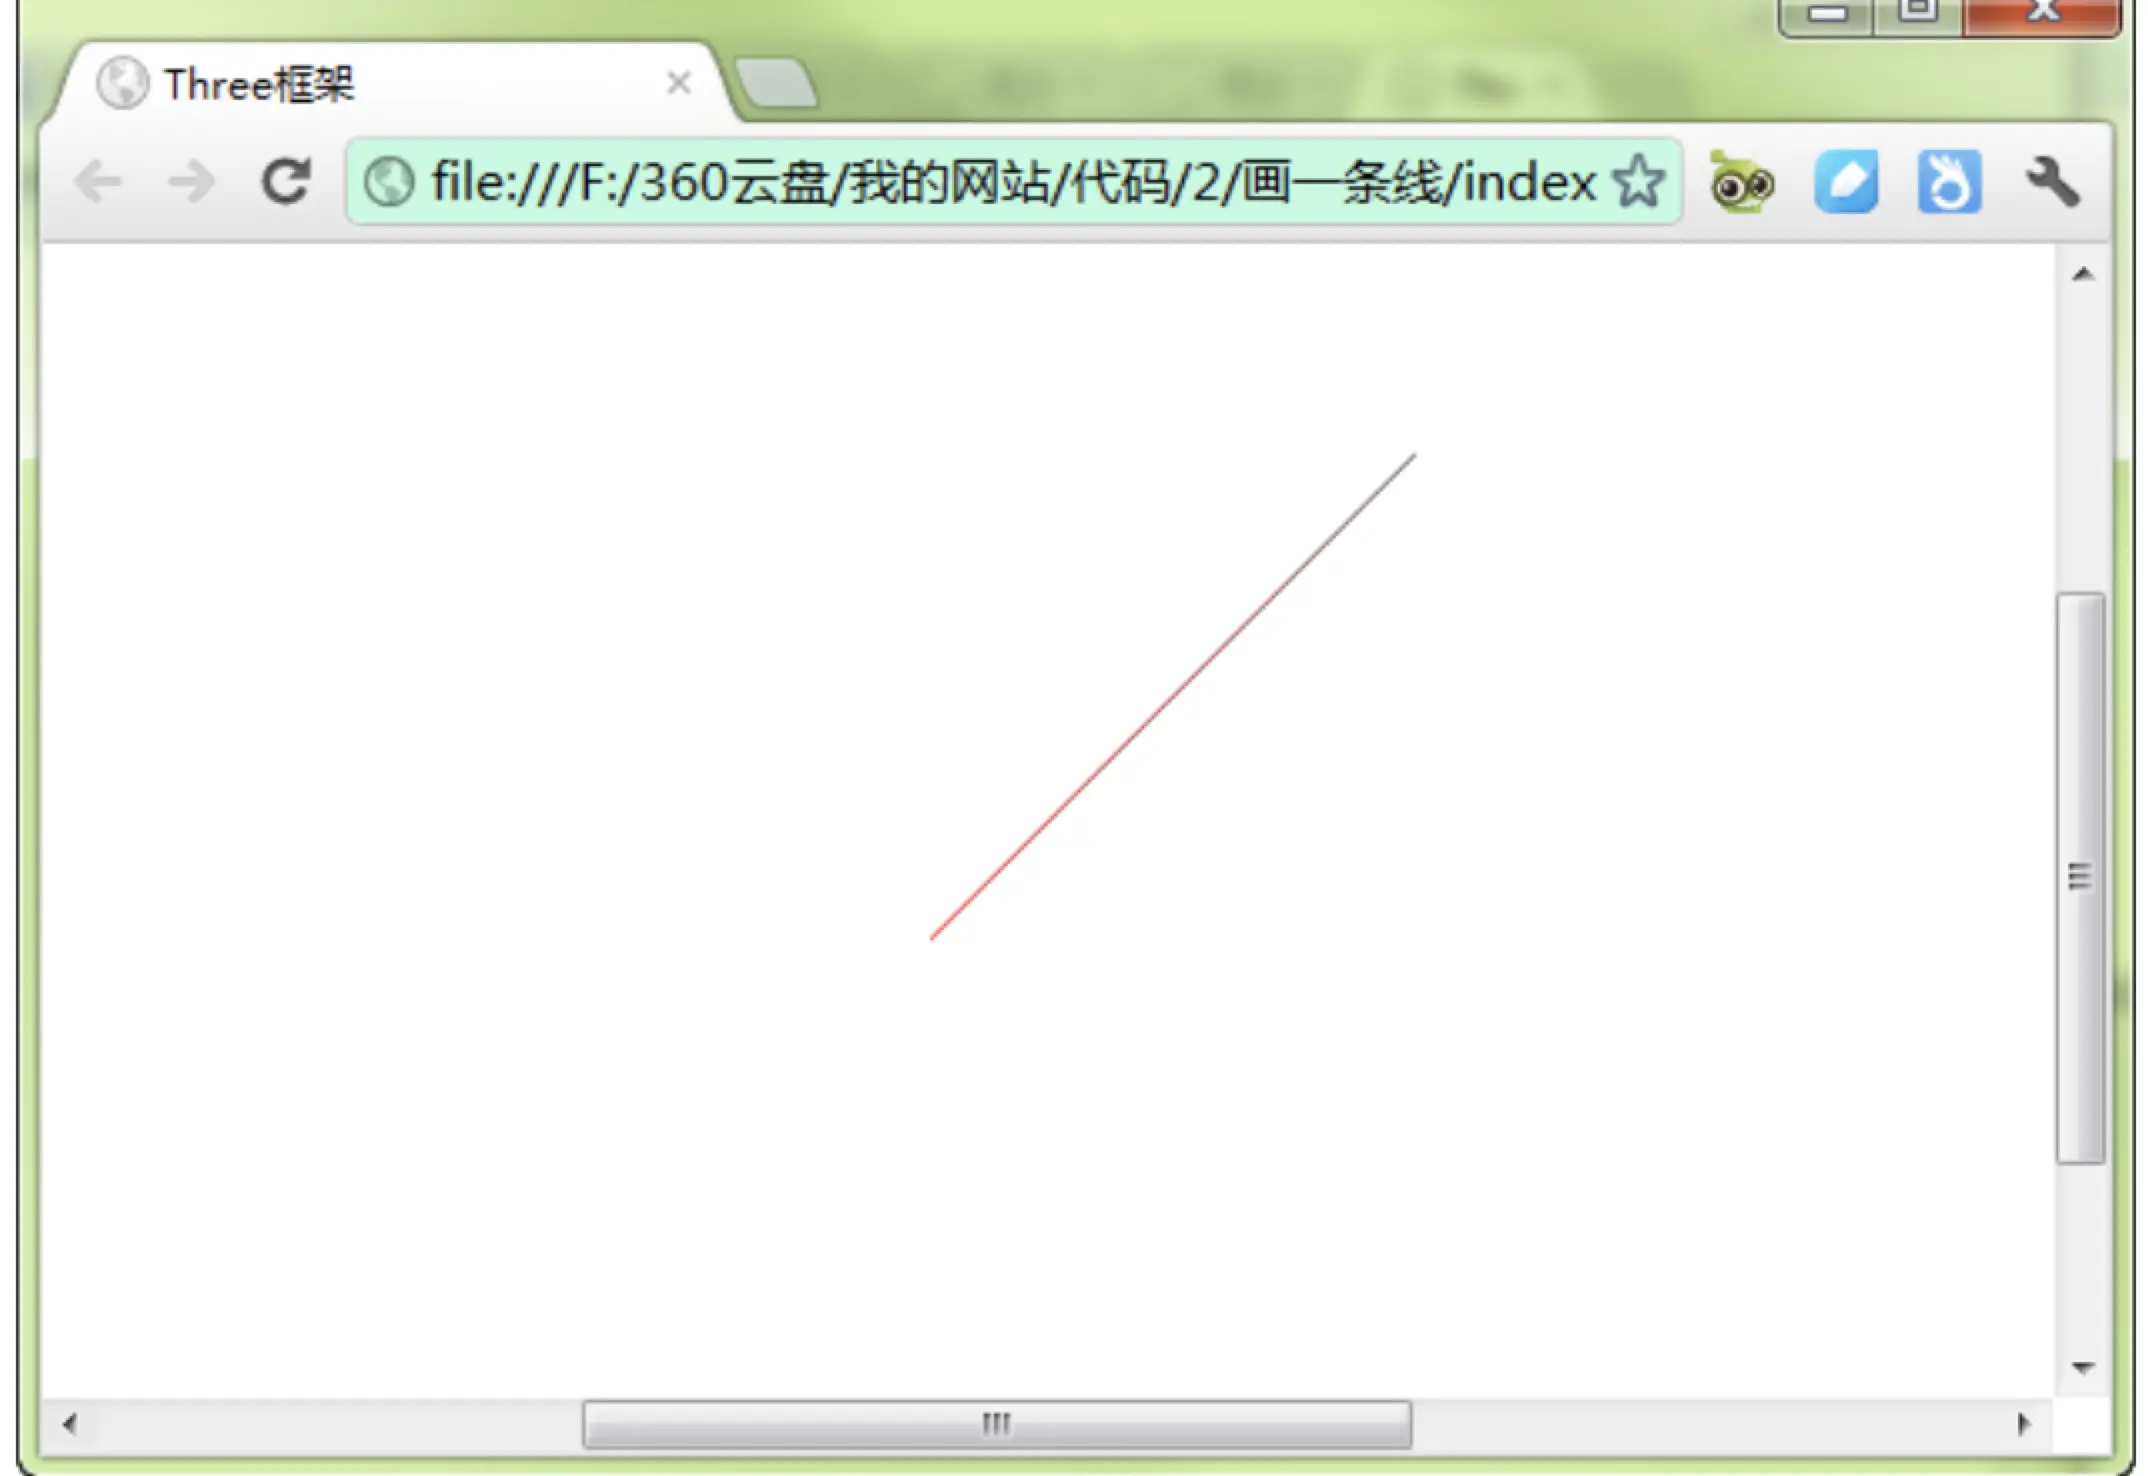
这是一条每个点不同颜色的线条
具体代码如下
class RenderPoint{
renderer;
camera;
scene;
light;
line;
width;
height;
constroctuor(id){
this.dom = document.getElementById(id)
}
initThree(){
this.width = this.dom.clientWidth;
this.height = this.dom.clientHeight;
this.renderer = new THREE.WebGLRenderer({
antialias : true
});
this.renderer.setSize(this.width,this.height);
this.dom.appendChild(this.renderer.domElement);
renderer.setClearColor(0xFFFFFF,1.0);
}
initCamera(){
this.camera = new THREE.PerspectiveCamera(45,this.width/this.height,1,10000)
this.camera.position.set(0,1000,0);
this.camera.up.x = 0;
this.camera.up.y = 0;
this.camera.up.z = 1;
camera.lookAt({
x:0,
y:0,
z:0
})
}
initScene() {
this.scene = new THREE.Scene();
}
initLight() {
this.light = new THREE.DirectionalLight(0xFF0000, 1.0, 0);
this.light.position.set(100, 100, 200);
this.scene.add(light);
}
initObject(){
let geometry = new THREE.Geometry();
let material = new THREE.LineBasicMaterial( { vertexColors: true } )
let material = new THREE.LineBasicMaterial( { vertexColors: true } )
let p1 = new THREE.Vector3( -100, 0, 100 );
let p2 = new THREE.Vector3( 100, 0, -100 );
geometry.vertices.push(p1);
geometry.vertices.push(p2);
geometry.colors.push( color1, color2 );
this.line = new THREE.Line( geometry, material, THREE.LinePieces )
scene.add(this.line);
}
threeStart() {
this.initThree();
this.initCamera();
this.initScene();
this.initLight();
this.initObject();
this.renderer.clear();
this.renderer.render(this.scene,this.camera);
}
}
1.首先,我们声明了一个几何体geometry,如下:
var geometry = new THREE.Geometry();
几何体里面有一个vertices变量,可以用来存放点。
2.定义一种线条的材质,使用THREE.LineBasicMaterial类型来定义,它接受一个集合作为参数,其原型如下:
LineBasicMaterial( parameters )
Parameters是一个定义材质外观的对象,它包含多个属性来定义材质,这些属性是:
Color:线条的颜色,用16进制来表示,默认的颜色是白色。
Linewidth:线条的宽度,默认时候1个单位宽度。
Linecap:线条两端的外观,默认是圆角端点,当线条较粗的时候才看得出效果,如果线条很细,那么你几乎看不出效果了。
Linejoin:两个线条的连接点处的外观,默认是“round”,表示圆角。
VertexColors:定义线条材质是否使用顶点颜色,这是一个boolean值。意思是,线条各部分的颜色会根据顶点的颜色来进行插值。(如果关于插值不是很明白,可以QQ问我,QQ在前言中你一定能够找到,嘿嘿,虽然没有明确写出)。
Fog:定义材质的颜色是否受全局雾效的影响。
好了,介绍完这些参数,你可以试一试了,在课后,我们会展示不同同学的杰出作品。下面,接着上面的讲,我们这里使用了顶点颜色vertexColors: THREE.VertexColors,就是线条的颜色会根据顶点来计算。
var material = new THREE.LineBasicMaterial( { vertexColors: THREE.VertexColors } );
3、接下来,定义两种颜色,分别表示线条两个端点的颜色,如下所示:
var color1 = new THREE.Color( 0x444444 ),
color2 = new THREE.Color( 0xFF0000 );
4、定义2个顶点的位置,并放到geometry中,代码如下:
var p1 = new THREE.Vector3( -100, 0, 100 );
var p2 = new THREE.Vector3( 100, 0, -100 );
geometry.vertices.push(p1);
geometry.vertices.push(p2);
5、为4中定义的2个顶点,设置不同的颜色,代码如下所示:
geometry.colors.push( color1, color2 );
geometry中colors表示顶点的颜色,必须材质中vertexColors等于THREE.VertexColors 时,颜色才有效,如果vertexColors等于THREE.NoColors时,颜色就没有效果了。那么就会去取材质中color的值,这个很重要,大家一定记住。
6、定义一条线
定义线条,使用THREE.Line类,代码如下所示:
this.line = new THREE.Line( geometry, material, THREE.LinePieces );
第一个参数是几何体geometry,里面包含了2个顶点和顶点的颜色。第二个参数是线条的材质,或者是线条的属性,表示线条以哪种方式取色,第三个参数是一组点的连接方式
然后,将这条线加入到场景中,代码如下
this.scene.add(this.line);
这样,场景中就会出现刚才的那条线段了。
