Hexo安装
安装前提
如果已经安装以上两项,可以直接安装hexo
$ npm install -g hexo-cli
初始化Hexo
$ cd <存放博客的路径>
$ hexo init <博客名>
$ cd <博客名>
$ npm install
创建完成,目录结构如下:
.
├── _config.yml	// 配置文件
├── package.json	// 应用程序的信息
├── scaffolds		// 模版 文件夹
├── source	// 资源文件夹
|   ├── _drafts
|   └── _posts	// 文章
└── themes	// 主题
启动服务,查看效果
$ hexo server // 或 hexo s
浏览器访问:http://localhost:4000/
Github关联
创建仓库,命名规则 <账户名>.github.io
修改_config.yml配置文件,末尾修改为以下内容(注意:“:”后面有一个空格)
deploy:
	type: git
	repository: https://github.com/xxx/xxx.github.io.git	// 刚才创建仓库git链接
	branch: master
推送到github仓库
$ hexo g	// 生成html静态文件
$ hexo d	// push到github
然后浏览器访问 https://<账户名>.github.io,即可查看博客
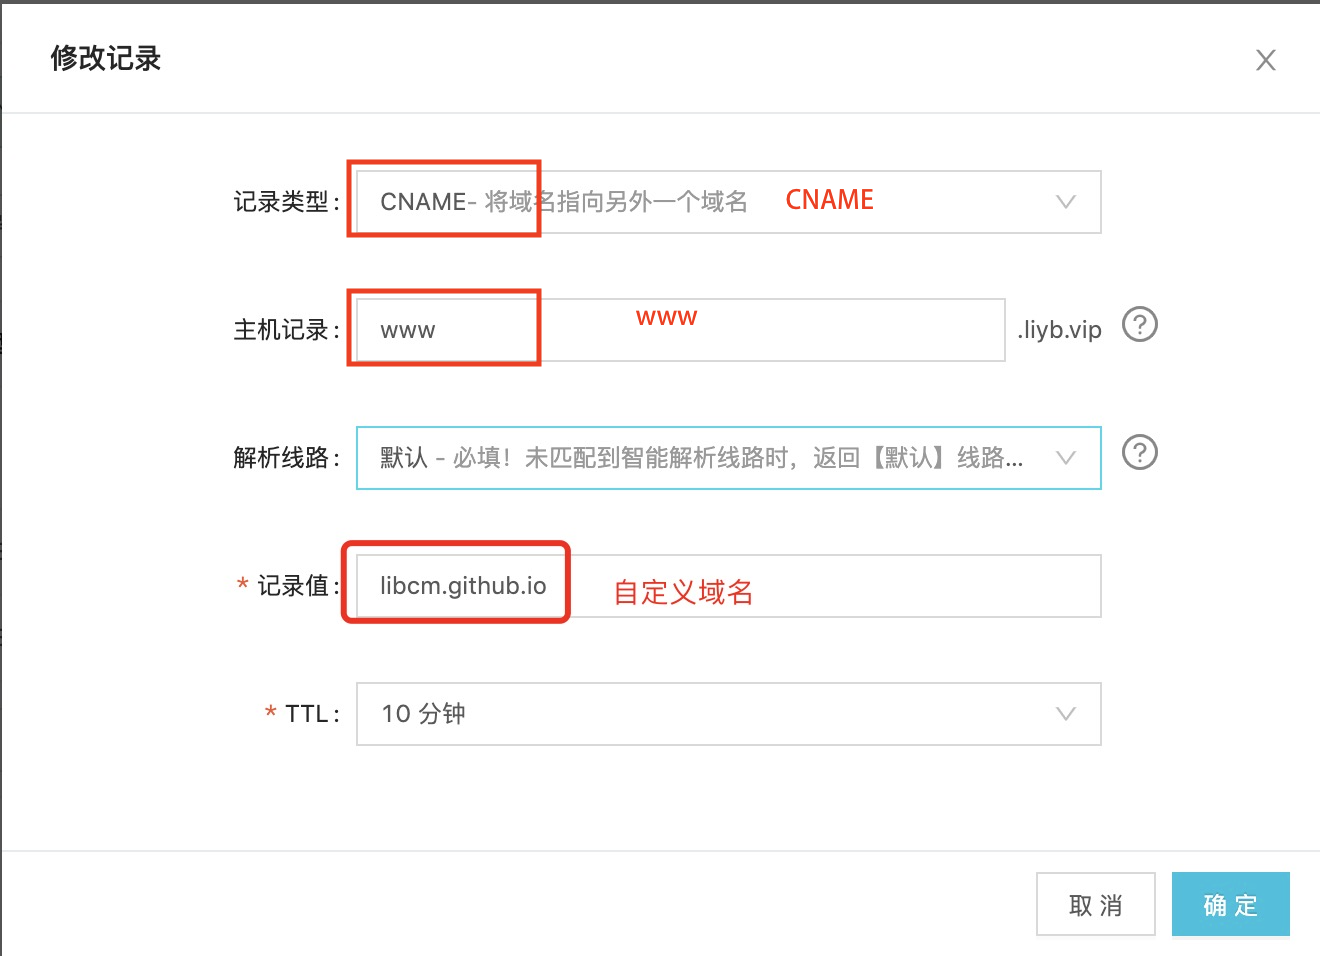
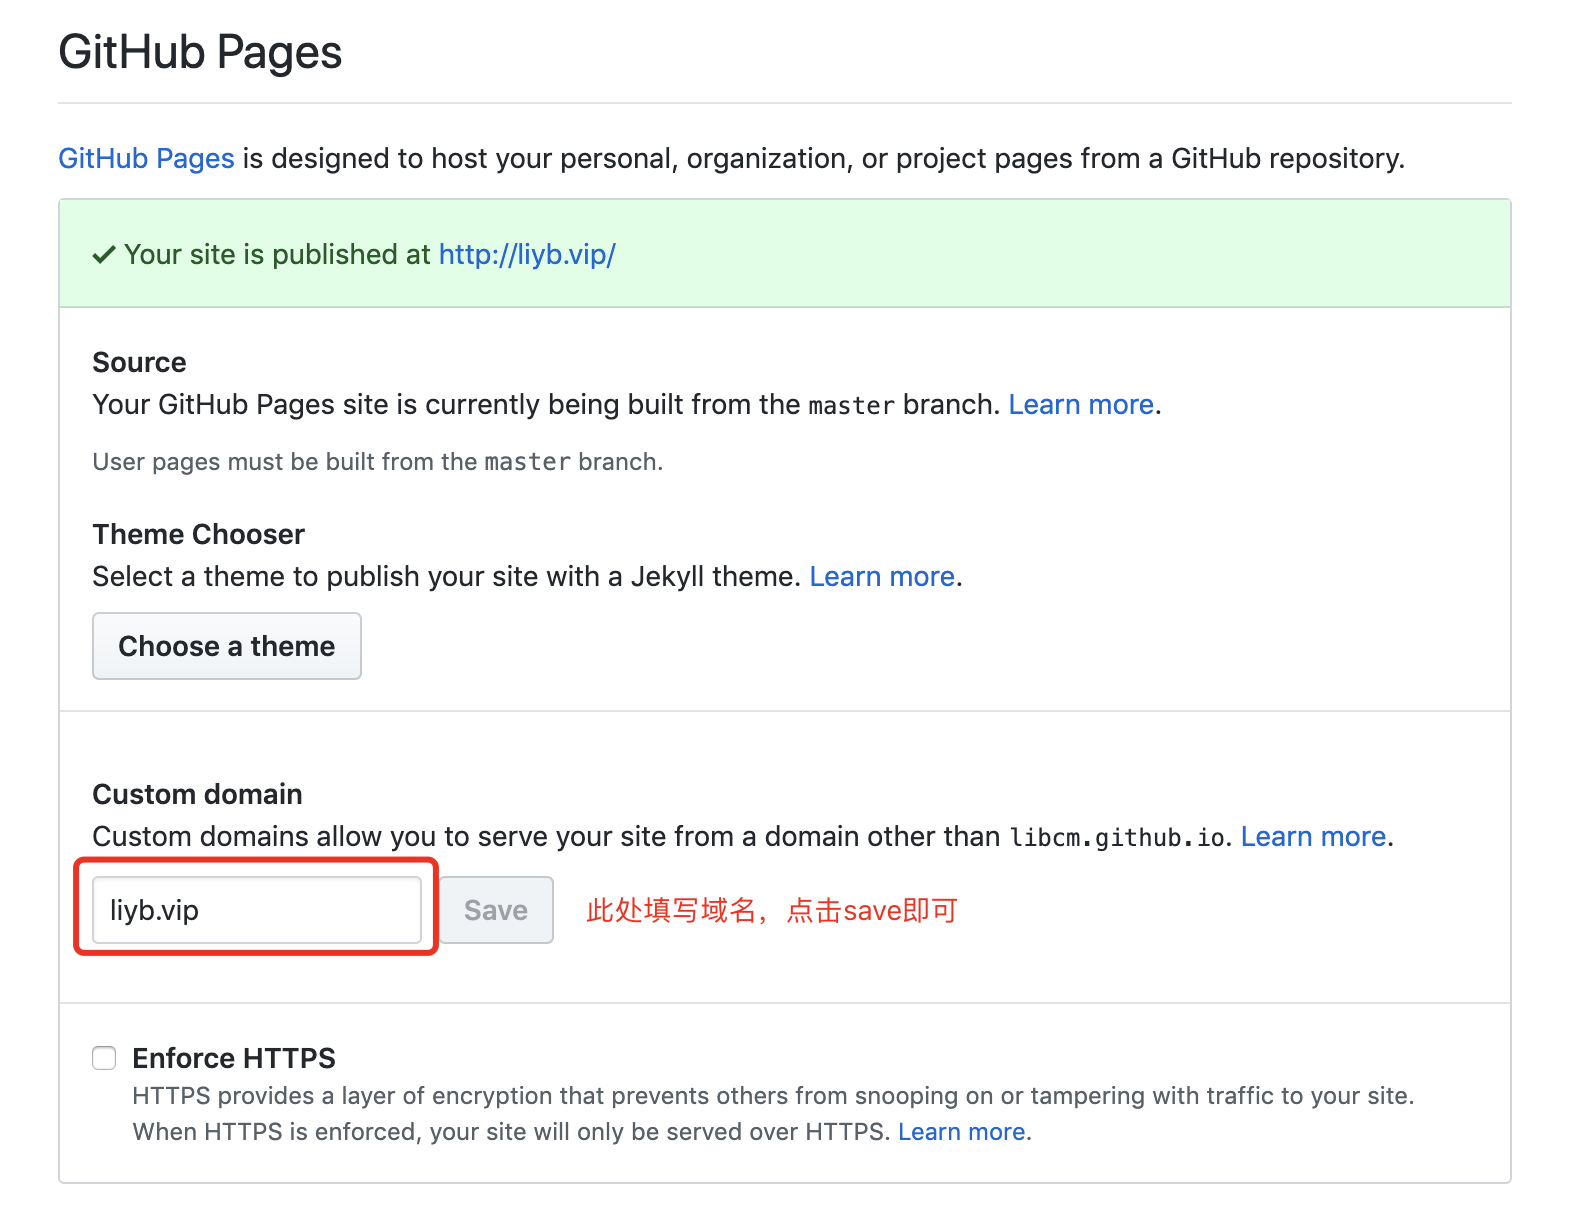
绑定域名
域名解析照下图添加即可