

前言
换汤不换药,用了还是好! 新手也能看得懂的好文章!


这真是太
这篇徒手撸一个框架-通用换肤框架(网易云) 就应运而生了(PS:代码都是我抄的,不服来战/滑稽)
原理说明
简单说:两个APK,一个安装包(main.apk),一个皮肤包(skin.apk);当我们的main.apk需要换肤的时候就通过资源的名字去skin.apk中取相同名字的资源然后进行替换操作。
必备知识
资源文件的获取
一般情况下,我们都是直接调用获取资源文件的代码来获取资源:
context.getResources().getColor(R.color.colorPrimary);
那么到底是什么在帮我们来进行资源的获取操作的?
老规矩,扒一下源码小姐姐:
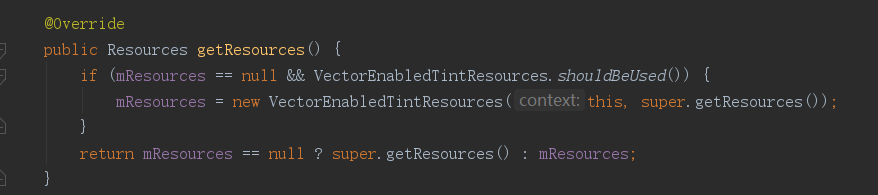
没毛病,就是获取一个Resources对象,多简单,

我源码小王子,看源码就是这么潇洒!顺便看一眼getcolor()

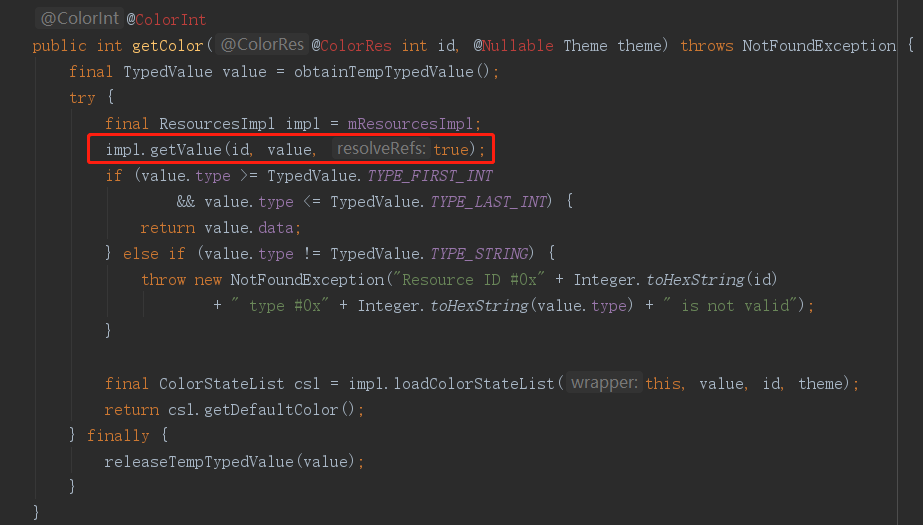
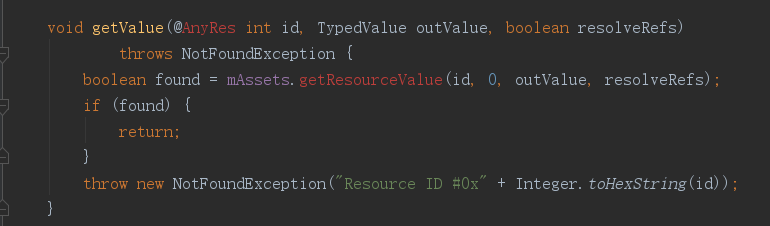

机器翻译:
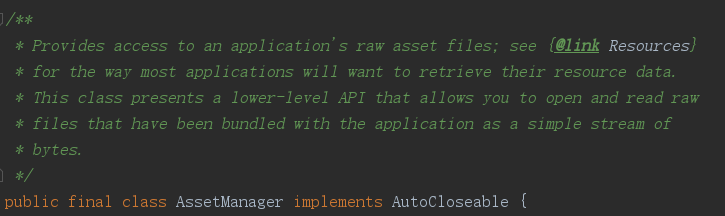
提供对应用程序原始资产文件的访问;对于大多数应用程序检索其资源数据的方式请参阅@link resources。此类提供了一个较低级别的API,它允许您打开和读取与应用程序捆绑在一起的原始文件,这些文件是一个简单的字节流。
额。。好吧,果然最终真正将资源读取出来的是Assetmanager
开始撸码
抽象一个BaseActivity
动手撸码前,突然想到一个问题——虽然是写demo,但是我的换肤操作难道要在每个Activity中都实现一边吗???当然不行!不偷懒的一定是个假程序员! 果断抽象一个BaseActivity出来。
public class BaseActivity extends AppCompatActivity {
private LayoutFactory layoutFactory;
private FrameLayout frameLayout;
private FrameLayout.LayoutParams layoutParams = new FrameLayout.LayoutParams(
FrameLayout.LayoutParams.MATCH_PARENT
, FrameLayout.LayoutParams.MATCH_PARENT);
private Unbinder unbinder;
private Toast toast;
private View childActivityView;
@Override
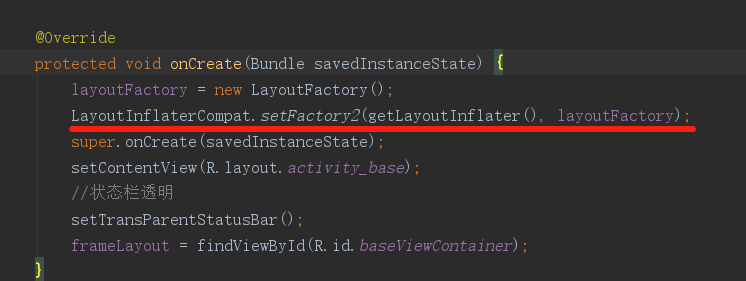
protected void onCreate(Bundle savedInstanceState) {
layoutFactory = new LayoutFactory();
LayoutInflaterCompat.setFactory2(getLayoutInflater(), layoutFactory);
super.onCreate(savedInstanceState);
setContentView(R.layout.activity_base);
//状态栏透明
setTransParentStatusBar();
//初始化Activity界面的容器
frameLayout = findViewById(R.id.baseViewContainer);
}
@Override
protected void onResume() {
super.onResume();
}
@Override
protected void onDestroy() {
super.onDestroy();
//ButterKnife移除回调
if (unbinder != null) unbinder.unbind();
//从容器中移除Activity界面
removeChildView();
}
/**
* 返回Activity的View
*
* @return emptyView : childActivityView
*/
public View getChildActivityView() {
if (childActivityView == null) {
Log.e("BaseActivity", "getChildActivityView() is error:Have not create an instance of Activity View");
return new View(this);
}
return childActivityView;
}
/**
* 添加Activity布局到界面中
*
* @param layoutResId 子Activity布局文件资源ID
* @return 子Activity布局生成的View
*/
protected void addContentView(@LayoutRes int layoutResId) {
removeChildView();
childActivityView = getLayoutInflater().inflate(layoutResId, frameLayout, false);
frameLayout.addView(childActivityView, layoutParams);
//绑定ButterKnife
unbinder = ButterKnife.bind(this);
}
/**
* 移除ChildView
*/
private void removeChildView() {
int childCount = frameLayout.getChildCount();
if (childCount > 0) {
frameLayout.removeAllViews();
}
childActivityView = null;
}
/**
* 通用toast
*
* @param msg 信息
*/
protected void toast(String msg) {
if (toast != null) toast.cancel();
toast = Toast.makeText(this, msg, Toast.LENGTH_SHORT);
toast.show();
}
/**
* 状态栏按钮点击事件
* 单独来用,这个方法没有@OnClick注解,ButterKnife是不会生成相关点击事件代码的
* 但是我们的子Activity中ButterKnife绑定的点击事件回调方法中可以利用super.onViewClicked(view.getId())将ID传递过* 来,这样就可以一起处理一些公用的控件点击事件(这里处理状态栏中的返回、用户按钮)
* @param viewId viewId
*/
protected void onViewClicked(int viewId) {
switch (viewId) {
case R.id.ivBack:
finish();
toast("点击了返回按钮");
break;
case R.id.ivUser:
toast("点击了用户头像");
}
}
/**
* 设置透明状态栏(PS:别忘了配合android:fitsSystemWindows="true")
*/
private void setTransParentStatusBar() {
if (Build.VERSION.SDK_INT >= Build.VERSION_CODES.LOLLIPOP) {
Window window = getWindow();
window.clearFlags(WindowManager.LayoutParams.FLAG_TRANSLUCENT_STATUS
| WindowManager.LayoutParams.FLAG_TRANSLUCENT_NAVIGATION);
window.getDecorView().setSystemUiVisibility(View.SYSTEM_UI_FLAG_LAYOUT_FULLSCREEN
| View.SYSTEM_UI_FLAG_LAYOUT_HIDE_NAVIGATION
| View.SYSTEM_UI_FLAG_LAYOUT_STABLE);
window.addFlags(WindowManager.LayoutParams.FLAG_DRAWS_SYSTEM_BAR_BACKGROUNDS);
window.setStatusBarColor(Color.TRANSPARENT);
window.setNavigationBarColor(Color.TRANSPARENT);
} else if (Build.VERSION.SDK_INT >= Build.VERSION_CODES.KITKAT) {
Window window = getWindow();
window.setFlags(WindowManager.LayoutParams.FLAG_TRANSLUCENT_STATUS,
WindowManager.LayoutParams.FLAG_TRANSLUCENT_STATUS);
}
}
}
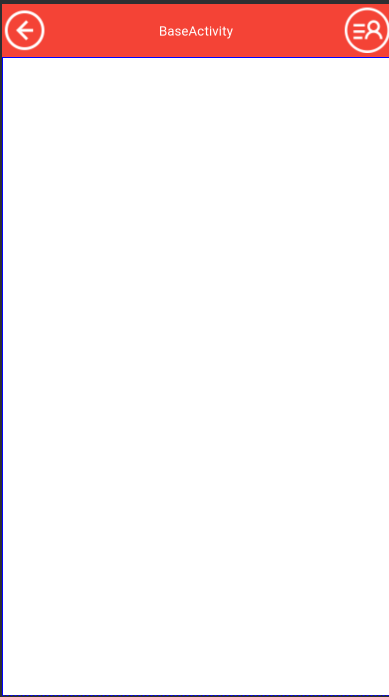
极为简单的布局文件,只有一个自定义的ActionBar
<androidx.constraintlayout.widget.ConstraintLayout xmlns:android="http://schemas.android.com/apk/res/android"
    xmlns:app="http://schemas.android.com/apk/res-auto"
    xmlns:tools="http://schemas.android.com/tools"
    android:layout_width="match_parent"
    android:layout_height="match_parent"
    tools:context=".BaseActivity">

    <FrameLayout
        android:id="@+id/actionbarLayout"
        android:layout_width="match_parent"
        android:layout_height="?attr/actionBarSize"
        android:background="@color/skin_actionBarBg"
        android:fitsSystemWindows="true"
        app:layout_constraintEnd_toEndOf="parent"
        app:layout_constraintStart_toStartOf="parent"
        app:layout_constraintTop_toTopOf="parent">

        <ImageView
            android:id="@+id/ivBack"
            android:layout_width="wrap_content"
            android:layout_height="wrap_content"
            android:layout_gravity="center_vertical|left"
            android:src="@drawable/skin_back" />

        <TextView
            android:id="@+id/tvTitle"
            android:layout_width="wrap_content"
            android:layout_height="wrap_content"
            android:layout_gravity="center"
            android:text="BaseActivity"
            android:textColor="@color/skin_actionBarTextColor" />

        <ImageView
            android:id="@+id/ivUser"
            android:layout_width="wrap_content"
            android:layout_height="wrap_content"
            android:layout_gravity="right|center_vertical"
            android:src="@drawable/skin_user" />
    </FrameLayout>
<!--所有的Activity界面都添加在NestedScrollView中的FrameLayout中-->
    <androidx.core.widget.NestedScrollView
        android:layout_width="match_parent"
        android:layout_height="0dp"
        android:fillViewport="true"
        android:background="#ffffff"
        app:layout_constraintBottom_toBottomOf="parent"
        app:layout_constraintTop_toBottomOf="@+id/actionbarLayout">

        <FrameLayout
            android:id="@+id/baseViewContainer"
            android:layout_width="match_parent"
            android:layout_height="wrap_content" />
    </androidx.core.widget.NestedScrollView>
</androidx.constraintlayout.widget.ConstraintLayout>
监听系统View的生成
- 监听原理
想要实现实时换肤操作,那一定是要能够监听View的生成,并且在View的生成过程中设置我们想要的元素,比如背景色等。 那么我们应该如何监听View的生成呢?这里其实谷歌已经给我们提供好了相关回调接口:LayoutInflater.Factory2 那么问题又来了,我咋知道这玩意可以监听View的生成呢?
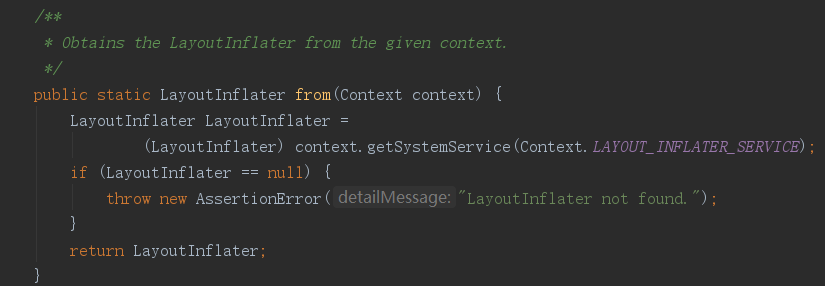
LayoutInflater.from(this).inflate(R.layout.activity_main,parent,false);
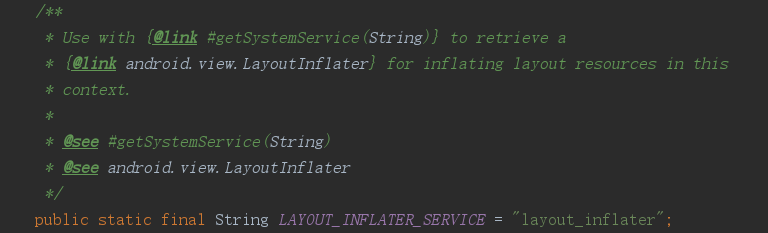
这行代码大家不陌生吧,就是这行代码将我们的xml转成了我们所需要的View!所以,为了证明我是对的,扒一下源码!一层一层往下看!
首先 LayoutInflater.from(this) :
然后 inflate(R.layout.activity_main,parent,false) 来进行xml的转换操作:
tips:为啥最后的参数要写false呢,可以看下源码中的参数说明你就明白了
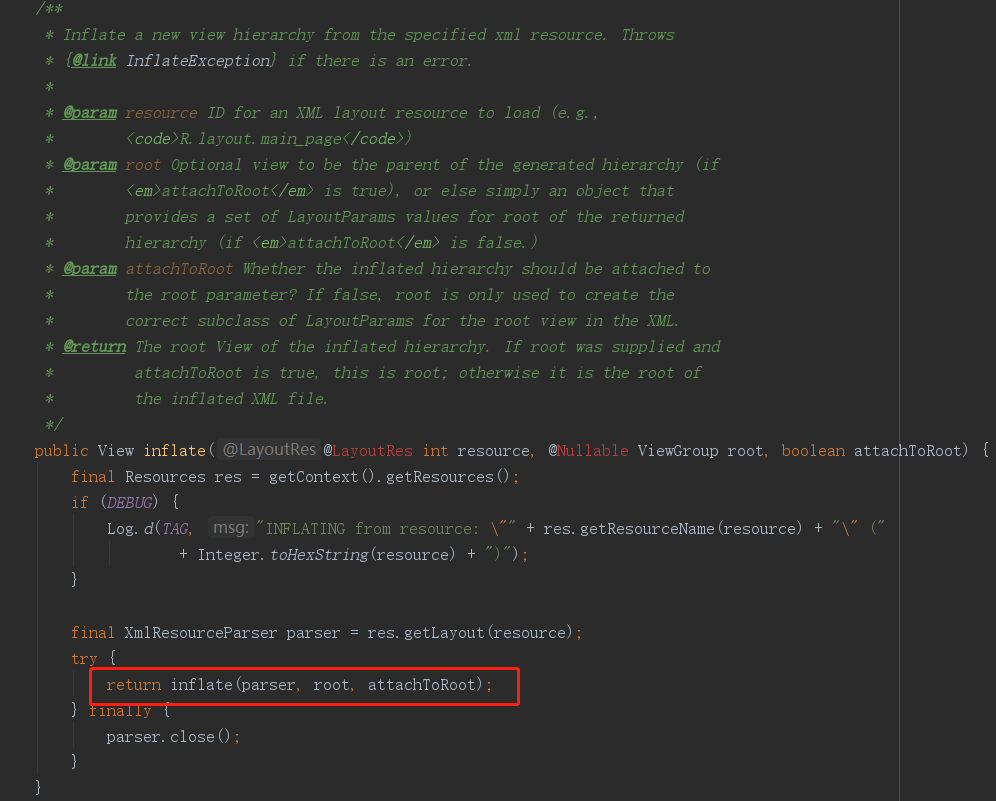
继续往下:

再往下:
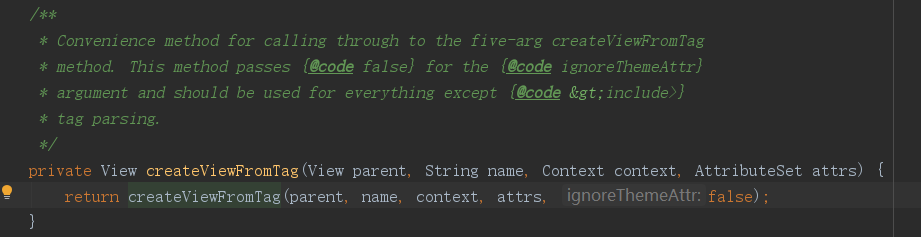
最终在 View createViewFromTag(View parent, String name, Context context, AttributeSet attrs,boolean ignoreThemeAttr) 方法中找到view的创建过程:
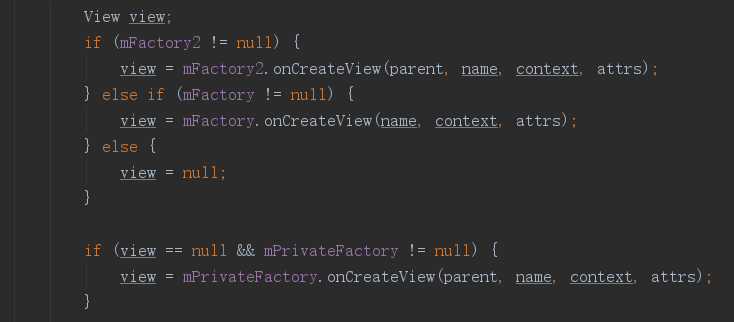
很明显,假如我们设置了mFactory2回调参数,那么View的生死就完全被我们掌控了!
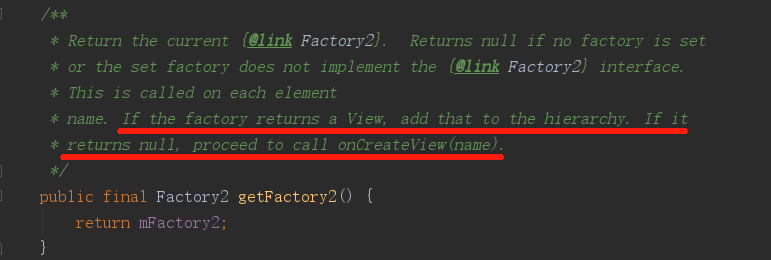
最后我们看一下 Factory2 的注释:
如果返回一个View,就将他添加到层级架构中去,否则继续 调用onCreateView(name)方法。(不明白的看上图中的代码,onCreateview()方法会一级一级调用)
也就是说,在View的创建过程中,我们完全可以自己定义要生成一个怎样View。
2. 实现监听
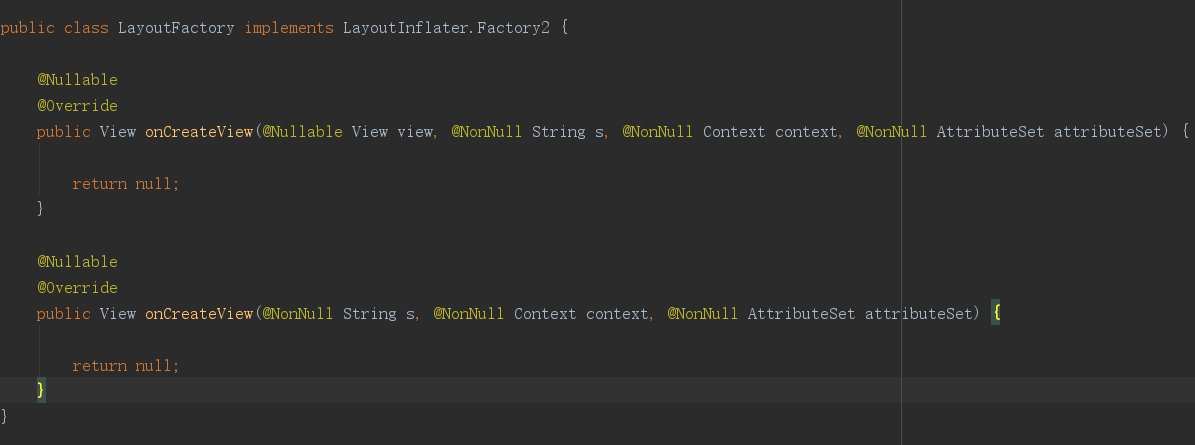
首先我们创建一个Factory2的实现类:
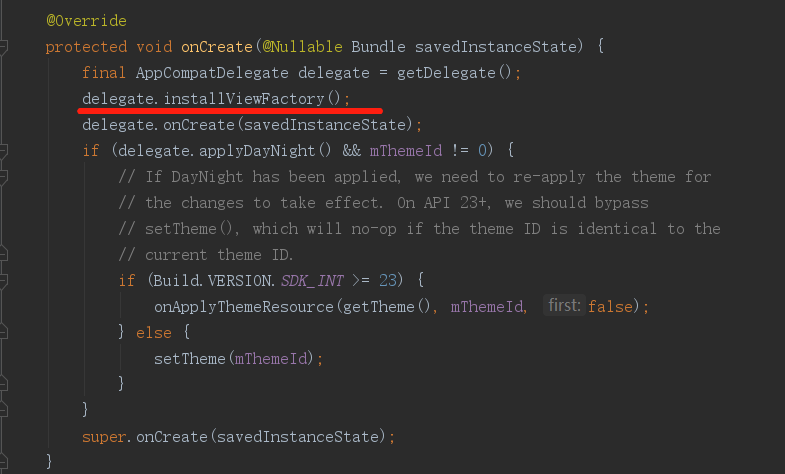
然后在BaseActivity中将这个实现类设置为监听入口方法:
至于为什么要放在这里,我们可以看一下 super.onCreate(savedInstanceState) 的父类:

筛选需要换肤的View
上一步我们已经实现了View生成的监听,这里我们实现View的筛选
在我们创建的 LayoutFactory2 中进行筛选:
public View onCreateView(@Nullable View view, @NonNull String s, @NonNull Context context, @NonNull AttributeSet attributeSet) {
   // 注意这里一定要自己根据传递过来的**attributeSet**参数实现View创建,而不能直接使用**view**进行筛选判断
   // 原因就是这个 view 并不是我们想要的 View 而是他的ParentView,所以这个View和attributeSet是不匹配的
}
完整的创建源码:
public class LayoutFactory implements LayoutInflater.Factory2 {
private List<SkinView> skinViewList = new ArrayList<>();
private final String[] prefixs = {"android.widget.", "android.view.", "android.webkit."};
@Nullable
@Override
public View onCreateView(@Nullable View view, @NonNull String s, @NonNull Context context, @NonNull AttributeSet attributeSet) {
View viewInstance = null;
//s就是xml中
// <TextView
// ****
// ****
// />
//的Textview字段
//由于我们创建View是利用的反射,所以创建的时候需要 包名.TextView这样的格式进行实例化
if (s.contains(".")) {//包含 . 说明是自定义View,直接可以用这个
viewInstance = onCreateView(s, context, attributeSet);
} else {
//不是自定义View的则遍历前缀集合进行实例化,如果实例化为空则说明不是该前缀下的控件
//包含View的包也就这三个吧 "android.widget.", "android.view.", "android.webkit."
for (String prefix : prefixs) {
viewInstance = onCreateView(prefix + s, context, attributeSet);
if (viewInstance != null) {
addSkinView(viewInstance, attributeSet);
break;
}
}
}
return viewInstance;
}
@Nullable
@Override
public View onCreateView(@NonNull String s, @NonNull Context context, @NonNull AttributeSet attributeSet) {
View view = null;
try {
Class aClass = context.getClassLoader().loadClass(s);
Constructor<? extends View> constructor = aClass.getConstructor(Context.class, AttributeSet.class);
view = constructor.newInstance(context, attributeSet);
} catch (Exception e) {
e.printStackTrace();
}
return view;
}
/**
* 条件筛选后添加需要换肤的View
*
* @param view Activity中的view
*/
void addSkinView(@Nullable View view, @NonNull AttributeSet attributeSet) {
if (view == null) {
return;
}
List<SkinAttr> skinAttrs = new ArrayList<>();
String idName = "";
//遍历View的属性并且判断该View是否需要应用换肤功能
for (int i = 0; i < attributeSet.getAttributeCount(); i++) {
//资源ID的具体数值,引用资源文件得到的资源ID格式是@123456
String valueString = attributeSet.getAttributeValue(i);
//如果不是直接引用了资源文件的属性则忽略
if (!valueString.startsWith("@")) {
continue;
}
//资源值
int value = Integer.parseInt(valueString.substring(1));
//资源ID的名字
String valueName = view.getResources().getResourceEntryName(value);
//属性名
String name = attributeSet.getAttributeName(i);
//资源ID的类型
String type = view.getResources().getResourceTypeName(value);
//找到了view的Id,取Id的name
if (type.equals("id")) {
idName = valueName;
}
//以 skin_ 为资源名开头的则说明需要换肤
if (valueName.indexOf("skin_") == 0) {
skinAttrs.add(new SkinAttr(idName, name, type, valueName, value));
}
}
if (skinAttrs.size() > 0) {
SkinView skinView = new SkinView(view, skinAttrs);
skinViewList.add(skinView);
}
}
private String getSimpleName() {
return LayoutFactory.class.getSimpleName();
}
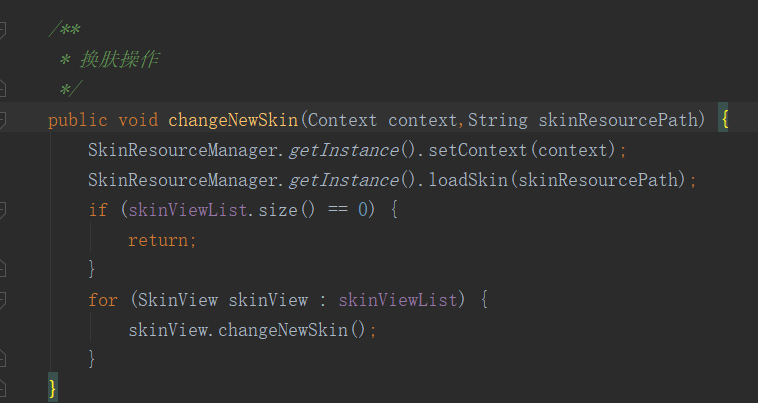
/**
* 换肤操作
*/
public void changeNewSkin(Context context,String skinResourcePath) {
SkinResourceManager.getInstance().setContext(context);
SkinResourceManager.getInstance().loadSkin(skinResourcePath);
if (skinViewList.size() == 0) {
return;
}
for (SkinView skinView : skinViewList) {
skinView.changeNewSkin();
}
}
/**
* 需要换肤的View的封装
*/
class SkinView {
//需要换肤的View
private View view;
//这个View中需要替换成皮肤包中资源的属性集合
List<SkinAttr> skinAttrList;
public SkinView(View view, List<SkinAttr> skinAttrList) {
this.view = view;
this.skinAttrList = skinAttrList;
}
//该View进行换肤操作
public void changeNewSkin() {
for (SkinAttr skinAttr : skinAttrList) {
if (skinAttr.name.equals("background")) {//设置背景
if (skinAttr.type.equals("color")) {
view.setBackgroundColor(SkinResourceManager.getInstance().getColor(skinAttr.value));
}
if (skinAttr.type.equals("drawable")) {
if (Build.VERSION.SDK_INT >= Build.VERSION_CODES.JELLY_BEAN) {
view.setBackground(SkinResourceManager.getInstance().getDrawable(skinAttr.value));
} else {
view.setBackgroundDrawable(SkinResourceManager.getInstance().getDrawable(skinAttr.value));
}
}
} else if (skinAttr.name.equals("textColor") && view instanceof TextView) { //设置字体颜色
((TextView) view).setTextColor(SkinResourceManager.getInstance().getColor(skinAttr.value));
} else if (skinAttr.name.equals("text") && view instanceof TextView) {//设置文字
((TextView) view).setText(SkinResourceManager.getInstance().getString(skinAttr.value));
} else if (skinAttr.name.equals("src") && view instanceof ImageView) {//设置图片资源
((ImageView) view).setImageDrawable(SkinResourceManager.getInstance().getDrawable(skinAttr.value));
}
}
}
}
/**
* 单条控件属性元素封装
*/
class SkinAttr {
//View Id的名字
private String idName;
//属性名,eg:background,textColor..
private String name;
//属性类型,eg:@color,@drawable,@String
private String type;
//资源Id的name
private String valueName;
//资源ID
private int value;
public SkinAttr(String idName, String name, String type, String valueName, int value) {
this.idName = idName;
this.name = name;
this.type = type;
this.valueName = valueName;
this.value = value;
}
public String getIdName() {
return idName;
}
public String getName() {
return name;
}
public String getType() {
return type;
}
public String getValueName() {
return valueName;
}
public int getValue() {
return value;
}
}
}
从皮肤包中获取资源的类:
public class SkinResourceManager {
    private static final SkinResourceManager skinResourceManager = new SkinResourceManager();
    /**
     * 皮肤包的包名
     */
    private String mPackageName;

    public static SkinResourceManager getInstance() {
        return skinResourceManager;
    }


    private Context mContext;

    public Resources mSkinResources;

    private String apkPath;

    private SkinResourceManager() {
    }

    public void setContext(Context context) {
        mContext = context.getApplicationContext();
    }


    public void loadSkin(String skinResourcePtah) {
        if (TextUtils.isEmpty(skinResourcePtah)){
            mPackageName=mContext.getPackageName();
        }else {
            try {
               AssetManager manager = AssetManager.class.newInstance();
                Method method = AssetManager.class.getDeclaredMethod("addAssetPath", String.class);
                method.invoke(manager, skinResourcePtah);
                //当前应用的resources对象,获取到屏幕相关的参数和配置
                Resources res = mContext.getResources();
                //getResources()方法通过  AssetManager的addAssetPath方法,构造出Resource对象,由于是Library层的代码,所以需要用到反射
                mSkinResources = new Resources(manager, res.getDisplayMetrics(), res.getConfiguration());
                mPackageName = mContext.getPackageManager().getPackageArchiveInfo(skinResourcePtah, PackageManager.GET_ACTIVITIES).packageName;
            } catch (Exception e) {
                e.printStackTrace();
            }
        }
    }

    //通过ID获取drawable对象
    public Drawable getDrawable(int id) {
        Drawable drawable = mContext.getResources().getDrawable(id);
        if (mSkinResources != null) {
            String name = mContext.getResources().getResourceEntryName(id);
            Log.i(SkinResourceManager.class.getSimpleName(), "getDrawable()--name=" + name + "--packageName=" + mPackageName);
            int resId = mSkinResources.getIdentifier(name, "drawable", mPackageName);
            if (resId > 0) {
                return mSkinResources.getDrawable(resId);
            }
        }
        return drawable;
    }

    //通过ID获取颜色值
    public int getColor(int id) {
        int color = mContext.getResources().getColor(id);
        if (mSkinResources != null) {
            String name = mContext.getResources().getResourceEntryName(id);
            Log.i(SkinResourceManager.class.getSimpleName(), "getColor()--name=" + name + "--packageName=" + mPackageName);
            int resId = mSkinResources.getIdentifier(name, "color", mPackageName);
            if (resId > 0) {
                return mSkinResources.getColor(resId);
            }
        }
        return color;
    }

    public String getString(int id) {
        String str = mContext.getResources().getString(id);
        if (mSkinResources != null) {
            String name = mContext.getResources().getResourceEntryName(id);
            Log.i(SkinResourceManager.class.getSimpleName(), "getDrawable()--name=" + name + "--packageName=" + mPackageName);
            int resId = mSkinResources.getIdentifier(name, "string", mPackageName);
            if (resId > 0) {
                Log.i(SkinResourceManager.class.getSimpleName(), "getDrawable()--name=" + name + "--packageName=" + mPackageName+"--get="+mSkinResources.getString(resId));
                return mSkinResources.getString(resId);
            }
        }
        return str;
    }
}
创建一个皮肤包
新建一个 skin_test module,该module是 application 类型,可以 build 成 apk

将生成的皮肤apk改名并放到对应手机的目录中:

应用换肤
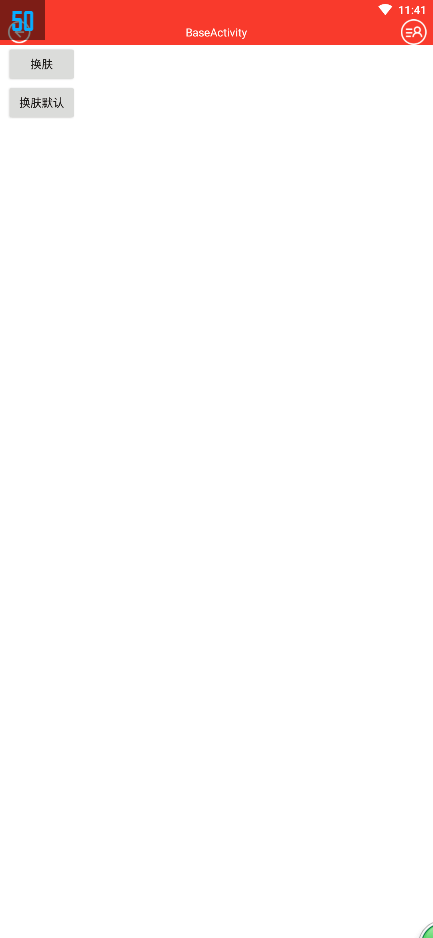
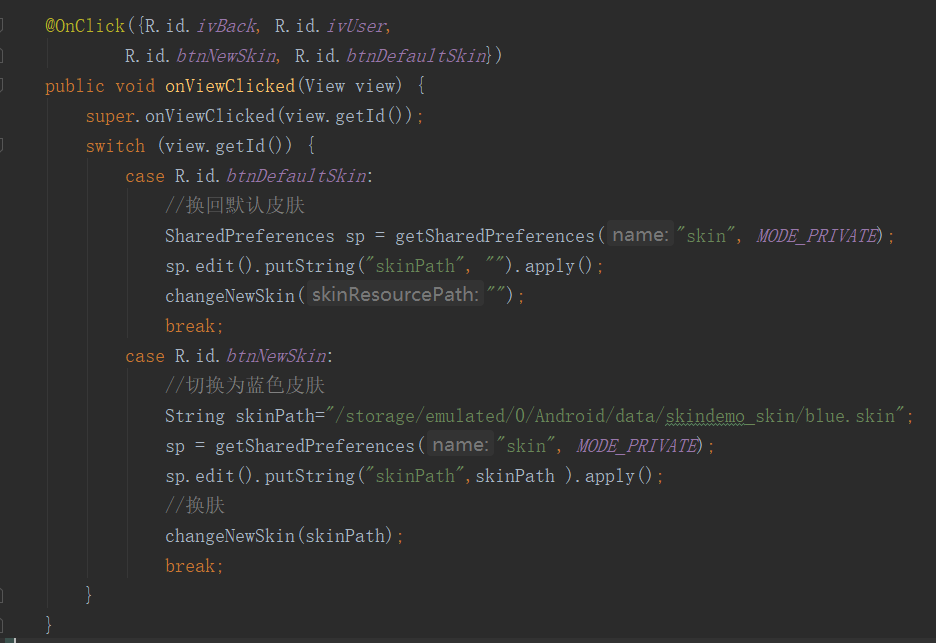
新建一个Main2Activity用于换肤操作
当点击换肤按钮时,将会切换至蓝色皮肤样式,点击换肤默认按钮时恢复默认红色皮肤
界面样式如下:
BaseActivity中新建换肤方法
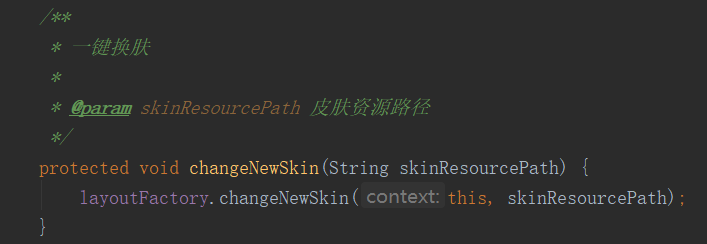
最终调用我们创建的LayoutFactory2中的换肤方法进行遍历换肤
Main2Activity中应用换肤操作
这里用 SP 来持久保存当前应用的皮肤资源路径
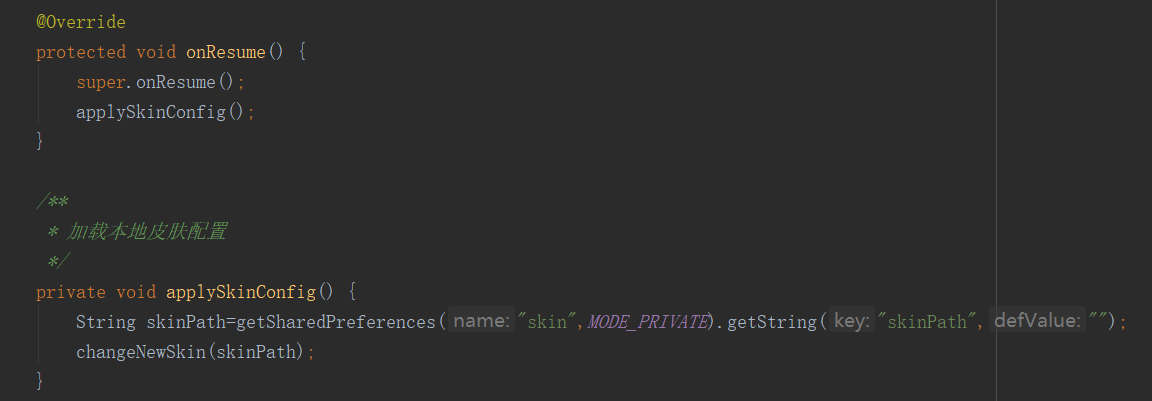
其他Activity中同时也应用换肤 在 onResume() 中判断一下是否需要换肤即可
完结
至此整套换肤流程就结束了
