

withRouter
测试用例
withRouter
You can get access to the history object’s properties and the closest <Route>'s match via the withRouter higher-order component. withRouterwill pass updated match, location, and history props to the wrapped component whenever it renders.
import React from "react";
import PropTypes from "prop-types";
import { withRouter } from "react-router";

// A simple component that shows the pathname of the current location
class ShowTheLocation extends React.Component {
  static propTypes = {
    match: PropTypes.object.isRequired,
    location: PropTypes.object.isRequired,
    history: PropTypes.object.isRequired
  };

  render() {
    const { match, location, history } = this.props;

    return <div>You are now at {location.pathname}</div>;
  }
}

// Create a new component that is "connected" (to borrow redux
// terminology) to the router.
const ShowTheLocationWithRouter = withRouter(ShowTheLocation);
Important Note
withRouterdoes not subscribe to location changes like React Redux’sconnectdoes for state changes. Instead, re-renders after location changes propagate out from the<Router>component. This means thatwithRouterdoes not re-render on route transitions unless its parent component re-renders.
Static Methods and Properties
All non-react specific static methods and properties of the wrapped component are automatically copied to the "connected" component.
Component.WrappedComponent
The wrapped component is exposed as the static property WrappedComponent on the returned component, which can be used for testing the component in isolation, among other things.
// MyComponent.js
export default withRouter(MyComponent)

// MyComponent.test.js
import MyComponent from './MyComponent'
render(<MyComponent.WrappedComponent location={{...}} ... />)
wrappedComponentRef: func
A function that will be passed as the ref prop to the wrapped component.
class Container extends React.Component {
  componentDidMount() {
    this.component.doSomething();
  }

  render() {
    return <MyComponent wrappedComponentRef={c => (this.component = c)} />;
  }
}

当我们希望每次切换路由的时候都会显示实时的路径时
我们就可以使用witchRouter对一个组件进行包裹
那么被包裹的组件就可以获取作为Route时拥有的属性
historymatchlocation
实际上就是等于被包裹的组件等于平时Route的component
import NavHeader from './NavHeader'

<div className="navbar-header">
  {/* <div className="navbar-brand">管理系统</div> */}
  <NavHeader />
</div>
import React, { Component } from 'react'
import { withRouter } from '../react-router-dom';
class NavHeader extends Component {
	render() {
		const { match, location, history } = this.props
		return (
			< div className="navbar-heading" >
				<div className="navbar-brand" onClick={() => history.push('/')}>正在{location.pathname}</div>
			</div >
		)
	}
}
export default withRouter(NavHeader)
注意最后的包裹withRouter(NavHeader)
我们在NavHeader使用的this.props就是withRouter提供的
代码实现
withRouter.js
我们上面的使用中就清楚的认识到,被包裹的组建,只不过类似于作为Route的component属性的组件
所以我们内部实现就是把传进来的参数,作为Route的componetn值
import React from 'react'
import { Route } from '../react-router-dom';
export default function (Component) {
	return () => (
		<Route component={Component} />
	)
}
记得在
index.js导出import HashRouter from './HashRouter' import Link from './Link' import Route from './Route' import Switch from './Switch' import Redirect from './Redirect' import withRouter from './withRouter' export { HashRouter, Link, Route, Switch, Redirect, withRouter }
这个组件是默认渲染的
我们要修改Route.js
Route.js
let { path = '/', component: Component, render, children } = this.props;
如果this.props没有传递path属性,我们就默认为/
这样就可以走if (Component) return <Component {...props} />
在这里我们顺便添加一个exact属性
exact: bool
When true, will only match if the path matches the location.pathnameexactly.
<Route exact path="/one" component={About} />
| path | location.pathname | exact | matches? |
|---|---|---|---|
/one |
/one/two |
true |
no |
/one |
/one/two |
false |
yes |
这个值就是更好作为pathToRegex里面end的参数
let regxp = pathToRegxp(path, keys, { end: exact })
最终Reout.js代码就是
import React, { Component } from 'react';
import Context from './context';
import pathToRegxp from 'path-to-regexp'

export default class Route extends Component {
	static contextType = Context;
	render() {
		let { path = '/', component: Component, render, children, exact = false } = this.props;
		let pathname = this.context.location.pathname;
		let keys = []
		let regxp = pathToRegxp(path, keys, { end: exact })
		let ret = pathname.match(regxp)
		let props = {
			location: this.context.location,
			history: this.context.history,
		}
		if (ret) {
			let [url, ...values] = ret
			keys = keys.map(key => key.name)
			let params = keys.reduce((memo, key, index) => {
				memo[key] = values[index]
				return memo
			}, {})
			let match = {
				url: pathname,
				isExact: pathname === url,
				path,
				params
			}
			props.match = match
			if (Component) return <Component {...props} />
			else if (render) return render(props)
			else if (children) return children(props)
			else return null
		}
		return children ? children(props) : null
	}
}
Prompt
测试用例
Prompt
Used to prompt the user before navigating away from a page. When your application enters a state that should prevent the user from navigating away (like a form is half-filled out), render a <Prompt>.
import { Prompt } from 'react-router'

<Prompt
  when={formIsHalfFilledOut}
  message="Are you sure you want to leave?"
/>
message: string
The message to prompt the user with when they try to navigate away.
<Prompt message="Are you sure you want to leave?" />
message: func
Will be called with the next location and action the user is attempting to navigate to. Return a string to show a prompt to the user or true to allow the transition.
<Prompt
  message={location =>
    location.pathname.startsWith("/app")
      ? true
      : `Are you sure you want to go to ${location.pathname}?`
  }
/>
when: bool
Instead of conditionally rendering a <Prompt> behind a guard, you can always render it but pass when={true} or when={false} to prevent or allow navigation accordingly.

现在我们的需求是,如果输入框里面有文字,我们在离开前就问先问一下用户是否离开,因为离开后编辑的文字就会不见了
还有我们在提交后,用户可能还想要再次添加,所以我们也要在用户点击提交后询问一次
我们先往state存储一个状态
state = { formIsHalfFilledOut: false }
然后我们要在该页面添加Prompt
render() {
  return (
    <>
    <Prompt
      when={this.state.formIsHalfFilledOut}
      message={location => `你是否将要离开,前往${location.pathname}`}
      />
    <form onSubmit={this.handleSubmit}>
      <div className='form-group' onSubmit={this.handleSubmit}>
        <label>用户名</label>
        <input
          ref={ele => this.textInput = ele}
          className='form-control'
          onChange={event => this.setState({ formIsHalfFilledOut: event.target.value.length > 0 })}
          />
      </div>
      <div className='form-group'>
        <input type="submit" className='btn btn-primary' />
      </div>
    </form>
    </>
  )
}
其实我们在input里面添加了一个事件
onChange={event => this.setState({ formIsHalfFilledOut: event.target.value.length > 0 })}
当输入框有值适,我们就把formIsHalfFilledOut设为true,所以就会触发Prompt出现的条件
还有我们点击提交后,我们也要修改formIsHalfFilledOut为true
这里注意了,我们要使用setState的第二个参数,意为改变后再执行的回调函数
因为我们的setState是异步的,如果我们只是修改formIsHalfFilledOut的值后
就直接执行页面跳转是不会触发拦截的
handleSubmit = (event) => {
  this.setState({
    formIsHalfFilledOut: true
  }, () => {
    event.preventDefault()
    let name = this.textInput.value
    let user = { id: Date.now(), name }
    let usersStr = localStorage.getItem('users')
    let users = usersStr ? JSON.parse(usersStr) : []
    users.push(user)
    localStorage.setItem('users', JSON.stringify(users))
    this.props.history.push('/user/list')
  })
}
综上,代码就是
import React, { Component } from 'react';
import { Prompt } from '../react-router-dom'

export default class UserAdd extends Component {
  state = { formIsHalfFilledOut: false }
  handleSubmit = (event) => {
    this.setState({
      formIsHalfFilledOut: true
    }, () => {
      event.preventDefault()
      let name = this.textInput.value
      let user = { id: Date.now(), name }
      let usersStr = localStorage.getItem('users')
      let users = usersStr ? JSON.parse(usersStr) : []
      users.push(user)
      localStorage.setItem('users', JSON.stringify(users))
      this.props.history.push('/user/list')
    })
  }
  render() {
    return (
      <>
        <Prompt
          when={this.state.formIsHalfFilledOut}
          message={location => `你是否将要离开,前往${location.pathname}`}
        />
        <form onSubmit={this.handleSubmit}>
          <div className='form-group' onSubmit={this.handleSubmit}>
            <label>用户名</label>
            <input
              ref={ele => this.textInput = ele}
              className='form-control'
              onChange={event => this.setState({ formIsHalfFilledOut: event.target.value.length > 0 })}
            />
          </div>
          <div className='form-group'>
            <input type="submit" className='btn btn-primary' />
          </div>
        </form>
      </>
    )
  }
}
代码实现
关于弹窗的实现就要涉及到
Window.confirm()
The **Window.confirm()** method displays a modal dialog with an optional message and two buttons: OK and Cancel.
SyntaxSection
result = window.confirm(message);
messageis an optional string to display in the dialog.resultis a boolean indicating whether OK (true) or Cancel (false) was selected. If a browser is ignoring in-page dialogs, thenresultis alwaysfalse.
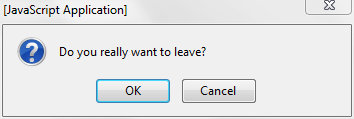
ExampleSection
if (window.confirm("Do you really want to leave?")) {
  window.open("exit.html", "Thanks for Visiting!");
}
Produces:
NotesSection
Dialog boxes are modal windows — they prevent the user from accessing the rest of the program's interface until the dialog box is closed. For this reason, you should not overuse any function that creates a dialog box (or modal window). Regardless, there are good reasons to avoid using dialog boxes for confirmation.
如果上面讲得不是很明白,我们独立创建一个HTML文件测试
<!DOCTYPE html>
<html lang="en">

<head>
	<meta charset="UTF-8">
	<title>Document</title>
</head>

<body>
	<script>
		let ret = window.confirm('confirm测试')
		console.log('<<<===ret==>>>');
		console.log(ret);
		console.log('==>>>><<<==');
	</script>
</body>

</html>
打开该页面后
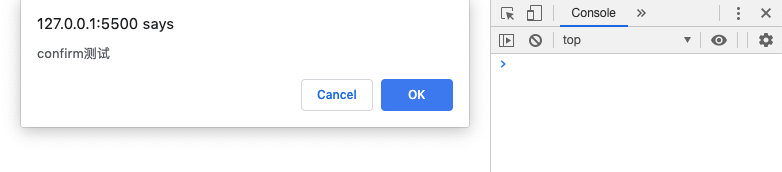
如果我们添加OK
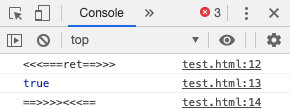
我们的ret就为true
如果我们添加Cancel

那么我们就知道我们的Prompt实际上就是触发了windown.confirm这么简单
<Prompt
  when={this.state.formIsHalfFilledOut}
  message={location => `你是否将要离开,前往${location.pathname}`}
  />
再来看看Prompt的两个属性
whenmessagestringfunc
HashRouter.js
那我们假设上下文就实现了这个功能,该接口就为block且存储在history
import React from 'react'
import Context from './context';
export default class Prompt extends React.Component {
	static contextType = Context;
	render() {
		this.history = this.context.history;
		const { when, message } = this.props;
		if (when) {
			this.history.block(message);
		} else {
			this.history.block(null);
		}
		return null;
	}
}
那我们可以猜想到这个接口实际上就是window.confirm
现在我们到HashRouter.js去实现这个block
我们在实例中添加一个message属性来存储消息
message = null
那么我们把这个属性添加到上下文中去
let value = {
  //...
  history: {
    // ...
    block: message => {
      if (typeof message === 'string') {
        this.message = location => message
      } else {
        this.message = message
      }
    },
    // ...
  }
}
return (
  <Context.Provider value={value}>
    {this.props.children}
  </Context.Provider>
)
现在我们把要显示的消息存储起来了
那我们的window.confirm什么时候调用呢?
当页面跳转的时候,我们就会调用这个api
所以,我们应该放在history.push里面
let value = {
  //...
  history: {
    push: to => {
      // 如果message有值,表示需要触发window.confirm
      if (this.message) {
        let allow = window.confirm(this.message(this.state.location))
        // 如果点 Cancel 即返回结果为false,我们就不渲染,保持原来的页面
        if (!allow) return
      }
      if (typeof to === 'object') {
        let { pathname, state } = to;
        this.locationState = state;
        window.location.hash = pathname;
      } else {
        window.location.hash = to;
      }
    },
    block: message => this.message = message,
    // ...
  }
}
return (
  <Context.Provider value={value}>
    {this.props.children}
  </Context.Provider>
)
但是这会有一个问题
就是当我们在跳转页面的时候,又会触发这个弹窗,因为此时的this.message是有值的
所以我们需要在离开页面前清除this.message
于是我们写一个清除的api给创建this.message的组件在销毁时调用
unblock: () => this.message = null
最终的代码就是
// src/react-router-dom/HashRouter.js
import React, { Component } from 'react'
import Context from './context';
export default class HashRouter extends Component {
	state = {
		location: { pathname: window.location.hash.slice(1) }
	}
	locationState = undefined
	message = null
	componentDidMount() {
		window.location.hash = window.location.hash || '/';
		window.addEventListener('hashchange', () => {
			this.setState({
				location: {
					...this.state.location,
					pathname: window.location.hash.slice(1) || '/',
					state: this.locationState
				}
			});
		});
	}
	render() {
		let value = {
			location: this.state.location,
			history: {
				push: to => {
					if (this.message) {
						let allow = window.confirm(this.message(this.state.location))
						if (!allow) return
					}
					if (typeof to === 'object') {
						let { pathname, state } = to;
						this.locationState = state;
						window.location.hash = pathname;
					} else {
						window.location.hash = to;
					}
				},
				block: message => {
					if (typeof message === 'string') {
						this.message = location => message
					} else {
						this.message = message
					}
				},
				unblock: () => this.message = null
			}
		}
		return (
			<Context.Provider value={value}>
				{this.props.children}
			</Context.Provider>
		)
	}
}
Prompt.js
那我们现在还要回到Prompt.js里在销毁前调用这个清除this.message
componentWillUnmount() {
  this.history.unblock();
}
最终的代码如下
// src/react-router-dom/Prompt.js
import React from 'react'
import Context from './context';
export default class Prompt extends React.Component {
	static contextType = Context;
	componentWillUnmount() {
		this.history.unblock();
	}
	render() {
		this.history = this.context.history;
		const { when, message } = this.props;
		if (when) {
			this.history.block(message);
		} else {
			this.history.block(null);
		}
		return null;
	}
}
BrowserRouter
react-router 的工作方式,是在组件树顶层放一个 Router 组件,然后在组件树中散落着很多 Route 组件(注意比 Router 少一个“r”),顶层的 Router 组件负责分析监听 URL 的变化,在它保护伞之下的 Route 组件可以直接读取这些信息。
很明显,Router 和 Route 的配合,就是之前我们介绍过的“提供者模式”,Router 是“提供者”,Route是“消费者”。
更进一步,Router 其实也是一层抽象,让下面的 Route 无需各种不同 URL 设计的细节,不要以为 URL 就一种设计方法,至少可以分为两种。
- 第一种很自然,比如
/对应 Home 页,/about对应 About 页,但是这样的设计需要服务器端渲染,因为用户可能直接访问任何一个 URL,服务器端必须能对/的访问返回 HTML,也要对/about的访问返回 HTML。 - 第二种看起来不自然,但是实现更简单。只有一个路径
/,通过 URL 后面的#部分来决定路由,/#/对应 Home 页,/#/about对应 About 页。因为 URL 中#之后的部分是不会发送给服务器的,所以,无论哪个 URL,最后都是访问服务器的/路径,服务器也只需要返回同样一份 HTML 就可以,然后由浏览器端解析#后的部分,完成浏览器端渲染。
在 react-router,有 BrowserRouter 支持第一种 URL,有 HashRouter 支持第二种 URL。
因为 create-react-app 产生的应用默认不支持服务器端渲染,为了简单起见,我们在下面的例子中使用 HashRouter,在实际产品中,其实最好还是用 BrowserRouter,这样用户体验更好。
import React, { Component } from 'react'
import Context from './context';
(function (history) {
	var pushState = history.pushState;
	history.pushState = function (state, title, pathname) {
		if (typeof window.onpushstate == "function") {
			window.onpushstate(state, pathname);
		}
		return pushState.apply(history, arguments);
	};
})(window.history);
export default class BrowserRouter extends Component {
	state = {
		location: { pathname: '/' }
	}
	block = null
	componentDidMount() {
		window.onpopstate = (event) => {
			this.setState({
				location: {
					...this.state.location,
					pathname: document.location.pathname,
					state: event.state
				}
			});
		};
		window.onpushstate = (state, pathname) => {
			this.setState({
				location: {
					...this.state.location,
					pathname,
					state
				}
			});
		};
	}
	render() {
		let that = this;
		let value = {
			location: that.state.location,
			history: {
				push(to) {
					if (that.block) {
						let allow = window.confirm(that.block(that.state.location));
						if (!allow) return;
					}
					if (typeof to === 'object') {
						let { pathname, state } = to;
						window.history.pushState(state, '', pathname);
					} else {
						window.history.pushState('', '', to);
					}
				},
				block(message) {
					that.block = message;
				},
				unblock() {
					that.block = null;
				}
			}
		}
		return (
			<Context.Provider value={value}>
				{this.props.children}
			</Context.Provider>
		)
	}
}
