

Switch
测试用例
Switch我们希望匹配到一个后就停止匹配,不再继续匹配下一个路由,我们可以使用Switch组件
<Route path='/home' component={Home} />
<Route path='/home' component={Home} />
<Route path='/user' component={User} />
<Route path='/profile' component={Profile} />
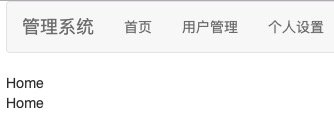
我们会发现Home被渲染了两次,默认渲染方式是就类似与
if(hash == '/home') render
if(hash == '/home') render
if(hash == '/user') render
if(hash == '/profile') render
所以如果有匹配的就会渲染
而很多时候,我们希望这个判断是
if(hash == '/home') render
else if(hash == '/home') render
else if(hash == '/user') render
else if(hash == '/profile') render
当其中一个渲染完成后,就停止继续往下判断了
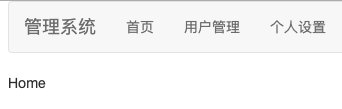
而Switch就是这个作用
<Switch>
  <Route path='/home' component={Home} />
  <Route path='/home' component={Home} />
  <Route path='/user' component={User} />
  <Route path='/profile' component={Profile} />
</Switch>
这个时候我们就只是渲染了第一个组件了
代码实现
Switch.js
实际上上面的代码还省略了在最外层的HashRouter
<Router>
  <Switch>
    <Route path='/home' component={Home} />
    <Route path='/home' component={Home} />
    <Route path='/user' component={User} />
    <Route path='/profile' component={Profile} />
  </Switch>
</Router>
Switch就成为了Router渲染出来的this.props.children
类似于Swtich在Router和Route做了一层代理
那对于Switch来说他的作用就是渲染出符合条件的this.props.chirlren 其中一个
那我们通过上下文获取hash
import React, { Component } from 'react'
import Context from './context';
import pathToRegexp from 'path-to-regexp';

export default class Switch extends Component {
	static contextType = Context;
	render() {
		let pathname = this.context.location.pathname

		return null
	}
}
然后遍历this.props.chirlen
获取组件的props.path
然后与上面获取的pathname匹配,如果匹配到了我们直接return
既然return了也就结束了遍历,即只是返回了其中一个组件
import React, { Component } from 'react'
import Context from './context';
import pathToRegexp from 'path-to-regexp';

export default class Switch extends Component {
	static contextType = Context;
	render() {
		let pathname = this.context.location.pathname
		for (let i = 0; i < this.props.children.length; i++) {
			const child = this.props.children[i];
			let { path = '/' } = child.props
			let regexp = pathToRegexp(path, [], { end: false })
			let ret = pathname.match(regexp)
			if (ret) return child
		}
		return null
	}
}
我们现在可以测试一下,我们在Route里的render中添加这一句
render() {
		let { path, component: Component } = this.props;
		console.log('render' + path);
  // ...
}
我们现在具体某个路由时
控制台只是输出
render/profile
我们在点用户管理的时候

控制台就输出
render/user
render/user/add
render/user/list
render/user/detail/:id
那是因为这里的路由没用使用switch进行包裹
<div className="col-md-10">
  <Route path="/user/add" component={UserAdd} />
  <Route path="/user/list" component={UserList} />
  <Route path="/user/detail/:id" component={UserDetail} />
</div>
所以会对每个组件进行渲染
现在我们来给这里添加Switch
<div className="col-md-10">
  <Switch>
    <Route path="/user/add" component={UserAdd} />
    <Route path="/user/list" component={UserList} />
    <Route path="/user/detail/:id" component={UserDetail} />
  </Switch>
</div>
此时再来点击,控制台就只是输出
render/user
从这里我们也可能发现我们可以使用Switch对项目进行优化,减少不必要的渲染
保护路由
测试用例
Protected.js
我们现在来实现一个受保护路由
用来保护那些只有登录后才能访问的路由
如果用户已经登录,则可以渲染组件,如果没登录,则需要跳转到登录页,登录后再跳回来
这里我们判断是否登录,简单的使用一个标记从localStorage获取logined,如果该值为true就表示已经登录
<ul className="nav navbar-nav">
  <li><Link to="/home">首页</Link> </li>
  <li><Link to="/user">用户管理</Link></li>
  <li><Link to="/profile">个人设置</Link></li>
</ul>

<Switch>
  <Route path="/home" exact component={Home} />
  <Route path="/user" component={User} />
  <Route path="/login" component={Login} />
  <Protected path="/profile" component={Profile} />
</Switch>

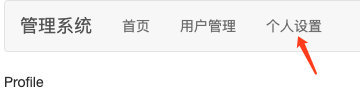
当我们点击个人设置的时候,如果没有登录,我们是无法直接进入Profile组建的
只有登录状态的时候,才渲染出Profile
这个Protected就是一个判断
if(登录)
  render Component
else
  render Login
但是我们要思考的问题是
我们在未登录时,会进入登录页面
在登录页面登录完后
我们希望是回到原本的那个需求登录的页面
这里指的就是Profile
Route
这里就要知道Route的渲染方式有三种
- Component
- render
- children
render: func
This allows for convenient inline rendering and wrapping without the undesired remounting explained above.
Instead of having a new React element created for you using the componentprop, you can pass in a function to be called when the location matches. The render prop function has access to all the same route props (match, location and history) as the component render prop.
Warning:
<Route component>takes precedence over<Route render>so don’t use both in the same<Route>
// convenient inline rendering
<Route path="/home" render={() => <div>Home</div>}/>

// wrapping/composing
// You can spread routeProps to make them available to your rendered Component
const FadingRoute = ({ component: Component, ...rest }) => (
  <Route {...rest} render={routeProps => (
    <FadeIn>
      <Component {...routeProps}/>
    </FadeIn>
  )}/>
)

<FadingRoute path="/cool" component={Something}/>
这里我们开始 介绍render这种方式
那这里我们就可以把上面的判断写成
export default function ({ component: Component, ...rest }) {
  return <Route {...rest} render={props => (
      localStorage.getItem('logined')
      ? <Component {...props} />
      : 转到登录页面
    )} />
}
我们先看下最外层的函数的参数为什么这么写
<Protected path="/profile" component={Profile} />
我们是这么调用这个组建的
函数组建的参数就是props和context
这里我们只是对props解构
除了作为渲染组件的Component其余都是要往下传递的参数
所以有{ component: Component, ...rest }
后面就是一个上面讲到是否登录的判断了
Redirect
现在我们要开始讲这个页面跳转到登录的过程了
这里会使用到Redirect页面重定向
Redirect的to不仅可以是一个字符串也可以是一个对象
to: object
A location to redirect to. pathname can be any valid URL path that path-to-regexp@^1.7.0 understands.
<Redirect
  to={{
    pathname: "/login",
    search: "?utm=your+face",
    state: { referrer: currentLocation }
  }}
/>
The state object can be accessed via this.props.location.state in the redirected-to component. This new referrer key (which is not a special name) would then be accessed via this.props.location.state.referrerin the Login component pointed to by the pathname '/login'
当to的参数为一个对象时有
pathname:要跳转的目标路径state:状态
pathname我们是已经知道的
这个state存储的是一个对象
该对象的属性是任意的,比如文档使用了referrer
我们这里我们希望缓存的是我们从即将跳转前的地址
所以我们就可以把代码写成state: { from: props.location.pathname }
这个表示我们原本要访问的路由,即profile
那等我们在登录组件确认登录后就可以利用这个属性重新跳回来刚刚需要登录的页面了,即profile
最后的代码就有
// src/components/Protected.js
import React, { Component } from 'react';
import { Route, Redirect } from '../react-router-dom';

export default function ({ component: Component, ...rest }) {
  return <Route {...rest} render={props => (
    localStorage.getItem('logined')
      ? <Component {...props} />
      : <Redirect to={{
        pathname: '/login',
        state: { from: props.location.pathname }
      }} />
  )} />
}
Login.js
那现在我们就要来开始写登录页面了
render() {
  return (
    <button className="btn btn-primary" onClick={this.handleClick}>登录</button>
  )
}
点击登录后,我们就往localStorage做一个标记
handleClick = () => {
  localStorage.setItem('logined', 'true');
}
上面就表示登录了
那我们登录后,我们需要返回到登录前想访问的页面
这时候我们就可以通过location.state来获取了
我们在上面把路径存储在了location.state.from
那我们就可以写成
	handleClick = () => {
		localStorage.setItem('logined', 'true');
		if (this.props.location.state)
			this.props.history.push(this.props.location.state.from);
	}
所以,代码就是
// src/components/Login.js
import React, { Component } from 'react'

export default class Login extends Component {
	handleClick = () => {
		localStorage.setItem('logined', 'true');
		if (this.props.location.state)
			this.props.history.push(this.props.location.state.from);
	}
	render() {
		return (
			<button className="btn btn-primary" onClick={this.handleClick}>登录</button>
		)
	}
}
那现在我们就实现了点击个人设置
如果登录就跳转到登录页面
点击登录后就进入个人设置
代码实现
在上面我们使用到了
Routerender
Redirecttopathnamestate
Route.js
我们现在来实现Route的render
render只是一种对component的简写,如果同时存在两者,component的优先级会高于render,即两者共存时,只渲染component
文档写的很是清楚
Warning:
<Route component>takes precedence over<Route render>so don’t use both in the same<Route>
那我们只要先提取出render
let { path, component: Component, render } = this.props;
然后在原本渲染component的地方添加一个判断即可
if (Component) return <Component {...props} />
else if (render) return render(props)
else return null
注意这里的render是一个函数,所以我们返回的是函数切原本的参数就作为函数的参数传递,即render(props)
最终的代码就是
import React, { Component } from 'react';
import Context from './context';
import pathToRegxp from 'path-to-regexp'

export default class Route extends Component {
	static contextType = Context;
	render() {
		let { path, component: Component, render } = this.props;
		let pathname = this.context.location.pathname;
		let keys = []
		let regxp = pathToRegxp(path, keys, { end: false })
		let ret = pathname.match(regxp)
		if (ret) {
			let [url, ...values] = ret
			keys = keys.map(key => key.name)
			let params = keys.reduce((memo, key, index) => {
				memo[key] = values[index]
				return memo
			}, {})
			let match = {
				url: pathname,
				path,
				params
			}
			let props = {
				location: this.context.location,
				history: this.context.history,
				match
			}

			if (Component) return <Component {...props} />
			else if (render) return render(props)
			else return null
		}
		return null;
	}
}
Redirect.js
我们再看下它的用法
<Redirect to={{
    pathname: '/login',
      state: { from: props.location.pathname }
  }} />
就是一个简单的页面跳转,所以我们只要往this.context.history里面push组件上的to属性即可
import React, { Component } from 'react'
import Context from './context';

export default class Redirect extends Component {
  static contextType = Context;
  render() {
    this.context.history.push(this.props.to);
    return null;
  }
}
HashRouter.js
但是这里值得注意的是,我们原本的往this.context.history里的push的只是一个字符串
所以我们需要返回到HahsRouter.js里面修改一下上下文
我们看下原本的代码
let value = {
  // ...
  history: {
    push: to =>  window.location.hash = to
  }
}
现在我们不能这么写了,因为to可能是一个对象了
所以我们要进行判断,如果是对象的话,我们就把pathname和state提取出来
push: to => {
  if (typeof to === 'object') {
    let { pathname, state } = to;
    // state应该怎么处理呢
    window.location.hash = pathname;
  } else {
    window.location.hash = to;
  }
}
这个state根据文档的时候,就应该存储在location.state
我们再来回顾一下测试用例的用法
handleClick = () => {
  localStorage.setItem('logined', 'true');
  if (this.props.location.state)
    this.props.history.push(this.props.location.state.from);
}
测试用例就是通过location.state来获取的
那我们就应该把state存储起来
我们先把state缓存到实例的属性上
export default class HashRouter extends Component {
  // ...
  locationState = undefined
//...
render() {
  //...
  push: to => {
    if (typeof to === 'object') {
      let { pathname, state } = to;
      this.locationState = state;
      window.location.hash = pathname;
    } else {
      window.location.hash = to;
    }
    // ...
  }
}
那当我们更新上下文的时候,就把locationState添加进去
componentDidMount() {
  window.location.hash = window.location.hash || '/';
  window.addEventListener('hashchange', () => {
    this.setState({
      location: {
        ...this.state.location,
        pathname: window.location.hash.slice(1) || '/',
        // 添加state
        state: this.locationState
      }
    });
  });
}
最终的代码就是
// src/react-router-dom/HashRouter.js
import React, { Component } from 'react'
import Context from './context';
export default class HashRouter extends Component {
	state = {
		location: { pathname: window.location.hash.slice(1) }
	}
	locationState = undefined
	componentDidMount() {
		window.location.hash = window.location.hash || '/';
		window.addEventListener('hashchange', () => {
			this.setState({
				location: {
					...this.state.location,
					pathname: window.location.hash.slice(1) || '/',
					state: this.locationState
				}
			});
		});
	}
	render() {
		let value = {
			location: this.state.location,
			history: {
				push: to => {
					if (typeof to === 'object') {
						let { pathname, state } = to;
						this.locationState = state;
						window.location.hash = pathname;
					} else {
						window.location.hash = to;
					}
				}
			}
		}
		return (
			<Context.Provider value={value}>
				{this.props.children}
			</Context.Provider>
		)
	}
}
导航样式
测试用例
我们在做导航的时候

希望说当页面显示该路由的时候,对应的导航会有别的样式提醒,比如上面的红框
所以我们会对这导航进行样式的封装
<ul className="nav navbar-nav">
  <li><Link to="/home">首页</Link> </li>
  <li><Link to="/user">用户管理</Link></li>
  <li><Link to="/profile">个人设置</Link></li>
</ul>
我们原本简单的使用Link来实现页面的切换
现在我们要对这个Link进行封装样式
所以我们自己封装一个组件
<ul className="nav navbar-nav">
  <MenuLink to="/home">首页</MenuLink>
  <MenuLink to="/user">用户管理</MenuLink>
  <MenuLink to="/profile">个人设置</MenuLink>
</ul>
而这个MenuLink我们就使用Route的第三种渲染方式
我们回顾一下Route的三种渲染方式
componentrenderchildren
children: func
Sometimes you need to render whether the path matches the location or not. In these cases, you can use the function children prop. It works exactly like render except that it gets called whether there is a match or not.
The children render prop receives all the same route props as the component and render methods, except when a route fails to match the URL, then match is null. This allows you to dynamically adjust your UI based on whether or not the route matches. Here we’re adding an active class if the route matches
<ul>
  <ListItemLink to="/somewhere" />
  <ListItemLink to="/somewhere-else" />
</ul>;

const ListItemLink = ({ to, ...rest }) => (
  <Route
    path={to}
    children={({ match }) => (
      <li className={match ? "active" : ""}>
        <Link to={to} {...rest} />
      </li>
    )}
  />
);
This could also be useful for animations:
<Route children={({ match, ...rest }) => (
  {/* Animate will always render, so you can use lifecycles
      to animate its child in and out */}
  <Animate>
    {match && <Something {...rest}/>}
  </Animate>
)}/>
Warning: Both
<Route component>and<Route render>take precedence over<Route children>so don’t use more than one in the same<Route>.
MenuLink.js
Route.children是不管路径是否匹配上都会显示的,这就特别符合导航栏的定位了
那我们就开始来写吧
import React from 'react'
import { Route, Link } from '../react-router-dom'
export default (({ to, ...rest }) => (
  <Route path={to} children={({ match }) => (
    <li className={match ? 'active' : ''}>
      <Link to={to} {...rest} />
    </ li>
  )}>
  </Route>
))
那这样,当我们添加的导航栏的时候,因为match匹配上了,所以就会给该导航添加了属性active
因为这里我们使用了bootstrap,所以当我们这里的li是active样式时,就会使用他的样式,现在的效果就是

代码实现
Route.js
这里我们就要开始来修改我们的Route让他可以渲染children
let { path, component: Component, render, children } = this.props;
那在渲染判断的时候就有
if (Component) return <Component {...props} />
else if (render) return render(props)
else if (children) return children(props)
else return null
Warning: Both
<Route component>and<Route render>take precedence over<Route children>so don’t use more than one in the same<Route>.
但是这还不够,因为我们还知道
Sometimes you need to render whether the path matches the location or not. In these cases, you can use the function children prop. It works exactly like render except that it gets called whether there is a match or not.
不管有没有匹配,如果有children都会渲染出来
所以整个判断就要修改成
let ret = pathname.match(regxp)
//...
if(ret){
  // ...
  if (Component) return <Component {...props} />
  else if (render) return render(props)
  else if (children) return children(props)
  else return null
}
else return children ? children(props) : null
这里就要注意了
原本我们为了减少不比要的计算,把props的计算放在ret存在时的判断
let props = {
  location: this.context.location,
  history: this.context.history,
  match
}
此时我们就要提升,放在判断之前,因为就算ret不匹配,我们的children也会使用到porps
最终的代码就是
import React, { Component } from 'react';
import Context from './context';
import pathToRegxp from 'path-to-regexp'

export default class Route extends Component {
	static contextType = Context;
	render() {
		let { path, component: Component, render, children } = this.props;
		let pathname = this.context.location.pathname;
		let keys = []
		let regxp = pathToRegxp(path, keys, { end: false })
		let ret = pathname.match(regxp)
		let props = {
			location: this.context.location,
			history: this.context.history,
		}
		if (ret) {
			let [url, ...values] = ret
			keys = keys.map(key => key.name)
			let params = keys.reduce((memo, key, index) => {
				memo[key] = values[index]
				return memo
			}, {})
			let match = {
				url: pathname,
				path,
				params
			}
			props.match = match
			if (Component) return <Component {...props} />
			else if (render) return render(props)
			else if (children) return children(props)
			else return null
		}
		return children ? children(props) : null
	}
}
Link.js
我们原本的Link只是一个简单的a标签,没有把属性传给它,以后可能会在该标签使用到属性,所以我们严谨传递属性比较好
import React, { Component } from 'react'
import Context from './context'
export default class Link extends Component {
	static contextType = Context
	render() {
		return (
			<a
				{...this.props}
				onClick={() => this.context.history.push(this.props.to)}
			>
				{this.props.children}
			</a >)
	}
}
