

安装
yarn add redux
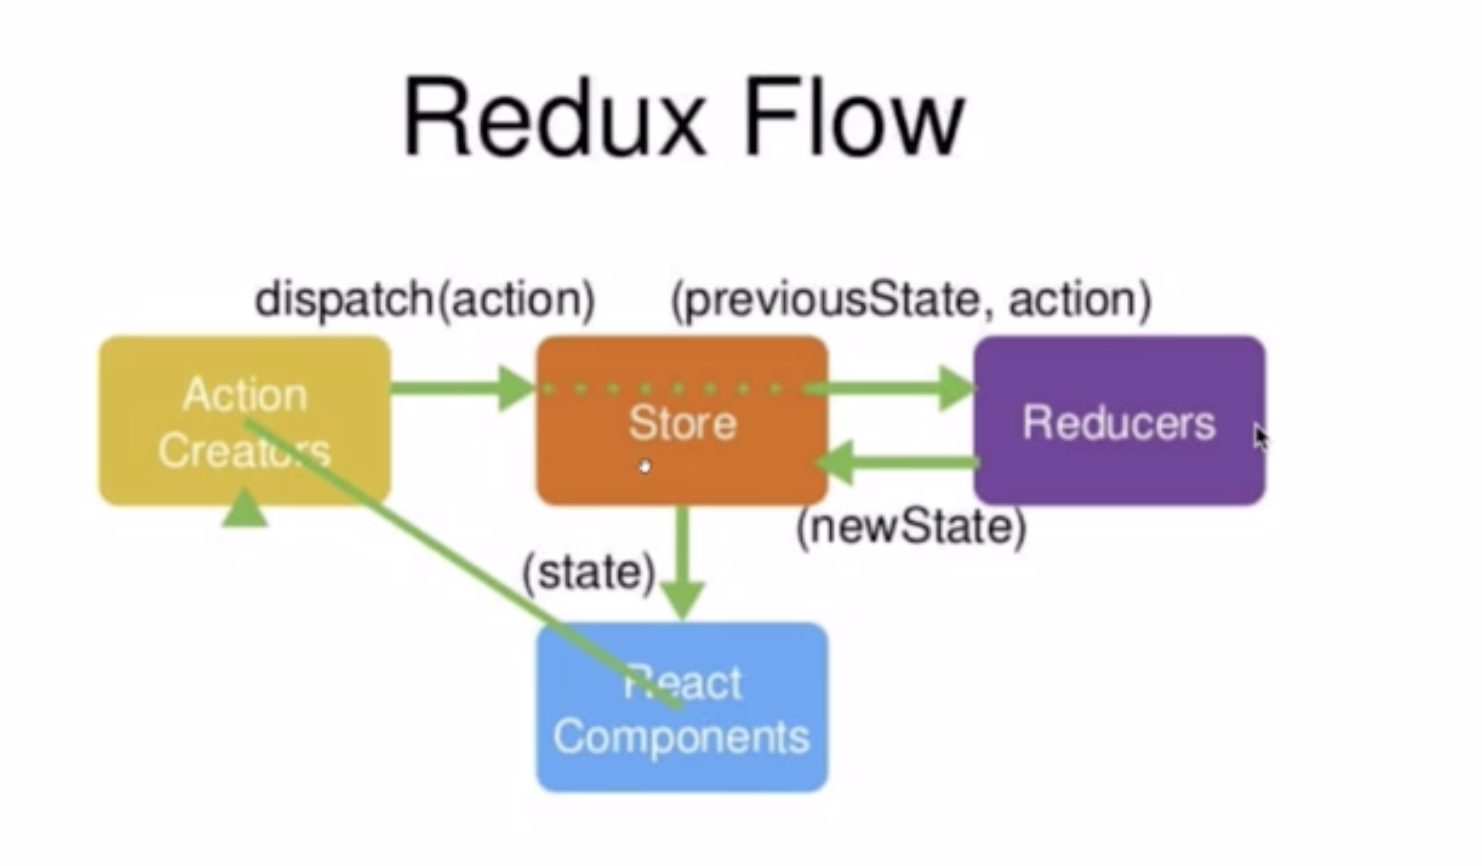
Redux流程
React Components(Interaction e.g onClick) -> Action Creators(dispatch(action)) -> Store(previousState,action) ->Reducers(new State) -> Store(state) -> React Components
实例
文件结构
component-demo.js
/store/index.js //store 代码存放位置
/store/reducer.js
代码(Input框输入内容联动效果)
这里以一个在input框输入内容存入reducer再更新到页面上的例子来解释redux
解释
首先在Component-demo.js里展示出Input框,
为其绑定onChange={this.handleInputChange}方法,
在handleInputChange方法中创建一个action,
给出type名称以及值,
通过dispatch(action)方法发送给store,
store自动传给reducer,
reducer中使用if判断action.type,
如果等于之前定义的方法,
则深拷贝当前的状态,
然后让复制出的状态等于action传过来的状态,
并将新的状态返回给store,
store在将state更新到组件。
组件通过this.state = store.getState()同步state状态。
使用store.subscribe(this.handleStoreChange);订阅状态,
在handleStoreChange方法中设置 this.setState(store.getState);同步更新到页面上。
/store/index.js
固定写法,创建一个store然后将store暴漏出去
import { createStore } from 'redux';
import reducer from './reducer';
const store = createStore(reducer);
export default store;
/store/reducer.js
//创建一个默认的状态
const defaultState = {
    inputValue:'',
}
export default (state = defaultState , action) =>{
    if(action.type === 'change_input_value'){
        const newState = JSON.parse(JSON.stringify(state));
        newState.inputValue = action.value;
        return newState;
    }
    return state;
}
component-demo.js
import React,{ Component } from 'react';
import store from './store/index.js';
class Component-demo extends Component{
    constructor(props){
        super(props);
        this.state = store.getState();
        this.handleInputChange = this.handleInputChange.bind(this);
        this.hanleStoreChange = this.handleStoreChange.bind(this);
        store.subscribe(this.hanleStoreChange);
    }
    render(){
        return(
            <div>
                <Input
                value={this.state.value}
                onChange={this.handleInputChange}
                />
            </div>
        )
    }
    handleInputChange(e){
        const action = {
            type:'change_input_value',
            value:e.target.value
        }
        store.dispatch(action);
    }
    hanleStoreChange{
        this.setState(store.getState);
    }
}
