

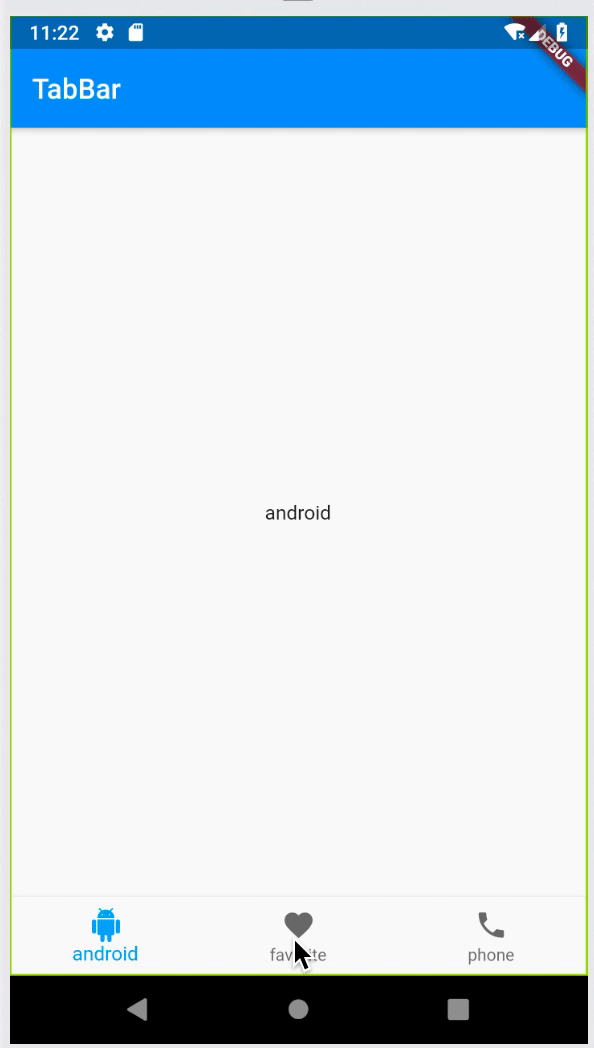
日常开发一个 app 时,首页一般都会有个底部导航栏,那如果底部导航栏对应的页面有顶部导航栏,那么应该怎么做呢?以下是本文 demo 的效果图:
一、 BottomNavigationBar
先直接看下 BottomNavigationBar 的用法:
@override
Widget build(BuildContext context) {
  return Scaffold(
    bottomNavigationBar: BottomNavigationBar(
      items: [
        BottomNavigationBarItem(
          icon: Icon(Icons.android),
          title: Text('android'),
        ),
        BottomNavigationBarItem(
          icon: Icon(Icons.favorite),
          title: Text('favorite'),
        ),
        BottomNavigationBarItem(
          icon: Icon(Icons.phone),
          title: Text('phone'),
        ),
      ],
      onTap: (index){
        setState(() {
          this.selectedIndex = index;
        });
      },
      currentIndex: selectedIndex,
    ),
  );
}
在 Scaffold 中有个 bottomNavigationBar 属性就是专门为底部导航栏提供的,BottomNavigationBar 有几个必须实现的属性,首先 items ,你想要有几个导航栏条目就放几个 BottomNavigationBarItem 部件即可。你还需要实现 onTap 属性,在点击条目的时候改变选中的索引 selectedIndex,这个 selectedIndex 用于 currentIndex 属性,同时也会定位每个导航栏条目对应的页面。从点击事件中也可以看出,底部导航栏所属的页面必须是 StatefulWidget,因为 selectedIndex 是可变的。
完成底部导航栏的部件后,接下来需要创建每个导航栏 item 对应的页面了,这个其实直接在 Scaffold 中的 body 定义即可:
final List<Widget> bottomBarViews = [
    FirstBarView(),
    SecondBarView(),
    ThirdBarView(),
  ];

@override
Widget build(BuildContext context) {
  return Scaffold(
    body: bottomBarViews[selectedIndex],
  );
}
bottomBarViews 里是一系列你任意定义的页面,数量和导航栏条目数量一致。
二、TabBar 和 TabBarView
顶部导航栏用 TabBar 实现,官方文档和很多文章都会用下面这种方式来实现:
  @override
  Widget build(BuildContext context) {
    return MaterialApp(
      home: DefaultTabController(
        length: choices.length,
        child: Scaffold(
          appBar: AppBar(
            title: const Text('Tabbed AppBar'),
            bottom: TabBar(
              isScrollable: true,
              tabs: choices.map((Choice choice) {
                return Tab(
                  text: choice.title,
                  icon: Icon(choice.icon),
                );
              }).toList(),
            ),
          ),
          body: TabBarView(
            children: choices.map((Choice choice) {
              return Padding(
                padding: const EdgeInsets.all(16.0),
                child: ChoiceCard(choice: choice),
              );
            }).toList(),
          ),
        ),
      ),
    );
  }
DefaultTabController 是 Flutter 提供的默认同步 TabBar 和 TabBarView 状态的部件,一般都会把 TabBar 写到 AppBar 的 bottom 属性中,然后在 Scaffold 的 body 属性中放入 TabBarView。这两个部件也是比较好理解,每个顶部导航栏 item 对应一张页面。但是这样和底部导航栏就冲突了,两个页面列表都是放在 Scaffold 的 body 属性,那么如何调整呢?
我在底部导航栏的第三个页面 ThirdBarView 中加入顶部导航栏:
class ThirdBarViewState extends State<ThirdBarView> with SingleTickerProviderStateMixin{

  List tabs = ["新闻", "历史", "图片"];
  TabController tabController;

  @override
  void initState() {
    super.initState();
    tabController = TabController(length: tabs.length, vsync: this);
  }

  @override
  Widget build(BuildContext context) {
    return Column(
      children: <Widget>[
        TabBar(
          tabs: tabs.map((text) => Tab(text: text)).toList(),
          controller: tabController,
          labelColor: Colors.blue,
          indicatorColor: Colors.pink,
        ),
        Expanded(
          child: TabBarView(
            controller: tabController,
            children: tabs.map((text){
              return Center(
                child: Text(text),
              );
            }).toList(),
          ),
        ),
      ],
    );
  }
}
首先因为没有使用 DefaultTabController ,我们需要声明一个 TabController 对象,可以通过这个对象来控制 TabBar 和 TabBarView 同步。然后就按照布局的方式把这两个部件放到 Column 中,TabBarView 外面需要包一层 Expanded 来占据剩余的空间。
三、 总结
最后贴出所有的代码:
import 'package:flutter/material.dart';

void main() => runApp(MaterialApp(
  title: 'tabbar',
  home: TableBarDemo(),
));

class TableBarDemo extends StatefulWidget {
  @override
  State<StatefulWidget> createState() {
    return TableBarState();
  }
}

class TableBarState extends State<TableBarDemo> {

  int selectedIndex = 0;

  final List<Widget> bottomBarViews = [
    FirstBarView(),
    SecondBarView(),
    ThirdBarView(),
  ];

  @override
  Widget build(BuildContext context) {
    return Scaffold(
      appBar: AppBar(
        title: Text('TabBar'),
      ),
      body: bottomBarViews[selectedIndex],
      bottomNavigationBar: BottomNavigationBar(
        items: [
          BottomNavigationBarItem(
            icon: Icon(Icons.android),
            title: Text('android'),
          ),
          BottomNavigationBarItem(
            icon: Icon(Icons.favorite),
            title: Text('favorite'),
          ),
          BottomNavigationBarItem(
            icon: Icon(Icons.phone),
            title: Text('phone'),
          ),
        ],
        onTap: (index){
          setState(() {
            this.selectedIndex = index;
          });
        },
        currentIndex: selectedIndex,
      ),
    );
  }

}

class FirstBarView extends StatelessWidget {
  @override
  Widget build(BuildContext context) {
    return Center(
      child: Text('android'),
    );
  }
}

class SecondBarView extends StatelessWidget {
  @override
  Widget build(BuildContext context) {
    return Center(
      child: Text('favorite'),
    );
  }
}

class ThirdBarView extends StatefulWidget {
  @override
  State<StatefulWidget> createState() {
    return ThirdBarViewState();
  }

}

class ThirdBarViewState extends State<ThirdBarView> with SingleTickerProviderStateMixin{

  List tabs = ["新闻", "历史", "图片"];
  TabController tabController;

  @override
  void initState() {
    super.initState();
    tabController = TabController(length: tabs.length, vsync: this);
  }

  @override
  Widget build(BuildContext context) {
    return Column(
      children: <Widget>[
        TabBar(
          tabs: tabs.map((text) => Tab(text: text)).toList(),
          controller: tabController,
          labelColor: Colors.blue,
          indicatorColor: Colors.pink,
        ),
        Expanded(
          child: TabBarView(
            controller: tabController,
            children: tabs.map((text){
              return Center(
                child: Text(text),
              );
            }).toList(),
          ),
        ),
      ],
    );
  }
}
