本文主要讲实现这个微信小程序备忘录的步骤,和其中遇到的一些坑。话不多说,直接上图。
一共3个页面,首页,编辑页面和授权页面。
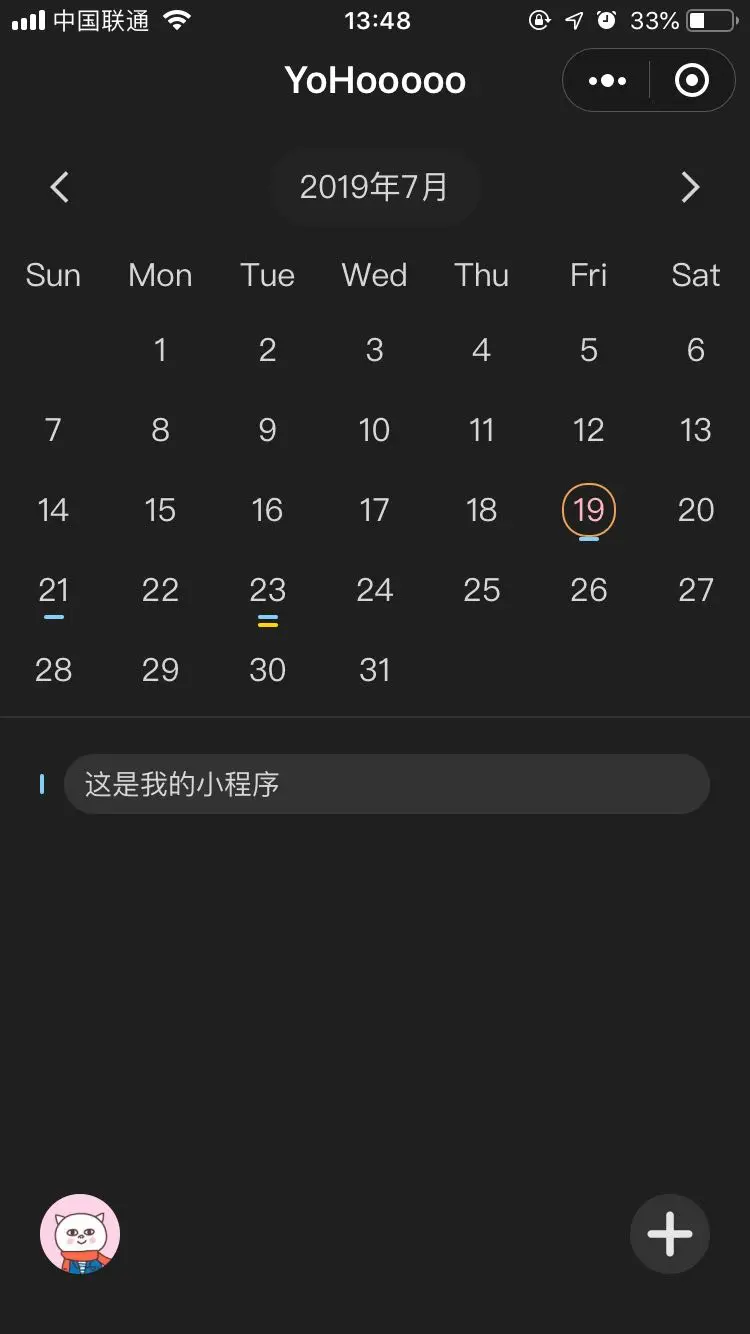
- 首页主要展示当前日历,和备忘录列表
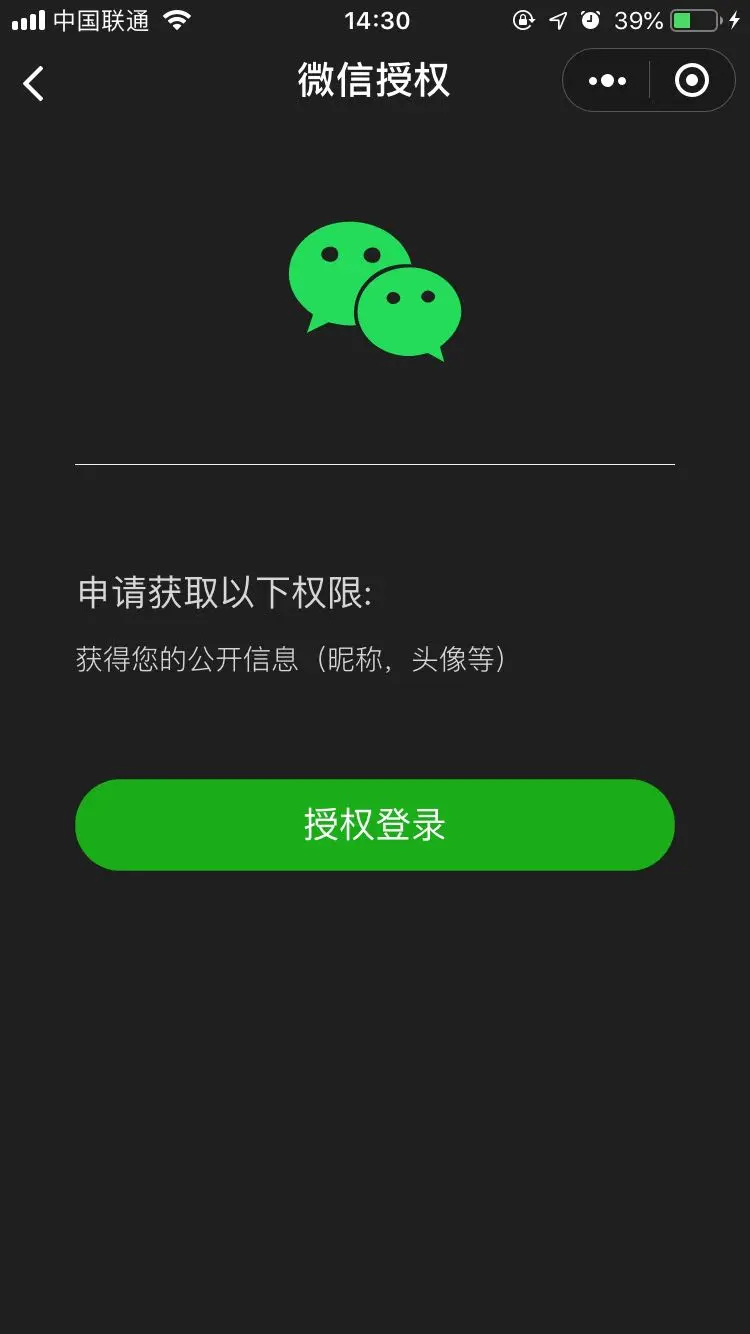
- 授权页面主要获取用户信息(包括头像,openid,昵称)
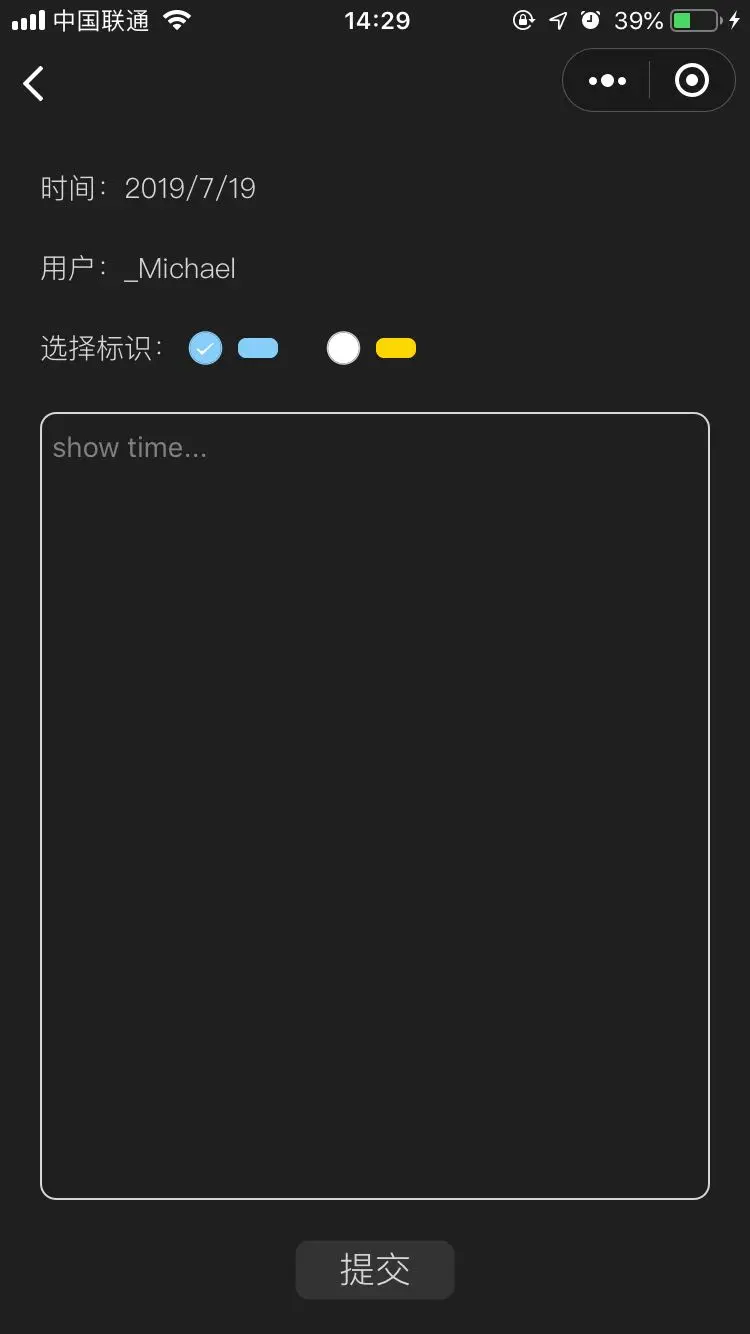
- 编辑页面主要是保存当前用户编辑的内容,同时也提供删除。
    - 前端使用wepy框架进行搭建,开发更加顺手,提供打包等功能。
    - 后端使用的就是小程序提供的云函数
    - 主要想要实现增,删,改,查等功能
日历组件的实现
目前小程序的官方并为提供日历的官方组件,所有我们只能自己实现一套日历组件。基本的难点就是在计算日历上面,对应年,月,日。

思路:
- 首先定义1-12个月的数组,对应的是相关的天数。
- 每年的2月份需要单独计算天数,需要判断是否为闰年
- 日历一共分为7列,周天到周六,行数为5行或者是6行,这个可以用flex布局。
- 计算每个月的1号在周几,就可以判断出前面空白的部分有几个,然后依次填入。
- 计算每个月的最后一天在周几,就可以判断出后面空白的部分有几个。
getList() {
        let year = this.year
        let month = this.month - 1
        let daysInMonth = [31, 28, 31, 30, 31, 30, 31, 31, 30, 31, 30, 31];

        //计算是否在闰年
        if ((year % 4 === 0 && year % 100 !== 0) || year % 400 === 0) {
            daysInMonth[1] = 29;
        }
        // 计算年月的1号是星期几
        let targetDay = new Date(year, month, 1).getDay();

        let total_calendar_list = [];
        let preNum = targetDay;

        // 这里就是判断在1号的前面有几个空白的部分
        if (targetDay > 0) {
            for (let i = 0; i < preNum; i++) {
                let obj = {
                    type: "pre",
                    content: " "
                };
                total_calendar_list.push(obj);
            }
        }
        for (let i = 0; i < daysInMonth[month]; i++) {
              let obj = {
                  type: "normal",
                  content: i + 1
              };
                  total_calendar_list.push(obj);
          }

        // 这一行代码的意思是计算每个月的最后一天后天有几个空白的部分
        // new Date(year, month+1, 0).getDay() 获得每月的最后一天在周几
        let nextNum = 6 - new Date(year, month+1, 0).getDay()

        // 然后依次填入空白
        for (let i = 0; i < nextNum; i++) {
            let obj = {
                type: "next",
                content: " "
            };
            total_calendar_list.push(obj);
        }
        this.list = total_calendar_list
        return total_calendar_list;
      }
基本上前期的页面工作,就在绘制日历上面,然后还有一些UI部分,可以自己设计。接下来我们说一说云函数的部分。
授权
    <template>
  <view class="contain-box">
    <view class="img-box">
      <img src="../assets/img/wechat.png" class="img">
    </view>
    <view class="content-box" v-if="canIUse">
      <view class="frist-title">
        申请获取以下权限:
      </view>
      <view class="sec-title">
        获得您的公开信息(昵称,头像等)
      </view>
      <button class="bottom" type="primary" open-type="getUserInfo" lang="zh_CN" bindgetuserinfo="bindGetUserInfo">
        授权登录
      </button>
    </view>
    <view v-else>
      请升级微信版本
    </view>
  </view>
</template>

<script>
import wepy from '@wepy/core'
wepy.page({
  data: {
    canIUse: wx.canIUse('button.open-type.getUserInfo')
  },
  methods: {
    bindGetUserInfo(e) {
      if (e.$wx.detail.userInfo) {
        wx.navigateBack({
          delta: 1
        })
      } else {
        wx.showModal({
            title: '警告',
            content: '您点击了拒绝授权,将无法进入小程序,请授权之后再进入!!!',
            showCancel: false,
            confirmText: '返回授权',
            success: function(res) {
                if (res.confirm) {
                  return
                }
            }
        });
      }
    }
  }
})
</script>

<style lang="less">
page{
  background-color: #1F1F1F;
  color: #D6D6D6;
}
.contain-box{
  height: 100%;
  display: flex;
  flex-direction: column;
  align-items: center;
  justify-content: center;
}
.content-box{
  width: 80%;
  margin-bottom: 200px;
  border-top: 0.5px solid #eee;
  padding-top:50px;
  .frist-title{
    font-size: 18px;
  }
  .sec-title{
    font-size: 14px;
    font-weight: 300;
    margin-top: 10px;
  }
  .bottom{
    border-radius: 80px;
    margin-top: 50px;
  }
}
.img-box{
  text-align:center;
  margin-bottom: 30px;
  .img{
    width: 100px;
    height: 100px;
  }
}
</style>
<config>
{
    navigationBarTitleText: '微信授权',
    backgroundColor: '#1F1F1F',
}
</config>
微信授权,需要用户点击按钮,才能进行授权
 <button class="bottom" type="primary" open-type="getUserInfo" lang="zh_CN" bindgetuserinfo="bindGetUserInfo">

 需要实现bindGetUserInfo方法 用户信息在wx.detail.userInfo,因为我这里使用的是wepy,这样写。
 bindGetUserInfo(e) {
  if (e.$wx.detail.userInfo) {
    wx.navigateBack({
      delta: 1
    })
  } else {
    wx.showModal({
        title: '警告',
        content: '您点击了拒绝授权,将无法进入小程序,请授权之后再进入!!!',
        showCancel: false,
        confirmText: '返回授权',
        success: function(res) {
            if (res.confirm) {
              return
            }
        }
    });
  }
}
云函数的实现。
首先明确,我们需要几个接口,分别做什么用处。
- 需要首页的获取列表的接口 getlist
- 需要详情页面的接口  getdetail
- 需要保存兼更新的接口  save
- 需要删除的接口  delete

基本上这些接口的实现都是对数据库进行操作,增,删,改,查

- 数据库查找
const cloud = require('wx-server-sdk')
cloud.init()
const db = cloud.database()

<!--通过参数去查找-->
db.collection('usercontent').where({
    openId: event.openId,
    year: parseInt(event.year),
    month: parseInt(event.month),
    day: parseInt(event.day)
  })
  .get()
  .then(res => {
    return res
  })
  .catch(console.error)

<!--通过_id查找-->
db.collection('usercontent')
.doc(event.id)
.get()
.then(res=>{
  return res
})
.catch(console.error)

- 数据库增加&&修改
if (event.id) {
    <!--更新操作-->
    return db.collection('usercontent').doc(event.id).update({
      data: payload
    })
    .then(res => {
      console.log('^^^^^^^^^^^^^^^^^'+ res + '^^^^^^^^^^^^^^^^^')
      return {
        code: 200,
        message: '更新成功'
      }
    })
    .catch(console.error)
} else {
    <!--保存操作-->
    return db.collection('usercontent').add({
      data: payload
    })
    .then(res => {
      console.log('^^^^^^^^^^^^^^^^^'+ res + '^^^^^^^^^^^^^^^^^')
      return {
        code: 200,
        message: '保存成功'
      }
    })
    .catch(console.error)
}

 - 数据库删除
 db.collection('usercontent')
    .doc(event.id)
    .remove()
    .then(res => {
      return res
    })
    .catch(console.error)
前端调用云函数
    切记调用之前需要调用初始化函数,但是仅需在页面初始化的时候,调用一次即可,不需要重复调用
    wx.cloud.init()

    wx.cloud.callFunction({
          name: 'getall',
          data: payload,
          success: res => {
            console.log('[云函数] [getalllist] user openid: ', res.result)
            this.flagList = res.result
          },
          fail: err => {
            wx.showModal({
              title: '警告',
              content: '服务异常,请重新调用[getalllist]',
              showCancel: false,
              confirmText: '确定',
              success: function(res) {
                if (res.confirm) {
                  return
                }
              }
            });
          }
        })
问题
- 头像问题,在前一个版本上线的时候,用户已经授权的情况下会出现头像丢失的问题,查了一下,发现是当用户重新打开的时候,页面data中的值会进行初始化,但是全局的用户的信息并不会初始化,所以解决方法。
if (this.$app.$options.globalData.userInfo && this.$app.$options.globalData.userInfo.openid) {
  this.headerImg = this.$app.$options.globalData.userInfo.avatarUrl
  this.getAllList()
  this.getWorkList()
  return
} else {
  this.getUserInfo()
}

- 上传问题,审核过程中,一直审核不通过,因为我是个人的开发者,不允许发布备忘录相关的小程序,
  其实微信的审核很严,基本上有输入框的小程序,都会审核不通过。所以还是建议使用企业账号。
- 如果是在没有企业的账号,也可以将微信的类别选为个人允许发布的类别,如果还是不行的,
  也可以在后台加一个开关,审核期间不显示相应的组件就可以了。