

前言
第一次写一些关于技术的文章,为了总结前一段时间看vue-property-decorator源码的一些收获,也希望能够帮到大家。文章中有什么地方不对的也希望能够指出,感谢🙏
先看个demo
function mixins(...list) {
    console.log('执行了mixins');
    return function (target) {
        Object.assign(target.prototype, ...list);
    }
}

function test(target, key, descriptor) {
    console.log('执行了test');
    console.log(target, key, descriptor);
    const originFn = descriptor.value;
    descriptor.value = function(){
        console.log(...arguments)
    }
}

const Foo = {
  foo() { console.log('foo') }
};

@mixins(Foo)
class MyClass {
    @test
    testFn(num) {
        return 0;
    }
}
// 等同于 MyClass = mixins(Foo)(MyClass)
let obj = new MyClass();
obj.foo();
obj.testFn(10);
上面一段代码中的@mixin和@test就是一个decorator(装饰器),上面代码输出结果分别是
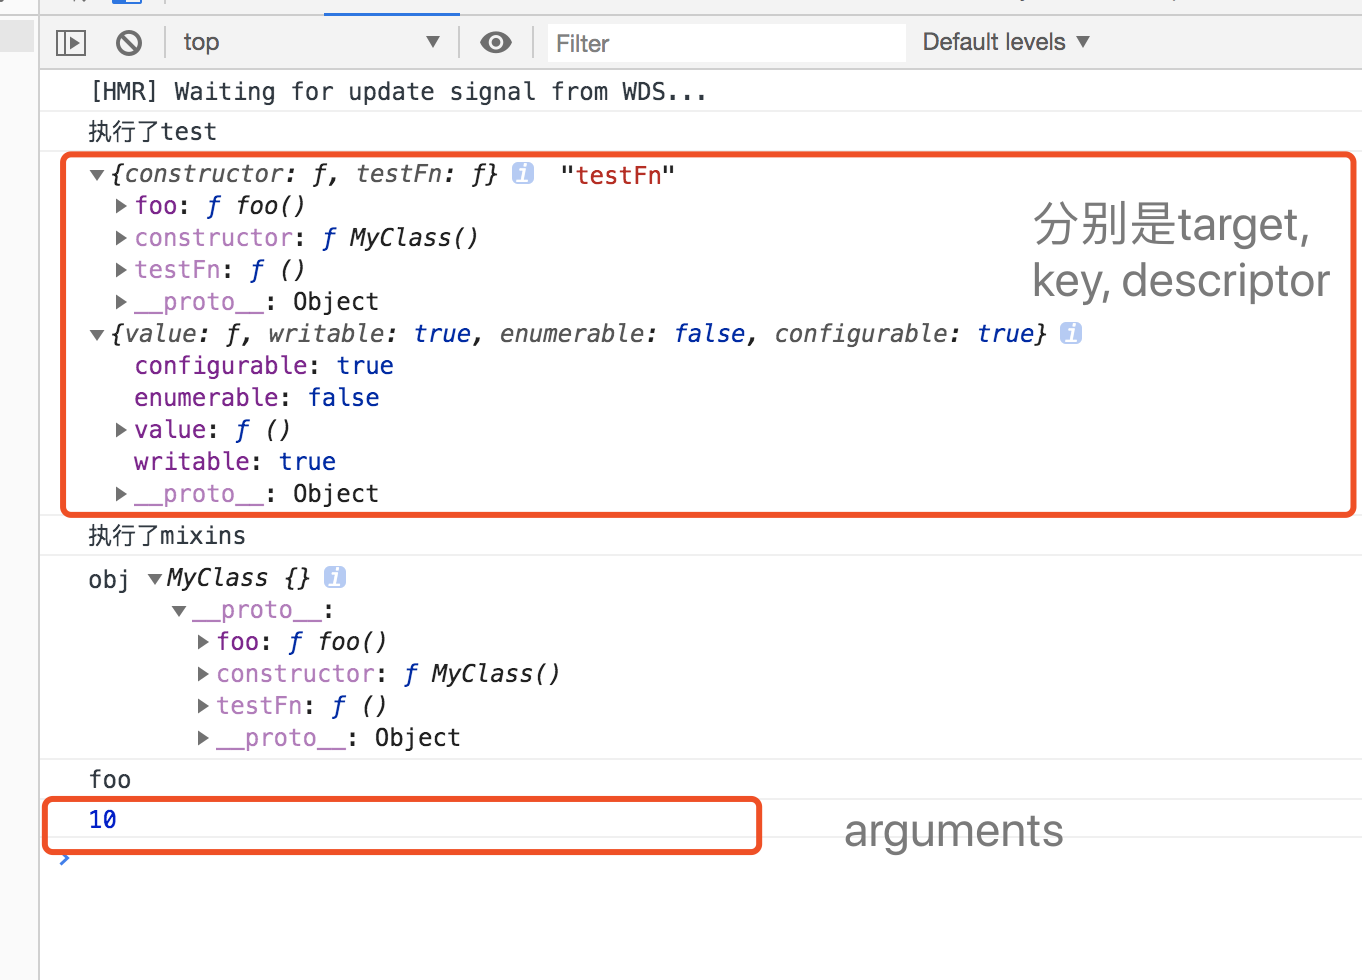
obj.testFn时也会触发描述符对象重写的value方法,从执行顺序上也可以看出装饰方法的test比装饰类的mixins先一步调用的。
关于描述符对象 (developer.mozilla.org/zh-CN/docs/…)
关于装饰器 (es6.ruanyifeng.com/#docs/decor…)
开始正文
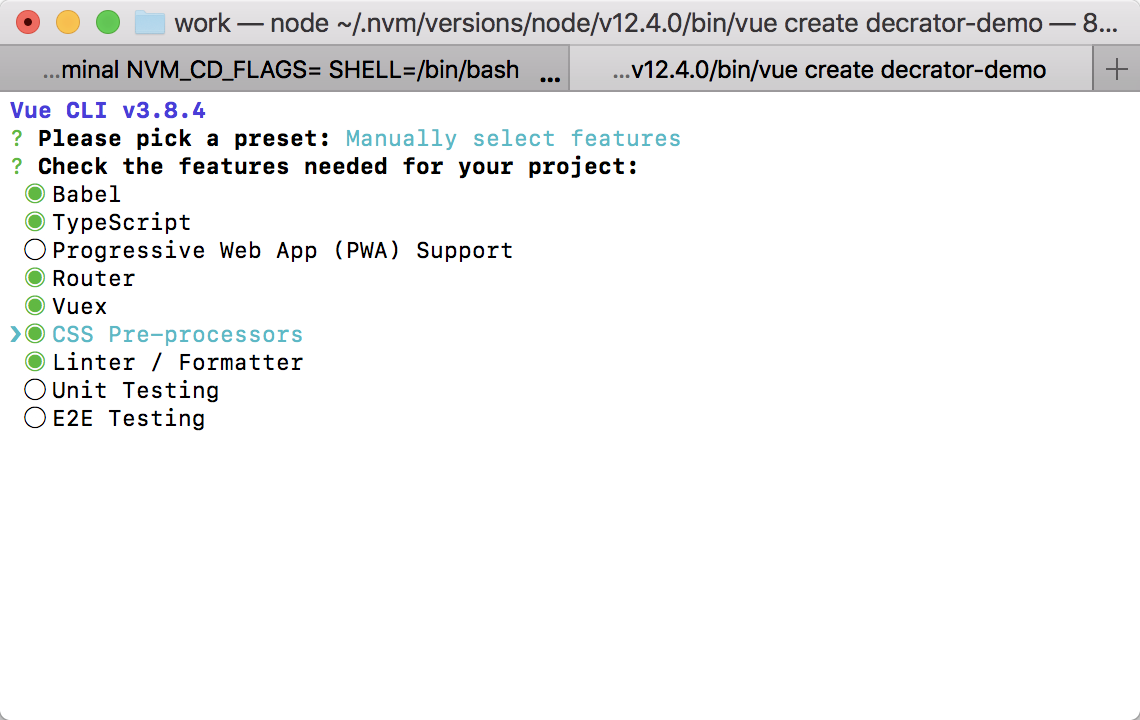
我这边为了省事直接用的vuecli3。步骤:
npm uninstall -g vue-cli
npm install -g @vue/cli
or
yarn global remove vue-cli
yarn global add @vue/cli

vue create decrator-demo
然后得到下图,空格是选中,回车进行下一步,我这边是勾选了大部分的库,TypeScript这个一定要勾选,这样就可以直接用vue-property-decorator去写vue组件了,然后一路回车就可以了
Component装饰器
我们直接定位到node_modules下的vue-class-component/dist/vue-class-component.esm.js有这样一段代码,这样是为了兼容两种写法
function Component(options) {
    if (typeof options === 'function') {
        // 相当于 @Component
        //       class xxx extends Vue {}

        return componentFactory(options);
    }
    return function (Component) {
        // 相当于 @Component(xxx)
        //       class xxx extends Vue{}

        return componentFactory(Component, options);
    };
}
然后让我们找到componentFactor这个函数,在我看下来后觉得做了比较重要的三个事情(欢迎补充)
1、生成options,通过一些判断给options上添加钩子以及属性
2、传递options给属性修饰器添加props、model、watch等属性方法
3、调用Vue.extend(options)创建一个组件构造器并返回
function componentFactory(Component, options) {
    if (options === void 0) { options = {}; }
    options.name = options.name || Component._componentTag || Component.name;

    // prototype props.
    // 循环类的原型对象,生成options
    var proto = Component.prototype;
    Object.getOwnPropertyNames(proto).forEach(function (key) {...});

    // 循环执行回调函数调用 factory,把组件内部的属性和方法添加到options上
    // decorate options
    var decorators = Component.__decorators__;
    console.log('Component.__decorators__', decorators);
    if (decorators) {
        decorators.forEach(function (fn) { return fn(options); });
        delete Component.__decorators__;
    }

    // find super
    // 创建组件构造器,传入options
    var superProto = Object.getPrototypeOf(Component.prototype);
    var Super = superProto instanceof Vue
        ? superProto.constructor
        : Vue;
    var Extended = Super.extend(options);
    forwardStaticMembers(Extended, Component, Super);
    if (reflectionIsSupported) {
        copyReflectionMetadata(Extended, Component);
    }
    console.log('Extended', Extended)

    // 返回组件构造器
    return Extended;
}
个人觉得第二个难看懂(看了好久才看明白了),我把它放到了下面的Prop去说
Prop
// vue-class-component.esm.js createDecorator 方法
function createDecorator(factory) {
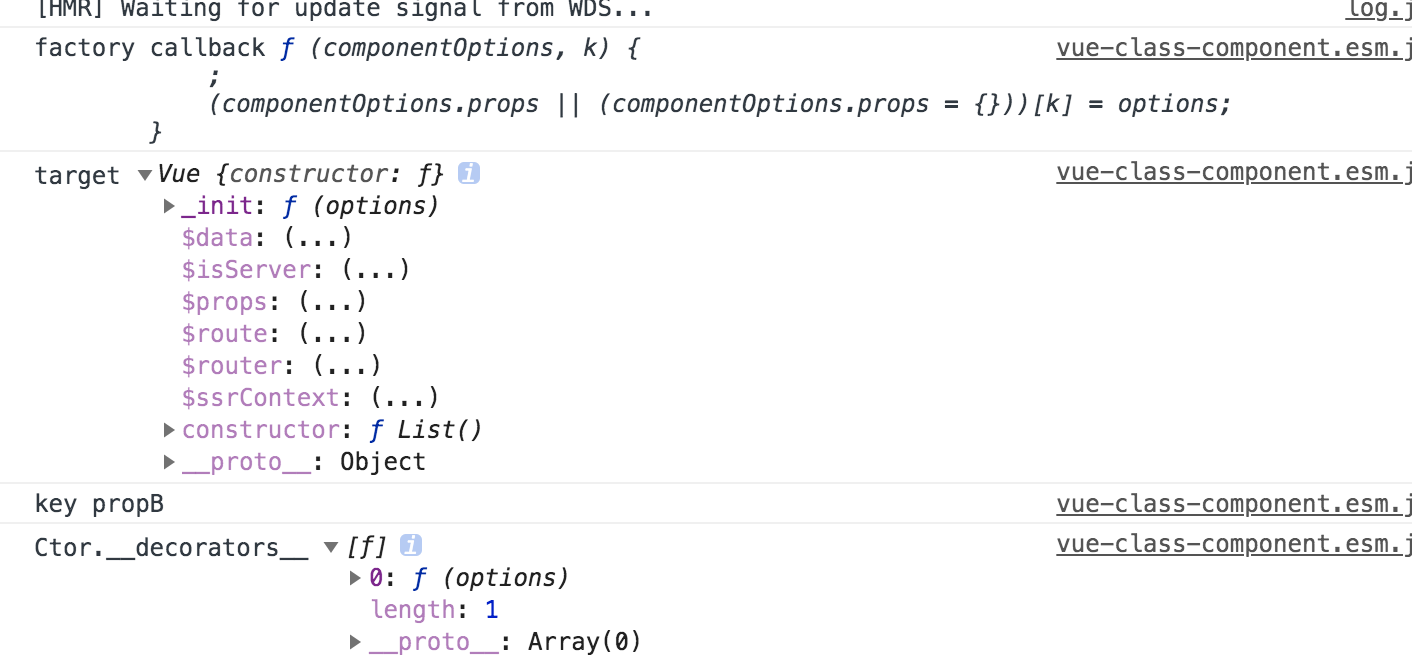
console.log('factory callback', factory);
return function (target, key, index) {
console.log('target', target);
console.log('key', key);
var Ctor = typeof target === 'function'
? target
: target.constructor;
if (!Ctor.__decorators__) {
Ctor.__decorators__ = [];
}
if (typeof index !== 'number') {
index = undefined;
}
Ctor.__decorators__.push(function (options) { return factory(options, key, index); });
};
}
// vue-class-component.esm.js ComponentFactory方法中的178-182行
var decorators = Component.__decorators__;
console.log('Component.__decorators__', decorators);
if (decorators) {
decorators.forEach(function (fn) { return fn(options); });
delete Component.__decorators__;
}
// vue-property-decorator/lib/vue-property-decorator.js
// Prop装饰器
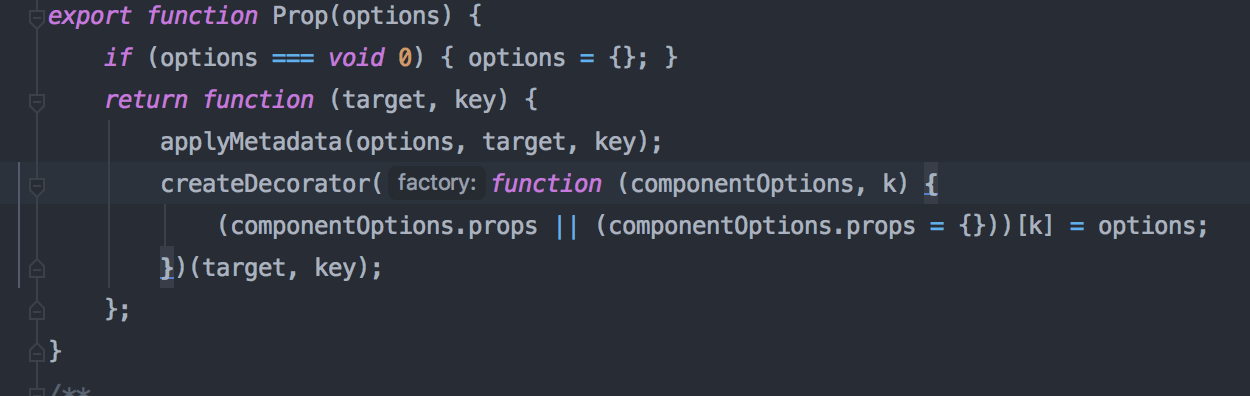
export function Prop(options) {
if (options === void 0) { options = {}; }
return function (target, key) {
applyMetadata(options, target, key);
const decorator = createDecorator(function (componentOptions, k) {
(componentOptions.props || (componentOptions.props = {}))[k] = options;
})
decorator(target, key);
};
}
// 调用方法
@Prop({type: String, default: 'default value' }) readonly propB!: string
根据上面的demo,装饰属性的装饰器是先执行的,我们先看调用方法这里的Prop装饰器函数接收一个options的参数,返回一个接收target(当前类的原型对象)、key(当前字段的key值)的函数;
这个时候调用了createDecorator函数,传递callback回调函数,并把factory callback回调函数push到当前类的原型对象的构造函数上的一个__decorators__数组里,这句话比较绕嘴😂😂
@Component装饰器的时候,也就是我上面贴出的代码片段时候去循环执行回调函数,并把生成好的options传递过去,然后执行factory的回调函数

factory做了些什么吧,这样我们在组件内定义的props就赋值到了options上,又通过Vue.extend创建组件构造器
function (componentOptions, k) {
    componentOptions.props[k] = options;
}
其他的Watch、Ref、Computed等的实现跟这个基本类似
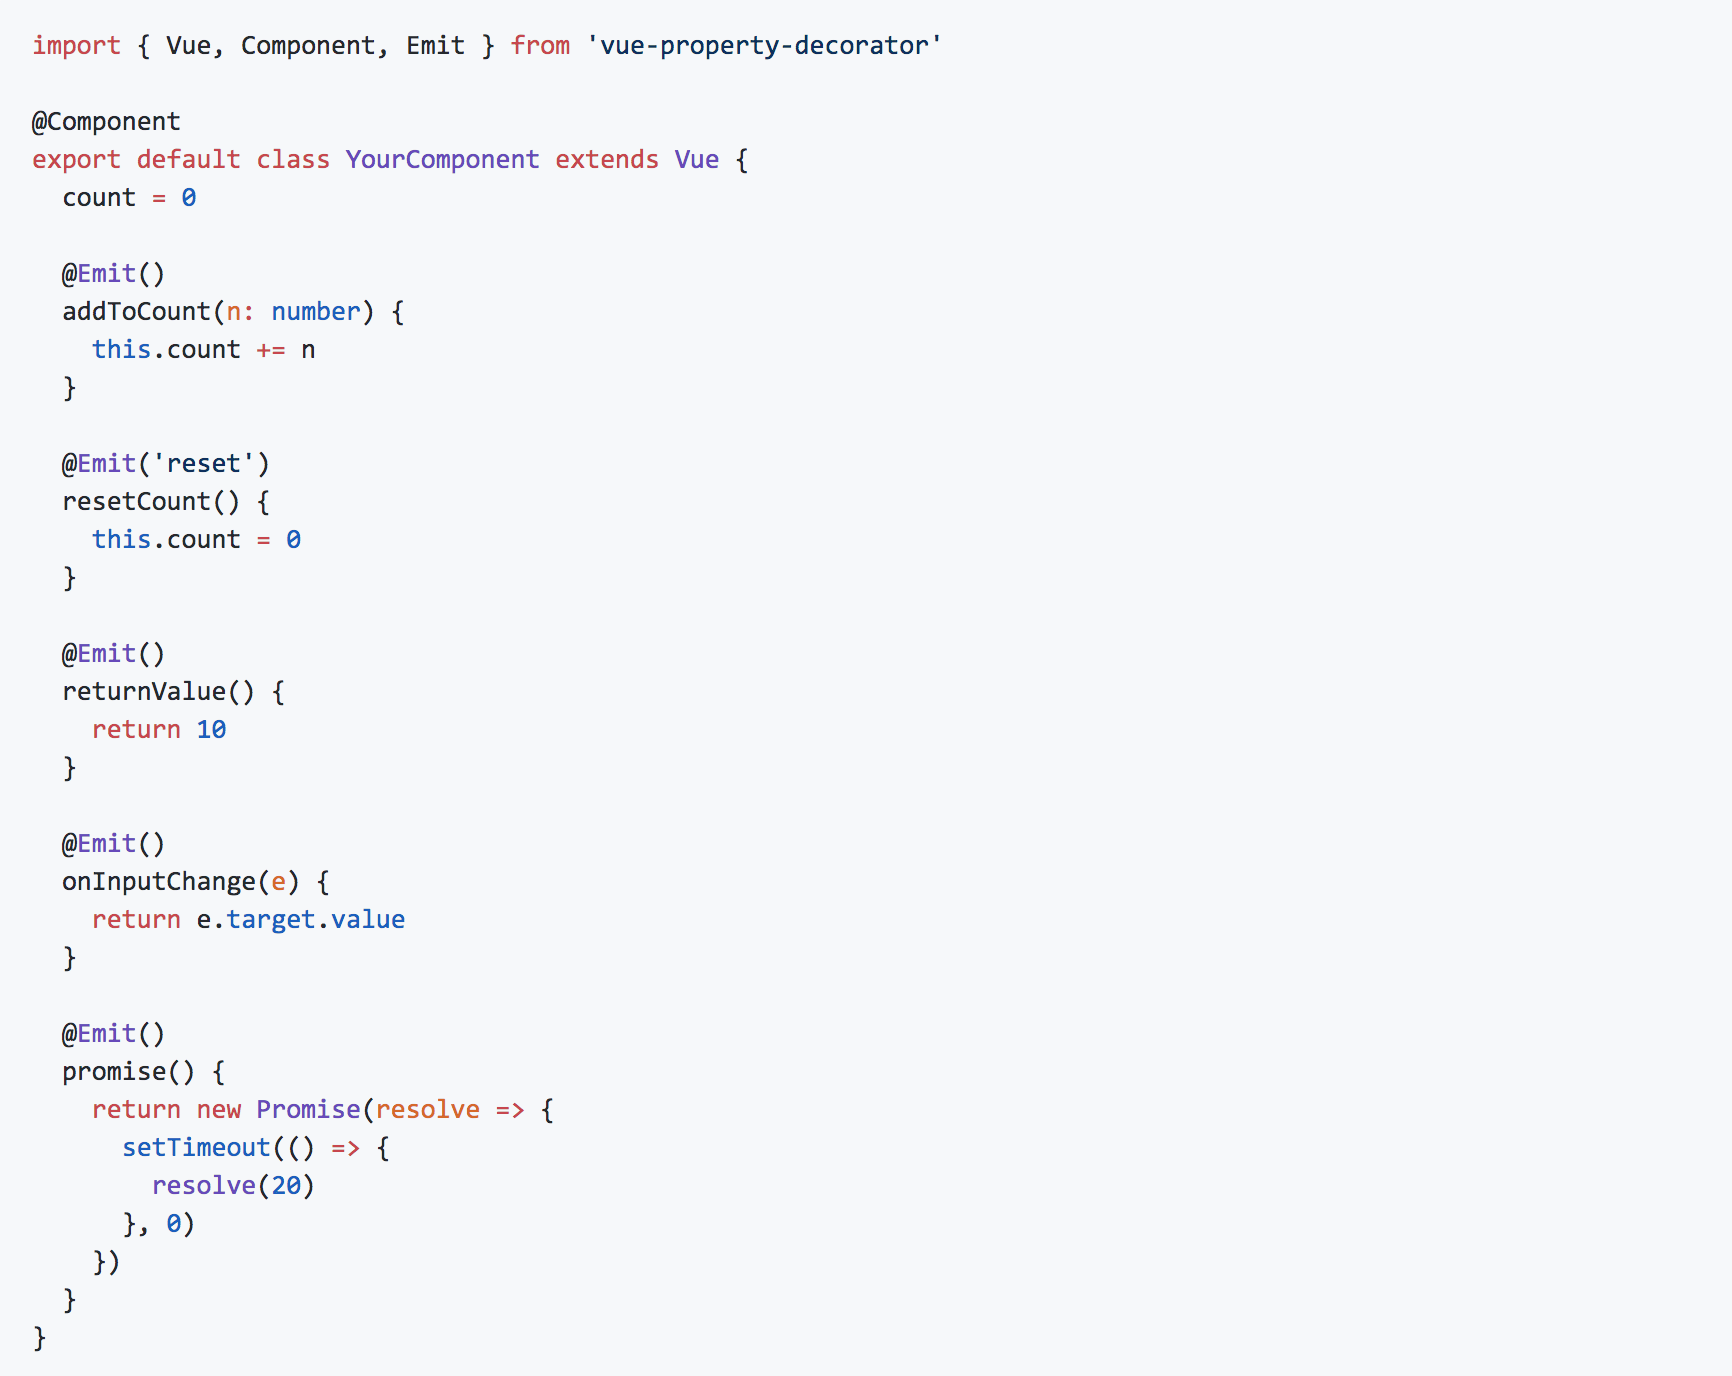
Emit
使用方法如下,在demo中我们知道了当装饰一个类的方法时,在实例对象中调用这个方法时会触发描述对象上的value方法
// vue-property-decorator/lib/vue-property-decorator.js
export function Emit(event) {
    // 接收一个emit事件名
    return function (_target, key, descriptor) {
        // _target 类的原型对象 被装饰key事件名 descriptor 方法的描述符对象
        key = hyphenate(key);
        // 保存原方法
        var original = descriptor.value;

        // 在实例中调用这个方法时触发
        descriptor.value = function emitter() {
            var _this = this;
            // 当前组件的实例对象
            console.log('this', _this)
            var args = [];
            // arguments 就是我们触发这个方法时穿的参数
            for (var _i = 0; _i < arguments.length; _i++) {
                args[_i] = arguments[_i];
            }
            var emit = function (returnValue) {
                // 有返回值,把返回值插入数组最第一个
                if (returnValue !== undefined)
                    args.unshift(returnValue);
                _this.$emit.apply(_this, [event || key].concat(args));
                // 等同于this.$emit(event, ...args)
                // 这里是把接受的参数和函数的返回值都$emit触发了
            };
            // 调用原方法拿到返回值
            var returnValue = original.apply(this, args);
            // 如果返回值时promise函数,就调用.then方法拿到返回值,并调用_this上的$emit方法
            if (isPromise(returnValue)) {
                returnValue.then(function (returnValue) {
                    emit(returnValue);
                });
            }
            else {
                emit(returnValue);
            }
            return returnValue;
        };
    };
}
Emit函数的核心就在于调用被装饰的方法时会触发描述对象上的value的值,然后在里面去调用$emit来实现
自己实现一个装饰器
知道了上面的原理,我们就可以自己实现一个装饰器,比如防抖函数
function Debounce(delay = 1000) {
        return function(_target, key, descriptor) {
            var originFn = descriptor.value;
            var timer;
            descriptor.value = function emitter(...args) {
                clearTimeout(timer);
                timer = setTimeout(() => {
                    originFn.apply(this, [key, ...args])
                }, delay)
            }
        }
    }
总结
文章中有问题的话,希望大家不吝指出,Thanks
